Search the Community
Showing results for 'capacity slots'.
-
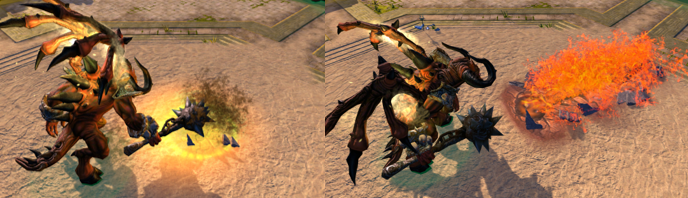
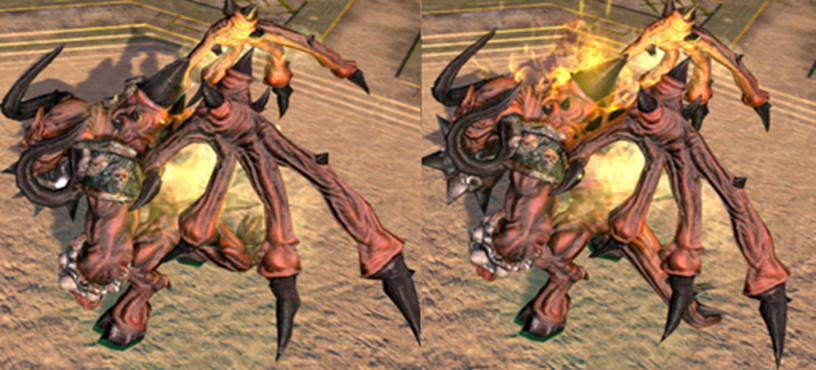
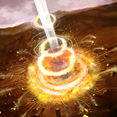
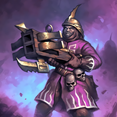
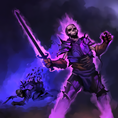
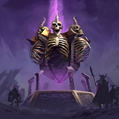
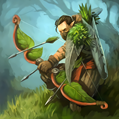
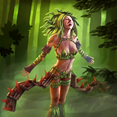
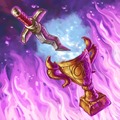
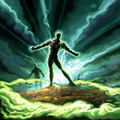
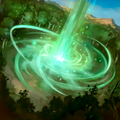
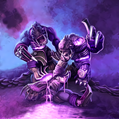
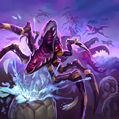
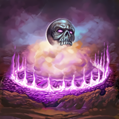
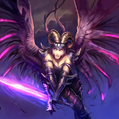
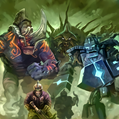
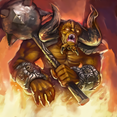
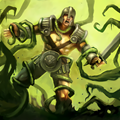
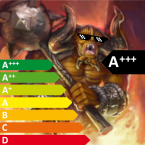
 Welcome to this guide on how to construct and pilot the Batariel deck. This guide will go over all the ins and outs of the deck, what to do in certain situations, and general tips and tricks for both beginning and more advanced Batariel players. Let’s open the Gates of Purgatory and jump in. What does Batariel do? Batariel is a Tier 4 card. It is a rare card and got two affinities. Its first ability is Gates of Hell. ACTIVE: Activate to smash Batariel's giant mace onto the ground, dealing damage to enemies in a 10m radius. The impact will crack open the ground, allowing an enormous cleft to emerge that will erupt fountains of red-hot lava after 5 seconds. Reusable every 30 seconds. Affects ground targets only. The second ability is Infused/Tainted Purgatory. PASSIVE: Unit enters stages of rage in battle depending on how much damage it has recently dealt. Either it does more AoE damage around himself, or he shreds the enemy’s armor, depending on the affinity. But if there is no damage dealt for 4 seconds, the flames will abate again. For this deck we will only be using the fire affinity, and all future references, unless explicitly stated, will refer to the fire affinity Batariel. The fire affinity is used because his passive does more damage, and the shadow affinity reduces the armor of the enemies. Reducing the armor is only relevant if you have other units to do damage as well, in a pure fire deck for example. How is the Batariel summoned if you do not have four Fire orbs? Enlightenment. Enlightenment is three orbs, two of which nature, and it allows you to use any card for the next 20 seconds without orb restriction. You do still have to pay the cost, 300 power in this case. The Deck Let’s start with the Tier 1 options this deck has. When playing a Batariel deck, you have three factions to choose from. Either you start with fire, nature, or shadow. Frost is by all means the worst faction to start with, as a general Batariel deck does not contain a single frost orb. Fire start With fire, most of the time you want to start with 3 Nomads (Nature affinity). An alternative could be Sunderer in some cases where you try to speedrun certain maps, but Nomads are recommended over Sunderer as they heal themselves and can hit air with their ability and are in general more flexible. The second card you want is Mine. Mine is an excellent card to take out the enemy units at your t2 camp. In bandits and Twilight maps, often one Mine should be enough. If you are fighting Fire you could use only one Mine, but if you are less experienced or are not as comfortable with a fire start, you can use two mines. When you encounter Lost Souls, you always place one mine and wait with engaging the camp until a second mine is off cooldown. The reason for this is that you may encounter Tier 3 units like Mana Beasts, one mine if often not enough. If there are also units that give shields, then two Mines might not be enough, and you need to place a third one. The third card you want to bring is Eruption. This card is excellent in taking out pesky (flying) units or to help out your opponents when they are in trouble. Eruption has one other very important use, which is to take our crucial spawn camps. One eruption does 300 damage for 75 power. All small spawning camps have 1200 health, so four eruptions will take out the camp and will set you back 300 power. This tactic is the mostly used in RPvE difficulty 10, but can also be utilized, and encouraged, in RPvE difficulty 9 when you try to clear the Tier 3 camp. In difficulty 9 and below, one to two Eruptions are often enough as you have your Nomads hitting the camp as well. Blaster Cannon an optional card. This card is not necessary in RPvE difficulty 9 and below, but is almost a must-have in difficulty 10. The reason for this is that there can be flying enemy units on your Tier 2 location, which does not happen in difficulty 9 and below. Blaster cannon fire affinity does insane damage versus flying units and because of that it is preferred over the shadow affinity. The shadow affinity also hits air, but traded extra damage against flying units for extra damage to ground units, but that damage is negligible. Sunstriders can be a nice addition too as they could replace blaster Cannon, they are inferior, but more versatile. Shadow start Shadow starts are very straight forward. The first card you want to bring are Forsaken. Forsaken do insane damage and have an awesome ability to do even more ridiculous damage at the cost of dying after the ability wears off. Nox Trooper is a decent alternative to Forsaken, and is far superior against Crystal Fiend camps, where Forsaken get destroyed. Also, they have a better trapping capability as they shoot each unit in a squad one by one. And base damage output is higher than Forsaken, even when they lose overall to frenzied Forsaken especially when getting rid of the spawner. Dreadcharger also a decent alternative, but very situation. Motivate is a card shadow can not go without. This card gives a near-dying unit a new purpose by allowing the same units to do more damage for the next 30 seconds. For Soul Splicer, we want to have the Nature affinity. You want to build this shrine outside the enemies range, as it takes some time to construct it. When constructed, it can collect corpses around itself and a select area. These corpses can be used to heal your Forsaken when they are within the range of the Soul Splicer. A general tactic when approaching the Tier 2 orb is to construct your Soul Splicer and wait until you have 6-8 Forsaken, depending on how comfortable you are. With the Forsaken you want to lure the enemy towards the Soul Splicer, so it can collect their corpses whenever they die. When fighting the enemy, use motivate on one of your Forsaken to allow the others to do more damage, and to have your first corpses inside the Soul Splicer. You want to bring an Embalmer’s Shrine if you bring Shadow Phoenix as your Tier 2 unit. You want to construct two Embalmer’s Shrines before doing anything else. If you play a shadow start in RPVE difficulty 10, then it is recommended to bring 9-11 forsaken, Lost Souls can require more, 3-4 squads gets frenzied and immediately attack the spawner. The remaining units clear the units with the help of a Soul Splicer and Motivate. Nature Start Nature t1 is relatively effective, in some cases better than fire, especially in solo. Basic composition is Windweavers + Dryad (Blue affinity) + Ensnaring Roots, for difficulty 10 Hurricane and Mark of the Keeper are very strong as well, and may be essential. Root is preferred over Hurricane is because it also helps vs non-S-units up to Tier 4. The edge that nature has over fire is solely not having to build a fire orb until an orb switch, with access to cultists + furnace and breeding grounds (especially useful with Shadow Phoenix against stronger t3-t4 camps) Windweavers is the go-to damage dealer for Nature Tier 1. They are versatile and can shoot multiple enemies at once, which makes them excellent in clearing early camps. Dryad provides the units around her with a damage reduction buff. One Dryad is often enough, but keep in mind that she does not buff herself. Having a damage reduction buff on your units allows you to use less heals. Surge of Light is great. It is super good to heal your low health Windweavers, and it scales super good into the later stages of the game as you can still use it to heal your Batariel. Ensnaring Roots is a must have. This spell can create distance between the enemy and your Windweavers. This card is also very effective when you need to take out a spawner in difficulty 10. Mark of the keeper is a must have in difficulty 10, but in difficulty 9 or lower it is not needed. No Shaman? Yes, Shaman is not used in Batariel decks. Shaman is a unit that rarely attacks, and it binds power. For every Shaman you have, you have one Windweaver less. There are only 20 deck slots, and Shaman should not be in there. Tier 2 options On Tier 2, there are a couple options to choose from. When you start with Fire, you are generally safe to use your Nomads + Mine and use Eruptions on the spawning camp. In difficulty 10, you can bring Gladiatrix (Nature affinity) with Curse of Oink, or you can bring Shadow Phoenix with Embalmer’s Shrine. If you start with Shadow, your best option is to bring Shadow Phoenix. You need three Shadow Phoenix to kill a small spawning camp. or When you are playing difficulty 10, if you start with fire and want to use Phoenix, you will need to do an additional orb swap for your Batariel. This sets you back some power, but might be required sometimes. Less optimal, but alternative options are Bandit Minefield and Lavafield. Core of a Batariel deck The core of a Batariel deck are Life Weaving and Unholy Hero. Life Weaving keeps Batariel alive, and Unholy hero allows the Batariel to do insane amounts of damage. Heals are important in every deck, Batariel decks are no exceptions. You should bring at least one heal spell, such as Regrowth. It is recommended to bring a backup heal in case you run out of Regrowth charges or the card is on cooldown. Two options are Surge of Light and Equilibrium (Frost affinity). It is totally fine to bring all three heal spells, as even some veteran players do. Very important spells to bring are both Frenetic Assault’s (one is mandatory, the other is quality of life), Infect (mainly quality of life, you can do without) and Disenchant (depending on the enemy faction). Frenetic Assault makes sure the enemies are not attacking your Batariel, but each other, which gives Batariel more survivability. Both Frenetic Assaults are recommended as they have a long cooldown between casts, and you might need more than one in a difficult camp. Infect serves a similar purpose and cleans up remains. After the enemies kill each other with the Frenetic Assault effect, two Nightcrawlers will spawn from each corpse, up to 10 corpses. 20 extra units to soak up damage and to do more incremental damage. Batariel needs to have his burning passive ability active as soon as possible. He does this be damaging enemy units or buildings. If Batariel is not able to attack, due to a paralyze effect, the chances are the Batariel will die. To solve this, Disenchant is a must-have when you fight enemies like Bandits and Twilight. Those otherwise annoying Willzappers and Windhunters are now useless when you bring Disenchant. Bandits have one boss that permanently reduces the attack by 50% when it does damage: the Equestrian Twins. This debuff can also be nullified with Disenchant. There are two more must have cards in every Batariel deck, which are Curse of Oink and Nether Warp. Curse of Oink was mentioned earlier as well in the Tier 2 section, but it is also an all-star when Batariel is out already. Curse of Oink is an instant CC (crowd control) spell. Whenever Disenchant is on cooldown, or whenever there are scary enemy units, Curse of Oink can keep incoming damage to a minimum. Keep in mind, this has no synergy with Frenetic Assault. When entering an enemy camp, you want to position your burning Batariel in a location where it can either hit as many enemies as possible, or where it can take out a spawner. Nether Warp is the solution for this. After you Batariels AoE burning is active, you can warp him further into the camp. Keep in mind, all the enemies will be able to target him, so make sure you have some heals ready and Life Weaving active. Recommended is the Nature affinity Nether Warp because the Frost affinity debuffs your Batariel with a slow effect. Yes, the Nature affinity heals your opponents units too, but that heal is insignificant compared to the damage output of the Batariel. When you have your core, there are one, two or three spots left for other cards. Thunderstorm is the one that is most recommended bringing as it is such a versatile damage spell. The second card is Soulshatter, as it can decimate smaller camps on its own, but you need to be careful as the damage also damages friendly units. The third option is Earthshaker. This card can take out crucial enemy buildings. This is optional, as Batariel should not have any problem taking out buildings on its own, but can be a quality of life. Void return Because spells are cycled non-stop in this deck, void return is of utmost importance. There are two options available for a Batariel deck. Either Shrine of War, or Cultist Master + Furnace of Flesh. Shrine of War is the best void return card in the game for multiplayer maps. You use spells whenever you want to kill enemy units, and whenever enemy units die, the Shrine of War gives back void power. It is the perfect synergy, there is however a big downside. Shrine of War costs 150 power and has no continuous upkeep. You will need two to be able to keep it running constantly. You will need to invest 300 power, which delays your Batariel immensely. Shine of War is recommended in fire starts. Shrine of War has been nerfed and now require 2 fire orbs, which forces you to play either the alternative option with Furnace of Flesh and Cultist Masters, or rely on a teammate. The ability of the Cultist Master is free, and it summons three Nightcrawlers that die after 20 seconds. When they die near a Furnace of Flesh, it gives back void power. Similar to Shrine of War, you will need to maintain the upkeep of this. It is recommended to have around three Cultist Masters to give reliable void return. If you have more than four, then consider building a second Furnace of Flesh or to alternate between the activations, but this requires way more micro. This option is preferred in Batariel decks that start with Shadow or in solo RPvE maps. If a teammate has a Shrine of War, you can kill the Cultist Masters and the Furnace of Flesh, as Shrine of War is superior to them. Fallen Skyelf Fallen Skyelf can play a critical role in certain scenarios, vs bosses like Twilight Hulk or Abaddon, which have very high damage output, or Hellhound who will eat all your units if you don’t kill him quick enough. And helps overall vs bosses. Plague Double Shadow starters sometimes gravitate towards triple shadow instead of switching to fire. These decks require more precise play due to the lack of cards like Disenchant or Earthshaker, but end up being significantly faster upon being executed well, given how strong Plague is. The spell speeds up camp clears in general and sometimes even allows very powerful pathing advantages as a spell combo around Plague + Infect (+ Frenetic) sometimes removes T4 camps on its own (ideally this even works against small boss camps i.e. Umbabwe/Bandit Lancer). Sometimes Disenchant cannot be removed upon facing factions like Twilight, but whenever there is an angle to cut the fire orb Plague should be your go-to choice when considering the orb swap with a double Shadow start. How to kill a camp When entering a camp best to attack a unit, preferably flying, because Batariel doesn’t dance around those, like he may sometimes when trying to attack ground entities. Also, because Batariel does more damage per hit with his normal attacks against flying units. If power levels/refund permits, then Batariels ability is a great way to enter, use it on a building cluster or a boss. Best to warp after front buildings are destroyed or nearly destroyed (possibly finished by infect). Infect should also be used when entering the camp to maximize the crawlers spawned, after the buffs with frenetic, not necessary, but can be useful, plays an especially important role vs Lost Souls and Twilight bugfest. When playing vs Lost Souls always have at least two Batariels for later camps, keep one in front to tank all the debuffs and for ground presence to cast cc spells against spellbreakers, and teleport second Batariel in the back line, who will take care of the camp. Preferably, use infect to soak up the damage and all the debuffs as well. In case of 2 Lost Bane presence, drag the camp out use spells (with infect) and try to either use Batariels ability on Lost Bane closest to the spawner, and then warp, or if possible just warp in. Can also try to power through after dragging the camp after getting rid of Lost Banes and having crawlers, enemies won’t pose as much threat even if they respawn, just keep eyes on Spellbreakers. Against Twilight Infect is crucial, especially against difficulty 10, where Twilight gazers are bugged and reflect huge damage back to Batariel if not careful, crawlers soak up that damage. Best wait to approach them is to use Batariels ability and maybe even port them together in a bunch, then frenetic/oink and use Batariels ability. But be careful as you won’t have nether warp available to get close to the camp. Bosses Against Bosses, either focus them with Skyelf support, if they can be killed within the ability right away, or warp in the backline and deal with a boss after taking out the majority of the camp. Raven ship is very tricky to kill with a Skyelf, she most likely will get focused, must use infect and possible defensive spells on her, or be on a safe side and deal with the boss without, it’s not too dangerous to Batariel, just have to oink gunner when it spawns. Twilight Dragon boss also takes a while to kill, and Skyelf will heal it if used too early, so it’s better to used when more than half hp is depleted. Nyxia debuff can be disenchanted, which means that the Batariel can freely attack her. Hellhound is best if approached with at least two Batariels like all late game LS camps, and infect must be used. Try to get rid of him asap, before your Nightcrawlers die and he starts eating Batariels. Killing him is not a problem, surviving is. Due to the Lost Spellbreakers Disenchant, engaging with Frenetic Assault (both work here) or Curse of Oink may save you a lot of trouble. Can be tricky, especially in non-motm maps where you don't know exactly where they're located. Against higher tier Souls camps with Banestones: 1 Banestone: Try to disable the Lost Spellbreakers as mentioned above, engage with Batariel ability onto the Banestone and port into the camp. Can be hard with Lost Dragons and such where the Batariels ability couldn’t be used, in that case Disenchant (G) works well. 2 Banestones: From my experience it's best to just wait for the camp wave to spawn into your direction, use Infect on it and engage the camp with the Nightcrawlers before Batariel to distract the Lost Spellbreakers. Try to get one Banestone down as fast as possible and use Frenetic Assault + Nether Warp into the camp (hoping that Bata burns at this point) Fire Bosses: Abaddon, you must avoid his ability at all costs, either send a unit in front to take it, or just dodge/warp in the backline and deal with Abaddon when you have taken care of the camp. Golem should be attacked with ability for the majority of HP, auto-attacking is dangerous. Magma Fiend boss is the most difficult to deal with as a Batariel deck. Must have at least 2 units, if only playing Batariel in t4, have 1 or 2 extra when approaching it, go in with a single Batariel without any buffs and instantly warp in the back line and cc the camp, infect will help as well, then buff Batariel and take care of the camp. After the majority of the camp is gone, send in other Batariels to tank debuff, and buff the one not being attacked. For all these bosses Skyelf is crucial, may not be mandatory. Keep Fallen Skyelf in a distance from Abaddon, she will die very quickly if she is close. General tips You might be asking, but what about Unholy Power? That increases the damage of Batariel too, right? Simple answer, no. Unholy Power is basically a dead card in your deck, as it does not stack with the burning of Batariel. When you fight Lost Souls or Fire, Disenchant is not needed, as these enemies has no way of stopping your Batariel via cc. When you start with Shadow, you can stay and you do not have to switch an orb to fire. If you spawn your Batariel at Tier 3, it is recommended not to build the two wells at your Tier 4 orb location. This will set you back 200 power, and will only pay off when you are floating in power anyway. Batariel does more damage with an attack than against non-flying: XL Ground: 481 L Flying: 697 XL Flying: 1045 This is due to the longer animation when attacking flying units and as the damage per 20 seconds is fixed, attack types with different execution durations deal different damage. @Volin has a in-depth Twitch Stream about Buffed Batariels, where you can see some gameplay: https://www.twitch.tv/videos/1423615481?t=00h06m39s Special thanks to the following people for helping out with this guide! @arabikaa @Damo @Donaar @Kapo @Mocaak @RadicalX @Volin
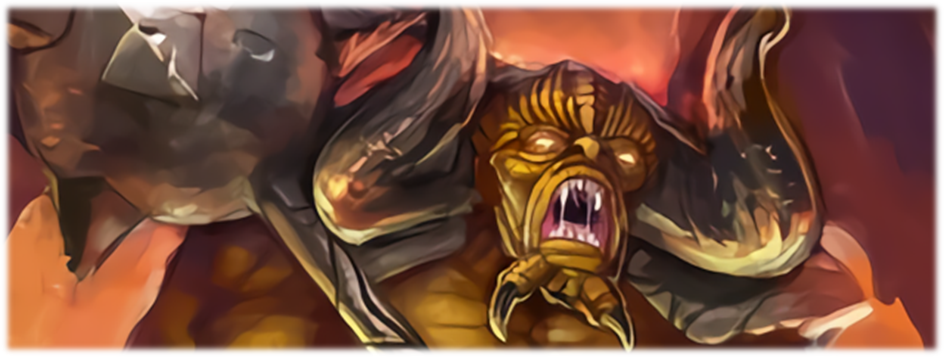


-
Shrine of War - The only void management tool that requires only one fixed orb. Most powerful in rPvE since enemies constantly die. Permanent uptime with two of them. Absolutely insanely overtuned return rate of 20%. Most expensive energy wise. Cultist Master + Furnace of Flesh - Occupies two deck slots, takes up population-space but is on demand and independent. Shrine of the Martyrs - Demonstrates that 8% return rate is already quite powerful. The most involved option and requires other cards in the deck to work. Shrine of Memory - A consistent trickle. Offers nothing comparable to the bursts of return of the three options. Independent and reliable. Shrine of Greed - Takes up the rare slots in Boosters and is sometimes used in speedrunning. Considering both rPvE and PvE, I'd say that SoW is the best option of the bunch because of how splashable it is and that it only requires one slot. Cultist Master/Furnace definitely a close second with different upsides. I would argue Martyrs is the poster child for a good and healthy void return mechanic, it gets the job done and you have to actively engage with it. If the goal was to equalize the power of these I'd take it as the baseline. Although it can be an equally valid approach to have them vary in power. Just not by this current margin. Memorys reliability can't make up for its comparatively lack of speed. And Greed gets the dunce cap. The % return of SoW is definitely ridiculous, even with 15% you'd keep your void spectacularly low in rPvE. I think the three steps you proposed are reasonable, even in combination. Noticeably reducing its duration so that you actually have to time it when things die would also be an option. That way it could retain some of its power elsewhere.
-
I'd like to preface this by mentioning it has been quite a while since i played this map as i am not a fan of it so please correct me if i misremember something. This is my least favorite map due to the relative indefensibility of the initial wells. Perhaps this could be addressed as part of the buildings pass but thats far into the future. I am not a fan of the gimmicky wall jumping either but considering the alternative I don't think it should be removed without fixes elsewhere. Furthemore preventing the wall hop makes that whole path useless. Speaking for adv difficulty ideally I'd like to see the structures next to the fire spawner be more defendable by t2. In general an advanced map should be beatable using a well rounded deck from any faction by the third try (including a single playthrough on standard). This map has multiple issues to meet that goal. 1. Firstly on standard the fire spawner is sufficient to prevent any type of defense requirement for a long enough duration to fairly easily complete the map so playing on standard is not adequately representative of advanced difficulty which should be fixed. It would make more sense that the behavior of such a match changing mechanic should be similar between std and adv to adequately prepare players. 2. Secondly the time constraints combined with the strength of enemy forces makes most t2 defenses nonviable fairly quickly (if you can even get them in place at all). Even orb stacking (which i also think should not be the primary strategy for any map on adv/std) tends to be very unreliable due to power constraints. Additionally due to the lack of reliability in defending those early orbs, the fire spawner is most often required for much of the time (after you let a couple wave spass through as is customary) which means the left side of the map is also completely useless. -2.5. Stuff like twilight dragons and those twilight fathom lords that spawn the poison area cant be countered adequately by buildings which further weakens the ability to defend. These issues could be addressed in the building pass or alternatively more likely in the case of the dragon perhaps a different unit such as one that doesnt have an anti ranged passive could be substituted. 3. Thirdly the twilight spawner just respawns which makes killing it relatively pointless unless you somehow manage to get forces there to kill it very quickly. This seems like a good opportunity to differentiate advanced from expert. If the twilight spawner did not respawn then advanced players could benefit by building their forces while defending early to then assault the spawner to prevent further incursions to the south. 4. Due to the siege-like nature of this map, it becomes very easy to run out of power, I suggest increasing the initial number of wells or increasing the initial capacity and the initial void power.
-
Disclaimer: The following thoughts are from me as a player, not me as a community manager or representation of the Skylords Reborn team. In general, I'm against making the game easier and in favor of removing map abuse. People complain about the lack of new maps/content all the time, yet we see mainstream map abuse or weird interactions that clearly should not work, resulting in maps being way easier than they should be. This again results in people ''completing'' the game at a faster phase, which is not helpful for player retention. Now I'm not saying every map needs to be insanely hard, but there can definitely be a few hard ones that requires a few restarts. My favorite memories of the game include struggling with my friends on a hard map, slowly gaining more knowledge and skill to complete it. The game has plenty of maps, so especially the ones that are unlocked late in the game and don't block any other maps can be harder to complete without scaring people away. We should also keep in mind that the game has an expert mode for a reason. Making expert maps easy because newer players are struggling makes little sense to me, we already have standard and advanced for those players. In my opinion, expert should embrace the idea of the map, challenge you in a good way, and assume you have a decent collection. Convoy Convoy is clearly one of the harder maps, and the one I was struggling with the most. I think it took me two nights with my friend to complete, but it still holds a fond memory. I think getting rid of the abuse is a good thing, but I disagree that the number of walkers have to go from 3 to 5. Suggestion: - Remove walker trapping and other tricks that can get you into the canyon (which is clearly not intended in the map design) - Keep the number of bandit walkers the same Crusade + Defending Hope I like these changes. Empire Empire was the last map added to the game, and it shows. The idea is cool, but it is still completely unclear to me which side is supposed to be the past, and which one is supposed to be the present. The fact that the side quest with Kobold Engineers and Midwinter doesnt really do anything does not help. Suggestion: - Agree with the suggestions - Maybe make it more clear which side is past, which is present, and how things actually impact each other. Encounters with Twilight I like these changes King of the Giants I agree with all suggestions. Nightmare Shard I'm against making expert maps easier, but if newer players indeed do struggle on standard, I'm all in favor of making Standard easier. I do think the map can be a bit tedious with its low power. However, increasing starting well capacity does not help with that. I'm more in favor of suggestion 4 (increasing void power to get slightly faster start). Nightmares End I actually would prefer to see this swapped the other way: make it so you have to destroy the power shrine to build the orb. Since the map is already quite long, I'm not against speeding the early game up a bit by adding some void power. Ocean No strong opinion on this map, except that it feels like there is too much going on that does not actually do anything for you. This was especially visible on the speedrunnig contest of Toggy, where you can just skip huge parts of the map. Oracle Flavor wise it makes no sense that the ritual doesn't do anything, so I'm in favor of this. Siege of Hope Don't have a strong opinion on this one. I remember playing it the first time and thinking it was insanely hard, but it has a good learning curve and is definitely playable. Slavemaster I never ran into this issue, but it can be long map so I'm not against these changes. Sunbridge It makes absolutely no sense that advanced is harder on expert on this map. I'm hugely in favor of getting rid of the switch abuse. I'm also in favor of making the boss fight harder, since by then you already dominated the map, and its currently no challenge at all. I'm not really in favor for swapping the dragon with Abomination, but it's something I can live with. The Dwarven Riddle I'm not really sure how I feel about adding a 4th orb. I never felt it was needed on this map, and it's part of the charm that some players fill a more supporting role. The guns of Lyr Guns of Lyr on expert is a very hard map if you don't trick it, but very satisfying to play with some friends. I'm all in favor of removing all map abuse here. The Insane God The transformed priest does feel a little bit lackluster, but it still has very decent stats. I don't think it needs to be changed, but a strong burrowers wall spit sounds like a cool idea. The Soulstree I agree with these changes The Treasure Fleet This one is actually one of my favorite maps (without exploits). Adding another fun challenge to it, without impacting the nostalgia or making it easier, sounds very cool to me! Titans Sounds like good changes to me. On closing notes, I'm also in favor of removing Nightguards Ability to take control of units she is clearly not meant to swap with. This also makes some maps way easier than they should be. Part of the charm of BattleForge is finding ways to beat certain challenges. Nightguard is one of those one-size-fits-all problem solvers that clearly is not meant to be used like this.
-
From my side, i will be brief and give my opinion only on the maps where I have something to say. In general, i am against making the maps easier. As many have already mentioned, Expert-Mode should be hard! Convoy I'm for not being able to block the walkers anymore. I never liked that and always thought it was "wrong". The change that you have 5 walkers for it, on the other hand, i don't think is necessary. It is just the Expert-Mode! Crusade I think change 1 is good. But it should stay the same as before. If you have cleared both ways, the final wave should come. If you are then unprepared, you just made a mistake and learned from it. I like the idea of the secret boss. A XP and/or Gold boost would be great, so that it is worth every time to enter the area. Nightmare Shard I have always felt that the starter well capacity should be higher. I would therefore welcome this. I don't think further changes for Expert are necessary here. Each faction has good ways to clear the first base. Also, as coco mentioned, there is still the option to go directly to the second base. And if a not so experienced player has problems clearing first base alone, you should eventually get the idea to attack first base with your mate together. Such an approach must be expected from the players on expert. Nightmare's End I personally like the map the way it is. I play it very much, have many decks for it and therefore think there is no need to change it. There are many ways to beat the map the easy way once you understand it. The proposed changes are minor and would be ok from my side. Sunbridge Absolutely in favor of removing the gate exploit. It's lame and just wrong that the map is easier to play on advanced than expert. And yes, at this point i do think it should be easier in return. The idea of swapping the Twilight Dragon to an Abomination i welcome. The Guns of Lyr The strategy with the blocking was hardly used, there we have exploits in the game which were clearly more present. So i don't think the change is that important, but i can absolutely understand it. But as wanky already noted, i never saw the tactic in the casual game either. If the change means big problems for some people, you should take a closer look at wanky's idea. I like it.
-
@Donaar You didn't list the point that it makes the game look like a mess if such blatantly unbalanced and upon further scrutiny unfinished/broken mechanics are just left unaddressed while they proliferate throughout general play. Handwaving issues away with "Just don't use it!" isn't design. It isn't a vision to go forward with and it isn't a guideline to base meaningful decisions on. And it also disregards the underlying psychology that is at work when humans engage with content like video games. There are plenty of resources out there that examine these processes and how the state of a games content influences and guides people. It's a fundamental pillar. A common narrative is that taking away options is bad. And more options is always better. Let us test this assertion with a hypothetical. Imagine all cards in the game are neutral T1. You can play all cards in the game right out of the gate. You can also combine all cards in the game however you please. The only limiting factors are now energy and deck slots. Ultimate freedom. No restrictions. Everyone can play what they want. Maximum options, apparently the best thing for an RTS. What would really happen though? Would cards which are T1-3 currently still remain attractive? A few would because they scale throughout tiers. But would the deck building remain an interesting and meaningful aspect of the games design? After all, you can just put anything in your deck, no limitations anymore. So many more options that wouldn't be possible with restrictive tiers and colors. Yet almost all cards would vanish into obscurity. What would you have to do to get all the cards up to speed in order for them to compete with the best? Even within the (current) T4 roster, what would manifest is a very narrow pool of cards that are "the best" and everything else is just a handicap. You could still play them, of course. Nobody is forcing you to play a 5000/5000 unit instead of a 500/500. It's all just options. Yet how meaningful are any choices one could make in this environment? The bottom line is more options does not equal better. It's deliberate restrictions and limitations that make for intrigue and creativity. Because those actually incentivize exploring what is out there instead of just having "Gun!" to throw against Rock-Paper-Scissors. The amount of options is of course important but equally so is the relative quality of the options. Because options that are too good will naturally suffocate others. Worse still if that is the case because they are simply broken. It offers the illusion of more choices but in reality it just warps the game and its power levels. Untouched options may remain at their current strength but their relative power changes with the top. If you have option A being worth 100, B 50 and C 40 there is a huge difference. But if you take the A down to 60 then suddenly you are looking at A being at 100% power but B jumping from 50% to 83% and even C going from 40% to 66%. Without touching them their relative power increased drastically. Ripping the band aid off always stings but what's below festered for too long.
-
I am personally not against increasing deck slots, although a careful analysis would need to be done. It may also not be possible. But about t4, imo there is no place for t4 in pvp. If you really have extra slots everyone will just take earthshaker, but t4 cards are so crazy OP that you can't even consider having proper counters and healthy gameplay. Even in t3, 90% of t3 cards are just basenuking or countering a base nuke. Games won't reach t4 (even if there are slots) unless wells and orbs get an additional hp buff, but then that will mean games won't end in t1/t2..... (btw, random thought but I wonder if it might be cool to have maps with different hp levels for different wells/orbs? That might be a cool way to spice maps up, and might also prevent certain rushing from happening, for example if the wells on wazhai cliffs had like 2500 or even 3000 hp, the person who wins the center fight may not auto win....)f But anyway, even if wells had a ton of health so t4 was the norm, nothing in t4 is balanced for healthy gameplay. There is a community map called something like "maze of survivors" which is kinda cool because you have to t4 fight your opponent, but after playing this map a couple times it is clear that t4 fighting is pretty silly and frequently reaches stalemates....
-

Need advice Lost Spirit Ship rPvE deck
Volin replied to nkmol's topic in Deck Building and Colour Strategies
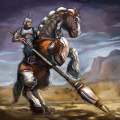
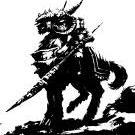
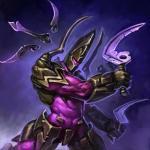
Hey mate, sorry for the late reply First: Your deck does not look that bad for first steps in BG10 I think - I see worse everyday. Additionally your Deck is close to the meta which in any case indicates a certain knowledge of the subject I take your text and add my thougts: Embalmer Shrine - I do not feel this is very useful for the main and only use with Shadow Phoenix. For the most BG10 one player taking Embalmers will be close to mandatory But speak with your group who is taking what buff buildings, don't waste card slots here. Furnace of Flesh & Decomposer - Also using Shadow Phoenix, which most of the time cannot be sacrifices and with the base units of 5x Windweavers and 1x Dryad, I feel like this is cumbersome and could instead use a much better replacement. Most of the time, it would only net in 200-300 void and takes up 2 slots of my deck. Can be valid, in certain speedrun matchups, but in the most cases the Voidreturn should do this work, a.k.a. ASAP Sow. Matter Mastery - I bought this for Willzapper buildings of Twilight, but found they are not that useful. Most of the time I am already paralyzed before I can take over the building. But this might also because I might do something wrong. It works but needs a little practice. Take the spell on your cursor before you see the first towers of a camp. Assume for the later camps one Willzapper in the first row on either side. As soon as you can see, spam the spell on the tower while running into the camp. Usually you can get the Zapper before it gets your Units. 2x lvl 1 orb CC Spells - I have both Ensnaring Root and Hurricane. I find both to be useful in different cases, but I am aware Hurricane is useful in very specific cases For BG9 I would recommend to take one out, for BG10 I would usually take both and even add Dryad Blue and/or Mark of the Keeper in your T1. For random BG10 I would love to have both. Cards I am thinking of adding: Incredible Mo - Mainly for the third buff so spells are not blocked As Embalmers above Aoe spell - Anything like Earthshaker or Thunderstorm Both great spells, always good "fillers" (and there are more such spells, that fit situational to most decks) If you got more questions, please feel free to ask Greets Volin -
I am delighted to hear how those changes would influence both PvP and PvE scenes. I am not sure if I am content with the effect being global, though. It had that personal touch before, and now it seems to be perhaps a bit too easy? Shrine of Martyrs requires freeze on enemies; FoF needs 2 deck slots, more power investment and some attention to work (if you want to get power immediately); and Shrine of War requires a player to be in a successful engangement. I found Shrine of Memory to be useful even before the change, but now without cap and even more efficiency, a global powerful void power return button seem to promote meta lazy approach even more. If it is supposed to be global I would suggest it as a less powerful (but uncapped) passive effect, to fit supporting role similarly to WoG (Nature has already plenty of "press to support" structures in my view) Or as a personal effect, more of a burst void return for extended amount of time.
-
I think most players who have played the game for a while will all have this issue, I like Dutchy's idea using gold/BFP to buy more deck slots. I just upgraded from a 10yo iMac and it worked fine, definitely never took 10mins to load a game.
-
Yes i think so too! I´ve just come up with another idea that would work better with a Fog-of-War-PvP-mode: - unit-cap could actually be based on buildings build (I´d go for a simple approach and either add new "House" cards, or a more difficult approach and give some/all existing buildings a unit-capacity) - if there were to be a lot different supportive buildings, you could actually build up a base- trying to protect you support buildings as good as possible, and scout your enemy to see for which support-buildings he went
-
@Nerevar "Why shouldn't he be able to?" Exactly for this reason: so that the leader isn't blocked out of his own match. And yes, the "open slots" number is as far as I know exactly what it says, open slots. If you are in a group with 4 people and only 2 are in slots, then there are still 2 open slots.
-
They explained this on the stream. They have a set number of slots, and if all slots are full, nobody else can log in. As the stress test progresses, they will increase the number of slots available. There were technical reasons they haven't yet been able to set up a queue, so you just have to try occasionally and hope for luck. The better the stress test goes, the faster they'll open up more slots.
-
As we all know, the positioning of booster cards in a pack indicates which cards you will get based on the rarity probability. e.g top left is always either a rare/ultra rare. For someone that finds opening boosters pretty fun, i think it would spice up the booster opening element if there was some way in the option to "Shuffle booster cards". Basically what this does is that the card positions that you get based on rarity can be moved randomly to any position. This would mean that the top left does not necessary equates to a rare/ultra rare and this position can appear in any of the other card slots in the booster. Hopefully, it will be much more fun and exciting to open as you technically don't know the cards you get.
-
I would like to see 25 slots eventually, given that each faction was adjusted to allow for more diverse viable strategies - especially pure factions (with the exception of pure shadow to some extend, there is some build variety there) are quite reliant on must have combos. Right now, i feel that only universally strong cards are being played and more situational cards are maybe 2-3 slots at max in meta builds depending on the faction (for some faction this number is 1 at most...). With a more viable set of optional counters / combos, it will be much viable to adjust decks to personal preferences and slot-hungry t1s like nature t1 (and frost t1 if you would otherwise not play home soil/ice barrier) would be buffed by this change.
-
Double click on cards to reforge does not work if card is in active deck
LEBOVIN replied to Refas_'s topic in Client-Sided
@Zyna he means even if u have duplicates of the card it still does not put those into the reforge card slots -
No thats the worst timing, because then there is almost no remaining capacity left that would take 40 / 45 / 50 / 55% longer to deplete...
-
The card functionality has not been changed. As the building has been build very often by players without achieving a benefit (especially in RPVE), the tooltip has been updated to make it clearer that the potential gains of this building only kick in after the power well would normally have been depleted. Old text: Own power wells in a 20m radius consume 40% / 45% / 50% / 55% less power, thus producing more. New text: Within a 20m radius the remaining capacity of own power wells takes 40 / 45 / 50 / 55% longer to deplete. Production per time increment remains the same.
-
How to play Nature T1 - a PvP Guide by RadicalX - -General talk- Okay I'm almost finished with the entire T1 section. I'll say the the same stuff as I did before, with this guide I want to provide information for newer players (Stuff like: Which cards do I use against which color), but also for the ones who are already dedicated veterans (going for in depth analysis here). Again I want to remark that every statement I make here refers to 1v1-PvP since 2v2 works in a different way (especially for nature because in 2v2 you can cover up most of its weaknesses while benefitting even more from the strengths nature offers). Let's just start with a short summary of what nature is good or bad at: + Nature T1 has a good scaling in extended T1 fights (it outscales Shadow & Fire units by a wide margin and can get really opressive due to free sustain) + Many people, even some of the top players, have no clue how to play against nature T1, because they never play against strong nature players. Since nature has a very different playstyle compared to other factions this can be a massive advantage for you. + Nature T1 spells scale well into mid/late T2, which opens up for very strong mid game options + Nature T1 is simply fun to play and practicing the micromanagement is really rewarding - Nature units don't scale into T2 at all with the exception of Dryad (playing T1 vs T2 with nature is also quite hard and requires alot of experience) - The deck is hard to play as it requires very crisp decisionmaking (can be good for you if you invest alot of time into practicing) - Nature has no clean answer against Phasetower (resulting in a matchup that is really hard to deal with and you need Primal Defender in your deck to survive). But Phasetower is disgustingly strong in any matchup. Nature has some weak points that can be exposed. The units are expensive, which makes you vulnerable for cross map action and aggressive T2's. You usually just want to avoid playing Nature as Shadow and Fire usually bring up much more stability to your decks. People who mastered their respective T1 could actually abuse nature T1 heavily. That said most high ranked players are very inexperienced when it comes to playing against nature. Even the “average Prime” from the old days would hide himself behind Phasetowers & instant T2's to get throught this early matchup regardless of strategic advantages. Deck building Let's start to take a look the cards, that are available in Nature T1. I'll simply set up groups like in my other guides to give you an overview of what cards I'd consider as strong or ... well not so strong. S - Tier Dryad (blue): Super essential card with an insane ability and passive. Definitely must have in the traditional nature deck. Does synergise well with pretty much everything your T1 offers and as an ranged M unit with splash damage almost perfect. Her damage often gets underestimated as her card description is wrong (should be 660 attack and not 550 since the splash damage is not part of the calculation). The additional crowd control can be used to very high value in micro trades. Ensnaring Roots: Super essential spell, one of the main reasons why you want to play a nature splash - it is useful in every stage of the game against almost every type of melee unit. Synergises really well with the wide arsenal of ranged units, that nature can bring on the table. Hurricane: Very powerful mid game spell, helps alot against S units in T1 fights and allows you to survive against stronger S units like Darkelf assassins in T2. Surge of Light: Grants you extra safety against AoE damage and makes your opponent think twice, if he wants to nasty that Dreadcharger into your full hp units. In addition to that this spell is almost always useful throughout the game, especially on open fights. It empowers very simple attacks (Playing Deep One + perma heal can put your opponent onto a massive amount of pressure in the later stages of the game). A – Tier Shaman: Also very important in a good nature T1 deck. The sustain it offers leads to great importance of micro, which gets rewarded heavily (saving these 1 hp units is so damn satisfying). It's super important for nature mirrors and overall useful in many ocasions. Clearly a must have for extended trading. Windweavers: The double shot ability makes them super useful in big fights and against squad targets. Windweaverspam beats out Nox spam, which is quite important, when playing against Shadow. Just struggles against knockbacks (Firesworn, Hurricane, Frostmage) so spamming it against anything else than shadow is rarely useful. Swiftclaw: Technically the best swift unit, if you're interested in playing an aggressive T1. If you want to avoid fights or save deckslots for stonekin, a different swift may be the better option. Its high dps is very useful against Frost players (Swiftclawspam can punish greedy early well choices) and also good as a front liner in early (!) nature mirror fights. Useless against shadow though, but still worth a deck slot most of the time as the high dps also brings up potential threatening to early T2s by your opponent. Spearmen: Very Important in alot of matchups. Their high hp pool makes them easy to micro, which leads to a very high heal efficency. Very good in dazed fights against Shadow and they also make the difference in early nature matchups. Underrated card, which is sort of similar in its function as skeleton warriors are in Shadow T1. In their M-Counter form they also get a little bit of extended range, which allows you to safely attack rooted melee units without taking damage by yourself. Primal Defender: Helps you alot to slow down phasetower-players on dangerous maps like Whazai and can slow down the game in general. Provides alot of safety and is a very good addition in your deck. I recommend playing it and at a certain point it is even a must have card. It also allows you to stall out at certain choke points against aggressive Frostmagespam in order to survive the early stage of the game. Treespirit: Destroys every type of healthy gameplay (has arguably the highest cost efficency out of your T1 units), but sadly doesn't help you against the real threats nature has to face (Mortar, Phasetower, Frostmage) as you can soak up damage rotations. Treespirits always just hit the closest target, which is an exploitable weekness, so while I see alot of people try that “only Treespirit T1”, it doesn't work out well. The card is insanely good, if you are weak at T1 looking to slow down the game to survive for later gamestages, but is very slow when it comes to transitioning into offense. B - Tier Amazon Blue: Very good, if you look for a fast T2, because its an L counter and its ability is deadly against Nightcrawlers (You can swap and activate them immediatly afterwards). Therefore it simply scales better than Swiftclaw, but is inferior in T1 fights. The beast damage reduction can be useful against some creatures (Swiftclaw, Treespirit, Sunderer). Mark of the Keeper: Defensive Building, which can be very strong in certain spots on the map and deadly against some decks, that rely to much on mid range units & spells. But usually you fall to far behind to protect every single base since 70 power is quite a huge price. Aura radius is too small to block Phasetower from attacking so it doesn't work as a replacement for Primal Defender. Evenom (red): Very good to support your army in T1 vs T2 fights. Helps alot to bring down skyfire drakes as it is a soft counter to ravage. Can be used to play out and punish instant T2s of fire splashes (don't do this against pure Fire though!). C – Tier Dryad (green): Synergises well with an endless amount of cards, which is very nice to have, but rarely useful enough to justify the 60 power investement. Can be nice to cheese your opponent with some sort of Darkelfassassins burst combos or and also denies small debuffs and anti magic areas. Werebeasts: They cost 75 power which is slightly less than the other swift units ... if you want to go instant T2 to safe 5 power this is your choice! Also a potential choice to swift start against Shadow T1 even though their combat ability is still lackluster. Mumbo Jumbo (both affinities): Cheese card that has to be used on an isolated unit, otherwise it has pretty much no effect. This card belongs to rPvE bossfights. Manawing: Troll card, which is fun to play and microing the teleport ability is super fun. But its hp pool is just too small to make serious use of it outside of the PvE area. All T1 factions do have good anti air units in their basic composition, which makes the air unit stat malus pretty bad for you. That said you can still use it to bring down annoying cliff mortar attemps (I'm looking at you DasToggy). Stranglehold: The card has huge damage and provides huge safety, but the cost is too high. Also doesn't hit buildings, which is very bad vs Phasetower/Mortar. D – Tier Amazon Green: The blue version has a damage reduction, which makes it just straight up better than this version, that does almost nothing. Evenom (purple): dps is too low to justify its power cost. Fountain of Rebirth: PvE card, does litereally nothing for you due to its initial cooldown. This is my T1 I use most of the time when playing nature T1: Swiftclaw Dryad (blue) Shaman Windweavers Spearmen Ensnaring Roots Hurricane Surge of Light Primal Defender Even though 9 slots look like a huge investment you need to keep in mind, that nature has alot of key spells (Root, Hurricane, Surge of Light) that scale very well into later stages and will be strong through the entire game. If you look for higher slot efficency you may consider cutting Spearmen. Matchup Discussion 1 Nature vs Shadow 1.1 General matchup discussion 1.2 How to deal with Nox Spam 1.3 how to deal with Dreadchargers 1.4 How to deal with Phasetowerspam 1.5 How to punish beast Shadow T1 players 1.6 What to do against instant T2 1.7 How to rush greedy power wells 1.8 Map advice 2 Nature vs Frost 2.1 General Matchup discussion 2.2 How to deal with Frostmagespam 2.3 How to punish early wells 2.4 How to deal with Ice-Guardians & Master Archers 2.5 How to deal with early T2 2.6 Map advice 3 Nature vs Fire 3.1 General Matchup discussion 3.2 Dryad spam dicussion 3.3 How to play the classic matchup 3.4 How to survive the early game against Wrecker 3.5 What to do against Mortar 3.6 How to deal with early T2 3.7 Map Advice 4 Nature Mirror 4.1 Swift unit starter 4.2 Swift vs ranged starter 4.3 Treespirits 4.4 Playing against early T2 1 Nature vs Shadow I want to start with the matchup against Shadow, because I think it's pretty easy to understand the dynamic from the nature perspective for a basic level. I want to describe how to beat the average Shadow T1 player: There are multiple scenarios you will encounter, when playing against Nature T1. I will go through all of them. First of all I will show you how the average Shadow T1 player plays & how to demolish him with ease. Then I'll go further to discuss what to do against dangerous unit compositions and strategies and how to survive against the overpowered Phasetower. 1.1 General matchup discussion Nature has a general strength, when fighting against S Units due to Windweavers double damage bonus & Hurricane. This makes Forsaken less effective, espcially in a spam they are absolutely weak against Hurricane. On the other hand nox troopers make your Swiftclaw/Amazon entirely useless as you want to get off max value out of ensnaring roots. Starting with your swift unit may result into an autolose, which leads me to one of the golden rules, when playing nature T1: Always let your enemy spawn his first unit before you. This gives you the information about his T1 therefore you can react properly. The matchup against Shadow is probably the easist one to learn at the beginning, which is my main reason why I'm starting right here. 1.2 How to deal with Nox Spam This is quite an easy task. All you have to do is spamming Windweavers and pull back that unit in a fight, which gets focussed. Most of the time your Windweavers will survive, because Nox Trooper need extra hits to kill squad units. Therefore you can save multiple units and heal them with surge of light. Even with motivate there is no way you're gonna lose that fight if you micro properly. Tip: You can select damaged units on the small screen at the right side. This allows you to pick your targets faster and more precisely. 1.3 How to deal with mass Dreadchargers Some people may try to circle around you with Dreadchargers, which is a little bit harder to defend. Spearmen do a good job though to protect you. Against a massive amount of Dreadchargers it's quite useful playing a second squad of Spearmen. The important part in this scenario is to avoid open areas in the early stage, because you may get crushed from multiple angles. Just hover around choke points and punish overagressive pushes by using ensnaring roots (best case scenario is to catch 2 units, who are close to each other so multishot of windweavers increases your damageoutput during the cc time). 1.4 How to deal with mixed unit combinations Probably the most effective way to play Shadow T1 is a combination of 1 Forsaken squad (to finish of S squads, because Nox struggle with this) and an equal amount of spammed Dreadchargers/Nox Troopers. You need to be careful with your micro and a good amount of Windweavers are necessary to eliminate threads quickly. Always try to kite back up until you have a big army and some additional power to support with your spells effectively. It should be easier to stay safe as Nox & Forsaken aren't that fast. Just be careful and don't fall back too far, otherwise a straight wellfocus into T2/Phasetower defence may put you far behind. 1.4 How to deal with Phasetowerspam This card ist probably your worst enemy when playing nature T1. It destroys windweavers with its absurd splash damage and has an insanely high cost efficency ... pretty much a cc immune long range high dps tank. You will face Phasetowers in 2 possible occasions (Defensive and offensive situations). If you are trying to rush against a phasetower player (because he picked up a greedy power well or something like that), keep in mind that you're still going to lose an engagement. Try to set up your mobility advantage to and walk up to the main base to bait out a Phasetower, then walk back to the extra well. This way you can soak 60 additional power out of your opponent's power pool. Keep in mind it simply doesn't work on large maps like Haladur. Phasetower will always favour the Shadow player unless he makes major mistakes. Maps like Whazai are even worse, because a straight phasetowerspam in the middle can reach your powerwells just after 2 ports. You need to set up a primal defender defence before your enemy gets to port in. Otherwise the game is just lost. 1.5 How to deal with a Shadow T1 Master This will be really tough. Your goal is early survival. The Shadow player has some ways to create massive advantages within the first minutes to build up big advantages. I'll show one of these powerful early attacks, that will end up with a clean 80+ power advantage for the shadow player most of the time. I'll give Yrmia as an example (Your opponent starts with a Dreadcharger. You have to respond with Spearmen or Windweavers . The game is over if you make one single missstep. You opponent will just start picking up a power well ... 1) Now you can decide if you want to rush him. If you decide to rush him he plays a defensive Phasetower, that can port to the main base if you try to switch (even though it takes more damage there, fighting at the enemies main base will be hard, because the Monument will also constantly attack you with its splash damage and finish off squads before you can heal them). 2) You take the well by yourself. This lowers the early voidlevel and leaves you open for a split attack which favours Shadow. An immediate double attack at your well and your main base will follow soon with 2-3 units per base. Shadow units are more effective without additional support while the expensive nature units need to synergise with each other and their support spells. In addition to that crowd control is nearly useless (1Dreadcharger, 1 Nox, 1Forsakensquad), because you won't be able to cc multiple units, you don't have enough crowd control in your base to make the cost investement worth it & you lack the units to kills cc'd units. If you try to overwhelm your opponent at one spot, he can just spam units at the other spot and get your powerwell over there (especially when he motivates the unit from the weaker side). You lose at least 1 powerwell. 3) Instant T2. If your opponent mimics your movements early and stays on the same side as you do, there is no way you can reach an orb fast enough with your slow first unit. If you decide to start swiftclaw, your opponent will read your plan in about a second and won't pick up the power well, so he can rush your T2 immediatly if it's needed. You can't go for a dazed fight anymore, because Nox Troopers demolish Swiftclaw/Amazon and winning a fight while being 80 power down this early into the game is just not compensable just by good micro. Shadow T1 is very powerful at the start of the game and you definitely need to respect that. But don't worry to much, you won't meet such a strong shadow T1 player on a regular base. Most of the time people do make mistakes, so you can pick off some units with your cc or simple do favourable damage trades that keep you alive until you start to scale up. You will still face turrets and instant T2's alot, but you can survive that by using primal defender or picking up instant T2 by yourself. In the best case scenario you may be able to rush your opponent. 1.6 Rushing an opponent who plays instant T2: 1.6.1 Pure Shadow Pure Shadow: Very hard to deal with. Rushing is only a good decision if you're close to your opponent's orb already and even then it may be close. You need spearmen as tanks and M counters to deal with Shadow Mages, who will destroy your units faster than you may think. If you are not in position there is no way to rush that, you need to be in position with your spearmen, when the T2 is finished already. 1.6.2 Bandits Bandits: Actually easy to rush if you are close. That is a big 'IF' since you can't start swift vs Shadow and this gives Bandits more space. Just split against crowd control, play 1-2 dryads and sleep incoming drakes. Bandits has no crowd control, so you can even rush over a decent distance. If your opponent is to far away, picking up a power well with primal defender (that thing demolishes drakes) is also fine. Just make sure to defend proactively & keep an eye on nightcrawlers aimed for split attacks. you need to catch units before they get close to your power wells (rallying banner attacks are annoying). I recommend practicing this, if you are a pure nature player, because Bandits has the upper hand in this matchup due to cards like windhunter and powerful rallying banner attacks. 1.6.3 Shadow Nature Shadow Nature: Don't overstay your welcome T1 against Shadow Nature. This deck is probably the deadliest out of all against T1 units. Cheapest high dps units + cheapst crowd control. A common strategy with this deck is to sacrifice entire T1 armies just to get a powerwell and then defend counterattacks with Oink + Phoenix (+Nightcrawler-Nasty). Don't fall for this bait 1.6.4 Shadow Frost Shadow Frost: Hard to rush, easy to defend against. You can just pick up a powerwell and defend early attacks with good micro. Just don't push to aggressively, as Shadow Frost does really well at defending power wells and orbs (but that should be well known). From a defensive spot you won't be surprised by any Lyrish Nasties or some stuff like that. 1.7 How to rush against greedy power wells This is a pretty common scenario when facing unexperienced shadow players. Most of them will put up very aggressive extra powerwells without the needed ressources to defend them. If you want to punish that, you still need to keep an eye onto two things. First of all you need to be in range to punish a potential defensive tower. Secondly you still need at leasty 3-4 combat units and some power to make good use of your support spells. Even with a 100 power lead an early engagement may be very bad for you, because Shadow units work much better on a very low power level. So taking like 20-30 seconds to build up your army in the first place might be a wise choice if you don't have enough units in the mix, but as I said you need to be at least somewhat close to 1.8 Maps (Tips and spots to watch out for) Lajesh: With the walls it's a great map for you as it blocks any early action and you control the only attack areas with your crowd control. Allows you to scale up to critical points, that allow you to take control over the game. Elyon: Phasetower or instant T2 by your opponent may lose you mapcontrol right from the start on, you need to fight from an uncomfortable position. At least the wall protects your main base, so you won't be pressured early, which is good for you to scale up safely, especially when playing pure nature. Haladur: Your main base is far away from the center of this map. This means you are open to get split attacked. Defending that on equal power level can be very tough, escpially due to the strength of motivate. Centered fights will be in your favour unless Phasetower is played. Yrmia: As seen above, this map gives you alot of trouble due to multiple spots to get flanked from, if your opponent mastered his T1. Phasetowers from the center position are very dangerous. Small entries can be covered by ensnaring roots though, which may a possible opening for you. Whazai: If you see your opponent starting with Phasetower you need a primal defender at your entrance to the center of the map, otherwise you will be destroyed by phasetowerspam. They just need 2 ports to attack your powerwells. Even T2 isn't enough to stop this. If phasetower isn't played you should be fine though, Windweavers are more valuable than spearmen in this scenario, because they can attack the powerwells at the main base over that cliff. Uro: Troublesome map. Gives you some issues due to the high distance between wells since you have to start with a slow starting unit, but it's not as bad as the Frost vs Shadow T1 matchup on this map since you've got a chance to win the dazed fights. Fast T2 is valuable for you on this map unless you win early trades. Simai: The is somewhat fine to play, but you may lose entire map control upon playing an extended T1 agianst Phasetower. So early T2 is somewhat necessary if you see your opponent prepare anything at the center of the map. Apart from that you've got 2 power wells next to you main base, that are somewhat safe to take, which is pretty useful. Generated maps (small): Similar problems as on Elyon. You may lose mapcontrol, rushing against instant T2 or phasetower is hard, but not always impossible. You make your decision based on your distance to your opponent if you want to rush or play the game slowly with less mapcontrol Generated maps (big): Games most likely shift to the T2 stage before anything dangerous may happen. You should be careful about sacrificial well focus strategies by your opponent as you can't counterattack over such a wide distance. 2 Nature vs Frost 2.1 General Matchup discussion Frost is an uncomfortable opponent for you, because Frostmagespam is negating your scaling power, therefore you can't sit back and scale up safely like in other matchups. You either need to be more proactive to get early advantages or try to use defensive buildings to stall out up until later stages of the game. That's easier said than done. The Frost player can fall back and also use its Ice-Guardians, but with strong micro plays you can force good early fights and create very nice advantages for yourself. 2.2 How to deal with Frostmagespam There are 2 options for yourself to deal with a Frostmagespam. You can either go for a Swiftclawspam, that is beating Frostmagespam very early into the game. You can try to force an early fight, if the Frost player oversteps. But you aren't guaranteed to get the fight you want if your opponent stays at his main base up until he scales up. If you play stonekin an aggressive T2 position may be an option due to the high amount of M knockback in, but as a pure nature player I don't recommend doing such things. The Frostmages S-knockback is negating the option of using spirit hunters & ghost spears to full effect. On bigger maps you can take an early well to force a response to create an easier target compared to the main base (keep in mind an orb also does formidable damage). It also lowers the void level which delays the big Frostmage burst breakpoint. A less aggressive strategy would be mass Dryads/Shamans against the magespam and hope, that your opponents splits up his mages a little bit too far. Then you can use ensnaring roots to pick up mages, that are placed too far from the main group to get your advantages. If your opponent picks up to many mages, because he doesn't allow you to outtrade him early, you need to rely on a more defensive strategy. Turrets work quite well in this case, because once the mage army gets to big the turrets will buy you some essential time. Frost units are too slow to run around your bases, therefore you are safe for a while with the option to prepare your next move. If you get to kill some Frostmages early on, you may be able to win this in the late T1, because Frost Mage charges are limited, while you have access to two combat units with the Shaman & Dryad. The mage player is still favoured in this matchup, but the homesoil nerf at the last patch in 2013 was apparently beneficial for the balancing in this matchup (I guess that was the only good thing about that nerf). 2.3 How to punish early wells On maps with big well distances like Haladur I recommend going for an aggressive early game. Swiftclawspam is an option here. You can switch targets once your opponent spent alot of power into Ice Guardians. They are too slow to follow your units when there is a great distance between power wells. You simply run away from the Ice Guardians while destroying the undefended power wells. If your opponent wants to go for a Frostmagespam, you can simply pick up an early powerwell to open up a spot to attack if the Frost player responds by taking a well on its own in the center. On a low void level the Frostmagespam is vulnerable to heavy aggression. Tip: Keep an eye onto the Glyph of Frost. Always try to anticipate it and try to bring up less predictable movement patterns on the board. Even though that seems a little random sometimes, it may be harder for your opponent to predict your movements correctly. 2.4 How to deal with Ice-Guardians & Master Archers This is probably an easy task for you. If Frostmage isn't involved you win the scaling game since you ranged advantage over Ice-Guardians and the Hurricane against a potential Master archerspam are simply way to effective. Just keep in mind that you need a good amount of units on the board to make your crowdcontrol worth its use as Frost units are very tanky. In the early game you need to be on point with your micromanagement in order to keep your units alive (Shaman heals, Dryad cc, kiting) before cc starts winning these trades for you in the late game. Frostbite is very dangerous here, you might lose units, that are out of position! Keep in mind to stay in an aggressive stance when commiting to an attack. Your opponnent might tech up and suddenly your poor Shamans are infront of a War Eagle, which is a situation you probably do want to avoid. 2.5 Playing against instant T2s I mostly would recommend picking up T2 by yourself in that case because you should have strong T2 options, when playing pure Nature here. Frost Fire, Frost Shadow & Pure Frost are very good T2 matchups for you and instant T2 give you an optimal position to gain leads over Energy parasites. Stonekin is pretty difficult to rush with nature T1 as Stonetempest is super effective against your M heavy unit composition. You need to be very close to be able to rush this effectively (getting a tempo lead by dealing damage to the orb during its construction time). 2.6 Map advice Lajesh: Again the walls are very valuable to block Frostmages as they can't shoot through them. If you get into a leading position here, you may consider trying to get mapcontrol as this blocks T3 for the late game. You always have the option of playing safe if anything goes wrong. Elyon: I usually recommend looking for an early T2 in the corner on this map. Your mainbase is safe, but you can't contest the center in an extended trade against Frostmages. If you're playing pure nature your opponent will be forced to go T2 by himself as he can't defend Energy Parasites with T1 and doesn't reach your T2 orb in time. Haladur: The big distance betweeen the main base and the center are always and advantage against Frost. Taking an early power well is your best bet here. Lowers the void and can't be rushed effectively as long as you've got a defensive building as back up. You've got at least a minute to prepare yourself before the Frost player gets into a meaningful range to do something useful. Yrmia: Very small map and very dangerous against Frost. It's really hard to safely aquire any position on the map here. The wall segment gives a 75 power boost for both players, which favours the Frostmage spam as your opponent will reach his critical mass earlier into the game. Wazhai: Keep in mind that melee units are less effective here due to the cliff. Going aggressive with Dryad + Shaman can work out pretty well, as most people will be nervous and overcommit into an early engagement, that nature wins due to the Shaman sustain. Against experienced Frost players a Primal Defender behind that cliff can block early center aggression. Uro: If you play Stonekin, you can go instant T2 against aggressive magespam. You most likely identify your opponent's itention as he either needs to take the long path in oder to get wells or the short path in order to fight. I think playing against this as a pure nature player is dangerous, because Magespam can rush early T2's and it's hard to defend any position apart from your main base. Simai: You can take that early well to create a big tempo lead in your advantage. Low void level, big map with walls to intercept Frost players for a good amount of time. Should be fine to play this matchup here. Generated maps (small): You most likely lose map control on these maps, which is a little unfavourable for you. But sometimes you can go for a swiftclawspam due to the big distance between center and main base. Generated maps (big): Early advantage for you as Swift units are very valuable here. You can try very aggressive Swifclawspam into T2 as there is no option to counterattack in time for non-swift units. The distance between both players is huge. Keep in mind that Frost T1 players usually play super strong late game decks so getting an advantage pre T3 can be very important for you. 3 Nature vs Fire 3.1 General Matchup discussion The matchup against Fire is very interesting and there are alot of ways this could play out. There are some easy & effective strategies, but also some advanced ones, that are way harder to execute, but more useful in the end. Fire T1 is often played differently dependend on the deck you are facing because there is a big variety in deckslots that are invested in T1 within the Fire deck. Pure Fire can throw 8-9 cards into its T1, while Fire Nature will simply use 4-6 cards, because it requires way more slots in T2. Some cards like Wrecker & Mortar turn around matches heavily and you need to know and respect their specific power once they are used. Before going into specific T1 fight discussion I need to warn you here. Fire players tend to skip T1 against nature quite often and nature units are very weak against T2. So keep in mind to avoid binding power into to many units while being in a passive stance. This frequently leads to frustrating losses and you want to avoid that. 3.2 Dryad Spam Discussion I would say this was a very famous way to play the matchup from the nature perspective. Alot of players would simply spam dryads to scale up to a point where they simply outscale the opponent. I agree with the fact, that Dryad is a very powerful card with good stat cost efficency and especially against Fire T1 the damage reduction is huge because of eruption. A double Eruption doesn't kill units anymore and its damage gets reduced to 225 per target (from 300). Anyways you need to be careful when to use this strategy. You lose alot of mobility and versitility, which makes you weaker against early T2 and Mortar tower. These are strategies you will face quite often and this is why I don't consider spamming Dryads in this matchup unless your opponent tries to go for a Fireswornspam. Dryad has a superior stat cost efficency and Firesworns can't use their ranged advantage or S knockback against such an army. 3.3 How to play the classic matchup The classic unit composition you will face is built around 1-2 scavengers combined with Sunstriderspam and maybe 1 Firesworn. Your opponent will try to fight on an open field or at least attack from multiple spots at once, so you can't use your cc onto all units. On most maps I recommend a Swiftclaw start to match the speed of Scavenger, because especially on mid centered maps Fire can pick up a well + mortar or instant T2 which is very unpleasent to play against. In rare occasions you may consider starting with a Dryad. In order to win this fight you need at least 2 Dryads, because you need the damage reduction against the Eruption on all of your units. Before you manage to do that try to avoid every possible fight. Tip: Spawn order is an important here. Your Dryads need to get spawned early on, because they need to be undazed to switch their mode for damage output. Shamans on the other hand are incredibly good dazed as they already heal for full value. This is very important to know to win extended trades. 3.4 How to play agianst Wrecker Wrecker has insane M damage. I think it's the best basic cost stat efficency out of all T1 units if you simply look at its damage output. This is something you need to respect in this situation. Most of the time only pure Fire players will carry Wrecker in their decks, because they do have the slot left to use them. But sometimes Fire Frost also goes for the Wrecker, because it has a weak T2 against pure Nature. They most important part in this case is your use of crowd control. Because Wrecker has the ability to allow undazed summons so your CC can end up being used against you. If you use ensnaring roots onto a wrecker, he can use the ability and spawn undazed melee creatures out of the root range while his sunstriders will be placed inside the root area, because they are immune to knockbacks over there, which is a safe spot against Hurricane. In addition to that Wrecker empowers split attacks by alot. Bringing up an undazed Sunderer or multiple Wreckers right front of your powerwell is a huge threat and you always have to respect that. 3.5 How to deal with early T2s 3.5.1 Pure Fire Don't rush this. It doesn't work unless you get a big gifted lead. Enforcer and Wildfire are a powerful defense against T1. Pure Fire will completely roll over you, you have to respond with T2 by yourself and avoid having more bound power in your T1 units. The pure Fire matchup is very unforgiving to play, so be on guard! 3.5.2 Fire Nature Fire Nature is a threat for you, but not as bad as pure Fire. As long as you are close to your opponent's orb, you can attempt to rush it down. If you won a trade beforehand it should be even better. Your biggest task is keeping all units splitted against cc, while keeping the dryad buff applied to all units. Make sure to sleep any T2 unit immediatly. Skyfire Drake is especially Dangerous. Envenom can work as a soft counter to Ravage here, as it is unlikely to kill a skyfire Drake without it. Always try to be ready for a lavafield. The Fire Nature options are powerful, but there is only limited power and time available for him and that can be your advantage. Keep in mind that a missed rush onto a fire nature T2 always means game over. So be careful. 3.5.3 Fire Frost Probably the easist deck to rush as Coldsnap is useless against nature. The 50% damage reduction is very good for your shamans. Still don't underestimate the power of Skyfire Drake and a potential Lavafield. You need tempo to force protects or cc to keep down the powerlevel in order to prevent a lethal strike. Think twice if you really want to run into the risk of rushing against Fire Frost when having a favourable T2 matchup anyways. 3.5.4 Bandits Nobody plays Bandits and we talked about that earlier in the guide. 3.6 What to do against Mortar This card is probably the most dangerous one for you in this matchup. Completely blocks any form of aggression. Once you lose map control and a mortar is up, the position is fone forever. In addition to that Mortar eliminates the ability to basetrade effectively as his damage/cost efficency is even above T2 level. Try to avoid mortar in every way. Cliff mortar attacks also can be difficult to defend once you fall behind, that's why I always recommend playing the game on a low risk level when playing nature in its current state. That said you can't get into a super passive stance as aggressive Mortars may force you into a fight. 3.7 Map advice Haladur: Bad map for you. Split attacks from the side paths are very dangerous. Defending a Sunderer in your main base isn't just dangerous and expensive, it also leaves alot of bound power in your main base making any center position very exploitable. Elyon: You can take fights if your opponent agrees on going for a T1 Battle. Center position to fight over, you should win extended trades, but lose early circle engagements. Be careful about instant T2 though. Lajesh: you can stall, but you won't be able to attack effectively either. Don't lose control over the postion close to your main base. That can end up pretty ugly when playing against pure Fire. Yrmia: You either have to be aggressive to pressure against potential instant T2 (with extended void power extremely dangerous!) or try to set up T2 at the other side of the map. T1 trades should be manageable, because you should be able to reach your critical amount of units pretty early. Uro: Big map, so keep an eye onto split attacks. Apart from that you should be fine by contesting the center position. Whoever gets it in the end will be at a massive advantage as it is a great setup for both players (split attacks for your opponent and EP management for yourself). Wazhai: Cliffmortars everywhere … super tricky to play against it. I would even consider playing manawing in a tournament to prevent this … When Mortar isn't used you should be able to play very aggressively as the wells at the cliff are very vulnerable, even when your opponent picks up early T2. Simai: Slow starter. As long as you don't lose map control entirely you should be fine for the early stage of the game. Be careful about welling up too much as this leaves you open for split attacks. Generated (small): Center rush + Mortar is disgusting to play against. Fire is clearly favoured on these type of maps due to this and you should try to bait out an early fight even though it may be difficult to win. Center control is key on alot of small generated maps. Generated (big): Just make sure you don't bind too much power in T1 units as this makes T2 pickups much more juicy for your opponent. Should be difficult to apply serious pressure here. 4 Nature Mirror I still feel like Nature mirrors are one of the most fun matchups in the entire game. Especially since Treespirit got nerfed and doesn't destroy the faction entirely anymore there is alot of room to show of crazy skills in this matchup. There are 3 ways to play out the game and I will explain the basic concepts right here. 4.1 Swift unit start Probably the most common way to play this. Swiftclaw or Amazon start into spearmen into dryad into shaman spam. This is the most effective unit composition in the early stage. You will try to use your dryad to keep as many units cc'd as possible while Shamans will switch between attack and healing rotations. Keep in mind, that it's your priority to keep your units alive. Important note: Don't use any spells in the early game! Your Shamans are more than enough to keep your units alive in the early game. Spells are wasted power, because once you use them your opponent can just play another Shaman while keeping his other units alive during the cc duration. At some point it may be useful to add a second Dryad to increase the damage output and protect your other Dryad from burst rotations. Shaman & Dryad micro is key in this matchup. Switching between damage and support modes while maintaining correct unit focus is incredibly hard and really allows you to show off your skill with the deck. Keep in mind that Swiftclaw will me more dangerous than Amazon, because Amazon damage reduction doesn't work against other units even though she can take on the Swiftclaw in a simple 1v1. Her damageoutput isn't sufficient in extended trades. Using the ability onto the Swiftclaw is a NoGo by the way! Dryads could just cc the swifclaw resulting in 65 power being almost wasted. In addition to that the unit ends up getting unbound, which is a huge advantage for the 4.2 Swift unit vs ranged start The second way to play this matchup is the Dryad start. You can't fight your opponent in the early game, because your dps is way to low and Swiftclaw + Spearmen are a huge thread to your units, but once you have 10+ units you can try to burst them down with crowd control. The melee units are somewhat useless, because they don't reach your units anymore while there is no way to heal them against the burst rotations in the late T1 anymore . But as I said if you get into a fight to early you will lose, because the Melee units do way more damage and Shamans will be able to sustain through your damage output, especially with a Dryad in the mix. In addition to that the lack of swifclaw reduces your pressure onto early T2s. EP spam vs Nature T1 can be a huge turning point. 4.3 Treespirits This is the third and probably the easiest version to play out the matchup is Treespirit spam. Beats out the dryad spam due to the high dps, but struggles alot against Spearmen, because they can soak up the damage early and get healed by Shamans later on. I feel like playing them is less effective after the damage nerf, because the sustained dps version beats them now unless you get enough Treespirits to Burst down Spearmen with one rotation (and you need many of them). Keep in mind, that you need to use your Dryad wisely here. Using the sleep animation just after a Treespirit used his attack is useless, because it has up to 10s cooldown between his attack rotations. Treespirit spam is even worse against early T2s though, that has to be considered here. Tip: Amazon takes 50% less damage against Green Treespirits and soaks up burst rotations aswell. 4.4 Rushing an opponent who picks up instant T2 4.4.1 vs pure Nature This isn't a big deal, because pure Nature doesn't have any high dps units do deal with your natural Sustain. Also you do have good cc tools to deal with Ghost Spears and Spirit Hunters. With many ranged units it should be easy to kite Deep One and apart from that there isn't too much pure Nature can offer in T2. If a pure Nature players goes instant T2 at least somewhat close to you I recommend to attack immediatly. Adding up 1-2 S units into the mix may be valuable as they deal well with the S units pure Nature can bring into the fight. Defensive T1 vs T2 is not recommended as Energie Parasites are impossible to defend with Nature T1. 4.4.2 vs Stonekin Way more difficult but still possible if you are close to build up a tempo lead by damaging the orb (preferably with a swiftclaw). Razorshard/Stonetempest can be quite annoying, so you need to make sure, that your unit split is perfect, but in the end there is no “burst combo” that can take you out, so there is nothing you need to be afraid of as long as you play your game perfecly. Spearmen can be really useful to support your unit composition in this matchup. 4.4.3 vs Nature Shadow Nature Shadow has huge potential against your T1 and is pretty big in the early T2 stage. Pretty dangerous to play agianst, but pretty unpopular deck. 4.4.4 vs Nature Fire Rarely played with nature starteres, but somewhat troublesome. At least Natures Swift units are more expensive than scavenger, so your opponent won't be able to use his power as effective as in the Fire T1 version and may be more open to an immediate rush. So that's it for now. I may be able to add some replays for some matchups later on. Thanks for reading this wall of text and I really hope to see some new nature starters in the future! Feedback's always welcome! Best regards RadicalX
- 7 replies
-
- 10
-

-
I'd invert this. In Ranked, it should be skill that decides where you end up on the leaderboard. Not capacity for grinding. And the reality is that if you fight with a non-optimized deck vs an optimized, you WILL run into situations where you lose against fairly simple unit spams because you don't own a specific key card for that matchup, or it simply isn't upgraded high enough. Also, talking for myself and my friend group of 4 people who play RTS together from time to time, we play games longer if they're balanced and fun. Grinding purely serves as a barrier to entry. It's much more satisfying to notice how you actually get better at the game and thus win more, as opposed to winning more because you have plainly better cards. Tbh I have a hard time even understanding the sentiment of wanting grinding for PVP. I can understand liking grinding in PVE, because there you're playing against a (rather dumb) AI and thus balancing makes no sense - if it was balanced, you'd win everytime. But in PVP, adding grinding just means that you're forced to play uninteresting non-games. I remember back when BF was still an EA game and I started out with lvl ~60, reasonably decent shadow/frost deck on low ladder. Roughly a third of my games, I'd play against a clearly terrible lvl 30 or so deck and completely stomp the opponent, even though I wasn't much better in terms of micro etc. . Another third of the time, I'd play against a lvl 100+ netdeck (often pure fire) and get completely stomped myself and again, not because I necessarily played worse. Actually interesting games, against OPs with similar deck lvls that are similarly optimized, seemed like the minority of matches. Only after I got lvl 100+ myself, reached a higher rank and had all the important cards, games were decided by skill. I don't mind getting stomped if the OP is actually clearly better. But if I had as little time back then as I have now, I don't think I'd have persevered until then.
-
Cleaning up and updating card descriptions - Megathread
Chimaka( ͡° ͜ʖ ͡°) replied to Bini Inibitor's topic in Client-Sided
All Charge abilities - show all the relevant numbers: the colldown in seconds, and total damage done to the target. Affected Cards: Strikers, Enforcer, Giant Slayer (iirc that's all). Healing Well - doesn't state that it has 0 initial healing pool, neither does it state at which rate it refills. Hammerfall - doesn't it state at which rate it refills the Shield/Healing Pool. Max Capacity is stated only for (Green) affinity. -
https://ufile.io/x8pnu - >fyre +2 spec slots https://ufile.io/mb4zi -> turan + 2 spec slots https://ufile.io/dnwwn -> danduil +2 spec slots
-
from what I've seen the ones who had no trouble with getting the game up and running seem to be able to get in and out of the game without much trouble and yet i'm here alongside over a hundred others who can't get in at all. i find it a very unfair point and personally if possible look at peoples game time if so i'd say ban them for some time to allow others to be able to play and at least be able to play somewhat well i got in the game for what 5min before it froze on me but i saw in the auction house at how many cards one person had for sale was alot meaning he got lots of game time, and i heard that the maximum the server can hold is 200? if so it's kinda stupid to put this public when there are over 500 players wanting to play its like trying to find a needle in a haystack. i'm thankful of @MephistoRoss for sorting out game start up troubles, but personally if it was me i'd close the open beta stress test for now until you have more capacity for players to join but i guess i'll just wait for the open beta official release because its too much effort and disappointment of seeing "logging in-Success" "load bar-Dc" every single time i go to go on the game with in over 60 attempts. but i guess people are just going to look at this post and say "boring, be patient, stop being selfish, this is annoying" well to be honest with you all i'm generally looking out for the players who have no chance of getting in game because the capacity is wayyyy too small
-
What do you mean by that? Strictly speaking there is no real price for cards unless you sell them directly in an official capacity and therefore set a limit to its market value. There is the relative rarity of a card compared to other cards and there is supply and demand. Also its usefulness. What are "prices of cards"? The average price over the last 30 days? Median? A graph? Something like this?
-
We definitly want to do this, but the Outreach Coordinator (Marketing) role is not yet filled. Personally im not a fan of giving youtubers a big BFP account, since I feel we should treat people fairly and they can always play on the test-server if they want a full-account, but that would be something for the outreach coordinator to decide. But short answer: yes, we agree and we definitly want to reach out to more youtubers. I wasn't around when this agreement got made. As far as I know, we are not allowed to make money, or pay money (thus have other people earn money) from battleforge. EA still owns the IP. And while I understand your logic, I don't think EA follows it. If I remember correctly, Battleforge got shut down back in the day not because it wasn't making a profit, but because it didn't fit EA's new guidelines of ''each IP of us has to make at least x% of our total profit''. Big companies can have weird rules, and we are already very grateful we get to not only release, but further develop a property we don't own ourselves. Im sure RadicalX can dive more in debt about these points, but my first reaction would be that reducing the costs of walls would not work. A - you also give pro's that reduction, and they will probably better know what to do with it B - it creates a false sense of security and/or longer games. New players might already have lost without them even realising, and suddenly their PvE-like defended wall gets either destroyed or just warped through. C - Same for making maps bigger, matches will last longer, but I doubt it would reduce the ''my opponent is better than me'' feeling. In starcraft, I might not rush my opponent, but if i have 4 expansions to his 1, he is still going to feel completely outmatched, even if the game is technically slower (read: lasts longer) I completely understand, and definitly do keep giving suggestions that might seem obvious. We have a couple of examples where a simple change was actually a great quality of life improvement. I just wanted to explain why we dont always change things that seem obvious to change 🙂 We are looking into things like specific time slots that reward more PvP rewards to try and get more people into PvP at the same time by the way. 🙂