
Dallarian
-
Posts
598 -
Joined
-
Last visited
Reputation Activity
-
 Majora liked a post in a topic by Dallarian in Community Update #18 - January 29th 2022
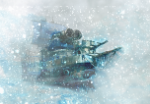
"Adorable Battleships need to eat a lot of snowflakes to survive and feed it's little babies, so they can grow up to become majestic whales.
And here we can see a school of Battleships in their natural habitat, imitating the shape of a much bigger ship to intimidate potential predators.
Inciddentally, they also do this to reduce the air drag factor. Tired Battleships will fall back from the front to the rear of the formation, allowing fully rested Battles to take the lead and provide the drag reduction.
If we look closely, we can see a few families of Icefang Raptors hiding underaneath the Battleships. Raptors and Battleships have a mutualistic relationship. The Battleships protect the Raptors, and in exchange the Raptors secure Monuments that contain Frost Orbs needed to grow snowflakes clouds and feed Battleship population. [1]" - read by Krystyna Czubówna
Nature is so beautiful.
And I absolutely love the new Forge. Below zero job!
[1]. Source:
https://www.reddit.com/r/Stellaris/comments/s5b35l/and_here_we_can_see_a_school_of_battleships_in/
-
 Metagross31 liked a post in a topic by Dallarian in Updated: BattleForge PvP Guide - by Hirooo & RadicalX 2.0
Thank you very much for updates on Pure Frost!
Battleship isn't in meta yet, but who knows what we'll see in next rookies?
-
 Dallarian liked a post in a topic by R4bitF00t in Map Editor Tutorial
Welcome fellow Skylords, to the official map editor tutorial!
Split into several parts, this tutorial will guide you on how to work with the BattleForge Map Editor. By the end, you will be able to create your own maps, script them, and publish them to the Community Maps section of the game.
Some of the topics might seem pretty lenghty. Truth is I only wanted to be thorough when making this tutorial, as the BF Map Editor has many little quirks, and any of them may prevent you from playing your map.
Don't be discouraged though, I will point out any known issues as I go along, and once you get more experience with the editor, you will find your best practises.
To begin, we'll need to start the map editor.
• Starting the Editor
Map editor is automatically installed with the game and is located in your Battleforge installation folder - look for pluginbasededitor.exe
Simply double click the exe, wait for the editor to load and congratulations! You have just launched the editor and are ready to make some awesome maps!
Below is a list of tutorials we will go over, in order.
• Tutorials
In-Depth Tutorials
These tutorials are meant to be followed in order, and are aimed at complete beginners. However they sometimes contain little details that are not widely known about the editor, so these can contain some new information even for a more experienced user. As the scripting tutorials go along, the topics covered in them get more complex.
Map Work Creating a Map Working with Entities Sculpting the Terrain and Blocking Texturing the Terrain Adjusting the Playable Area and Minimap Publishing a Map
Scripting Script Editors Scripting Introduction Scripting Basic Events Part 1 Scripting Basic Events Part 2 Script Groups, Script Areas and Script Paths Creating Goals Default Script Files Member Scripts and Camp Respawns Using Ifs and Loops Warfare Patterns (Coming Soon)
Extra Tutorials
These tutorials discuss topics that are not necessary for map creation, but can make work easier or elevate the map to another level.
Importing a Heightmap Map Patches (Coming Soon) Sound Tool (Coming Soon) Creating Cutscenes (Coming Soon) Unit Aggro (Coming Soon) Template Scripts
• FAQ
Before we begin with the tutorial itself, here are some frequently asked questions.
Note that you can always ask questions in official Skylords Reborn Map Making Discord.
Q. Why cannot I see the map in the game?
A. Make sure that you:
set up the teams and player kits, ideally, using the available presets create and save the map description place and assign a starting position and monument for each player PAK the map look in the correct place in game - for PvE maps only - open the Community maps node, for PvP or PvPvE maps open the Sparring node
Q. Can I create my own entities? Such as an XL Mauler or S sized Emberstrike?
A. Unfortunately, no. BUT you can "modify" entities via the scripting tool. It is very basic and easiest is adding passive abilities. If you want to add active abilities, you also need to manually script the unit to use those abilities and where to target them, which is another problem altogether.
Q. My map keeps crashing when I want to play it, what do I do?
A. If you get an error message (it might be a bit tough to actually open the error message window) try to read it, it usually gives you a pointer to a script that is causing the issue, and what the issue might be.
If the map crashes without an error, check for any typos in your code, or if you accidentaly put an Action into Condition block, or vise versa.
If you still cannot figure it out, turn to our map making discord: Skylords Reborn Map Making
Q: How can I make a unit have Boss Immunities?
A. Use
EntityAbilityAdd {Tag = "tag", AbilityId = 1473, ApplyToFigures = false},
With ApplyToFigures = default or true the unit will be immune to certain spells (like mind control) but still can be paralysed and frozen.
Q. What are the things that can crash the editor or corrupt my map?
A. Several:
Cutscene editor - crashes, prevents map saving
While the tool is functional, it is heavily advised to leave creating cutscenes as the absolute last part of map development. Switching maps and then changing tags of entities - crash
With frequent saving, this, as any other crash, will be only a mild inconvenience. Working on a map that is not saved - crash
It is best to save your map as soon as possible, the editor cannot handle working on an unsaved map for longer period of time and you will lose all your work. Selecting quest_pve_soullight object under Leveldesign folder (DBID 254) - crash
Simply selecting the object in Entity Placement is enough to crash your editor. Hiding entities via Entity List - occasional crash
Sometimes the editor crashes when hiding entities, it seems to mostly happen for the first couple of times you use it, just save often and you'll be fine.
-
Dallarian liked a post in a topic by LichterLoh in Community Update - January 2024
Units for the Amii look epic!
Thanks for your lovely work and time
-
Dallarian liked a post in a topic by Majora in Community Update - January 2024
Understandable, let me right that wrong:
-
Dallarian liked a post in a topic by Kapo in Community Update - January 2024
I officially protest that you mention this and give the people no picture of the cat.
-
Dallarian liked a post in a topic by Majora in Community Update - January 2024
In addition to the community update, I'd also like to take this time to share some of my personal thoughts as we transition into year 4 of Skylords Reborn.
3 years and 43 Community Updates in the books! Working on this yearly recap sure was a trip down memory lane with many "Did we really release that this year?". With so many moving parts and various things in development, things can start to blur a bit. Due to the nature of map making, this felt like a year in which we did a ton of work behind the scenes, but couldn't show off our hard work yet. I'm excited we can now finally start to reveal what the team has been working on.
I hope our monthly community updates still managed to show we are hard at work, and had enough to reveal for players to feel engaged with the project. In hindsight, there were some things that we probably announced too early, (for example the Lost Soul Rework) but with so many variables in our project (our team now has 50 volunteers!) that is bound to happen now and then. I am extremely proud of the work our team put out this year, and I can't wait for players to get their hands on our new campaign maps.
Speaking of the team, we had a bunch of lovely people joining as volunteers! I am super grateful that 3 years in, we still have so many people with dedication and love for the project that they are willing to spend their free time on it. The following Skylords joined in 2023:
CrazyCockerell and Titan as Tech-artists
Piskr as Client Developer
Pierakor as Tool Developer
Lucas Ansei as Web Developer
Ultralord as Video Editor
Volin as Map Tester Coordinator
Damo and Hrdina Impéria as Map Designers
Kayrie as Map Artist.
Discoheart and Noah.K as Audio Editor
Vultagx and Linkz as Global Moderator
ElementG is currently in his trial period for Tech-artist
But it would be unfair to not also give a shout-out to the members who left the team during 2023:
Katchau (developer) left the team
Nukie left the event department
Watermelon Lord, Nukie, Pfirsichkralle and Dallarian left the Moderator department
Thank you all for your work for the project!
Besides the team, I would like to give a personal shout out to Kapo and Dreamlord. You know Kapo from his CCC and Masters of the Forge series, but he does not get nearly enough credit for how much he does for the project and has always been a reliable friend, whether it be proofreading my documents, or getting a Rayman statue imported from another country. Dreamlord has been our favorite Banzaiii Lorrrd and I have been consistently impressed by not only his quality voice acting but his professionalism and willingness to help out, sometimes on short notice. Besides doing voice-overs for our trailers, you can also expect to hear him in our loading screen narrations for the new maps in 2024. I have high hopes for his voice-acting career, and I hope 2024 will be the breakthrough year for him!
2023 was a year full of highs and lows. My girlfriend and I got our own apartment and a lovely cat named Lyra. At the same time I saw friends struggling with depression, break-ups, war and death of loved ones. The world can be a rough place, so please take care of yourself and each other.
What was your highlight for 2023? And what are you most excited about for 2024? Would love to hear it in the comments!
Thank you so much for being a part of this lovely community.
-
Dallarian liked a post in a topic by Majora in Community Update - January 2024
Greetings Skylords!
A new month; a new Community Update! It's time to bring you up to speed with everything going on in Skylords Reborn!
• Skylord Reborn 3rd Anniversary
Happy New Year, everyone! We hope 2024 will be a wonderful year for every one of you!
December 2023 marked the 3rd Anniversary of Skylords Reborn, and we are happy you are here to celebrate it with us!
In case you missed it, we hosted a special Anniversary Stream last Friday, which you can rewatch here.
In this Community Update, we would like to take a look back at 2023, and share what 2024 has in store for Skylords Reborn. We have a lot to talk about, so let's get started!
• Looking back at 2023
Can you believe it's already been a year since we added cosmetics? Here is a quick summary of every patch we released in 2023.
January 14th, 2023
Early in 2023, we released our 2nd Anniversary Patch. The patch contained three new cards; Sanctuary, a Tier 4 Nature spell to go along with our ongoing Pure Nature rework, Raven Archwalker, our first Legendary card, and Worldbreaker Gun Promo, the first Promo building in the game.
This patch also introduced cosmetics; unlockable ways for Skylords to personalize their banner and avatar border. We also added 32 new achievements, many balance changes, and a ton of Quality of Life features; like a longer Marketplace option, more advanced filtering options including a handy in-game guide, and an import/export deck function.
February 27th, 2023
As with most major patches, our follow-up patch was a small one, containing some bugfixes, and the QoL option for players to re-roll the same quest multiple times. The minimum quest reward after re-rolls was changed to 50 BFP.
April 8th, 2023
After our successful Halloween Event, we wanted to surprise Skylords with an Easter-themed event. While the map and general idea were received positively, we probably should not have attached a speedrun contest to it. Players expressed playing the map once was fun, but grinding the clunky Egg-push mechanic for the top time turned out to be a bit tedious.
Regardless, completing the special map ''The Easter Tree" on any difficulty resulted in the completion of the newly added achievement "Bunny Brawler", which automatically rewarded Skylords with a new Easter-themed banner. We saw that banner equipped a lot around the holidays, so we are happy to see it being received so positively.
This patch also contained some bugfixes, and a change to the friend list to display only online friends by default, a much requested change.
May 19th - 2023
In May, we released another big content patch, called appropriately called Nature's Awakening. Alongside many Nature-themed changes, the patch also contained one new card: Sleetstorm.
The spotlight for this patch, however, was on the addition of the Nature faction to rPvE, joining Fire as the second Skylords-Reborn exclusive addition to the game mode. Hodron spend a lot of time balancing the faction and making it fun to play against, which you can read more about in our interview. The patch also contained many balance changes, mostly focusing on our Pure Nature rework.
The patch also included many Quality of Life changes, including a single-player pause feature, key-down vs key-up interaction, the ability to copy text or import a deck from the in-game chat, and gold chests being openable in combat. Lastly, the patch also included our first part of our Gold rework, a few campaign map changes, and a rework of the community map section.
This rework allows Skylords to have an easier time finding great community-made maps, by showing more information, and having featured maps for maps that are especially good or unique. We also had an event on two of those great community maps: An Expedition South and Lyrish Uprising. We would once again like to stress that every Skylords Reborn installation comes with a Map Editor, so feel free to add your creations to the list!
July 25th - 2023
Sadly, the major content patch came alongside some annoying bugs, the most infamous being the lag in the Forge after playing for a while. The issue should be solved, though we still sometimes receive reports of similar behavior. If this is the case for you, please report it to our team to investigate.
We also used this occasion to fix some inconsistencies in card descriptions and enabled playback for outdated replays. However, because replays are playbacks (instead of being a video), if cards were used that have since been changed, it can still result in not accurately reflecting the original gameplay. Regardless, it solved a major headache for our Event Department and Community Events to still be able to access replays if the game had been patched in a way that only effected a few cards that were not present in their replays.
October 28th - 2023
For our Halloween patch, we added a new Pumpkin avatar for Skylords to unlock by playing the custom map Spooky Encounters once more during the Halloween season. The patch also contained one new card: the long awaited Soulstone. This card saw the longest development cycle yet, but we are very proud of how it turned out.
There was one more thing for Skylords to unlock: we released a special Fire-themed Forge, locked behind an achievement we noticed not many players were participating in due to the old lackluster reward. We are happy to see an increase in the completion rate after adding the special Forge.
Lastly, we also released a bunch of balance changes, bugfixes, and a batch of Quality of Life changes, like a higher deck-limit (500), a warning notification for queuing up with a low deck level for ranked (pointing towards the free PvP decks), and some improvements to comparing profiles.
The Fire-themed Forge can be unlocked by completing the achievement "Never Thought of Him"
December - 2023 -> January 2024
Originally, our plan was to bring out a patch for our 3rd Anniversary in December. Sadly, we had to delay after crucial staff members became sick. Which brings us to...
• Looking ahead at 2024
We are kicking off 2024 with our first content patch, and today we are happy to announce the patch date:
January 26th - 2024
Our first content patch of 2024 will contain various previously announced features. You can expect to see the new card Lost Manabeast, our overhaul of the rPvE difficulty system, our Lost Souls Rework, balance changes, and quality of life features, like buttons in the Forge to pause, speed up and slowdown. While we are trying to include previously announced cards like Tectonic Shift and Bedrock, technical issues are plaguing their developments, so we can't make the promise they will be included yet.
2024
While we are not able to provide a concrete roadmap for 2024, we are able to share some general information about what we have planned for the new year. We have spent a lot of 2023 working on map-content, and we are very excited to share what we have been working on! The following content can be expected further along in 2024:
New Campaign Maps
2024 will see the release of some brand-new campaign maps! There are currently four maps in development, three 2-player maps, and one 1-player map. The first two maps you can expect will be Unexpected Visitors and Into the Jungle, which are part of our new Key of Ashia story campaign, filling in some of the questions the original campaign failed to answer. In Unexpected Visitors, you will face the Lost Souls to protect the last Amii tribe, while Into the Jungle tasks you with finding a new safe haven for them. We did a short live-play of Into the Jungle during our stream.
Unexpected Visitors will be the first new campaign map of Skylords Reborn.
New Cards
You can expect more new cards, including three for the Amii faction: Amii Golem, Amii Simulacrum and Amii Skydancer, bringing long-awaited higher tier units to the faction. We will reveal more about these new cards in the upcoming Community Updates.
Besides new Amii cards, we also have a couple of other new cards in various stages of development.
More voice-acting
Alongside voicing our new campaign-maps, we are also working on providing voices for both new and old cards alike. A teaser of the Amii Golem was already heard in the Amii-teaser above, but we also have talented people working on Burning Spears and other cards that patched without voice-lines.
To navigate the players through the new campaign, we have also worked on a Frost Skylord named Gaeron, artwork made by our artist Tweeto. Gaeron was an Imperial Captain defending a Lyrish town. He is shortly mentioned in the original lore book in the game, and we thought he would be a fitting candidate to expand upon. We have found a great voice-actor to voice him during our search back in June.
Balance changes
We are always tweaking cards and looking for opportunities to make underplayed but cards with potential viable, and 2024 will be no different. Be sure to join our balance discord if you want to join the discussion and/or provide suggestions! A lot of the changes in SR are community suggestions, after all!
More Map Content
2024 will continue our vision of focusing on returning content. We are especially excited about Map Modifiers, special conditions that can be activated on campaign maps to provide new and exciting challenges. Modifiers that increase the defense of enemies, or cause them to explode once defeated, are simple examples that can already impact maps drastically. We plan to bundle these with a highlighted Map of the Day campaign map, resulting in additional rewards for Skylords facing the challenge.
Example screenshot of Map Modifiers. Work in progress.
With new campaign maps, expanding on rPvE and Map Modifiers freshening up the original Campaign Maps, 2024 should be a good year for replayable content!
• Events
Kicking off 2024 we also have a new event to enjoy!
• NEW - Amii Training Camp
While we eagerly wait for new Amii cards, let's find out if you fully master the excising ones! Play rPvE with only Amii Paladins and Amii Phantoms on Tier 2 and see how fast you can get! More information.
• FIRST PHASE - PvP AI programming contest
We are gathering players for a new type of event. Get ready for an AI Programming Tournament, where the submitted programs will face off in an epic showdown to find the ultimate AI strategist! More information.
In between our monthly Community Updates, we host various events and tournaments, so be sure to keep a close eye on the in-game event tab and the forum calendar to stay informed and not miss out on any exciting events!
• Host your own tournament / event
Want to host a tournament or event? Please reach out to our other Event Organizers, @Metagross31or @Minashigo Hiko. We can help you out with various topics and are glad to discuss potential ideas. We can also sponsor the prize pool for your event. If you have a cool idea for a PvE event, or want to host a PvP tournament, please don't hesitate to reach out to us, we will gladly assist you.
• Community Spotlight - Masters of the Forge
In this podcast-like series, Kapo interviews various staff members to discuss the project and personal stories about their interaction with BattleForge and Skylords Reborn. There are currently 10 episodes to watch:
• Episode 1: Dutchy, Lead Moderator - Watch now.
• Episode 2: Majora, Project Coordinator - Watch now.
• Episode 3: Volin, Testing Coordinator - Watch now.
• Episode 4: RadicalX, Faction Designer - Watch now.
• Episode 5: Ult, Server Developer - Watch now.
• Episode 6: Ultralord, Video Editor - Watch now.
• Episode 7: Zyna & Ladadoos, Admins - Watch now.
• New: Episode 8: Maze, Web Developer - Watch now.
In this episode, Maze and Kapo talk about the moderation tool, different APIs, and of course in great detail about Maze' wonderful website, the Skylords Marketplace Journal (www.smj.cards)
• New: Episode 9: Windhunter, Lead Designer - Watch now.
In this episode, Windhunter and Kapo talk all about design, the priorities of picking what to change next, the state of the economy and loads of submitted questions from Fire-Frost to Deepdives, and what's upcoming in the next months and years.
• New: Episode 10: Emmaerzeh & Hodron - Watch now.
This episode is all about the art of map-making, in all variations from campaign, rPvE and PvP-maps; with a highlight on how (community) mapmaking is done.
• Contribute
Skylords Reborn is a community-driven project fueled by the passion and dedication of over 50 volunteers. We are always on the lookout for like-minded individuals. If you have a passion for gaming, programming, design, or marketing, we invite you to have a look at our open positions!
We are especially looking for an active and passionate outreach coordinator, helping us reach new Skylords by contacting streamers, influencers, media, and other potential parties. This role can make a drastic impact for Skylords Reborn! More information.
Please consider applying for this position; we would love to gather both new and old players alike in 2024 to check out our new campaign maps. We are also looking for someone who can help us with our newsletter.
Don't have time to formally join the staff, but still would like to help out? Please check out this guide on how to support Skylords Reborn as a community member.
• In Conclusion
That's all for this Community Update! We appreciate you taking the time to read through it.
As is tradition, we're including a scratch code as a small token of our appreciation for your support.
The code will reward you with a General booster: LOOK-BACK-YEAR-2023
The code is valid until February 1st, when we will bring you another Community Update.
We're always looking for ways to improve and value your feedback. If you have any questions, comments, or suggestions, please don't hesitate to share them with us. We'll be back next month with more updates on our ongoing projects and upcoming features. You can also sign up to our e-mail newsletter here.
Archive
• Skylords Reborn Documents (Deep Dives, Behind the Scenes, PvP Guide)
• Overview Community Updates
• Community Update December 2023
-
Dallarian liked a post in a topic by R4bitF00t in Map Editor Turorial - Texturing the Terrain
How you texture the terrain is probably the most important visual aspect of the map.
It may not seem like it, but 90% of the time, players look at the empty spaces of the map - the playable area.
Due to the nature of playable area, it should be sparse in visual clutter, but still look interesting - we can achieve that with texturing.
Since textures are such a big part of map feel - I've also included a chapter with some texturing tips.
This is where we diverge from the correct order in which you should do things when working on a proper map.
For a fully fledged map, you want to have an idea and interesting map mechanics first.
Make that map as bare as possible. Set up the players and enemies, block out the layout with cliffs, and then script the functionality.
Otherwise, you may find that you need to delete hours of your work, because you made the map pretty, before you made it functional and fun to play.
Because we are gradually exploring the tools available to you, the tutorial continues with how to work with the map visuals.
If you want to get to the functional part of the tutorial, skip to the Scripting topics.
Just remember - function first, make it pretty later.
If you encounter any issues, don't hesitate to ask in Skylords Reborn Map Making Discord.
• Content
Texture Tool Working with Layers Layer Setup Texturing Texturing Pointers Base Layer Gradients Borders Next Chapter
• Texture Tool
Let's have a quick look at the Texture Tool window.
It is split into 3 areas.
Area 1 is the Layer Setup area Area 2 is the Texture Atlas Area 3 is the Brush Settings If you don't see area 2 you need to press the Arrow Button (4) on the right of the window
• Working with Layers
The game uses Layers made up of different textures that you can apply to the terrain. If you are familiar with photoshop, you will understand this from the get go.
The basic premise is that the layers at the top of the list are drawn over all the layers that are below them in the list, creating a hierarchy.
The layers don't interact with one another, they are stacked on top of one another.
You set up these layers in the Layer Area (1) with the components (textures) found in the Texture Atlas (2).
We can create a new layer with the New button and copy it with the Duplicate button.
There are also buttons to Load and Save a layer setup as a Prefab.
When you create a layer setup you like, you can save it and then load it into another map to save yourself some time.
The rest of the buttons are self-explanatory.
When you find that you need to rearrange the layers, you can click a layer and drag it above/below another layer to change the hierarchy.
To ease our work even more, at the top of the layer area there are some useful buttons.
Load Layer Set - will load a preset of layers
there are default layer setups for the greenland, frostland and wasteland layer sets Save Layer Set - will save your current layers into a layer set
you can load the layer set into another map to get access to the same layers as they were set up With these buttons, you can get quickly up to speed by loading a previously used layer set you liked.
The Export and Import buttons are used to export the textures as they are painted on the map itself - meaning you can save the painted map and paste the textures as they were onto another map.
You will probably never use this functionality.
• Layer Setup
Each layer is made up of several textures from the texture atlas.
One from each category:
Color - determines what the texture looks like Blending - determines how the texture will blend when painted
Essentially what border it will create, NOT how it will blend into other textures Normal - determines the 3D effect of the texture, it's highlights and shadows, so it doesn't look so flat Specular - determines shininess
High specular means the texture will be very shiny - look metal-like, low specular textures will not shine and will look more dirt or grass-like
The only required texture is the Color texture.
With a layer selected in the layer hierarchy, you can pick whichever combination of textures you like from the texture atlas to create your unique layer.
Color, Blending and Normal textures have the highest visual impact on the layer.
You can usually get away with the default Specular texture.
Buttons at the bottom of the texture atlas are not important for working with textures.
• Texturing
When you think you have set up a layer that you like, it's time to try it out and paint it on the map.
There are two modes in which you can paint your layers - Texturize and Texturize additively.
In either mode:
Paint the texture onto the terrain with Left Mouse Button Erase the texture from the terrain with Right Mouse Button
In Texturize mode, you will paint and erase the texture INSTANTLY to the Opacity set in the brush settings.
In Texturize additively mode, you will paint and erase the texture GRADUALLY by the Opacity set in the brush settings.
I have created a layer from these textures to demonstrate.
With the Texturize mode, I painted this beautiful piece of land.
The Color texture I set means the texture is green.
The Blending texture I chose creates that interesting blend (border) at the edge of the painted texture.
And the Normal texture is what creates the effect of 3D cracks in the texture.
If I were to paint the layer with a lower opacity - in this case, because of the Blending texture - the cracks in the grass would gradually disappear the lower I set the opacity.
By now you might feel a bit confused by the Texture tool, it is one of the more complex tools in the editor after all.
Play around with different layer setups and with how the different painting modes work, and you will get the hang of it in no time.
• Texturing Pointers
I also want to include some advice about texturing.
I'm not the definitive authority on this, I am still learning more tricks and what makes a nice looking map. So don't take these tips as etched in stone. Experiment on your own and find something that works for you.
You can learn a lot and gain a better feel for the original developers' work, simply by analysing the campaign map's visuals.
Just get in game, play the map and then pause in the replay. Explore and analyze what the original devs did and why.
As a general rule, though, simplicity seems to be the king when it comes to BattleForge map art.
• Base Layer
The bottommost layer in the layer hierarchy is the base layer. This layer is automatically applied over the whole map.
Naturally, using it well can save you a lot of time when texturing, but there are some things you should do.
If you want it to cover most of the map - the base layer should have a Color texture that doesn't have any major details - look at the greenland grasses or dirts to see what I mean. They are almost singular color with only very minor details and contrast.
The Normal texture of the base layer should be something very decent - almost flat.
You might be wondering why would I make the base texture essentially as boring as possible.
Well, that's because you want the playable area to be as clear as possible. Including large contrast or a lot of details in the texture that is all over your map, means the players' eyes are constantly bombarded by information about detail - leading to visual fatigue and generally unappealing maps.
Just look at the difference between these two images. You cannot really grasp the difference, until you see these textures over the entirety of your map.
This principle can be generally applied to any layer that you want to use on larger playable areas. Apply high-detail layers with care.
Note: I know everything visual is highly subjective, but trust me - having large areas of detailed textures with strong normal textures will not feel appealing to a lot of players.
If you want your maps to feel truly BattleForge-like. There are two general principles that the original devs seemed to go by.
I will name these principles Gradients and Borders.
• Gradients
Gradients are used to break up the monotony of larger spaces, that use a single texture.
What you do, is create an underlying layer - let's say smooth grass.
Then you create a new layer above that underlying layer - with the Color texture of a slightly different color than the underlying layer.
Let's call the underlying layer the Basic Layer (not to be confused with the Base Layer) and that second layer on top the Gradient Layer.
The Normal texture of the Gradient Layer is generally the same as the Basic Layer.
Blending texture of the Gradient Layer would be the greenland 000 blending texture.
An example of two textures with suitably different colors - greenland 004b and greenland 001.
You then Texturize the Gradient Layer on top of the Basic Layer with different Opacities, creating a linear blend from the Basic Layer to the Gradient Layer.
You don't have to go from 0% to 100% Opacity, I usually paint about 20% opacity area, and inside I paint a smaller area of about 30-50% opacity.
When you combine the gradient principle with the height tool to deform the terrain, you will get a result that is much more visually interesting than a flat plane of one color - while keeping the playable area clean.
Note: When you deform the terrain based on the color of the texture, it can create more pronounced ridges and valleys.
Add some cliffs, smaller 3D details with rougher textures around them and within a couple of minutes, you can have an interesting little scene.
• Borders
Borders is how the original devs eased a transition between two textures.
The easiest example can be seen, when we want to add a road to our little scene.
Pick a Color texture, choose a nice Blending texture (usually one that has smaller blend area) and paint the road. While there is not much wrong with this, and you can get away with it, the transition between the grass and the dirt feels kind of flat.
Well, let's fix that.
We can duplicate the dirt texture - that way we'll have it set up exactly the same.
Now we just choose a different Normal texture, that will have some more roughness to it, and we apply it at the edge of our dirt road.
As you can see, the dirt road now looks more interesting, believable and BF-like.
If we wanted to impove the scene, we could add some more 3D details. And definitely some textures along the cliff's upper and lower borders. But you can do that on your own.
• Next Chapter
In the next chapter, I will tell you how to adjust the size of the playable area, and create a nice, basic minimap.
• Adjusting the Playable Area and Minimap •
Alternatively, there are some extra topics about working with the map that are not that important, but can be very useful. You can find them back on the Map Editor Tutorial homepage.
• Map Editor Tutorial •
-
Dallarian liked a post in a topic by R4bitF00t in Map Editor Tutorial - Importing a Heightmap
In this part, we will go over how you can import a heightmap image into the editor.
Sometimes, you want to have a symmetrical map, or just want to create the layout of your map really quickly.
You can do that through creating a heightmap in an image painting software first, and then importing it into the editor.
If you encounter any issues, don't hesitate to ask in Skylords Reborn Map Making Discord.
• Content
Creating a Heightmap Importing a Heightmap Calculating Height Measuring Distances Return to Mainpage
• Creating a Heightmap
We will need to create an image to serve as our heightmap.
Heightmap images are black and white - with black being 0 height in the editor, and white being the max height we set when importing the map.
In general, you don't want your heightmap to include black color, or have it too dark. If you change your mind about the layout later and want to add some deep chasms, you might find that you don't have enough height left for that.
Before we make a heightmap image, we actually need to decide on the map size first.
The reason is that the heightmap resolution MUST be the same as the size of the map.
Why? Because every pixel on the image is equal to one node of the terrain in the editor.
The red dots on the image are the terrain nodes.
If you have a different number of pixels in the image than the map size, the editor cannot use the pixels to deform the terrain nodes.
So stick to 256x256 images for 256x256 sized maps, and 512x512 images for 512x512 sized maps.
When painting the heightmap, I would recommend painting with sharp pixels. If you paint smooth transitions between pixels, the results in the game might not be what you desired - the cliffs generated will be staggered like stairs.
For clean cliffs, you need to have sharp pixels.
This is the heightmap I made for the sake of this tutorial.
Now that we have a heightmap image, we can import it.
• Importing a Heightmap
You can import your heightmap through File -> Import Heightmap...
When you select the heightmap you created, you will be greeted by this window.
In here, you can set what white color means in terms of height - note that in this dialogue window, the height is in meters, while in the Height and Cliff tools, the height is in centimeters.
If you have incorrectly sized heightmap, you will get an error when hitting Apply.
We, however, have created a 512x512 heightmap for 512x512 sized map, so our heightmap is imported successfully.
There is one unfortunate thing, and that is we have no cliffs generated. Units will be able to walk over all of these steep hills.
To fix that, we will need our Terrain Cliffs tool.
In there, set up the cliffs you want to use, and with Attach Manually function, paint the cliffs over all the steep terrain.
This is where you might notice the difference between sharply painted pixels, and "smooth" pixels.
On the left are cliffs generated by smoothly transitioning pixels.
On the right are cliffs generated by sharply painted pixels.
You might have to clean up the map after importing your heightmap. If you made any mistakes in the heightmap, simply fix them in the image and import the heightmap again.
• Calculating Height
Further down the line, you might need to calculate the map height precisely.
We will need math for that (eww).
White color has an RGB value of 255 - when importing, you are asked what white color means in terms of height on the heightmap.
Well, we need to decide on how high each point of RGB value will be - I suggest a nice, whole number such as 20 or 25.
When you want your ground to be 5000 centimeters high, and cliffs to be 6000 centimeters high, you can calculate the value you need to use to paint the proper height.
I will give you an example.
I have decided on height of 25 centimeters per 1 RGB value.
And I want my ground to be 5000 centimeters high and cliffs 6000 centimeters high.
Then I divide 5000 by 25 to get the RGB value of my ground.
5000/25 = 200
So I need to use RGB value of 200 to paint height of 5000 in game centimeters.
To paint my 6000 centimeters high cliffs, I need to calculate the same equation.
6000/25 = 240
So to paint 6000 centimeters high cliffs, I need to paint a RGB value of 240.
Now I need to calculate how high the 255 RGB value will be.
Simply multiply 255 by 25.
255 * 25 = 6375
So, when we want to import our heightmap, we need to specify that white (255) means 6375 centimeters, or 63.75 meters.
• Measuring Distances
I will flat-out tell you, that one terrain node - or one pixel - measures 1.4 meters in game.
To measure distances in the image editor, you will need an editor with the measure or ruler functionality.
Make sure to set the tool up so it measures in pixels.
Afterwards, measure the number of pixels between two points and multiply the number by 1.4.
• Return to Mainpage
You can return to the Map Editor Tutorial homepage from here.
• Map Editor Tutorial Homepage •
-
Dallarian liked a post in a topic by R4bitF00t in Map Editor Tutorial - Script Introduction
Welcome to the scripting introduction.
Here, I will explain the basic principles of writing BattleForge scripts.
This part focuses a lot on explanation of script structure and rules, if you are not interested in this, and you prefer to learn by doing - skip to the next part of the tutorial HERE.
Just be aware that having solid basics can save you a ton of headaches when debugging your code.
If you encounter any issues, don't hesitate to ask in Skylords Reborn Map Making Discord.
• Content
Script Structure States Events Conditions Actions Commas Next Chapter
• Script Structure
BattleForge uses LUA scripts to influence the map when playing.
These scripts are not pure Lua, they use a customized version of Lua called BattleForge Script (BF Script for short).
The name of the script can be whatever you choose, just follow these pointers.
Use lower case letters Don't include spaces in the name Don't put any dots or special characters in the name File extension needs to be .lua All the scripts for a map need to be located within the script1 folder.
To start off, I will provide you with an example script, so you can see what I am talking about.
example_script.lua
BattleForge scripts are state machines.
The machine (or script) contains one or more states, and can switch between the states, but only one state can be active at any time.
Think of it like a machine that can make either lollipops or baskets. The machine cannot make lollipops and baskets at the same time - you need to switch it from lollipop making state into basket making state, and vice versa.
Within these states, we have events.
Events are functions, that will execute actions once the conditions are met.
Take a while to look at the example script and try to identify the states, events, and where they begin and end.
• States
The states are the basic building blocks of scripts.
States don't do anything by themselves, but they are containers for events.
The state starts with { and ends with };
Everything between these brackets are the contents of the state.
An example:
State
{
StateName = "Example State",
};
Every state needs a name - you should not include any dots or special characters, and the name should be unique to that script.
(You can have multiple scripts that contain a state of the same name, but you cannot have one script with multiple states with the same name.)
You declare the name between the state brackets with "StateName = "State name here",".
You need at least one state in each script, but you can have as many states as you want. Just be aware that, the more complex you make the script, the harder it will be to fix if something goes wrong.
The script will start in the first declared state in the script (the one at the top).
Functionally, the script can only be in one state at a time, so you will need to switch between states via events.
Remember:
Every state needs to have a unique name.
Only one state can be active at any time - meaning the script will evaluate events only from the active state.
Now this might have sounded a bit robotic, but the gist of it is, within your script, you need at least one state with a unique name, and you can put events that influence the map into that state.
State is the only part of the script, where you need to have a semicolon ( ; ) after the closing bracket.
• Events
The events are the workhorses of scripts. They control the behaviour of maps, for example: casting spells on Nightmare Shard, sending attack waves, respawning enemies, timers etc.
Similar to states, the events can be named.
Contrary to states, the name of the event doesn't matter - it is there so you can label the event, quickly explaining what it does.
You can have multiple events with the same name.
Same as states, the event's contents are declared inside the { and }; brackets.
Like this:
OnOneTimeEvent
{
EventName = "Name here",
Conditions =
{
},
Actions =
{
},
GotoState = "self",
};
There are a number of different events you can use in your scripts, we will go into detail about them in the next part of the tutorial.
At the moment, the important thing is this.
All events have conditions and actions.
If the conditions are met, the actions will execute.
You might have already deduced what the GotoState parameter is for.
Once the conditions are met, the event will execute the actions and switch into the state declared in the GotoState. You need to write the name of the state exactly as you have declared it.
Note that not all events have the GotoState parameter.
The GotoState parameter is optional, you can delete it if you don't intend to switch states in that event.
The events contain actions and conditions, let's look at them now.
Conditions
Condition is a line of code that returns either true, or false.
There are too many possible conditions to list here. The best way to find out what the conditions do, is simply by looking at their names and experimenting.
Condition can have one, or multiple parameters. Some are optional, some are not.
You can consult the scripting reference wiki for condition parameters and descriptions.
Conditions are written into condition blocks of events.
You can have multiple conditions inside a condition block - meaning that ALL the conditions written need to be true, for the event to execute its actions.
You can also have no conditions in a condition block - meaning the event's actions will be executed instantly, because no condition is preventing the execution.
Actions
Action is a line of code that determines what the event will do - spawn a squad, destroy a building, send out an attack wave etc.
There are too many possible actions to list here. The best way to find out what the actions do, is simply by looking at their names and experimenting.
Actions are written into action blocks of events.
Same as conditions, an action can have one, or multiple parameters.
Some of these can get pretty long.
You can consult the scripting reference wiki for action parameters and descriptions.
All the defined actions will get executed in the order they are declared when the conditions are met.
So if you, for example, want to spawn a squad and send it somewhere - make sure to declare the spawn action before the goto action.
• Commas
Notice the commas ( , ) at the ends of most lines. These commas are not optional, they separate the different blocks of code from each other. You need to put a comma ( , ) or semicolon ( ; ) after every
Closing bracket } of an event, action block, and condition block Parameter inside a condition or action Extra parameter - such as StateName, EventName, GotoState and others You need to put a semicolon ( ; ) after the closing bracket } of every state.
Personally, I use commas inside an event, and semicolon after the closing bracket of an event.
Look at the example below (or any other examples), and notice where the commas and semicolons are written.
To reiterate, States are the only parts of the script, where you need to have a semicolon ( ; ) after the closing bracket.
• Next Chapter
This concludes the scripting theory. It was a bit boring, I know.
But in the next chapter, we will go over how we can create a fully functional script, and influence enemy squads placed on the map.
• Scripting Basic Events Part 1 •
-
Dallarian liked a post in a topic by Kubik in Dear Skylords Reborn Developers
Hello, can I ask how old are you, that you consider 10 years a "short amount of time"?
There is no way to donate money, because that would breach the aggreement with EA. We have enough to run the servers for quite some time.
You can read trough open position, and consider if something there would be a fit for you: https://forum.skylords.eu/index.php?/forum/89-contribute-to-the-project/
-
Dallarian liked a post in a topic by Kapo in Complete Pure Nature Guide
Hello Skylords,
After starting the Masters of the Forge, I had the setup ready to record some videos - and since I was always drawn to Pure Nature, I thought it would be nice to have some chill sessions and record all necessary maps for the Mana Wing Promo.
In the playlist linked below, you will find a complete collection of Pure Nature playthroughs - I might also add some bonus content, especially if there are some requests.
CLICK HERE FOR THE PLAYLIST
This content is in honour of BadKen, who did the same back in the days, and I remember very fondly that his content helped me a lot not only to understand how to play Nature, but also how the more tricky expert maps work.
See you in the Forge, fellow Skylords!
-
Dallarian liked a post in a topic by Metagross31 in Affinities - Yay or Nay?
To me it depends. For some cards, the affinities feel like a cheap way to just create more cards without providing a lot of diversity. In these cases, the two cards feel more or less the same to me.
In other cases, one affinity is clearly superior to the other, creating essentially a useless card.
In rare cases however, both affinities provide completely different playstyles which both have their unique nieche. In these cases, affinities are awesome!
In general, I think the best way to go is what Windhunter wrote in the card design document - make affinities where they make sense, don't make them, when they feel unnecessary.
-
Dallarian liked a post in a topic by WindHunter in Mapmaking Fundamentals - Spawn Design
Mapmaking Fundamentals - Spawn Design
This was originally written as an internal design document meant to guide our current development of new campaign maps. It has been shared here for interested players and as an aid for aspiring community mapmakers.
Introduction
BattleForge campaign maps have a particular feel to them, and this feel is a fundamental component of the unique experience which is playing BattleForge. The goal of this design guide is to use existing campaign maps, particularly the best campaign maps, to understand and to categorize the distinct features of the spawns in BattleForge’s campaign, such that we can better design future campaign maps. This guide is therefore intended to categorize the design choices of the original devs and to act as a reference for future development for both community and official map development.
Legend
Given the nature of map design, this guide uses a high density of visual examples to illustrate map design principles and standard practices. Across all examples, a standard legend is used.
Purple – is used to highlight NPC camp formations. Purple text is used to describe the various dynamics occurring in the enemy camp. Light Blue – is used to highlight spawn locations and any special interactions which these spawn locations enable. Orange – is used to highlight non-standard flanking routes available to players. In the majority of cases, orange designates available paths for flying units, but it can also represent potential cliffing opportunities, particularly for artillery units such as Firedancer and Firestalker. Red – is primarily used to highlight player attack routes. It is secondarily used to highlight key features of camps which affect said attack routes. Black – is used to highlight terrain features. Green – is used to highlight map objectives and any locations that might be directly connected to those objectives.
Table of Contents
1. Spawn Types
2. Defensive Maps (Defending Hope)
3. Hybrid (Attack/Defense) Maps
A. Nightmare's End Analysis
B. The Guns of Lyr Analysis
4. Escort Maps
A. The Treasure Fleet Analysis
5. Conquest Maps
A. Ocean
B. Mo
Spawn Types
Enemy spawns come in four primary types: one-time, timed, conditional, and permanent. These spawn types are not exclusive, in fact it is normal for maps to have multiple or even all four types at once, and often specific spawn interactions constitute multiple types simultaneously.
1. One-time Spawns: These spawns are typically scripted based on the fulfillment of a map objective, such as the Raven fleet’s approach in Ocean when the player clears enough of the center island, or are based on proximity events, such as the many “ambush” events in maps like Encounters with Twilight. Regardless of how they trigger, these spawns only happen once.
2. Timed Spawns: What is meant by timed spawns are those spawns which are primarily triggered based on the passage of time in-game and not player actions or map conditions. These types of spawns are quite rare on their own but are frequently combined with other types of spawns. For example, the permanent spawns on Convoy and Nightmare Shard steadily scale in strength based on the amount of time which has passed. A time component is almost always included in the case of permanent spawns to pressure the player or to keep pace with the player’s growing strength. The attack waves on Siege of Hope and Blight are both conditional timed spawns. If the player fails to kill the spawn buildings in time, a large one-time attack wave is released after a specific period of time. Conditional spawns often contain an alternative time provision. The spawn actives after X objective is fulfilled, or if Y time has passed.
3. Conditional Spawns: Conditional spawns are tied to map triggers which change on their own or due to required player actions. They can be temporary or permanent. Spawn buildings are the primary example of conditional spawners. The spawns are directly tied to the building’s continued existence; destroy the building, and the spawns stop. Many spawners also have additional conditions which must be fulfilled before they begin to spawn units at all. Some spawners only replenish units tied to specific camps, while others only launch attack waves once the player has reached a certain location or has activated a specific trigger condition. In random PvE, only the spawners directly adjacent to the player’s location initially launch attack waves, but if the player attacks a camp and kills an entity within that camp, all adjacent camps also begin spawning attack waves from that point forward. Sunbridge and Slavemaster are examples of conditional spawns tied to player action. In both cases, while the spawns are permanent, the player has the agency to direct the spawn paths via a switch and a fire emitter respectively. In the case of Sunbridge, once the Amii Power Shrines cease to exist, the gate-based spawn waves also cease.
4. Permanent Spawns: Once begun, permanent spawns never stop. This type of spawn is a common feature in defensive maps such as Defending Hope and Guns of Lyr. Non-defensive maps do not typically have unconditional permanent spawns, and if they do, they are typically limited in either strength or location. Mo is an example of a non-defensive map with permanent spawns.
Defensive Maps
Defensive maps are those maps where the player’s sole primary goal is the defense of an objective or a set of objectives. Any expansion made by the player is meant to better facilitate his defense of the existing objective and not because he needs to conquer additional areas of the map to complete other required objectives. Defense of Hope is the only current official campaign map which is a pure defensive map (Ascension map 1 is the next closest example). Despite only having one such map as an example, we need not fear because Defending Hope is a superbly designed defensive map that contains all the necessary components to teach us how a map designer should design a defensive map’s spawn mechanics.
Defending Hope - Spawn Wave Interactions
1. Well Defined Defensive Perimeter – The area which the player must defend is visually distinct from the surrounding area, being protected by naturally existing terrain and buildable walls. This defensive area has overhang spots, occupied initially by Defense Towers, which can attack in a wider arc, as well as plenty of space to build defenses behind the walls. Areas from which enemies normally do not approach are blocked by Lyrish houses, adding an aesthetic flair while also preventing players from building otherwise inefficient defenses.
2. Alternating Attack Waves – Spawn waves on Defending Hope alternative between approaching from the north and from the south side of the city. This allows the player to opt for micro-managing archer units on both the east and west sides, rotating archers between the northern or southern wall depending on which direction is currently under attack. A skilled player can then save up power more quickly to make the transition to T2 or T3.
3. Spread Out, Multi-directional Attacks – While the walls on the east and west sides are close enough that archers can be rotated between them in the early game, they are far enough apart that the player is required to invest in defenses for both the north and south walls on each side, or to invest in a permanently mobile ranged component which can be rotated as needed. This multi-dimensional nature of the defense is important because it keeps the player engaged while also reducing the power of spells. If the units all approached from one-direction, the player would only need to invest in one set of defenses while also being able to destroy most incoming waves with spells, quickly leading to a feeling of stagnation (An example of this stagnation would be position 4 on Bad Harvest, which is initially very challenging, but once defenses are established, becomes dry and boring). With four directions to defend, permanent defenses are encouraged at each location while spells function as a means to plug gaps that form in the player’s perimeter, as their charge limit and cooldown prevent continual usage.
4. Optional Non-fortifiable Expansion Zones – Outside of the singular exception of aiding Rogan Kayle to enter the city, the player need never wander outside of the city’s defined defensive perimeter. Yet, if he choices to, he is rewarded with the possibility of many Power Wells and access to T4. Notably, these areas of expansion are shorn of any means of fortification while also being under constant attack. These means that the player must calculate the potential risk of both venturing forth from the city and investing in additional hard-to-defend assets, but if he proves capable of doing so, he earns himself a permanent benefit in terms of additional power and access to higher tier cards.
5. Permanent & Conditional Spawners – Instead of only spawning enemies from caves, the original designer chose to introduce 4 spawn buildings which the player can destroy. This gives the player more to do, while also forcing him to balance the risk/reward between investing into an expeditionary force that takes power away from the defenses and the benefit of permanently reducing the enemy’s offensive pressure. The buildings themselves have significant defending forces and are XL-spawners with 3200 life points, meaning that the player must do more than just run around erupting them to death.
Hybrid (Attack/Defense) Maps
Hybrid maps are those maps which mix player responsibilities between attacking and defending. These maps require the player, and any potential teammates, to move forward and conquer new areas of the map while defending map objectives (not Power Wells & Orbs) in other areas.
Hybrid Maps: Nightmare's End
Nightmare’s End - Player Defense Points & Enemy Spawn Locations
The issue with the spawn waves on Nightmare’s End is not so much that spawns can attack every player location on the map, though this is indeed an issue, but that none of the places the player is required to defend are capable of being fortified outside of the initial starting location (which eventually is no longer attacked as the player’s T3 and T4 orbs redirect enemy waves to themselves). Players are required to try and cram defensive structures and units into small areas where buildings often block each other from attacking. These same buildings cannot be built into a coherent frontline due to a lack of space, meaning that even if the buildings placed in the back can attack, they are blocked from reaching the ranged units targeting the building in the front. Additionally, there are no walls or other mechanisms by which the player can slow the enemy’s advance, meaning the frontline units or buildings must also tank the incoming wave. Combined with being the largest map in the entire game by far, making reinforcing areas with existing units nearly impossible, and the fact that enemy waves respawn nearly instantly in close proximity to their intended targets, the spawns on Nightmare’s End are truly a nightmare. Consider then, that after establishing all these defensive networks, the player is suddenly told to abandon them and defend yet another non-fortifiable location from a 5-minute-long onslaught. The fact that this last defense is in no way foreshadowed except for a small wall south of the Forge Shard, is a fitting illustration to how poorly thought through and poorly implemented the spawn mechanics are on this map.
A final point worth mentioning about this map is that the trigger conditions for spawning new attack waves and increasing the strength of existing attack waves are poorly defined. For example, one side of the map allows the player to build their T3 without destroying the concomitant Amii Power Shrine within the same camp. This in turn prevents the map from spawning the intended attack waves to attack the player's T3 location, because the trigger for spawning these waves is not the player building their T3, but the Power Shrine being destroyed. Setting aside whether or not the T3 should even be attacked in this manner, the key point here is that the trigger conditions for spawn waves and map events need to be carefully defined to avoid player exploitation. This same issue occurs on Behind Enemy Lines, where the trigger for increasing attack wave difficulty is tied to destroying the Twilight spawn buildings in the T2 and T3 camps. Said buildings are placed in such a way that players can build their T2 and T3 without ever destroying them, thereby trivializing the map in the process. In both cases, simply tying the wave increases to the player achieving a higher tier would have fixed the problem.
Nightmare’s End - Southwest Quadrant
Hybrid Maps: The Guns of Lyr
The Guns of Lyr - Defending Player Progress & Attacking Player Spawn Waves
In my opinion, Guns of Lyr is an overly complex, badly designed, and badly balanced map that players have figured out how to exploit in a way that actually makes it enjoyable to play. An entire document could be written solely on how poorly thought through and executed the map's mechanics are in the final product we see in-game. While such a document could perhaps prove useful to the team, we will satisfy ourselves here in pointing out three issues with the map related to how its spawns function. The first is related to what triggers the infected Twilight camps to start sending out attack waves against the player in the "attack" position on each side. These spawns are actually triggered not by the actions of the attacking player, but the defending player. The map suggests to the player, with its set of retreating walls, that the initially defending player is supposed to forfeit their starting base and replace it with the wells and monuments found on the route of the Kobold Engineer which they are told to clear. Simultaneously, the respective side's attacking player is supposed to clear the 3 Twilight camps before transitioning into helping the defender. The issue is that the 3 Twilight camps do not actually trigger attack waves based on interactions with themselves or how much time has elapsed in the map, the camps only replenish defending units lost in attacks on the camp. Instead, the attack waves of these camps are triggered by the defending player attacking the units in camp 1 marked on the minimap above. This in turn leads to a situation where knowledgeable defending players simply do not expand past T2, but wait for the attacking player to reach T4 and trigger the final spawn wave early to end the map. Regardless of intention, it simply does not make sense that the trigger condition for spawning attack waves from these infected camps is tied to attacking that specific location on the map. A valuable lesson can be gleaned from this mistake, which is that spawn triggers for spawn waves need to be carefully defined so as not reward players who exploit the map while punishing those players who engage with the map in the intended manner.
The second issue we will discuss in regards to Guns of Lyr is the ability for the player to avoid the map's mechanics and trigger the final spawn wave before actually achieving the necessary map objectives. Map designers need to be cognizant of the ability of players to damage locations behind "impassable" terrain features and take the necessary steps to safeguard these locations or punish the player (in a logical way) for doing so. In the case of Guns of Lyr, the original devs could have responded to the issue in several different ways. An easy method would have been to simply not spawn the final Twilight Manifestation building until the gate was opened, or to shield the building until said condition was met. A more creative approach would have been to immediately trigger other final spawn waves from any remaining Twilight Infestations on the map, making the condition of having to destroy these infestations meaningful, lest these other spawns bypass player defenses and kill Rogan.
The Guns of Lyr - Northern Defenses
The third and final issue to discuss is how the map's terrain stifles the ability of the primary Twilight attack waves to be meaningful threats by forcing them through single path chokepoints. The map is clearly designed in such a way that the original devs assumed player defenses would steadily move backwards in the face of increasingly difficult attack waves. The map even destroys the original walls in an attempt to force the player to abandon their already constructed fortifications. If players acted in this way, it would cause early waves to attack a single wall, while later waves would eventually attack two and then three walls, spreading out enemies and player defenses over a wider area. The issue is that players do not act in the intended way and are not incentivized by the map to do so. It is always better to defend a single location versus multiple, and it is a hard pill to swallow to voluntarily sacrifice both existing defenses and your starting location, thereby accepting a permanent weakening via lost power and charges. Besides these reasons, allowing enemies to spread out, when you can instead force them through a narrow chokepoint would just be silly. The funnel at the top and bottom of Guns of Lyr clumps together enemies for players to then smash with powerful area-of-effect abilities and spells such as Worldbreaker Gun, Cluster Explosion, and Frenetic Assault. At the same time, the closeness of player defenses means that a single Protector's Seal or Revenge can cover the entire defense, which would not be possible if players voluntarily spread themselves between 3 separate lanes. For the map's defensive gameplay to succeed, it would have to be either more forceful in removing players from the initial chokepoint via harsh penalties or more rewarding in terms of benefits accrued. Another better option would be for the map to spread enemies out initially instead of shepherding them through a perfect kill box. If the devs wanted players to have a last stand location, it would have been better to allow them to set one up directly surrounding Rogan's Stronghold in the center of the map. This would make the map reminiscent of a medieval fortress, with large hard to defend edges that eventually coalesce into a single fortified keep at the city's center. Long story short, do not funnel enemy attack waves through a single narrow chokepoint, spread them out of a wider area or create multiple points of attack to force players to do something more than spam spells and launch Heavy Snowballs.
Escort Maps
Escort maps are those maps whose primary objective revolves around protecting a non-player-controlled unit as it moves from one location to another.
Escort Maps: The Treasure Fleet
The Treasure Fleet is the purest form of escort map in the sense that the player has both a direct control of the area around the target being protected, unlike Convoy, and that the target moves forward before the player could have reasonably cleared the route of enemies in any permanent sense. King of the Giants is technically an escort map as well, but it does not feel like one for the vast majority of the map. This is because Rogan arrives far after the player begins conquering the map, so it is less escorting and more clearing a path, and because enemies do not threaten Rogan on the way if the player clears out the pre-existing enemies. These same conditions are not met on Treasure Fleet, and the player is consequently tasked with defending a wagon from the Treasure Fleet as it travels through enemy territory under constant assault. While The Treasure Fleet has a number of issues (which will be discussed later), such as monotonous gameplay, low replayability, and a fixed timer, these issues are largely unrelated to the spawn mechanics of the map.
Both the spawn and camp designs of Treasure Fleet are well-done. As the Treasure Wagons move forward, the path itself is relatively unimpeded by walls or permanent enemy encampments, the exception being the Twilight encampment just before the target location which the player can then conquer for himself. Instead, incoming attack waves come from a mix of permanent caves and destroyable spawn buildings built adjacent to the wagon's pathway. The player can choose to only act as an escort for the wagon, or to invest resources into destroying the spawn buildings on the side, making future wagons safer but reducing the resources which can be used to defend the wagon currently en route. At the same time, there are 3 permanent spawn caves, ensuring that players cannot completely eradicate the enemy's capacity to attack. The area around these caves is open, allowing the player space to build defensives without impeding the forward progress of the wagons. There are also a number of optional areas into which the player can expand for additional resources. These side objectives are largely safe from attack, keeping the player's focus on the wagon travel route. The continual focus of the enemy attack waves on the wagon path, along with existence of some of the player's resources on the path itself, is an example of how map and spawn design go hand in glove. The player's own resources are only attacked where it makes sense for an enemy obsessed only with the Treasure Wagons to be attacking.
Despite a well designed layout and well scripted spawns, The Treasure Fleet suffers from several balance problems and core design issues. I think these are worth pointing out because it is important to understand how multiple small issues can drag down an otherwise well designed map. The first major issue is that the map has a fixed time limit which cannot be meaningfully changed outside of early game exploits via killing one of the wagons. While this is fine for a few playthroughs, it severely damages the map's replayability, which is the second major issue. A good player quickly learns how to exploit a map's weaknesses to achieve objectives in creative manners and this accumulated map knowledge is typically rewarded with an easier playthrough, or better, a faster completion time. What happens with veterans in The Treasure Fleet, assuming it is played normally without the early wagon kill, is that veterans quickly and efficiently destroy enemy spawn buildings, grab early wells for fast power generation, and neutralize the spawn caves whose attack waves are easily destroyed due to not being guarded by map terrain or reinforcements. By the time the last 1-2 wagons spawn, the player has already beaten the map and merely needs to repair the odd tower while they scroll social media waiting for the wagon to meander its way to the finish line.
In other maps, the player's high level of proficiency would lead to a faster conclusion to the map itself, providing a meaningful way for a player to measure their own improvement and to show off. While you could post a replay showing you cleared the map of enemies faster than other people, the fact is that this is not an easily quantifiable measure of skill because it does not show mastery of the map as such, in the same way that faster map completion times do inherently. Also, no one is going to watch the replay. This issue would have been fixable through mechanics such as the ability to reroute a wagon via a faster but more difficult route, or the ability to release multiple wagons at once but by doing so, the player triggers much harder attack waves as a result. Such mechanics would have required much more complex map scripts to achieve and given the time necessary to achieve this, and the fact that the original devs, based on the abilities of the Twilight Edition cards, seemed to believe PvP would be the more popular mode, it is not that surprising The Treasure Fleet was not given the love necessary to generate long-term replayability.
Conquest Maps
Conquest maps are those maps whose primary objective is to clear the map of enemies, potentially culminating in a boss fight which triggers the map's end. Lodgement maps, as discussed in the companion camp design guide, are a type of conquest map.
Conquest Maps: Ocean
The majority of gameplay in Ocean is fighting on different islands made up of different combinations of center and line-based camps. These sections of the map are largely uninteresting for our purposes here. Besides island hopping, Ocean has an additional mechanic, which is that Raven Battleships spawn in from 8 different locations around the edge of the map, and if these Battleships succeed in assembling a fleet of 5 ships, the player loses. This mechanic is a good example of creative spawn scripting, which is well integrated into the map and its lore, and which adds a dynamism to the map that helps make each playthrough a bit different. I would also note that I personally think semi-randomized spawn events of this kind make for a better map experience because they make the map feel more alive. In general, I think Ocean does a very good job of making the map feel like a real location and not just a videogame map to play in. While some islands feel silly, such as the tiny ones populated by ground troops, others like the Skyrake island do a good job of both sticking to the standard enemy faction of Bandits, while also feeling like a place where Skyrakes might actually populate and breed. This feeling of life is helped by a large number of one-time map events, such as the bird attack at the beginning, the mines which spawn on the western isle, and the ability to earn Skyrakes for yourself when you conquer their island. This is a good reminder that one-time spawn events play an essential part in making the level feel alive and lived-in. The existence of the Deathray summoner, which seems a bit random when reflected upon, but which is an iconic part of the map, is another reminder that sometimes it is okay to add a twist to the map.
After the player reaches the main island, a second Raven ship mechanic activates which spawns Raven ships along the entire edge of the map hellbent on killing the trapped white juggernaut. This is an example of a bad spawn mechanic. The massive invasion comes out of nowhere, is never foreshadowed, and it is poorly executed. Most of the islands and base locations which get attacked by the incoming ships lack the ability to respond to attacks due to the twin factors of little space to build and the fact that Raven Battleships have a 50m range and can fire from fog of war. While this is functionally the boss battle of the map and therefore it is not necessarily wrong that the player's bases are put under real pressure, the issue is that the map itself is not built to facilitate such a fight. In the first part of the map the arrival of each ship is foreshadowed and the player can prepare by building towers and moving units, but the same is in no way true here. The confusing part is that this omnidirectional attack is then followed up by a single direction attack from Blight which seems much less scary in comparison. The final Raven fleet fight would likely be much better if the fleet came from 1-2 directions, instead of all directions, but that the chosen locations were still semi-randomized so that the player could not preemptively defend against it. I personally would have made the existence of the incoming fleet be foreshadowed similar to the singular Raven ships, while giving the player a 1 minute timer to rapidly prepare some defenses in the direction which got chosen. I then would have made Blight appear with ships from all directions to provide a better sense of hopelessness and impending doom, thereby making sense of Mo giving into QueekQueek's blackmail due to a real worry for his life.
Conquest Maps: Mo
Mo is simultaneously a well designed and a poorly designed map, which is why it alone has been referenced in both the spawn and camp design guides. The general idea of the map, the player getting to control a boss-like NPC unit which he needs to safely guide to the end, is simply a great map concept. The power fantasy of playing as Mo and singlehandedly smashing through Bandit defenses, helps to give the player a real sense of why Mo is treated as such a threat in universe. In terms of sections, Mo is split into three distinct parts. Each of these three parts have substantially different spawn patterns and each have a lot to teach us about good versus bad spawn design.
In the first section, Mo smashes through half-camp after half-camp until reaching the player's T3. While passing through this section, Mo activates 3 permanent spawn caves which continue to vomit flying units for the entire rest of the map. These hostile fliers can kill every well and orb from the player's starter base to his T3. After reaching the player's T3, Mo turns north to fight a mini-boss in the form of Banzai Lord. Banzai Lord spawns Banzai Birds, which Mo can either kill or play hide-and-seek with on his journey northward. The layout of this section facilitates both playstyles, giving the player several safe zones where they can stop and heal their ailing juggernaut. Once the Banzai Lord is dead, the Banzai Birds stop spawning and this section remains permanently safe. The third section, which was discussed in detail in the camp design guide, is then mostly self-contained and functions as a lodgement map. The lodgement section makes use of conditionally permanent spawn waves. Enemies spawn from caves, the spawners are therefore indestructible, but once the condition is met (death of Raven Command Walker or Bandit morale reaching 0) the spawns permanently cease. If the spawn locations themselves were moved and the waves spawned less frequently, to allow players to avoid and hide from patrols while otherwise slowly gaining ground, the third section would be very well designed overall. While the third section's spawns feel less organic than the second section's, the concept of Bandit morale is very sound and lacking only in the fact it is hampered by the issues mentioned above. Speaking of the second section, little needs to be said. The whole area is done so well it is a clear example for how Skylords Reborn map designers should design such areas in their own maps.
The real issue with Mo's spawn design is the first section. The spawns are clearly intended to place continued pressure on the player as a kind of failure condition. This was likely done because Mo can simply be held back and he is therefore never in real danger of death. If the player were to do that, the player would never be able to fail the map. In light of this, the original devs added the need for the player to continually defend his T1-T3. The issue is just how ham-fisted the whole thing feels in terms of implementation. Does it really make sense that there would be an infinite spawn of only Skyrakes and Windhunters? In terms of map art, it looks like the player disturbed some bird nests and it therefore makes sense that some flying units would spawn in response, but why do they eventually turn into Tortuguns? Overall, the whole bird spawn mechanic just feels like a band-aid to a mistake made in map design which likely could have been fixed in another way. If you look at the picture included above, you will notice that the first and second sections of the map have the same mountain + green field look. Given their connection in aesthetics, it would have been better to connect them in terms of spawn mechanics as well. If I were to remake the map, I would have tied the spawns in the first section to killing the Banzai Lord in the second section. This gives a reason for why the birds were attacking to begin with, because they belonged to the Banzai Lord. The fact that the player would no longer be able to lose permanently after that point is fine, there are plenty of other maps where this is true, and technically they can still lose by letting Mo die which is likely the more common failure condition anyway. The key lesson to takeaway here is that true permanent unconditional spawns should be very rare in maps; it is almost always better to implement conditional permanent spawns when you feel like you need to pressure the player in this way.
-
Dallarian liked a post in a topic by Carofex in Skylords Reborn 2023 Summer PvP Tournament
Sometimes Mana Wing is played in PvP, too. Will the promo version from the Reborn Edition be in the prize pool?
-
Dallarian liked a post in a topic by Metagross31 in Skylords Reborn 2023 Summer PvP Tournament
Hello fellow Skyladies and Skylords!
It has been a very long time, but we are finally back with a new PvP tournament!
Tournament Date
On Sunday 20.08.23 starting at 2:00 p.m. CEST (Berlin time).
Format
The tournament will be played as a 1on1, Best of 3, double elimination tournament, meaning if you lose a set, you move to the lower bracket and can still make the finals! Grand finals will have a bracket reset, meaning the player coming from the lower bracket has to win two sets against the finalist to win the tournament.
Prize Pool
Participation Reward
Playing at least two rounds in the tournaments will earn you 1 General Booster, even if you lost both rounds!
Ranking Rewards
• 1st place 8 General Booster packs + 1500 BFP
• 2nd place 7 General Booster packs
• 3rd place 6 General Booster packs
• 4th place 5 General Booster packs
• 5th place 4 General Booster packs
• 6th-8th place 3 General Booster packs
Winning Rewards
For each set you win, you will get 1 additional General Booster (limited to up to 3 per person).
Random rewards
Additionally, there will be a pool consisting of all PvP cards from the Rebirth edition, which will be randomly distributed between all participants!
Organization and sign-up
The tournament brackets will be on Challonge, so register and join the tournament there using the button below. Please sign up in advance!
Please use your in game account name to make communication and finding your enemy easier.
In case of problems, contact @4esan4o95 (ingame name: BoxIngJester) or one of the mods via Discord or ingame.
Stream
A live stream covering the tournament will take place on Eirias' channel on YouTube. Streaming will start around 13:45 p.m. CEST (Berlin time). We will use the stream to communicate with the players, so be sure to join the stream to be notified of last minute updates. Everyone is welcome to hang out and watch the action as well!
Rules (read this!)
• Disconnection during a game results in a default loss. If both sides agree, it is possible to have a remake.
• Not showing up to your match after 15 minutes results in a default loss. The plan is to play a round of matches every ~30 mins.
• After your match, go to Challonge and insert the result. That is done by clicking on your match and selecting the winner/stats. The brackets will be updated automatically.
• The Map Pool is: Haladur, Simai, Elyon, Lajesh, Uro and Yrmia (same pool as in ranked duel).
• The first map to play on will be decided by the players banning maps. The first player to ban is decided at random.
• After that it is loser's choice, but you can't pick a map you have already won a game on in the same set.
• The winning player (who won the previous match in the bo3) also has to lock in his deck first.
• The brackets for the tournament will be shuffled before the tournament starts!
• Use your BattleForge name for the tournament. If your Challonge account differs from your BattleForge account name, use the "Sign up with an alternate name" feature or change your name for the tournament in the settings. Finding your opponent will be a LOT easier this way.
• Playing at least two rounds in the tournaments will earn you 1 General Booster, even if you lost both rounds. This is meant to encourage players to give PvP a try, immediately surrendering or not showing up for a match will disqualify you for this reward.
Special Thanks
Special thanks to @4esan4o95 who will be in charge of organizing the tournament on the event day and hyping this tournament already in advance.
Also, big thanks to @Eirias for agreeing to stream the tournament.
Thanks also to everyone, who sponsored something to the prize pool:
@eltorro: 3 General Boosters @triggz: 8 General Boosters @4esan4o95: 7 General Boosters @Yuah: 7 General Boosters @Metagross31: Set of Rebirth Edition PvP cards The Skylords Reborn Team: The remaining General Boosters and 1500 BFP
Questions
Reply in this thread if you have questions, we will answer them as soon as possible.
Best regards,
The Skylords Reborn Team and 4esan4o95
-
Dallarian liked a post in a topic by regonas in Totally big list of custom cards
Amii Dragon
Echoing Breath - deal X damage every 2 sec. Damage done by this attack accumulates on creatures as delayed damage and it is dealt instantly after 5 sec of not being attacked.
Great Collapse - become more devastating to buildings rather than units:
Ruining Breath - deal X damage every 3 sec. Deal 100% more damage to buildings.
Rare Stone Collector
Loaded Bullets - deal X damage every 2 sec. This attack penetrates all damage reducing effects.
Collect Gems - enter into a special mode. Immobilize itself and gather nearby corpses to regain health.
Resurrected Hero
Healing Gas - continuously heal injured allied units in front of it.
Rejuvenating Gust - every 10 sec this units heals an ally unit for 100% of its health over 10 sec.
Life Trader - this unit takes damage based on how much it heals.
Burning Motivation (red) - when healing units who are below 50% of their maximum HP this units will regain X HP every second.
Bad Motivation (purple) - this unit will deal X damage every second to nearby enemies while it is healing friendly units.
Big Motivation (blue) - when healing units who are affected by an ice shield this units will regain X HP every second.
-
Dallarian liked a post in a topic by regonas in Totally big list of custom cards
Small Tomb Guardian / Tomb Guardian / Eternal Tomb Guardian
Quick Burial - consume nearby corpses equal to maximum HP of this unit and heal nearby units for X% of gathered amount, up to X total healing.
Bad Totem - all nearby enemy units of the same rank or lower will take X damage every 2 sec.
Tombstone of Rage (red) - when attacking an units who is of the same rank or higher, this creature will slowly become enraged dealing more damage over time. Rage ends when this units doesn't attacking any enemy unit of the same rank of higher for X sec.
Monument of Peace (green) - all nearby friendly units of the same rank or lower will be healed for X HP every 5 sec.
-
Dallarian liked a post in a topic by regonas in Totally big list of custom cards
Emerald Elemental
Emerald Burn - deal X damage to a creature instantly and X damage over 6 sec.
Healing Mists - apply a healing aura on a damaged friendly creature for 6 sec, healing affected creature and all other friendly creatures for X HP every second.
Emerald Chill (blue) - deal X damage to a creature instantly and X damage over 4 sec.
Curing Mists (blue) - apply a healing aura on a damaged friendly creature for 9 sec, healing affected creature and all other friendly creatures for X HP every second.
Emerald Sacrifice (red) - sacrifice a targeted friendly creature and heal all other nearby friendly creatures for X HP.
Emerald Damnation (purple) - sacrifice this unit to create a zone for 6 sec. All enemies within this zone can not make melee or ranged attacks.
-
Dallarian liked a post in a topic by regonas in Totally big list of custom cards
Twilight Obelisk
Pulsing Searing (blue) - deal X damage to nearby enemies every 2 sec, up to X total damage. If a building damaged by this ability dies soon, then it will infect all nearby friendly creatures with twilight curse.
Creeping Pulsation (purple) - deal X damage to nearby enemies every 2 sec, up to X total damage. Enemies damage by this ability will move slowly for 5 sec.
Twilight Obelisk - immobilize this creature, disables the above ability and activates the below ability:
Spring Healing (blue) - every 2 sec heal all nearby Twilight creatures for X HP.
Fall Healing (purple) - every 2 sec heal all nearby non-Twilight creatures for X HP.
Singer for the Lost
Anti-magic Zone - spell can not be played near this creature.
Oblivion Bolt - deal X damage to an enemy every 2 sec. Attacked creature will move slowly for 3 sec.
Cold Oblivion Bolt (blue) - deal X damage to an enemy every 2 sec. Attacked creature will move very slowly for 3 sec.
Dark Oblivion Bolt (purple) - deal X damage to an enemy every 2 sec. Attacked creature will suffer bonus damage equal to portion of their power cost.
Less Humanity (red) - all nearby hostile buildings will lose X% of their maximum HP every second.
Flesh Mountain
Leaking Liquids - this creature deals X damage to all nearby creatures every 2 sec.
Rapid Rot - this creature loses X HP every 2 sec.
Noxious Smell (red) - all other nearby creatures will deal X% less damage.
Sour Smell (green) - all other nearby creatures will receive X% less healing.
Germ-chill (blue) - sacrifice X of this unit's HP to freeze all nearby creatures for X sec. This creature must have at least X HP to activate this ability.
-
Dallarian liked a post in a topic by regonas in Totally big list of custom cards
Death Tribe
Jungle Curse - any creature attacked by this creature will deal X damage every 2 sec to all other nearby enemy units for 6 sec.
Raging Chanting (red) - consume nearby corpses accumulating up to X of their health, and then incite other friendly units to deal X% more damage for 10 sec. Duration of this buff depends on the amount of corpses gathered.
Wild Chanting (green) - incite nearby friendly units to regenerate X% of their maximum HP over 10 sec. Duration of this buff depends on the current missing HP of this unit.
Death Chanting (blue) - consume nearby corpses accumulating up to X of their health, and incite nearby friendly units to regenerate X% of their maximum HP over 10 sec. Duration of this buff depends on the amount of corpses gathered.
Nabuku Domore (blue) - this unit moves swiftly and can't be trampled while near an enemy building.
Awakened Crystal
Crystalizing Shot - deal X damage around its target, for up to X total damage. All enemies hit by this attack will move slowly for 5 sec.
Black Crystal Within (purple) - immobilize this creature and prevent it from attacking. While this ability is active, all nearby Shadow, Ammi, Bandito and Lost Soul creatures will take X% less damage and regenerate X% of their max HP every second.
Red Crystal Within (red) - immobilize this creature and prevent it from attacking. While this ability is active, all nearby Fire, Twilight and Bandito creatures will take X% less damage and regenerate X% of their max HP every second.
Black Ant
Colony Call - grant Swiftness to all other nearby Beast Soldier units for 20 sec.
Desert Adaptation (red) - this creature deal X% more damage to Fire, Twilight and Bandito Creatures.
Tundra Adaptation (blue) - this creature takes X% less damage from Frost, Stonekin and Lost Souls creatures.
Rot Adaptation (purple) - this creature heal itself for X% of damage done when attacking Shadow, Bandito, Amii or Lost Souls creatures.
Corpse Eater (purple) - this creature consumes/removes corpses.
-
Dallarian liked a post in a topic by regonas in Totally big list of custom cards
Voodoo Wood
Voodoo Howling - every 30 sec this unit will release a wave of energy which will grant Life Stealer (10-20%) effect on nearby allies for 5 sec.
Never to be seen again - every time an enemy unit dies nearby, this unit may collect their corpse to reduce the remaining cooldown of Voodoo Howling by (3-5) seconds.
Voodoo Splinters - this unit will start rapidly losing health while releasing a halo of spikes around itself every 3 sec. Stacking this ability increases health draining and reduces the duration between each halo of spikes.
Voodoo Oakin
Acid Sap - this unit deals X damage to nearby enemies whenever it loses X% of its HP within X sec.
Acid Globes - throw acidic sap against an enemy within medium range. Deal double damage against structures.
Vodoo Da'Nature - this unit immobilizes itself to disrupt all hostile root networks within X meters. While rooted, your melee attacks will be replaced with Acid Globes.
Twilight Worm
Dawn Consumption - every X sec this unit will shoot an enemy and deal X damage to them. The longer this unit attacks the same enemy - the more damage it deals.
Twilight Expulsion - if this unit kills an enemy, then it will erupt and deal X damage to all other nearby enemies. This damage scales with bonus damage accumulated via Dawn Consumption.
Twilight Brain
Infection Ball - every X sec release an energy ball against an enemy and all other enemies nearby to it, dealing X damage in total. Enemies built resistance (lasting 6 sec) whenever they take damage from this attack and will take progressively less damage with each stack.
Twilight Leader - nearby twilight creatures (friendly and hostile) will deal X% more damage.
Twilight Ember
Fiery Infection - when this creature is spawned, it will infect all nearby friendly units with Twilight Curse for 10 sec.
Explosion Rebirth - when this unit is transformed, it will deal X damage to nearby enemies. Knock back small and medium enemies.
Twilight Knight
Great Stomp - every X sec this unit will stomp the ground and deal X damage to all nearby enemies. This effect is also triggered whenever a nearby friendly unit Transforms.
Infected Royalty - cost to Transform nearby twilight creatures is reduced by X.
Twilight Angel
Great Twilight Lance - every X sec (very slow attack speed) unleash a powerful energy blast against a single target and deal X damage to them. Knock back small, medium and large units.
Twilight Mania - gain increased attack speed, but lose some health every second.
Lost Ritualist
Anti-life Bolt - every X sec deal X damage to a single enemy. After X sec this energy bolt will return to this unit and will heal it for X HP.
Lost Soul Regeneration - every X sec this unit will sacrifice X HP to heal a friendly unit for 100-150% of HP sacrificed. Lost Revenants receive 50-100% more healing.
End Of Doom - target a Lost Revenant unit and disable this creature. For next 20 sec targeted Revenant will deal X% more damage and will take X% less damage. Revenant will not expire while under effect of this ability. However, if Lost Ritualist gets killed, then Lost Revenant will die as well. At the end of of this ability both units die.
Mushroom Sorceress
Mushroom Blast - attack your target and enemies nearby it dealing X damage to them. For next X sec all damaged enemies will move slowly.
Fungi Gathering - gather nearby corpse and store them.
Nutrient Infusion - consumed stored corpses to restore HP to an ally. If the target is part of the root network, then connected units/builds will received a small portion of the healing as well.
Skull Thrower Beast
Rot Artillery - disable melee attack and grant access to:
Skull Barrage - units consumes a portion of gathered corpses to launch a globe of flesh. After 3 sec globe explodes, deals damage and knocks back small units. Affects ground units only.
Armored Ghouls
Flash Batter - this unit heal itself for X% of damage deal against enemies who are bellow 50% of their max HP.
Gift Of Denial - this unit take half damage while it is being attacked by Large or Extra Large creatures.
Flesh Rage - for next X sec attacks done by this unit will knock back small and medium units. When this effect expires, this unit will die.
Animated Gravestones
Gravecall Spores - whenever this unit attacks, it unleashes spores who jump to up to 2 additional enemies nearby. These spores deal less damage with each jump.
Sacred Burial Rights - nearby enemy units take X% of corpse maximum HP as damage whenever they attempt to gather corpses.
To Beyond Again - sacrifice this unit to gather all corpses nearby into a globe for X sec. Your units, spells and buildings will be able to gather corpses from this globe.
Gate Demon
Premature Departure - all corpses created nearby this creature will be automatically destroyed, and thus this creature prevents corpse gathering.
Departure Delay - for next X sec any corpse destroyed by Premature Departure will produce an explosion dealing X damage to everyone nearby.
Spirit Caller
Melody Of Joy - every X sec this unit will deal up to 3 allies in front of it.
Spirits Be Gone - create a magic field around itself for X sec. Enemies can not gather copses within this field.
Healing Elemental
Healing Fumes - every second this unit produces healing enemies and heal allies in front of it for X HP.
Erupting Restoration - sacrifice this unit to create a healing field for X sec. All allies in this field will take X healing every second.
Amii Crystal Maiden
Ancient Hail - deal X damage to all enemies in a cone.
Ancient Echo - this creature gains bonus attack speed with each attack it makes. Lose all bonus attack if it doesn't attack for 6 sec.
Amii Lore - create a dome for X sec in targeted area. Enemies inside of this dome will move slowly.
Amii Ritual Guardian
Shred Magic Resistance - every X sec this minion will curse an enemy to take X% more damage from all spells.
Ultimate Ward - every X sec this minion will bless an allied unit to take X% less damage from all spells.
Ancient Truth - any beneficial spell or effect applied to this creature will last X% longer.
Amii Temple Beast
Amii Sacrifice - turn all nearby allied units into living bombs. If affected units die within X sec, then they will explode dealing X damage to all nearby units. Enemy units take X% more damage from these explosions.
Ancient Force - attacks done by this creature knock back small, medium and large creatures.
Limited Life - each time this creature attacks it loses some health. This creature can not be healed by spells or other creatures.
Outlaw Alchemist
Venom Injection - attack an enemy and cause them to take X damage over X sec.
Bandit Medicine - every X sec heal an ally for X instantly and for the same amount over X sec.
Regeneration Potion - create a healing field in a targeted area for X sec. Allies in this field will regain even more health via life stealing and corpse gathering.
Enslaved Rootface
Devastation Slam - slam the ground and deal X damage to all other units. Knock back small, medium, large and extra large units.
Barely Under Control - if this units falls to X% of his max HP or lower, then you will lose control of it. In this state it will attack any nearby unit and it will no longer grant land presence for you.
Bear-cursed
Savage Scavenging - this unit can gather nearby corpses to regenerate X health.
Savage Tactics - X% of damage this unit deals to building will be added to its health. Furthermore, any building being directly attacked by this unit will lose X% of its maximum HP every second.
Bandit Golem
Makeshift Repulsion Field - protect this unit for X sec from all ranged attacks.
Built-in Anti-air Defense - every X sec this unit deals X damage to nearby enemy unit. Knock back small, medium and large units. Affects flying units only.
Living Siege Weapon
Blazing Bombardment - every X sec this unit attacks its target and all enemies nearby. High attack range. Very slow attack speed.
Sacrifice Bombardment - sacrifice a nearby unit to greatly increase attacks speed of this unit for X sec.
Mushroom Soldier
Heavy Spores - attacks done by this unit knock back small units.
Decomposition Mode - immobilize this unit to gain:
Spore Field - consume some of accumulated corpses on this unit to deal X damage to nearby enemies every sec.
Tundra Walker
Ice Built-up - every X sec gain an Ice Shield absorbing X damage.
Channel Tundra Essence - enter special mode to gain:
Arctic Eruption - every X sec this unit emits ice wave. Enemies hit by this wave take damage. Frozen enemies take bonus damage.
Hanging Balloon
Terror From Above - deal X damage to a an enemy. Knock back small units. Affect only ground units.
Doom Approaches - nearby enemy flying units will move slowly.
Hand To The Death - target a ground unit. Sacrifice this unit to kill the targeted unit. Only works on small and medium targets.
-
-
Dallarian liked a post in a topic by Metagross31 in The legendary forum game "count"
3044
It will never die!