Search the Community
Showing results for 'capacity slots'.
-
Shadow T2 issues in PvE : As you all know, shadow in PvE is in a really weird place in the T1-T2 phase. Past T3, shadow has access to plenty of tools to equal the playing field with other factions. At T1, shadow is in a hard place. But PvP balance & shadow identity make it hard to assure a good T1 in PvE. It is however still viable, with access to sustain, good range units, a global damage buff, and a viable tower in def scenario. Considering how careful balancing T1 require, owing to PvP, I'm going to concentrate on T2 viability. T2 shadow is defined by 2 cards : harvester and shadow phoenix. All other options are clearly inferior. Shadow mage foulplay + chaos knight neither warp TP is too cluncky, and impossible to scale up (you can successfully & with a limited range TP 1chaos knight for a good explosion, but more than one and they kill each other, so you can't scale the combo, & by itself it isn't enough). Nightcrawler suicide rush and eliminator + rippers simply don't work well enough outside of really specific situations. Harvester is overall in a good place. It benefit from lifeweaving for increased survivability, and can use stocked corpses from soulsplicer to insure the 1st use of it's ability. Then we got shadow phoenix + embalmer's shrine combo. A combo that has always been problematic because it allows to basically crush any land armies while unbounding your army. Now, I don't think having strong card combo is a problem in the game. After all, synergies are good to push payers toward complex deck building, and combo of cards also cost precious deck slots, a resource that was always at a premium, and a downside that is even more costly in the post amii monument era we are in. Having said that, phoenix + embalmer combo is a clear outsider compared to others (Time vortex + FoF, viridya + lost shade, strikers + Fire Force, commandos + rioter's retreat, ...). Contrary to all those, the phoenix + embalmer combo allows not only quick nuking of entire group of ennemies, but also the full unbouding of your army. That last part is what really make the combo stands out compared to all others. It's also the reason why shadow hasn't received any PvE T2 support from the team. It's too strong, hence you can't up the rest of the faction. For the short term, it's also a combo that is used as a short gap for the almost non-existent T2 amii. On the long term however, it will also keep the rest of the faction from evolving, like T2 shadow. Now let's talk about the other options, should we ever do something about it. 1st the limits : 1) The unbounding part is almost impossible to remove, with phoenix in it's current iteration. 2) We do need to offer compensation, but also an alternative, to shadow T2, and to a lesser extend to amii & maybe even bandit & lost soul. 3) We should avoid destroying the combo, & more importantly the cards themselves. 4) We need to offer alternative to the affected factions. The last point 3 points is what has motivated me to write this long post 😅. Many ideas have been thrown around to solve the phoenix issue. There's basically 2 big side : make shadow phoenix spawn smaller phoenix or phoenix with less damage (the reduce damage per iteration solution), or increase corpses requirement after each resurection iteration. It is the last one that has made me realise 1 of the biggest issues of the combo : embalmers shrine insanely high level of corpes increase +220% or x3,2. It basically divide by 3,2 the resurrection cost of the phoenix. But outside of phoenix, the card is never seen. So we got a card that trully enable the combo, but is never used anywhere else. Right now, a phoenix can do up to 2200 dmg. Add dmg to buildings not generating corpses, ennemies shield, and overkill, and it's hard for a phoenix to pay for it's own corpse cost. With embalmer, it's 625. 2 unit in the area is already 1100 dmg. even with shields & overkill, it allows easy resurection. So my idea is this : rework embalmer shrines to reduce its combo potential with phoenix, while opening the card to combo with others shadow corpses based cards, like FoF, necro-blaster, shadow insect & altar of chaos. To do that, it means reducing the bonus significanty while giving a better reason to play the cards in any other situations, introducing flexibility. We need to"de-couple" a bit the 2. My idea is then to make the shrine passive, moving it to T2 &increasing itscost in compensation while cutting by more than half the bonus : Orb cost: Shadow, Neutral (T2) Power cost: 70-90 range Charges : 4 Description: Passive : all corpses in the current game will grant (55-65 / 60-70 / 70-80) 80-90% more life points when being gathered At 80% bonus, phoenix resurrection cost increase to 1111 instead of 625, meaning that at least 3 units per phoenix must be hit to trigger its effect. Additional testing must be done with the numbers of course (& maybe resurected phoenix will need to have an increased cost to 2500-3000 if trully needed), but this change is a step that allows us to both keep the combo with a slap on the wrist, while giving a new tool to shadow to combo with other cards. FoF basically becomes 9% void return, but at a cost of 1/1.5 less cultist master at T3 bounded power in the shrine). It "gives" back to casual players a solution to automate their necro-blaster defense, so without cultist, but at a cost of an additional card slot (which in this case is alright, again a solo tower is problematic, a combo of card isn't, the player will have to sacrifice something else, like cultist). Now for the compensation : we need something to help shadow T2 units (mage, knight, rippers, nightcrawlers, eliminator). I already made post on the subject. What shadow T2 needs is a healing/sustain spell. There's 2 theme for shadow : corpses & lifesteal. Lifesteal is out of the question for T3-T4 scalability reason (thx Cocofang & Hrdina Impéria). Furthermore, as pointed out by Tristan in previous conversations, we need to be carefull not to allow the new card to enhance harvester (PvP & PvE considerations). After much iterations, the best idea I have than can work is to introduce a sustain shadow spell using the special effect from rippers; allowing units or the spell to consume corpses. Since many sustain options are 1 orb restrictive (nature heals but also bloodhealing), & in the idea to also help amii, I think it's faire to make the spell 1 orb restrictive : Soul Feast Orb cost: Shadow, Neutral (T2) Power cost: 90p (more ?) Charges : 16 Description 1 : Summon a 25m radius corpse collecting aura in a chosen area. For the next 30 seconds all corpses in that area will be consumed to regenerate 35-45 life points every seconds to every friendly unit in the area. Reusable every 30 seconds. Description 2 : Summon a 25m radius magical aura. All friendly unit in the aura consume nearby corpses to regenerate 35-45 life points every second. Last 30 seconds. Reusable every 30 seconds. I feel the correct regeneration rate is somewhere between 35 & 45hp/s. The new card will combo with our reworked embalmer's shrine, but most of all shadow mage doubled with a frontline of chaos knights or rippers. This spell will give an alternative to shadow at T2 that doesn't enhance harvester. I'm still not 100% on how to make the effect work in relation to range units (I prefer description 2, easier to implement, but the question for me is whether ranged units will have enough range to gater the corpses for regeneration). The spell doesn't combo that much with ashbone, who tends not to kill things 1 by 1 but often all at the same time due to their flamethrower, & then moving away. Viridya already offer a 45hp regen every 2s to them, unconditionnaly. Big XL units at T3 don't gain much with this. Only magma hurlers could be a bit of a problem (& even there unity G might be better so i'm not too much afraid). The big upside of this spell is that it allows shadow to use both shadow mage at T2, and cultist master at T3, in an offensive way (blood healing with cultist master is impracticale). To resume : 1) To nerf phoenix + embalmer combo, & open embalmer to other possibilities, make it passive in exchange for Tier & cost increase, & massive corpses buff decrease. 2) Give shadow/amii/bandit/LS a new sustain tool using rippers effect. To me it is strange that only rippers & overlord use this considering how shadowy the effect feels. This tool open shadow to shadow mage + frontline rippers/chaos knight combo, & use of cultist master offensively (shadow mage needs 35hp/s min to regen between 2 shots). These changes should open more possibilities for shadow at T2, while starting to put in check the phoenix combo. Your though ? https://discord.com/channels/604212371828899851/739437604914855996/1388891178920837333
-
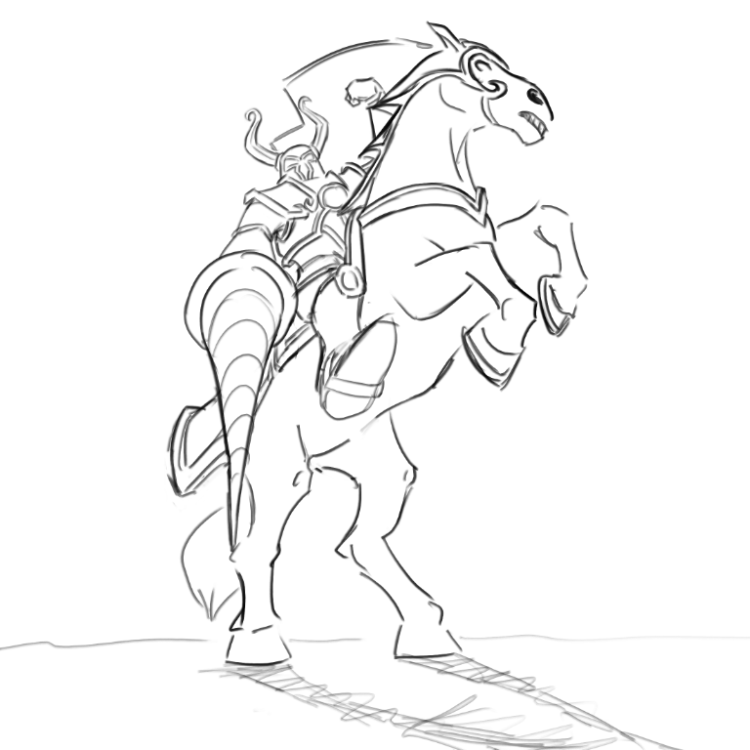
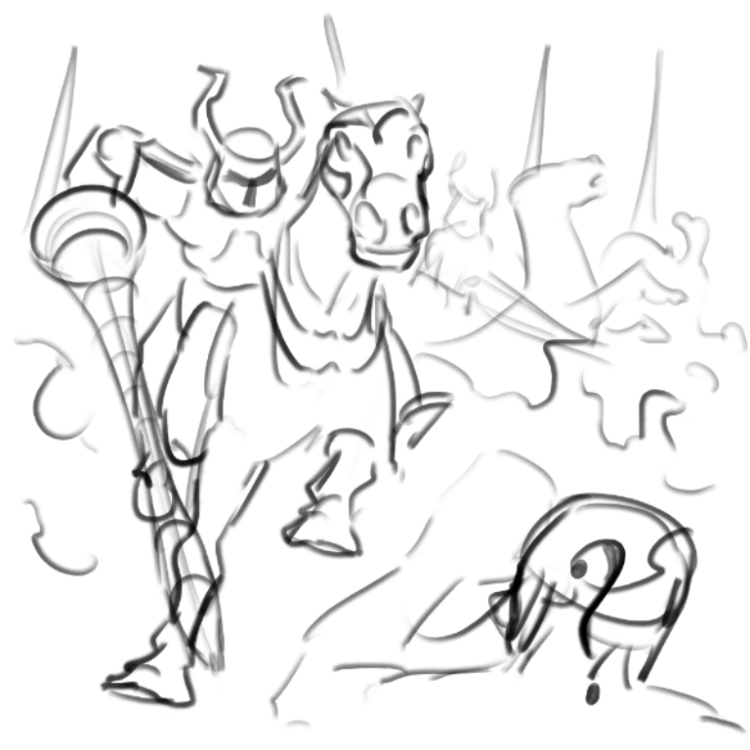
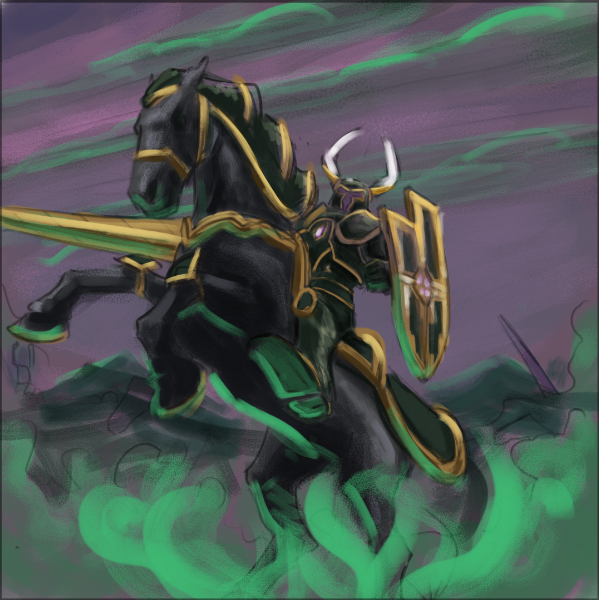
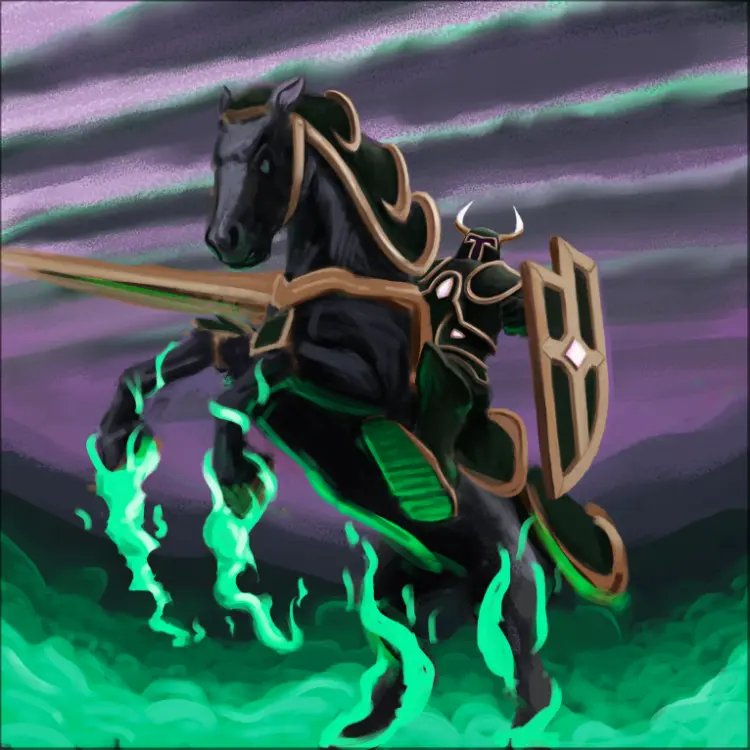
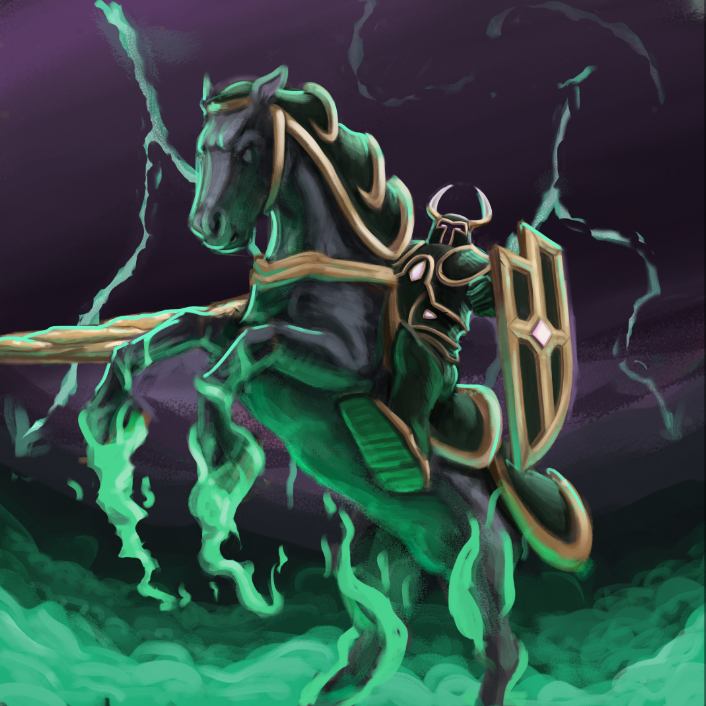
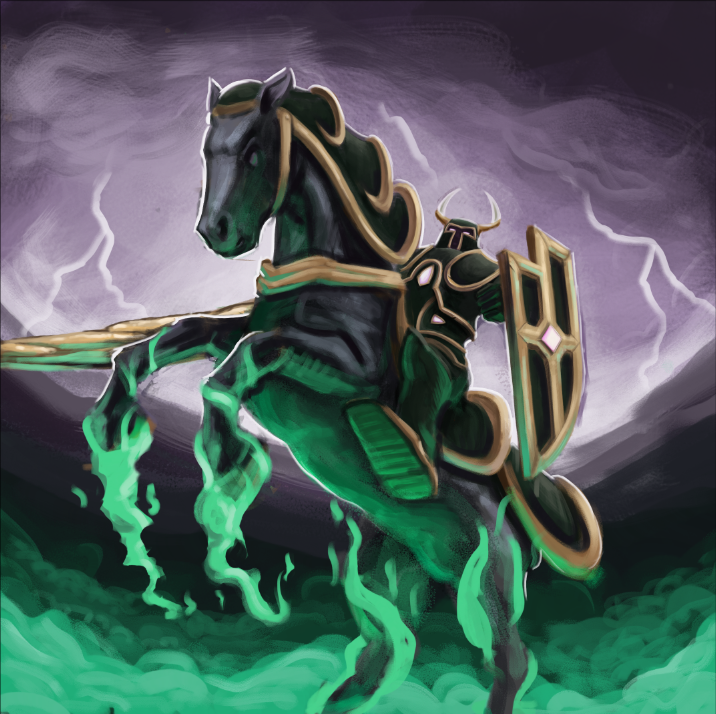
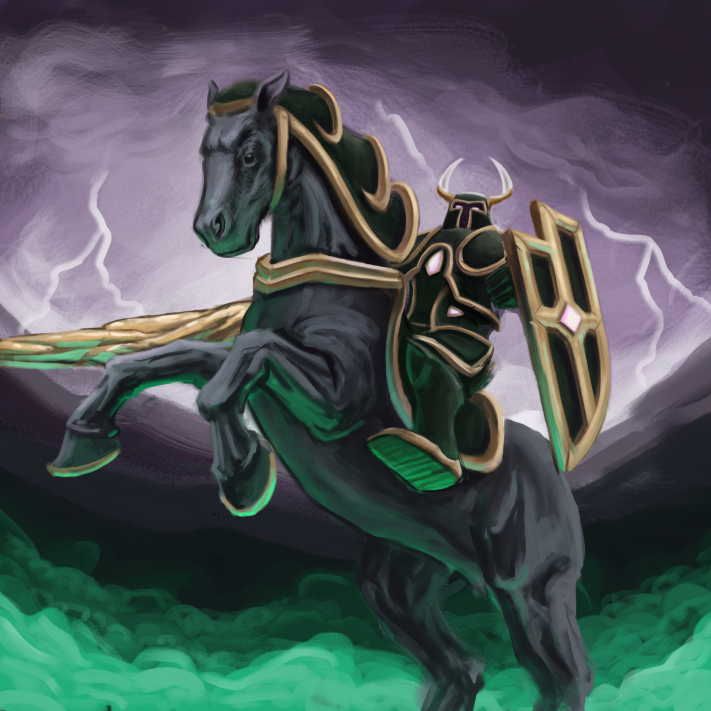
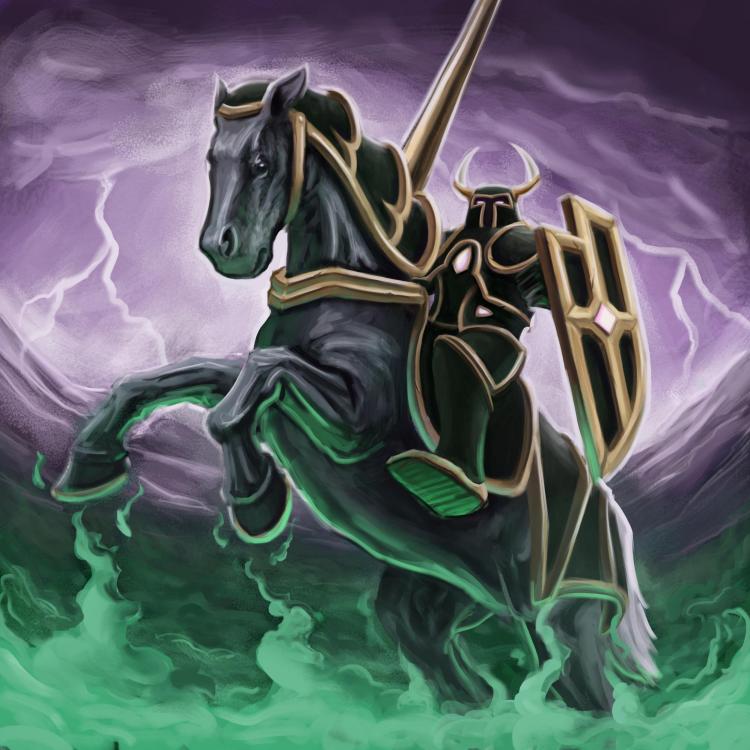
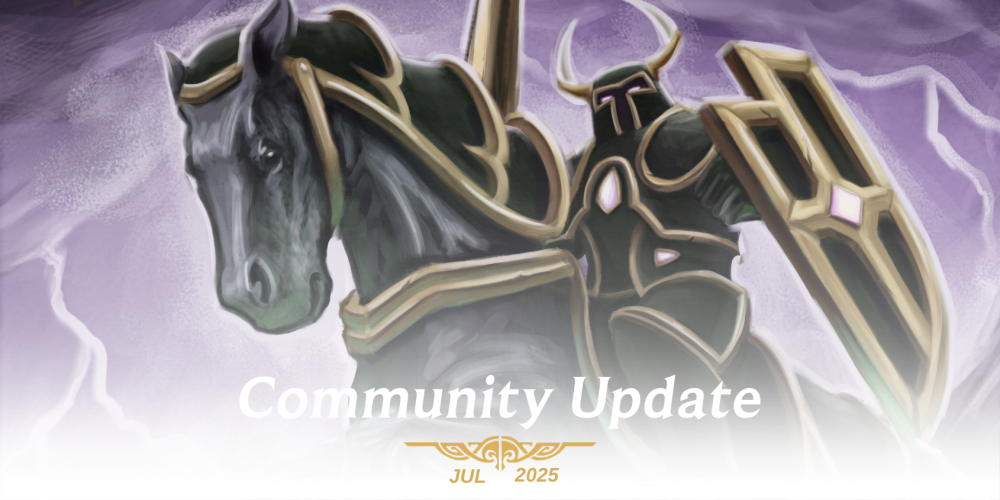
Greetings Skylords! A new month; a new Community Update! It's time to bring you up to speed with everything going on in Skylords Reborn! • Season #1 - Primordial Fire - Month #2 Last month, we released a patch that kicked off our very first Season, and the reception has been largely positive! Player numbers have gone up, and Skylords are enjoying the fresh challenges the season brings. This season will last for four months: June, July, August, and September. Unfortunately, with so many moving parts, some bugs were inevitable. Our team has worked hard to fix as many of them as quickly as possible. We've addressed these issues through several hotfix patches, which you can find in the patch notes here. Some of these hotfixes include minor touch-ups related to the season, such as description clarifications and small UI improvements. The update from June 29th also included minor balance changes, so be sure to check out the patch notes. We'd like to take this opportunity to address a few topics that have come up frequently since the season's release: Connection Problems for Russian Players We've noticed that some Russian players are experiencing issues connecting to our server, which is located in Germany. Although these issues began around the time of our patch release, they are actually the result of sanctions outside of our control. We're currently exploring alternatives, such as hosting a VPS in another region to forward traffic. We expect to have more information within the next 1 to 3 months. In the meantime, we advise affected players to use a VPN to connect. Nightmare Challenges We’ve seen some players expressing frustration about not being able to complete certain challenges or finding them too difficult. We want to emphasize that Nightmare challenges are intended for the highest-level players and are not required to earn the top rewards. You will be able to unlock Promo Sunderer this season without completing any Nightmare missions. However, you will need to complete the second and third batches of challenges (along with most repeatables), which will be released today and in August. We highly advise players not to burn out on a specific challenge if you are not having fun. We’ve tried to include content for everyone this season. That means some challenges may feel too easy, while others may feel too difficult, depending on your playstyle. But remember: you don’t need to complete everything. We do encourage you to try strategies outside your comfort zone, but at the end of the day, it’s all about enjoying the game. And if you do want to conquer a particular challenge, the community is more than happy to help. Be sure to check out our Discord if you're looking for advice or teammates! Dwarfen Stronghold Challenge 2.5 requires players to complete two community maps. It reads: Win the 4-player featured community maps Dwarfen Stronghold Rework and Twisted Legends on advanced difficulty or higher, with all team members using decks that contain 10 or more Fire, Twilight or Bandits cards. Some players experience a crash or error when trying to host the map Dwarfen Stonghold Rework. To fix this, close the game, go into your doc/BattleForge/map folder and delete all instances of Dwarfen. After restarting the game, you should now be able to download the correct map and host your match. Filtering for Twilight Edition Challenge 2.8 has caused some confusion among the player base. It reads: Complete 5 different campaign maps or featured community maps on advanced difficulty or higher, with all team members using decks that contain only Fire, Twilight or Bandits cards, none of which are from the Twilight edition. Back when the original BattleForge came out, cards were released in expansions, with the base set being called the Twilight Edition, and cards were purchasable in boosters from specific expansions. When we overhauled the economy to free-to-play, we actually removed those edition-boosters, and replaced them for faction-boosters instead. While this was a great improvement, it also means that non-veteran players were never really exposed to the "Twilight Edition'' naming. This was an oversight on our part when we created this challenge. To clarify; cards from the Twilight Edition all have the Sunrise Icon, are only Nature, Shadow, Frost and Fire (so no hybrid/neutral), and have no affinities. Even though the name might imply it, the Twilight Edition contains no cards from the Twilight faction. For this specific challenge, there is actually a filter you can use to exclude every card from the Twilight Edition. If you write the following text into the search bar of your inventory, you are left with all cards that are not included in the Twilight edition: !(edition=twilight) Just remember that challenge 2.8 also restricts you to Fire, Bandits or Twilight (the faction, not the edition!) cards, though you can easily filter for those with the elemental buttons on the left. If you want to know more about filtering options, have a look at our Advanced Filtering document. It goes into detail what is possible with the search bar, and how it came to be. Fire Wormlings Fire Wormlings, unfortunately, hold the questionable honor of being the most problematic card in the history of this project. Initially intended as a new type of archer to be placed on walls, it had to be completely redesigned after model issues made that original concept impossible. Then, after finally being released, the card caused lag spikes when played for extended periods. Thankfully, we were able to fix those lag issues relatively quickly, but soon after, another problem surfaced: players began reporting widespread desync issues. Unfortunately, we have not yet been able to identify and fix the root cause of these desyncs. To better understand the complexity of the situation, consider the following: - Fire Wormlings is a resized version of an XL model. - It's a squad unit, based on a model that was never originally intended for use in a squad. - Its attack lays down a unique visual effect that deals damage over time. - It has a buff that checks for specific unit classes nearby, activating and deactivating accordingly. - It uses the worm model, which moves in a very unique way, basically teleporting across the map while appearing to burrow underground. - Desyncs are reported in most matches where Fire Wormlings are played. - In single-player matches, the desync warning does not appear, but replays are often out of sync with the actual match. - None of our tests so far have been able to pinpoint the issue with certainty. We’ve been testing a variety of solutions, including removing the passive ability, resizing the worm, or converting it to a single unit. While we still lack a definitive answer, current evidence suggests the desyncs are related to the movement behavior of the worm model. Similar reports have occurred for the original XL worms in the past, but those units are played less frequently, and later in matches, due to them being Tier 4. Additionally, those issues have been rare and hard to reproduce consistently. We suspect that the combination of smaller size and squad mechanics increases the likelihood of movement-based desyncs. For instance, if the squad moves over uneven terrain or is knocked around, parts of the squad can get separated or stuck, increasing instability. We considered temporarily restricting the card in multiplayer, until we discovered the same issue also affects single-player matches. Adding to the challenge is the open in-game market. While Fire Wormlings is part of the season rewards, some players have paid a significant amount of BFP to acquire it. Simply removing the card and refunding players isn't viable, since that also raises questions about how to handle those who sold the card. We obviously don't like players not being able to use their new cards. At the same time, players are currently asking each other to stop using the card, basically banning it from play anyway. We considered replacing the model entirely and reworking the card from scratch, but this would also require new artwork, effectively meaning we’d need to remove the Wormlings and create a completely new unit. This would be a months-long process and would seriously disrupt our planning. Fire Wormlings is also heavily featured in our marketing for the season, so removing it is something we hope to avoid. So, where does that leave us? We are currently testing a version of Fire Wormlings that removes the squad mechanic, and results so far have been promising. However, we still haven’t found a consistent fix for the desyncs, and we’re increasingly concerned that the worm model itself might be inherently problematic. Because of this, we’re also exploring the option to rework the burrow movement, potentially replacing it with a more generic movement style while maintaining a similar visual through existing animations. However, we are limited in our options here, considering we don't have the source code and can not create new models or animations yet. We hope this breakdown helps players understand why Fire Wormlings is still not fixed and why solving the issue has been so challenging. Due to our limited testing capacity, we are now considering deploying the most promising version of the card to the live server soon, to collect feedback and data from the broader player base. We would also like to expand our internal testing, so if you want to help out as a tester, consider reaching out. With your help, we hope to finally identify the exact cause and deliver a stable version of the card for everyone to enjoy. Changes mid-season Many of you have already shared what you like and dislike about various aspects of the season. From challenges and rewards to UI and descriptions, your feedback is incredibly valuable in helping us determine whether we’re on the right track. While we’ve already been able to implement some quality-of-life improvements based on your input, not all suggestions can be incorporated mid-season. That said, we are carefully observing what works and what doesn’t, and we will take this into account for future seasons. Common feedback includes the option to play Standard difficulty on certain challenges, less restrictive deck-building, and the concern that neutral/legendary cards are not playable in any future season with the current setup. We’ll definitely keep this feedback in mind as we prepare for Season 2. Non-seasonal content We’re also hard at work on a new patch unrelated to seasonal content. While we believe it’s important to offer exciting rewards through the seasonal track, you can still expect new cards and new map releases through content patches, just like we did before the introduction of seasons. While we don’t have anything concrete to share just yet, we expect to have more to announce soon! • Seasonal Challenges Batch #2 As we enter the second month of this season, a batch of additional challenges is now available! The following challenges are now active: 20+10 1 3.1 - Survive until the end on the survival community map, The Last Soultree on advanced difficulty or higher, with all team members playing only Fire cards. 20+10 1 3.2 - Win the 1-player scenarios Behind Enemy Lines and Siege of Hope on advanced difficulty or higher, with you playing only Fire cards and no building cards. 20+10 1 3.3 - Win the 2-player scenario, Crusade and the 1-player featured community map Spooky Encounters on advanced difficulty or higher, with all team members playing only Fire cards of Tier 2 or below. 20+10 1 3.4 - Win the 4-player scenarios Empire and Raven's End on advanced difficulty or higher, with all team members playing only Fire or Neutral cards, with units of Tier 2 and above being Neutral units. We hope you enjoy the current batch of challenges! The final set of challenges (including new Nightmare missions) will release in August. Players will then have the entire month of September to complete any remaining challenges before we wrap up this first season. After the season concludes, players will be able to use the new Relic resource to purchase any missed seasonal cosmetics rewards, including the Promo Sunderer, through the Relic Shop. Relics can be earned during the season by completing challenges and by beating the weekly map affected by a map modifier. The Fire Boosters and the cards Fire Wormlings, Hellhound and Treasure Wagon will not be purchasable with relics however. The new cards will drop from boosters after the season has concluded. Our next season will also feature relics that can be used to purchase rewards from Season #1 – Primordial Fire. • New Card Reveal - Amii Ashrider While players continue with the first season, we are constantly working on additional content and are once again able to give you a sneak peek into a future new card. We have already expanded the Amii unit roster with various new cards: Amii Paladins, Amii Sentinel, Skydancer and Energy Core. Now that Elkondo has settled into our art department, we are able to create a new tier 2 unit for the faction. Let's take a look at Amii Ashrider! Please note: We are still working on the card. While we are generally happy with it, numbers and effects might still change before release. Ride of the Amii When the unit is surrounded by 3 other friendly Ashriders in a 25m radius, it moves at high speed (8.0 m/s) and knocks back small and medium units dealing 25 damage, up to 100 in total. Elusive Units with Elusive have the duration of the immobilizing effects of Freeze and Paralyze reduced by 10%. Design notes: There are several cards in the game with movement knockback mechanics that deal damage. These are mostly confined to the higher tiers and besides the reworked Colossus are found on ranged units like the Worms or the hybrid melee-ranged unit Thunderwagon. When we were thinking of a new Amii T2 unit, we thought it was time to finally put the movement damage effect on a lower tier unit. Particularly, we thought it would fit with a horse-based Amii unit, therefore allowing players to simulate performing a cavalry charge. As can be seen with the new Treasure Wagon card, having a perpetual M-sized trample effect in T2 provides a substantial amount of crowd control. Ashrider is our first non-T4 Amii unit made specifically for PvE. Other Amii units, towers, and spells are on the way to flesh out the faction's T2 and T3 arsenal in PvE and allow players to enjoy a full Amii deck from T2 onwards. Amii Ashrider will release in an upcoming content patch, date to be announced. • Art Spotlight - Amii Ashrider Amii Ashrider was drawn by our artist Elkondo. Below, he will share what went into creating the new unit. Take it away Elkondo! "The first challenge was to come up with a clear and distinct pose for the unit. Since Skylords Reborn already features multiple horseback units, it was important to differentiate it with a unique silhouette as well as colors." "After some exploration, the pose was quickly decided, and with a quick paint-over, the general vision for the artwork became clear." "At this stage all that was left was cleanup. The 'Ride of the Amii' skill causes the unit to leave behind a trail of green smoke - this was something we wanted to show in the artwork." "As cool as it was, however, it looked too much like flames. At the same time, we wanted to simplify the background to make the unit stand out a bit more. It took a few attempts to finally find contrast that works best." "With the background done, it was time to polish the main subject a bit and add some much-needed details. We realized the attempted strong perspective on the rider didn't really work any more. The green flames were also removed to try a different look later." "Lastly, alongside additional polish and new smoke effect, the lance was simplified and moved, as the previous intricate design didn't really fit the Amii aesthetic." And that is how our latest Amii unit got its artwork! We hope you are looking forward to Amii Ashrider! • Team Changes We are happy to announce that two new members have joined our volunteer team! First off, VicRattlehead has joined our team as a Discord Moderator, while also showing interest in helping out with development in the future. Secondly, Arphox has already offered a lot of help in regards to improving our updater, and has now properly joined the team as a Tool developer with the goal of making more improvements. Thank you both, and welcome to the team! • Contribute to Skylords Reborn Skylords Reborn is a community-driven project fueled by the passion and dedication of over 50 volunteers. We are always on the lookout for like-minded individuals. If you have a passion for gaming, programming, design, or marketing, we invite you to have a look at our open positions! Don't have time to formally join the staff, but still would like to help out? Please check out this guide on how to support Skylords Reborn as a community member. • Events In between our monthly Community Updates, we host various events and tournaments, so be sure to keep a close eye on the in-game event tab and the forum calendar to stay informed and not miss out on any exciting events! Current events: • STREAM - WINNER REVEAL: Battle of Tactics #9: The Great Mage Magician - 04.06.2025 Find out who is the greatest of the Great Mage Magicians and their mighty generals in the winner reveal stream of this 3-player event. Join Ultralord on July 4 at 7:00 PM on Twitch. • FINISHED - The Skylords Reborn Spring Cup 2025 The Spring Cup was our second PvP tournament of the year, and it included some great matches. The tournament was hosted and livestreamed by Ultralord, and you can watch the action here. • NEW - PvP Tome Tournament - 06.07.2025 15:00 CET Tome was a PvP game mode in the original BattleForge where players had to build their decks with cards from boosters. With everyone playing with random cards, there are bound to be some unconventional strategies! Please sign-up in advance. • COMING SOON - Crystal Solid Defence - PvE Event - Starting 11.07.2025 until 27.07.2025 While we arent ready to reveal this event just yet, be sure to check back in on the 11th for a new PvE Event! • Host your own tournament / event Want to host a tournament or event? Please reach out to our Event Organizers @Metagross31 or @Ultralord. We can help you out with various topics and are glad to discuss potential ideas. We can also sponsor the prize pool for your event. If you have a cool idea for a PvE event, or want to host a PvP tournament, please don't hesitate to reach out to us; we will gladly assist you. • In Conclusion That's all for this Community Update! We appreciate you taking the time to read through it. As is tradition, we're including a scratch code as a small token of our appreciation for your support. The code will reward you with a Fire booster: HEAT-LAVA-FIRE-CARD This code is valid until August 1st, when we will bring you another Community Update. We're always looking for ways to improve and value your feedback. If you have any questions, comments, or suggestions, please don't hesitate to share them with us. We'll be back next month with more updates on our ongoing projects and upcoming features. You can also sign-up to our e-mail newsletter here. Archive • Skylords Reborn Documents (Deep Dives, Behind the Scenes, PvP Guide) • Overview Community Updates • Community Update June 2025


.png.b32328c7d3914fde4b4ce37dd81f23c1.png)
- 7 replies
-
- 11
-

-
BattleForge PvP Guide - by Hirooo & RadicalX (Last Update: Q1 2023) Hello and welcome! Since this has been requested for a while we made an update for the PvP 1vs1 deck preview Hirooo and I ended up writing more than 5 years ago. The meta has changed since then, mostly due to recent balance changes and the introduction of brand new cards. We also expanded our matchup descriptions a little bit to provide some additional information and hopefully some useful tricks. With the official release of Skylords Reborn, free PvP decks were added to the game. They have replaced our previous "deck examples". Where to find the free PvP decks - Select the sword on the top right of the menu to select your 2 free PvP decks, see image below. - Free PvP decks are fully upgraded decks, that can only be used in PvP. - You can select two new decks every day, if you want to switch things up. - You can freely swap around cards in those decks with cards in your collection to customize the decks to your liking. You can do this by clicking the tab in your inventory on the top left and changing General to Free PvP and vice-versa. What will you find in this PvP guide? Here is what each of the sections in this guide contains: • Regularly updated power rankings, followed by our top 3 deck recommendations for new players • Basic deck descriptions where we point out major strengths and weaknesses and explain how to play and possibly adjust the presented free PvP decks. • Comprehensive matchup discussion, sorted by favorable, skill based and difficult matchups. [ POWER RANKINGS ] These rankings should give you a rough overview of the state of each deck on this current patch. Do not get discouraged if your deck of interest isn't rated highly. Any deck can perform well and with a good strategy or strong micro play you can overcome matchup dependent differences more often than not. #10 Fire Frost (↓) Currently the weakest deck on this patch, has rather unclear win conditions whenever shielded Skyfire Drakes do not dominate the matchup. Other decks that were previously considered weaker received strong buffs leaving Fire Frost a little behind. Due to the lack of faction cards Fire Frost solely relies on splash synergies whereas other factions have much more powerful carrier cards. Some strong new combos like Warlock + Core Dredge emerge, but fundamentally the faction is just less well rounded than others. That said, Fire Frost offers a very unique, fun and micro rewarding playstyle and can still be worth playing for that reason. Final rating: 4/10 #9 Amii (↓) This might be a surprise for some as Amii received 2 new cards, which are both reasonably strong. The reason for Amii being listed low on this ranking is the Nightguard nerf combined with other faction buffs. Amii relied the most on Nightguard usage out of all Shadow splashes as the faction does not have a very powerful response to melee L-Units. You are forced to win at early T2 in almost any matchup. While some of the most critical counter decks are a little bit more forgiving now, Amii’s major weaknesses are maintained. The lack of both large and flying combat units makes Amii incredibly susceptible to strong AoE damage effects and limits the T2 scaling. It might be the hardest deck to execute as micro-managing a lot of low energy units non-stop is a tough task, but when mastered the deck is still absolutely viable with a lot of new tricks you can make use of. Final rating: 6/10 #8 Twilight (↓) As Twilight is receiving numerous changes, this rating is rather preliminary and might change in the near future. Twilight units are getting more and more powerful, but do not entirely compensate for the faction's downfall compared to its old times (Fire Nature was considered top 3 before the first balancing changes). Melee unit dependency and hefty deck slot limitations made it harder to keep up with other factions that kept improving. Twilight Transformations add depth to the faction in late T2 nowadays, but this can be complex in execution. Twilight can still play with very high tempo and its late T2 pushes are one of the most rewarding ones in the game. Even though the deck’s performance is not at its prime we can still recommend learning it if you are interested, it will definitely pay off in the long run. Final rating: 6/10 #7 Pure Shadow (↓↓) The biggest downfall compared to the last rating where the faction received a top 2 rating. Pure Shadow’s performance got worse in almost any T2 matchup. Major changes with an impact: Nightguard nerf, Burning Spears release, Twilight Crawler release and buffs, Parasite Swarm buffs, Creeping Paralysis buffs & Tranquility release. Is pure Shadow a weak faction now? Definitely not! Even though Harvester is less dominant than before, the pure Shadow T3 still is one of the most flexible and powerful ones. On top of that the faction has a lot of deck building options and unique units creating leads throughout the game. Nether Warp’s playmaking potential is beyond crazy and in the right hands pure Shadow can still turn into the overly dominant faction we used to see in the past. Final rating 7/10 #6 Pure Nature (↑↑) Pure Nature is on the rise. After taking the bottom spot in our last rating the recent set of changes turned out to be strong buffs overall and helped multiple nature players secure a position at the top ranks of the PvP ladder. With much more versatile tools to deflect attacks and buy time, the faction has seen a lot of improvements compared to when it was rated as the worst faction in the game. Energy Parasite might be the most micro intensive unit in the game as it is spammable and vulnerable, yet so valuable it will pay off in the long run. Great map awareness, strong micro and an easy to use L-unit make for a very well rounded and strong deck. The main weakness of this faction is its slow start as nature T1 is susceptible to high tempo play and pure Nature does not have the best defensive tools to balance this out at early T2. But once you gain control of the game, it will be hard to stop you. Final rating: 7/10 #5 Pure Frost (↑) Pure Frost probably has the most powerful T2 defense in the entire game. Strong counter units, endless building synergies and solid crowd control options can even compensate for power deficits. When fighting around your own wells and orbs, pure Frost has the potential to outtrade any faction in the game. It is very easy to well up and scale towards later gamestages when playing this deck, but it can be hard to obtain enough map control in the first place. Due to mobility restrictions and reliance on building synergies Frost can not cover great distances without losing out on combat power. Your enemy will be able to pick fights on his terms, block important positions on the map and disjointed units will easily be outmaneuvered. But through good unit control and resource management you can overcome this and maintain a compact defense until your Eagles get to strike back. Final rating: 8/10 #4 Pure Fire (-) This one streamer telling you pure Fire is bad is lying! Do not believe him, it is a deception! The faction has very dominant trading tools for combat on the ground. Firedancer is the best Siege unit to break a defender's advantage, Enforcer is overwhelmingly strong, Wildfire is extremely versatile and Juggernaut is a simple brute force siege tool, strong enough to win games on its own. No deck can leverage tempo leads as well as pure Fire does, which leads to a rating at the upper half of this list. On the downside the faction’s air control is still weak and combined with the lack of hard cc some factions can take advantage of this in T2. But pure Fire is a very powerful deck that performs perfectly fine regardless of your skill level. Final rating: 8/10 #3 Bandits (↓) Bandits remain to be the biggest winner of balancing changes ever since Phasetower/Mortar nerfs enabled more T1 options. The faction has a wide set of strong ground combat tools, powerful air control, reliable attacking patterns and solid defensive options despite the lack of hard cc. Unique mechanics like Bandit Sniper ability and a reasonable T3 scaling through tools like Bandit Lancer, Cultist Master or buffed Soulhunter round this up extremely well. Bandits is a versatile deck with little weaknesses to take advantage of. The faction scales fairly well throughout all stages of the game. But unlike the decks that are listed higher on this tier list, Bandits does not have this simple win condition you can use to break up evenly matched games. After various balancing changes Bandits is definitely not as oppressive and less powerful than it used to be, but it is still a great faction that deserves a spot in the top 3. Final rating: 8/10 #2 Lost Souls (↑) Lost Souls is just outright solid at every stage of the game, extremely powerful scaling. This makes it the most well rounded faction you can play. You have a plethora of counter tools, strong spell synergies and except for the lack of air units the faction has anything you would want from a good PvP deck. Lost Souls is the most stable deck in the game, but also a rather slow paced faction. It is harder to apply pressure throughout the early stages compared to more aggressive factions and you can leverage your tempo leads by welling up instead of attacking your opponent most of the time. This makes it easier to play compared to most other factions, but also limits its potential at perfect play. Overall Lost Souls mostly benefits from the decline of pure Shadow and Bandits and reclaims a top 2 position in the current meta. Final rating: 9/10 #1 Stonekin (-) Stonekin is the best T2 faction by far. Stormsinger + Nature splash support is so good, it can either carry the deck by allowing big T3 scaling set ups or simply synergize with remaining faction tools in T2 to build up a constantly growing deathball. The faction does not have very clear weaknesses as they only emerge from slot limitations. The only issue to point out is the lack of burst leading to a minor weakness to equalize early tempo deficits when getting attacked by strong Siege tools (i.e. Firedancer). But with its overwhelming dominance across multiple matchups, this won’t stop Stonekin from defending its top spot this patch. Final rating: 10/10 [ NEW PLAYER RECOMMENDATIONS ] If you are new to the PvP, it can be difficult to find out where to start. Usually the best way of learning the basics is by sticking to one faction you enjoy playing. Get to know your cards, matchups and improve step by step. Look up some content from veterans using your faction and most importantly, play the game even if the matches end up being very tough. You will naturally improve over time and after learning the basics PvP is so much fun and offers incredible strategic depth. For that reason I would highly advise to pick a faction that you enjoy playing, even if it's not rated super highly by us. Every faction (except for Fire-Frost) is can be viable at the highest level and if you like pure Fire for example, just pick it from the free PvP section and play it. For anyone unsure about which faction to pick, we will list our top 3 starter recommendations. This list will be updated with every patch to make sure it is not outdated and provides some basic information. We think the following factions will give an enjoyable experience for newer players while teaching you important game mechanics, but again it's more important that you have fun with the faction you are using. Pure Frost Pure Frost wins a lot of matches through defensive play and strong air control. War Eagles are arguably your most powerful T2 unit, but due to their low mobility and inability to attack air, you need time and more units to protect them well in order to get something done. Overall you have a very well rounded deck with strong defensive mechanics and due to its reactive nature you are not force to perfom a lot of micro actions in oder to succeed. Lost Souls Lost Souls offers a lot of versatility that usually makes it appealing for most players. The faction's core cards and mechanics can be understood rather intuitively and you have the tools to compete with other decks throughout every stage of the game. Lost Reaver + Lifeweaving can be a simple, but effective tool to attack in T2 and your late game scaling is rock solid. The high hp frost units synergize incredibly well with Shadow spells like Liveweaving and Nasty Surprise and with Tremor/Grigori you can overwhelm opponents at T3 almost effortlessly. Stonekin Stonekin wins games by stacking up unit masses over time. Use your crowd control spells to win unit trades and add more pieces to your army step by step. With a lot of knockback tools the faction can be infuriatinng from ahead. Most mechanics are easy to learn, but hard to master. This faction is an ideal choice for players that don't like to follow a meta path and like to experiment with deck building. The majority of our free PvP cards could be replaced in stonekin and the deck would still be able succeed at any level (just keep the support spells, they are really great). [ MATCHUP DISCUSSIONS ] Structure The following ratings will go from easiest matchup (1) to the hardest one (9) for each faction. In addition to that, the matchups are divided in 3 categories: favourable, skill based and difficult matchups. The matchup description with details and a rough gameplan follows afterwards. [ PURE FROST ] 1. Deck description Pure Frost is a very defensive oriented faction, that can be very dominant in close base encounters. War Eagles are one of the most powerful T2 units and with proper support they will provide full control of the game. Your various units are reliable and your scaling into late game is fantastic, but the deck often follows a slow playstyle limiting your options. In T1 the lack of a swift unit can get exposed, therefore you may have a lot of trouble acquiring map control. The risk of playing Frost is not as big as it used to be and with the introduction of buffed White Rangers/Mountain Rowdy there is a lot more variety making the deck interesting to play. You will be highly rewarded for learning this faction. Pure Frost dominates some decks, that are fairly strong in the current meta. Your T3 scaling is fairly solid with interesting deck building options, but late T2 air dominance is what makes this deck shine the most. 2. Matchup discussion Favorable matchups: (1) Pure Frost vs Pure Fire (-) Used to be one of the most one sided matchups during EA times and still is clearly Frost favored at the T2 stage. Going even in T1 without taking too many risks is the way to go. Skyelf Templar, while being nerfed, still plays an essential role to establish air control, which is so important to attack pure Fire. With Skyfire out of the way, War Eagle can freely counter any M sized ground unit, which includes more than half of pure Fire’s arsenal. Be careful with using Area Ice Shield too early as Global Warming has been buffed and could counter massively. Rather try to time the spell i.e. when a Skyfire projectile is in the air about to kill a War Eagle/Skyelf Templar. With a very controlled T2 you can dominate this matchup, but you shouldn’t be overforcing. Upon establishing control with a strong Skyfire Drake split, pure Fire can either protect Firedancers for potent counter attacks or safely scale towards T3, where Juggernaut will outmatch you most likely. With Amii Ritual you can build a counter T3 though as the spell can block Stampede and buy time for Skyelf Sages to remove the Juggernaut before your wells and orbs get taken out. Then again pure Fire lacks tools to attack air as long as you split your units against backlash. Skill matchups: (2) Pure Frost vs Pure Shadow (↑↑) With Nightguard getting nerfed, you have the upper hand in this matchup now. War Eagle being less contested means pure Frost has better chances in various trading situations and can only be matched by Darkelf Assassins. With White Rangers getting buffed you also have a solid answer to them, as their ability punishes any reckless activation of Unholy Trance. Heavy unit spam can be deflected by mountain rowdy as the ability counters low hp ground units and the slow buys time to catch and out-micro your opponent. Harvester usually does not work against Lighblade + War Eagle + Frostbite. Stormsinger will always be a good addition into your unit mix and should establish full control in T2. Since most Shadow units are pretty cheap it will get harder to split them up later into the game, strengthening your AoE tools i.e. War Eagle scream is more efficient. Just keep in mind to avoid heavy unit stacking yourself, because Aura of Corruption counters low mobility single area attacks. Play around the high spell cooldown or split up your attack. Freezing units with Liveweaving is extremely effective, because the two damage reductions don't stack. A nice micro trick in this matchup is to cancel out War Eagle screams in order to bait out a Nether Warp dodge attempt. The T3 stage is rather dangerous since Frost relies on unit spam to finish the game, which can be hard countered by Voidstorm. The newly buffed Nox Carrier might be a soft counter to stalling base gameplay around Amii ritual. (3) Pure Frost vs Lost Souls (↑) With nerfs to Nightguard, pure Frost tends to have the upper hand at T2 given that you don’t lose out on T1. Giving up a little bit of map control is fine as long as you have enough space to take a couple wells and don’t get locked out of T3 entirely. Lost Souls will mainly use Darkelf Assassins + Stormsinger + Frostbite in trades, which can be easily matched by Mountain Rowdy and White Rangers as long as you don’t run into a large tempo deficit. Taking extra wells is safe more often than not. Souls does not have any air unit, so try to get a good position for your War Eagle. Cliffs are ideal as they protect against the Stormsinger ability and also ensure an escape path whenever necessary. Be careful with putting too many resources into a single area attack though as a slow army will always be susceptible to an Aura of Corruption. Defending Lost Reaver is not a big deal due to Lightblade and War Eagle, but you still need to split against him as the Nasty Surprise combo can be devastating. In T3 both decks are fairly similar, but Lost Souls is slightly stronger here due to access to stronger spell synergies and the more flexible slot distribution usually leading to a bigger T3 investment overall. You don’t need to close games on T2, but building up a lead early on is advised. (4) Pure Frost vs Twilight (↓) Twilight will be able to match and outmaneuver you on open ground as superior mobility and cheaper crowd control will allow your enemy to pick fights whenever he wants to. Skyfire Drake and Twilight Crawlers are fast and very dynamic units that can build up leads even though your units tend to be more stat efficient overall. The easiest way to get rid of mobility concerns is securing a close well position. Even if your slow units, especially the War Eagle, get outmaneuvered you can still set up powerful counter attacks and reinforce appropriately. Vileblood attacks can be defended with War Eagle and Lightblade, but are not to be underestimated once your opponent gets ahead. The siege damage is massive and will drain a lot of power for building protects or cc. You need to intercept any minor attack as early as possible, making sure you can weaken the attack as much as possible before it gets close for transformation. Always try to build up some Stormsingers count from neutral states as kiting works very well in trades against the melee unit heavy Fire Nature deck. Keep an eye on any attempt to play Breeding Grounds as the card generates ridiculous amounts of value. If you see it being used you have to be proactive in order to shift attention to another base quickly. If your opponent is forced to spawn at another base the Breeding value gets negated for some time. Ideally you get to punish the initial investment and take down a power well. On higher energy levels you start to outscale Fire Nature in T2. War Eagles are a dominant force and with enough power to protect them you will consistently win trades. Fire Nature has limited options to contest air units (Eruption, Gladiatrix, Skyfire Drake, Twilight Transformation). War Eagle beats Gladiatrix, Area Ice Shield can protect against burst combinations around Eruptions, so Skyfire will be the most dangerous unit to play around. If you have some cliffs for your Eagles, try to make use of them as Twilight Transformation does not function here. Depending on how many counters you have to establish air control (Gravity Surge, Defenders, Skyelf Templar), your life might be even easier in this particular matchup. Nightshade Plant transformations can be a major threat in T3, so consider playing for Skyelf Sage + Amii Ritual to block early tempo pushes. As Fire Nature often does not have deck slots for a large T3 your enemy will burn out of charges way earlier. (5) Pure Frost vs Stonekin (↑) Even though Aggressor can be quite annoying for your War Eagles the matchup got easier since Stone Tempest received some nerfs. Stonekin still has what it takes to prevent you from executing successful attacks. Stormsinger & Spirit Hunters are fairly efficient against air units in the early T2 stage and the mix of building protects and cheap crowd control is always hard to overcome. Crystal Fiend might also play a big role in this matchup, shutting it down as quickly as possible needs to be high priority (Gravity Surge may be a very useful addition here). The constant healing over time can start a snowball that will be impossible to stop once you fall behind. Never take additional wells in early T2 without a good reason and try to scale slowly, because you might give your opponent an opportunity to play an uncontested Breeding Grounds, which almost always out-values an extra powerwell in slow paced matchups. Keep an eye on how many different cards your enemy uses in the T1/T2 stage. Stonekin often has a weakness based on slot allocation and it is important to identify which stage is the weakest. Some players might skip T1, others might try to play without a T3 to pressure you a lot in the mid game. If the energy level is high enough you can even overcome some power deficits, but you sometimes need to reconsider based on deck building whether it’s best to play for a mass War Eagle push in T2 or a T3 win. (6) Pure Frost vs Fire Frost (↑) This matchup might be a little bit harder than you might expect initially. Skyelf Templar and White Rangers contest air units and War Eagle gets rid of any M ground units that might try to attack them (Icefang Raptor vs White Rangers, Gladiatrix vs Skyelf Templar etc.) . Overall Fire Frost has a limited amount of playable units and you have fairly solid answers to these options, even the famous Frost Sorceress + Skyfire Drake combo. Mountaineer can be easily matched by Lightblade after losing his M knockback as you can force him into shield mode whenever you want. Defenders can be a strong niche option to keep contesting air control in this matchup. While everything looks very good on paper up to this point, there is one thing Fire Frost can take advantage of. With lots of slow and high health units the unit count during skirmishes is very high in this matchup making Coldsnap + Warlock a deadly combo. If a buffed Skyfire dodges your Coldsnap and the enemies one hits, you are in serious trouble. Also never use Mountain Rowdy against Warlock as the self freeze will also trigger the damage amplification. On top of that Warlock will also ensure superior T3 scaling, where Timeless One provides endless access to the Freeze mechanic. Combined with some high energy scaling T3 unit (i.e. Core Dredge) you will have a very hard time matching this. This is why a good unit split against Coldsnap in mid T2 will often make the difference between winning or losing this matchup. (7) Pure Frost vs Pure Nature (↑) Frost Mage spam is not as oppressive in this matchup anymore, but can still win the game at the early stage. The strategy is still very powerful against Nature T1 on small maps and strong enough to rush greedy fast T2 attempts. Ghost Spears and Spirit Hunters are useless against knockback without cc support and Deep One gets kited against Frostbite. If you manage to get a critical amount of units (7+ Mages) while being close to the enemy's base you are set up to win. Try to stack your army to avoid getting caught and isolated by ensnaring roots and slowly push forward. Nature can shut this down by playing a very aggressive early game which confines you at your base. This is especially annoying on large maps. Try to snipe overextended units with Frostbite or Glyph of Frost to shut this down. At T2 the matchup got better for you considering Mountain Rowdy is another strong L counter for Deep One with a strong ability to shut down supported attacks. White Rangers also add strong defensive capabilities that allow you to defend every kind of attack. Your absolute main priorities need to be never letting an Energy Parasite reach your Power Wells and never allow a Parasite Swarm take over one of your L units. This is still true if it means you have to take bad trades. Investing a Coldsnap for one Energy Parasite is still 10 times better than allowing him to use the ability. Usually Stormsinger + Frostbite are your main counters, add Gravity Surge to your deck if you keep struggling. Also sacrificing L units is much better if you can not prevent a Parasite Swarm ability from getting through anymore. It is more likely to lose to nature's energy manipulation than getting overwhelmed in trades even with some energy deficits. Whenever you manage to defend successfully you can transition into counter attacks. Nature is fairly weak at defending, especially if you can split your low cost units well against crowd control. With Area Ice Shield support you can quickly opt into a well focus. Whether T3 can be used as a win condition solely depends on whether you have a solid XL unit in your deck or at least some sort of counter for Parasite Swarm. Otherwise the nature player could stay in T2 for a very long time and just zone/take over your T3 units. Energy Parasites get even more annoying because you don’t want to play a lot of Stormsingers after investing power into your T3 orb. Skyelf Sage might help, but is also rather expensive. Therefore, keeping the 250 energy for stronger T2 attacks could be the better move here. (8) Pure Frost vs Amii (↑↑) With Nightguard being removed, Shadow Nature can not be considered a hard counter to pure Frost anymore. Mountain Rowdy and White Rangers are strong defensive tools to shut down the early aggression Amii is known for and with superior high energy scaling this might be enough to turn the tides in this matchup. A combination of Darkelf Assassins and Amii Paladins still functions dangerously well and needs to be respected when playing on 3-4 wells early on. But if you keep sufficient map control you will be able to endure these attacks and slowly scale up. Make sure to play around the Amii Paladins active ability as a reflected War Eagle scream might be devastating. The level of early pressure you need to deal with is highly dependent on player proficiency, much more than in other matchups. In late T2 War Eagles control the Battlefield, but you usually won’t be able to attack as Aura + CC is very strong and small unit attacks get shut down by Amii Phantom spam. You should be able to reach a good T3 transition, where Amii Ritual will be a key card to defend heavy Cultist Master attacks. Fortunately the spell counters Evocators Woe making your defense very reliable. A niche counter option to decimate any attempt of Cultist Master stacking would be Frost Shard. Timeless One handles any small scaled attacks. Buffed XL units like Brannoc will be weak against Coldsnap + Lightblade taunt granting ideal set up for a late game win once charges start running out. Difficult matchups: (9) Pure Frost vs Bandits (-) Bandits arguably have the best tools to remove War Eagles from the map entirely making it the best deck to pick into pure Frost. Windhunter is an excellent L counter and combined with well splitted Darkelf Assassins pure Frost starts to struggle a lot. Your advantage lies within your reliable trading tools and strong defense. Fortunately Bandits do not have the strongest Siege units and need to get ahead to make good use of Rallying Banner attacks. This gives you a chance to play very defensively and stall games out until reaching T3. Stormsinger and White Rangers might be enough to play a safe mid game to then win through good trades around your crowd control or T3 scaling. Mountain Rowdy (purple) is a great counter tool to large rallying banner attacks. Counterpressure into the Minefield/Bandit Sniper combo will be extremely difficult though. If you can slow down the game and play a very controlled match you might have the upper hand. With little ways to trade into stacked Windhunters you somewhat rely on your opponent making a mistake in order to stabilize though. The T3 pattern is fairly similar as Bandits have the tools to play faster and aggressively, whereas pure Frost wants to slow down and scale into T3. Amii Ritual will be very helpful to buy time against split attacks and Frost Shard might be a card worth considering for this matchup as it counters Rallying Banner + Cultist Master spam. Soulhunter might be hard to trade against unless you play Skyelf Sage, make use of your building protects and cc tools including Lightblade. If you manage to drag out the game in T3 you should win in the long run. [ PURE FIRE ] 1. Deck description If you want a deck with offensive strength, this deck provides it. Crazy dps units & spells and an immense siege potential with Firedancer. In addition to that pure Fire has one of the best T3 units also known as Juggernaut, which makes closing out games seem quite easy. Your downside is the lack of deck variety and limited air control. The amount of viable cards is insanely limited and you end up with a fairly predictable set up. On the other hand a very clear deck structure allows you to focus on improving your execution and micro management, especially in T2. Strategic matchup approaches are not overly complex and learning the faction in a reasonable amount time is possible. In many matchups you attack with the same unit setup (2x Enforcer, 1x Fire Dancer, 1x Skyfire), which is simple but effective. 2. Matchup discussion Favorable matchups: (1) Pure Fire vs Stonekin (↑↑) The release of Burning Spears relieved a lot of pressure in this matchup. You don’t have to trade with M-units into Stone Shards anymore and with their steadfast passive the Burning Spears are extremely reliable against the knockback centric Stonekin deck. Your opponent now has to fall back to Stormsinger/Spirit Hunter + Root or Stoneshard spam, which can be outscaled rather quickly. With a certain energy level or a tempo lead, pure Fire will take over, because Firedancer can always force the Stonekinplayer away from his power well, making him lose the defender's advantage. A unit mix around Enforcer, Burning Spears and Skyfire Drake supported by the strong AoE damage spells will always come out on top in this situation. A high energy level is usually helpful for you. If the game reaches T3 and your opponent tries to play Stone Warrior (blue) + Timeless One against your Juggernaut, try to disenchant the Stone Warrior ability mid air. At this rate the ability cast goes through, enemy loses energy, the ability goes on cooldown, but you don't receive any damage. With Stampede being this powerful, snowballing is not a problem. (2) Pure Fire vs Amii (-) Amii solely relies on small and medium low hp ground units to trade and apply pressure. The powerful AoE spells like Lavafield & Wildfire can shut this down, which is almost the entire story of this matchup. The only unit capable of contesting the Fire army are Amii Paladins. The unit trades well into your M-units and can reflect Wildfire damage if timed properly. You need to kite them well, play around the high ability cooldown and wait until energy level rises. Lavafield gets more and more valuable over time as the spell is expensive in the first place and the high damage cap automatically adds late T2 scaling. Amii can’t diversify its unit composition, because the faction has no access to flying/large units. A slow and methodical early game usually is the best way to approach this matchup, because Amii spikes very early while falling off in later T2 stages. Getting to this position without a deficit is usually winning, because Amii lacks the tools to stop powerful Rallying Banner attacks. With little threats to your Firedancer the enemy has to walk up to you instead of playing around his base. This often exposes units that can be picked off by an Enforcer. Whereas Tranquility is not very relevant in this T2 matchup, it can be a big nuisance in T3. The spell can force out your disenchant, creating a positive trade and indirectly strengthening the threat of all remaining cc spells and buffs from Amii. Brannoc with Surge of Light and Lifeweaving support will beat Juggernaut in a direct encounter as a result. So either try winning on T2 or ensure reaching T3 with a clear tempo lead so your Juggernaut can strike first. (3) Pure Fire vs Lost Souls (-) Pure Fire performs fairly well into Lost Souls. Enforcer is superior to Nightcrawler/Stormsinger and Firedancers are really hard to remove. This gives you a solid advantage in open field trading as well as siege scenarios. L units are the only ones that are difficult to deal with. Mountaineer & Lost Reaver can apply a solid amount of pressure and also synergize well with Live Weaving. But with well timed disenchants and good uses of wildfire you can deflect these attacks without losing a powerwell to then start a powerful counterattack in return. In this particular matchup it's extremely important to always consider the potential impact of Nasty Surprise. It is the most disruptive spell Lost Souls can use against pure Fire and if you get caught off guard it might turn the tides in this matchup. At higher void levels you will start rolling over your opponent due to damage ramping up and overloading building protects. In T3 Juggernaut may be the best tool in the game to break through a Timeless One defense, so scaling is on your side as well. Skill matchups: (4) Pure Fire vs Pure Nature (↓) The nature matchup got more difficult than before. Parasite got added into the mix and needs to be respected as it is another tool capable of attacking heavy usage of Skyfire Drakes. You can always Disenchant the Parasite or counter with Ravage as long as no damage sources are around. The green Disenchant is recommended here, because it does not only remove the Parasite Spell, but also can grant immunity against other poison effects or Mind Control. Parasite Swarm always needs to be defended, because an unbound Skyfire Drake with Nature spell support is scary. Your overall gameplan didn’t really change. A short and aggressive T1 leading towards a low void T2 usually is the best way of controlling the game pace and preventing fast scaling. Once you win a trade you can try to push towards your opponent's power well immediately with a Rallying Banner set up. Firedancer & Enforcer convert tempo like no other faction, but with Creeping Paralysis there is another tool you need to play around in order to get consistent results. The cc duration is very long and might enable a successful well repair, but you often get to dodge the spell due to its long animation. Nature can win at a high energy point by snowballing with Deep One + Spirit Hunter setups that are still fairly hard to counter once there is enough power for heal-spam support. HP nerfs to Deep One and the Burning Spears delay this scaling point fairly well, but do not prevent it entirely. Always keep a good unit split due to the high amount of cc spells from pure Nature.If you can’t avoid high energy counts, you need to try winning through T3, because Juggernaut is still unrivaled in this matchup. (5) Pure Fire vs Twilight (-) A pretty specific matchup, but not too complicated to learn. At the early T2 stage Twilight Minions + Skyfire Drake is really hard to beat, because your own Skyfire Drakes get oinked and die without dealing damage at all. Twilight Minions are M Counters and stronger on a low void base than Scythe Fiends. Vileblood can be matched with Burning Spears partially, but crowd control can buy enough time to put pressure on your power wells. With energy level rising you'll have an easier time, because pure Fire will be able to match air control once Skyfire + Oink can be countered by an immediate double Eruption (155 power vs 150 power). Skyfire charges are also limited at 8, so keeping track of that might create further opportunities to win. Burning Spears trade stat efficiently into any Twilight unit except for the Crawlers. This makes them very strong considering Twilight lacks ranged units to kite them properly and Crawlers can be annihilated by an Enforcer. With Wildfire support on top of this you will win trades on the ground. Scythe Fiends can also help leveraging tempo fairly well and T3 is Juggernaut’s playground. (6) Pure Fire vs Bandits (-) Bandits can be a tough opponent due to its strong T2. With the tremendous buffs to Windhunter, your Skyfire Drakes lose a lot of value in this particular matchup. Gladiatrix will be an essential tool to burst down Windhunter in combination with Eruption and it is extremely important to disenchant Life Weaving that could block this combination. Bandits can build up incredible pressure even with small leads, so there might be a reward for playing a risk aversive early game in order to prevent a T2 snowball. Winning a trade against Bandit Spearmen and Windhunter in early T2 is fairly unlikely, but with Burning Spears you can at least prevent straight well focussing. If you get into a position to counter attack, look to play around close base attacks in order to utilize the high attack range from Firedancer. Saving the 50 power from Rallying Banner can make a big difference. If you manage to withstand the early attacks and trade evenly until T3 the game is almost won. Juggernaut will be unstoppable as he outtrades the Soulhunter as well as the Bandits Lancers with ease. Just make sure you don’t run into an Aura of Corruption with Stampede on cooldown. Difficult matchups: (7) Pure Fire vs Fire Frost (↑) This entire match up comes down to surviving against the Skyfire + Frost Sorceress combo. It converts leads really easily and almost always comes out on top in trades. Stormsinger adds up to a really good unit mix that pure Fire will struggle against. Once you lose some of the open field trades, the snowball will be hard to stop. As the pure Fire player you want to play really passive early on to survive with the help of undazed respawns and more space for good unit positioning. Ideally you get to expose the Shield Sorceress and hunt her down with an Enforcer. The shielded Skyfire Drake can be disenchanted by Gladiatrix to allow bursting it even if it’s not entirely energy efficient. Global Warming can also be helpful in this matchup. A nice little trick to ensure better positions in this matchup is to extend your T1 and take as many power wells as possible during this stage. The Fire Frost player does not have the best tools to force an early T2 (very expensive set up and no cheap siege tools) and even then you could play T1 vs T2 for quite some time. This allows you to invest more power into your economy instead of getting a rather low value T2 very early. Once you get tempo at the late T2 stage or manage to break skyfire charges at any given point, pure Fire will roll over. Frost Sorceress will be too vulnerable without a Skyfire protecting her and units get bursted before the shield cast goes through. T3 also ends up being clearly in your favor. Fire Frost has no tools to fight against Juggernauts in T3, which can be very important on large maps that allow uncontested tech ups. (8) Pure Fire vs Pure Shadow (↓) This is mostly a retrospective rating adjustment and not the result of any actual changes. We moved pure Shadow into the section of difficult matchups as we agreed that pure Shadow is just way easier to execute in this particular matchup. Burning spears might prevent a Harvester from turning games on its head, but you still can’t just sit back and wait for the Shadow player to make the first move. You are on a timer as removing Harvester power efficiently is not very likely. T3 is pretty hopeless either because Voidstorm can hard counter Juggernaut and even Netherwarp can stop stampede from destroying your base. This leads to a position where you need to create a substantial advantage at the T2 stage. You need to move out of your base and break the defender's advantage. With proper execution this is possible because of your superior trading tools, but any misstep might result in your opponent stabilizing until the first Harvester can be played. An approach to shut this concept down is to set up a Rallying Banner attack next to the enemy's base without committing entirely. You need to hover around the enemy’s base with a Firedancer, forcing the Shadow player to respond and push her away from his well. You can then summon Enforcers to protect your position and bait out further reinforcements. Your enemy either binds power into many units that can be countered by a Lava Field at some point or has to leave his base, losing the defender's advantage of spamming undazed Shadowmages safely around the power well. In both situations Harvester timings get delayed, which is good for you. Once you win a trade, you can just add pressure until you can steamroll with an Enforcer spam. A very useful micro trick here is using the Enforcers to dodge Shadow Mage attacks. During the charge animation they can outrun a shot consistently (try practicing this one in the Forge). If you dodge the first shot, your charge goes through allowing the Enforcer to win the 1v1 against the shadow mage without taking any damage. (9) Pure Fire vs Pure Frost (-) Even though this matchup is listed as the most difficult one for a reason, the level of pure Frost’s dominance is greatly overestimated in this matchup. Pure Fire has a very clear win condition in T3 and by making good use of tempo and defender’s advantage in T2 it is possible to reach this stage uncontested more often than you might think. If you carry Global Warming in your deck, your chances are even better. Overall it is important to play very defensively in T2 and avoid playing units that do not help you contest air control. Try to use Skyfire Drake against War Eagle and Gladiatrix against Skyelf Templar. Everything else is micro dependent. Your units are weaker in direct combat, but more mobile and you have more tools to retreat and reinforce around your own structures. After acquiring multiple units, always try to split your Skyfire Drakes against crowd control. Eruption can be used to add some extra burst, but don’t get baited into an Area Ice Shield. Try to keep as much distance from your opponent as possible as pure Frost is significantly weaker on open fields. Do not take any close wells and do not take risks like taking more power wells after winning a small trade. This will mitigate the pressure across this critical game stage. If you manage to outtrade your opponent heavily it’s better to counterattack and apply pressure by adding a Firedancer to your units mix. She can keep her distance from War Eagles and is easily protected by your army unlike the other melee units in your T2. If the Frost player starts switching to heavy ground unit support, you can always add a Rallying Banner later and run them down with Enforcers. If you trade well enough, you might get a shot of beating your opponent at late T2 or simply enable a T3 transition, where Juggernaut can take over. Considering you often want to take T3 before your opponent, Backlash can be extremely helpful whenever the Frost player decides to play extended T2 vs T3. [ PURE NATURE ] 1. Deck description Pure Nature might be the most skill expressive faction in the game as it has an endless amount of tools you can make use for micro and macro oriented playstyles. The deck has very strong crowd control and trading tools. With Energy Parasite there is a unique mechanic of generating resource advantages without setting up siege attacks in the first place. This leads to a fairly unique playstyle none of the other factions can offer. On the downside you lack defensive capabilities since nature does have limited access to defend its power wells, especially from a power deficit. High tempo attacks will always end up problematic. In T3 you have decent scaling since Parasite Swarm scales super well into the higher tech stage. Creative deck building can also be rewarded. With various tools like Mumbo Jumbo, Tunnel, Rootnetwork or even Enlightenment you can quickly adjust the deck to your personal playstyle and surprise opponents. 2. Matchup discussion Easy matchups: (1) Pure Nature vs Fire Frost (↑) This matchup is solid for you. Pure Nature is a soft counter to Fire Frost, since it's able to trade well into its units during the early stage of the game and in addition to that Parasite Swarm is a huge threat for the buffed 100+ power cost units. Fire Frost needs to establish good trades by using Stormsinger and Icefang Raptor (which got better after it received a mobility buff), which is something you can shut down especially after Ghostspears received stat buffs. Energy Parasite can always cause some trouble even though you probably won't get to use the ability too often against Skyfire Drakes, but you can slow down the tempo to safely scale up to the later game stage where Deep Ones are available, which guarantees successful trades. With Parasite against unsupported Skyfiredrakes there is more room to play out the game from ahead. In T3 you can close games fairly well even against Timeless One defense as pure nature has access to strong game finishing tools. Skill matchups: (2) Pure Nature vs Amii (↑) Pure Nature gained a lot of power in this particular matchup. Nightguard dropped down in priority and as she used to shut down Deep One entirely, this is a blessing for pure Nature. With increased cost and Parasite as a strong tool to target her, you can overcome the strong early phase of the Shadow Nature deck and outscale comfortably. You need to respect the strong Amii tempo play on low energy count (Motivated Burrowers, Darkelf Assassins/Amii Phantom + CC), but with Energy Parasites pressure and even stronger crowd control tools you can stabilize more often than not. Creeping Paralysis will buy enough time to keep your Spirit Hunters safe and establish Deep Ones on the board. With more energy income nature will win out on trading and reach a position for a strong counter attack. Attacking on low unit counts is not advised as Tranquility is extremely powerful on low energy levels. On T3 the decks are rather evenly matched with a slight edge to Amii, but this also depends on deck building. That said this matchup usually ends beforehand, because both decks are good at applying pressure and none of them is built to ensure late game scaling. (3) Pure Nature vs pure Shadow (↑) After recent changes Parasite Swarm reduced Harvester pressure, making Rogan Kayle less mandatory for this single matchup (full duration oink -> rogan kayle ability -> full duration oink still works though). This opens up more freedom in your slot distribution and you can build the deck more towards your preferred choices. The shadow matchup doesn’t change dramatically as a result, but you will get more consistent results against other decks. For Shadow in particular Deep Ones are still solid, but with buffs to Knight of Chaos and nerfs to Nightguard it is less snowbally. Energy Parasite needs to be used carefully since Shadow Mage can one shot them, but on the other hand you can force mage spawns far away from map relevant positions and abuse the fact that they are much slower than your Energy Parasites. Your trading tools are solid and Creeping Paralysis can be very strong against the slow Shadow Mages. Root + Parasite can be useful against unitstacking. But you need to outmaneuver the Shadow player at some point in T2, because Voidstorm scaling is really powerful. T3 definitely goes in favor of pure Shadow and puts you on a timer. You could play a T3 with Abyssal Warder here as a niche soft counter to Voidstorm, but he would be less effective in other matchups. (4) Pure Nature vs Lost Souls (-) Pure Nature does pretty well against Shadow Frost in T2. If you don't lose tempo during the T1 the odds should be in your favor generally speaking. Energy Parasites can generate a huge amount of pressure and if you micro them very well you are in full control of the game pace. Ghost Spears & Spirit Hunters beat the core trading units in Souls, but make sure you don’t get picked off by Frostbite. After acquiring a power lead you can use Deep One & Burrowers to attack the enemies economy. Nightguard is no problem anymore since her costs have been increased and the recently buffed Parasite can remove her reliably. Try to split up your army and attack multiple areas to play around Aura of Corruption. Surge of Light is your main tool to keep up pressure for an extended time and will give you a change to overload building protections. It is very powerful, but keep in mind you immediately run out of steam once Surge of Light charges are gone. There are different gameplay options in T3, but against Lost Souls building around Mutating Maniac and Nightshade Plant can really help. Without an appropriate XL counter Lost Grigori might cause you trouble. (5) Pure Nature vs Pure Frost (↓) The dynamic between pure Nature and pure Frost has changed to some extent. War Eagle dependency in T2 is much lower nowadays, because Frost received more tools to trade. This reduced Parasite Swarm’s hard counter function within pure Nature. Unpunished Frost Mage spam can be hard to deflect in the early game even though T2 + Creeping Paralysis is offering a newly buffed tool here. You need to neutralize this strategy by playing a very aggressive early game with your Swift unit, which is snowballed by a Shaman spam. The constant free healing will be a major threat as frost lacks burst early on. Use your mobility advantage to confine the enemy in his base. To contest Shaman healing other units than Frost Mage will be required, allowing you to delay the critical Frost Mage stacking as long as you keep up the pressure. In an ideal scenario your opponent over invests into mages and loses the game right here. But keep in mind that stacking T1 M units in this matchup might be heavily punished if your opponent finds an opportunity to take T2 and clear your army with War Eagles. In T2 you have to make use of Energy Parasites to force Stormsinger spawns far away from any potential fighting area. Frost is much better at trading around its own structures with various counters to everything your T2 has to offer (White Rangers, Mountain Rowdy, Stormsinger, Lightblade etc.). Use the terrain to get a mobility advantage and also sync up your Energy Parasite movements with the rest of your army. This forces a choice where your enemy either trades with less energy or allows the Energy Parasite to use its super powerful ability. Ideally your opponent gets mentally overstrained and messes up on both ends. Against War Eagle Parasite Swarm still works very well. Try to hover around cliffs as flying units will be immune to any sorts of Gravity Surge at those areas. Deep One spam is weaker than before, but still very potent. in T3 you can use Nightshade Plant to break through Timeless One defense, making high energy games less concerning especially considering the extra value Parasite Swarm generates against T3. Just keep in mind that you are not allowed to waste too many healing charges early on as your T3 heavily depends on Surge of Light. (6) Pure Nature vs Bandits (↑↑) While listed as the worst matchup previously, the T2 interactions changed drastically. Deep One is not a beast anymore giving nature a much more reliable counter to Bandit Stalkers. Ghostspears and Spirit Hunters have been fairly vulnerable to Bandit Minefield in the past, but Deep One can easily move out of the radius and pull one of his enemies away from your wells negating the zoning effect entirely. Energy Parasites can apply constant pressure, especially if you prevent your enemy from getting the map center, to slow down Bandit Sniper. If you make good use of nature's skill-expressive tools you should be slightly favored in T2, because Creeping Paralysis & Hurricane are an excellent way to shut down Rallying Banner + Darkelf Assassins. Strong AoE damage tools like Thunderstorm or Mutating Maniac can stop heavy Bandit Lancer/Cultist Master spam. If your deck can handle the pressure from Soulhunter, you are set up to win. While nature favored on perfect execution, Bandits late T2 pressure can still be extremely difficult to deal with and always needs to be respected. (7) Pure Nature vs Pure Fire (↑) While still challenging, pure Fire can be dealt with nowadays. Parasite is a new tool in your kit to attack Skyfire Drake spam at power limit and Creeping Paralysis can be used frequently to catch Firedancers and Enforcers off guard. You need to focus on trading well through the early game, because you are not allowed to fall behind ever. Fire can take down your wells very quickly, but as long as you get to diminish the pressure from Fire’s strong Air control you will be able to scale. Deep One + Spirit Hunters is a very strong trading combo, because Deep One can draw a lot of attention, enabling Spirit Hunters poisoning all the counter units constantly. Don’t tunnel on power wells, because the damage from Burning Spears & Wildfire can’t be ignored. Try healing up your Deep One right before it drops below 300 hp unless you know your enemy already reached his power limit. You might bait greedy enemies into wasting an Eruption. Don’t spam too many units at one area to avoid Lavafield value and use excess energy for spell support, split attacks or Energy Parasite distraction. Another option of winning this matchup would be a successful Parasite Swarm swap. You can’t rely on it, but getting an unbound Skyfire Drake is close to game over. In T3 Fathom Lords can be really solid trading tools, but they can not outpace Juggernaut so do avoid T3 if possible. You can make use of another trick here though and add Mumbo Jumbo to your deck. Juggernaut often walks alone and the spell can take his ground presence away, making it impossible to disenchant any cc spells. (8) Pure Nature vs Stonekin (↑) Stonekin slowly outscales pure Nature during t2 as Stormsinger stacking is more effective compared to other Frost splash matchups since Stonekin has the nature cc sources to support them against Ghostspears, Spirit Hunters or Deep One. With Crystal Fiend support this used to be unbeatable, but you can potentially remove the unit with Parasite nowadays. Burrower spam also is less of a problem unless you are behind considering Creeping Paralysis can buy time with its long cc duration. Even if it’s dodged the spell can force Burrowers to move away from power wells making them susceptible to Ensnaring Roots. But as you won’t win through normal unit trading it all comes down to Energy parasite micro to generate power leads. Deep One pressure, Parasite Swarm swaps, cc chains etc. can work, but only if you get ahead. In T3 Mutating Maniac can be a game changer as the poison cloud is a lot cheaper than before, which allows you to counter heavy unit stacking more efficiently. Overall the matchup is still stonekin favored, but only to a lesser extent. Difficult matchups: (9) Pure Nature vs Fire Nature (↓) This matchup got more difficult than before. Deep One lost some of its hp as a compensation for the buffs Nature received across the board and Fire Nature benefits the most from that power shift as the faction has solid counterplay to Pure Nature's newly buffed tools. Burrower/Twilight Crawler + Skyfire is the most mobile set up to create pressure on the map and Creeping Paralysis gets outmaneuvered. Parasite can be helpful against Skyfire Drake, but with Disenchant you can’t guarantee a removal, because unlike in the pure Fire matchup Fire Nature usually saves up power for spells instead of investing everything into the initial unit set up. Slaver can stop Deep One in its tracks and has dangerous burst potential with the 450 damage passive that can be triggered any time. Again, Mumbo Jumbo is a potential gamesaver. As Fire Nature often doesn’t invest too much power into units during an attack you often face 1x Burrower + 1x Skyfire attacks. This can be countered by Parasite Swarm + Mumbo Jumbo on the Burrower denying ground presence for a Hurricane. Your opponent has to sacrifice the Skyfire or even allow the swap, which would be a game changing trade with how powerful unbound units are. T3 is extremely risky, because Fire Nature has more flexible options in terms of summoning the Nightshade Plant. [ SHADOW NATURE / AMII ] 1. Deck description Shadow Nature is my personal favourite deck. It rewards proactive and aggressive gameplay during the early game and it's playstyle is really fast paced. You've got no L-unit to rely on in offense, neither do you have any building protects or high defensive capabilities. Your strength lies within strong split attacks and aggressive open field skirmishing by combining the powerful shadow splash units with the cheap nature crowd control. At later T2 stages the deck doesn't offer as much as most decks, but you can still rely on a very solid T3 to close out your games once you managed to get ahead. Alternative deck 2. Matchup discussion [Reminder: Amii Paladins just got released, so some of these matchup impressions might change a little bit based on how well the unit performs - I will update the overview during the process] Favorable matchups (1) Amii vs Lost Souls (-) Amii has been known as a specific counter for Lost Souls for a long time and this functionality has not changed. Whereas both factions have almost the same set of core units, Amii has much more effective crowd control. This leads to distinctive advantages in trades. Your early T2 is clearly superior and you can set up constant pressure to a point where your opponent gets overwhelmed. The best way to snowball an advantage would be to activate frenzy on multiple Nightcrawlers at different bases and overload building protects with a well timed Motivate. Ideally you look for a timing where Coldsnap is on cooldown. In mid T2 Shadow Phoenix can also be a very powerful finisher against well clusters that synergizes extremely well with the cheap nature cc to secure strong dives. Lost Reaver + Live Weaving is the most powerful tool for counter attacking you need to respect, make sure to cycle through Nature cc and Tranquility to keep him busy. Darkelf Assassins and Amii Phantom can be used to kite and deal significant damage, even without a direct L counter. Even though the matchup is Amii favored, the main downside is the high micro requirement for execution pressure all the time. The Souls player has the luxury of scaling, he can play defensively fishing for a good Nasty, Aura etc. in order to scale up to T3. At this stage Amii ends up losing so you need to be proactive and put your units into much more dangerous territory. But if you practice this matchup enough and constantly force these beneficial T2 unit trades, you can toss any Lost Souls player around like a puppet. Skill matchups (2) Amii vs Pure Shadow (↑) Pure Shadow is easier to play against nowadays. As Tranquility allows you to kite Harvesters into infinity you don’t really sit on an early timer to get something done. Shadowmage might deflect your early attacks effectively, but as long as you play on an open field and use your cc well, you should be fine. Shadow Phoenix provides a great AoE damage tool against low pure Shadow units and Ensnaring Roots can counter Netherwarp dodge attempts. Amii Phantom is very strong in this matchup too as she leverages tempo lead very well. Against Harvester you need to play chain cc. Do not play Aura of Corruption carelessly as buffs or Skeleton Summons might counter this. From a leading position an Amii Phantom spam is able to stop a Shadowmagespam since you can use an oink to set up an engagement. With their melee mode they can disable ranged attacks, which allows them to win a duel against both Shadowmage or a squad of Darkelf Assassins. Nightcrawlers are a big threat, but for that you can switch some of your units into ranged mode and kite well due to the slow effect. Amii Paladins can be useful to trade into M oriented compositions as well, while also granting the setup for a strong nasty surprise. But at some point you need to make your move as T3 is difficult to play. Voidstorm/Aura of Corruption/Netherwarp are way too good at shutting down any aggression Shadow Nature has to offer in the late game. (3) Amii vs Fire Frost (-) Fire Frost is another faction you need to beat down in the early game. Fortunately Amii has the tools to do so, but you need to make sure you don’t mess up. One massive Freeze or Lavafield might shut down early aggression which is something you want to avoid. Fire Frost is rather weak against S units. Therefore, you want to rely on Darkelf Assassins and Amii Paladins to get ahead. Icefang Raptor always needs to be respected and Amii Phantom can help kiting the unit. Amii has a pretty clear advantage in the early T2 stage. Nightguard is still an option in this matchup to deal with expensive shielded units despite the nerfs. Fire Frost usually needs a lot of time and resources to set up their unit mix, which grants your Nightguard enough safety. If the game goes to a higher void level you need to solidify a strong power lead as Lavafield can be used more frequently and you do not have the tools to match that outside of micro intensive split attacks. Your units don't have a very large hp pool which makes them vulnerable. Fortunately you can still close out games by reaching T3 as Cultist Master + CC is absurdly strong when ahead, but you should never underestimate the potential scaling options of a frost splash deck. (4) Amii vs Pure Frost (↓) Pure Frost used to be a very easy matchup for Amii considering Nightguard + cc used to shut down any attempt of pure Frost staying in this game. But as Nightguard got a tremendous nerf and Mountain Rowdy ends up being extremely good against ground unit stacking the matchup dynamic changed. Tranquility is a worthy replacement and the new card can help you with low energy skirmishing, but Frost will try to stall out the early T2. With the ability to scale by defending around their own base, this sets up Frost to win in this matchup. You need to break this set up, because even though you can prevent War Eagle pushes with Aura of Corruption, Frost's late T2 scaling is clearly superior. You need to make use of your cc tools, stack Darkelf Assassins and build up leads through high pace gameplay. Use Amii Paladins to circumvent Area Ice Shield with their reflection ability if necessary. A small trick that can turn the tides in this matchup is the green Dryad. Her passive negates the unholy trance downside from Darkelf Assassins and allows them to attack for 20 seconds. On top of that the aura can block poison/DoT effects, which is extremely powerful against Mountain Rowdy and might surprise even a very experienced opponent. If you play high paced in T2, you will most likely stay ahead on the power curve and even though your scaling might be inferior, T3 can be a very powerful weapon to close out leads as Ashbone + cc and Cultist Master split attacks can be overwhelming, even against a powerful Frost defense. (5) Amii vs Stonekin (-) Against a player, who it not familiar with this matchup, you can probably just win this matchup by disabling some of the expensive stonekin ranged units like Stonetempest or Aggressor with Amii Phantom. She can disable half of the units and match Stormsinger equally in ranged battles. Supported with Dark Elf Assassins and crowd control you often get to overwhelm your opponent and snowball out of control. Make sure to split your Darkelfs against Hurricane (Triangle Formation) and chase down any ranged unit with one Amii Phantom. Throwing in Burrowers or Frenzied Nightcrawlers to increase pressure onto buildings is a valid strategy, but make sure to get rid of Stone Shards quickly. Against well clusters Phoenix can help to overload building protects, especially if you manage to secure a revival. T3 can be used to finish off persistent opponents as split Cultist Master or any supported XL unit can overload Stonekin T2 defense. But be careful with focussing too much on T3, because Stonekin might also play for that dependent on slot distribution. A 4 card stonekin T3 will beat your setup most likely. (6) Amii vs Pure Nature (↓) With pure Nature’s additional tools to punish early aggression and functional counterplay against Nightguard through Parasite, Amii is at a slight disadvantage in this particular matchup now. That said, your early trades are still powerful and especially with tranquility you can shut down the high cost trading units by surprise. The spell is very versatile and can be useful against nature across the entire game. As your trading tools are heavily outmatched by Deep One + gifted catch at higher energy levels, you need to get ahead. Burrowers can be great tools to apply pressure and outmaneuver the nature defense and leverage leads, but one misstep and a Creeping Paralysis might put an end to your push. In T3 your best chance is winning through a buffed XL unit as Cultist Master usually ends up being unable to overload the nature cc sources. Difficult matchups: (7) Amii vs Bandits (↑) With the introduction of Mine Field it became difficult to utilize the Darkelf Assassin spam in order to break through the enemy's base. With Bandit Stalker being a strong counter to both Nightcrawler and Burrower this matchup get really tough. Fortunately it is not as oppressive as before, because both of these troublesome cards received nerfs. Amii Paladins can be an interesting choice as they trade well into Bandit Stalkers and even reflect Bandit Minefield damage with their ability. They might grant your Darkelf Asssassins a lot more breathing room to trade well as Amii will clearly come out on top whenever Minefield is on cooldown. Always try to split accordingly and make use of your cc advantage in order to build leads by winning trades over and over. If you outmaneuver a Bandits player once this quickly results in a destroyed powerwell as the faction neither has crowd control nor building protects. You need to avoid high void level games at all cost as Bandits is another faction that can make good use of Lavafield to outscale you. Determine the pace of the game by trading a lot. As Bandits usually tends to stack a lot of units around a Rallying Banner, it might be a great opportunity to set up a powerful phoenix + cc combo to relieve a lot of pressure. (8) Shadow Nature vs Twilight (↓) Twilight does have a certain advantage in this matchup as the efficiency of Skyfire Drake & Twilight Crawlers increases tremendously due to the strong synergy with nature support spells.This strictly limits the trading advantages you have. Your best way of applying pressure is to play on a low power level. Most Twilight units are expensive and the faction is reliant on melee units. This makes Nightcrawler and Darkelf Assassins really strong in skirmishes with very limited power. In order to achieve this you want to play hyper-aggressively right from the start. Constantly look for trades, punish extra well attempts, offer base trades and don’t wait too long before taking T2. This is your best shot at winning this particular matchup, but if you don't get a substantial advantage before Lavafield spamming is an option, you will most likely lose. Burrower + Skyfire attacks are really hard to defend at some point and once multiple Vilebloods enter the field, the lack of an L counter will be noticeable. Therefore, Twilight has an easier time playing this matchup once there is a reasonable amount of power available. On T3 things will turn into your favor again as you can delay and remove Nightshade Plants fairly consistently, but you won’t reach that stage so easily when playing this matchup. (9) Shadow Nature vs Pure Fire (↑) This matchup used to be one of the most one sided and brutal ones in the entire game. Pure Fire remains as the most difficult matchup, but it is less oppressive than before. Amii Paladins can be a really useful tool since it’s the only unit that does not get totally outmatched by Enforcer. They are a much more suitable M counter, that matches the raw trading power and dps pure Fire has to offer. With a well timed ability a Wildfire can be even utilized to burn down the Fire player instead. But Amii Paladins are prone to kiting especially since their powerful ability does have a long cooldown. If you lose tempo at any given point, pure Fire can always use this to immediately deal damage to your economy by taking out 1 or even 2 power wells with Firedancers. Without access to air units or a high damage nasty surprise it gets rather tough to deal with the Rallying Banner siege set ups. All of your other units are very susceptible to Enforcer + Wildfire combos, your cc is weaker against the ability to resummon undazed units at any time. Wildfire might also prevent powerwells from getting repaired. With the strong aoe damage tools to block almost any counter attack, it gets really difficult to stay relevant at higher energy levels. If you manage to survive and reach T3 though, Brannoc + Heal + Lifeweaving can outmatch a Juggernaut in a duel. As the new Amii spell Tranquility can disable a Juggernaut more effectively, the fire player needs to decide whether he wants to get rid of the effect or removes the Life Weaving from your XL unit. Either way you will come out on top. [ FIRE NATURE / TWILIGHT ] 1. Deck description Fire Nature is probably known as one of the most solid decks, because it has pretty much tools for everything. You have a solid counter for all unit types and sizes, instant damage spells to remove spam based attacks, crowd control to ensure good trades, strong siege units to launch attacks and control at both ground and air department. The big variety within its T2 is Fire Natures biggest strength and makes it one of the most well rounded decks overall. That said, Fire Nature might struggle at other Tech levels due to slot issues. In order to play towards its T2 strengths most players prefer cutting slots in T1 or T3 which might hurt the deck. Alternative deck 2. Matchup discussion Favorable matchups: (1) Twilight vs Pure Shadow (-) You come out on top in the various unit trading patterns. Twilight Minions, Crawlers and Skyfire Drake combined with the damage and crowd control spells tend to win all kinds of skirmishes on open ground. Pure Shadow tends to struggle against that, especially in the mid T2 stage, because all of its low cost units are vulnerable to Lavafield, especially Shadowmage. You need to be aware of flanking units to prevent a nasty surprise against your Skyfire Drake. Your defense against Harvester is also pretty nice due to the highly efficient Root & Disenchant combo. Just leave some Skyfiredrakes and a Gladiatrix behind that and they will take the Harvester down before he reaches your power well/orb. To stay relevant during mid and late T2 you can add Vileblood into your deck to increase the amount of pressure you can apply to the power wells. While this matchup is listed as one of the easy ones, keep in mind that at a really high level of play the matchup starts turning around, because Netherwarp really has an unparalleled amount of playmaking potential. (2) Twilight vs Pure Nature (↑) Your early T2 is superior due to the lack of an M/M counter in the pure Nature deck. This is something you can use to dictate the pace of the game right from the start with Burrower pressure. All you need to take care off are Energy Parasites. Defending them during the early game is your top priority, because it probably is the only way you might fall behind outside of losing in T1. Air Control usually pays off, because Skyfire Drake trades well into most units, but be careful with the newly buffed Parasite spell. With the use of crowd control you can easily prevent Parasite Swarms from controlling your units. With Burrowers and Skyfire Drake you can set up high tempo attacks, avoid high value cc spells and easily take down power wells whenever you have a little bit of tempo. Slaver is great tool against melee L-units, which deflects any attempts of Deep One pressure until mid T2. As long as you defend Energy Parasites and don't play too slow in matchup, you should be set up to win. (3) Twilight vs Amii (↑) In this matchup your defensive capabilities are straight up better, which leaves you in a very comfortable position. You have good ways to counter Nightcrawlers, Dark Elf Assassins & Burrowers around your own base and in case your opponent over commits at some point you can launch insanely powerful counterattacks, that are way harder to defend in return. Fire Nature is just a little bit more well rounded in T2 and can attack Amiis weakness of being built around small and medium ground units exclusively, which increases the efficiency of Lava Field over time. Amii Paladins need to be respected here and might be a setup for some strong damage combos, but apart from that you can keep them in check with Hurricane. Vileblood is an extremely effective tool on higher power levels, because besides Tranquility there is nothing that can keep melee L units in check. T3 is all about tempo as both set ups are fast paced, but not that strong in defense. Nightshade Plant can always turn games by surprise if it’s used in a creative way, but it usually is more wisely to look for a late T2 victory. Skill matchups: (4) Twilight vs Fire Frost (-) A very interesting matchup. The early game is about Twilight Minions vs Icefang Raptor. Your support is slightly better, giving you an early advantage in this matchup. To some extent the matchup feels similar to the pure Fire one play style wise. Twilight Minions + Skyfire Drake can be used to trade very efficiently early, but at the later stages of the game you might start to struggle due to the value of Frost Sorceress in multi-unit compositions. Shielded Skyfire Drakes are hard to remove and Twilight Curse might be a consideration to surprise the enemy by disrupting his unit composition. The shielded drake usually guards more vulnerable units like the Frost Sorceress or Warlock and an unexpected removal might expose the remaining army. Either way you want to keep up the pressure and try to attack the enemies units constantly before the Frost Sorceress ends up generating too much value. Nightshade Plant can be an excellent game finisher, but on the long run Fire Frost will come out on top in high energy late game battles. (5) Twilight vs Pure Frost (↑) Twilight Crawlers make a major difference in this matchup. On large maps they outmaneuver War Eagles due to mobility and they easily contest White Rangers to create more space for your Skyfire Drakes. As pure Frost plays a very slow game, Breeding Grounds has to be mentioned in this particular matchup. The card is overpowered anyways and I usually don’t want to promote such things, but the mechanic is so good against low mobility scaling T2s. Otherwise pure Frost will be able to secure air control in late T2 and establish a strong set up.You want to utilize your crowd control advantage at the early T2 stage to gather a better position on the map and ideally a certain energy lead. If your opponent is too greedy and goes aggressive too early, you can outtrade with Skyfire + Minions/Crawlers + Oink. If Twilight Minions get matched by White Rangers or Ice Fang Raptor consider transforming them into a vileblood to outmatch the counter system and also put a powerful damage buff on your unit. If you keep up a high pace, pure Frost will be unable to stabilize. Otherwise Skyelf-Templar and White Rangers get to contest Air Control at some point and with War Eagles added, counteraggression starts to be a possibility. T3 is something you want to use to close out games, but shouldn’t be considered without any lead. Nightshade Plant is literally built to close out games quickly, because the Transformation spawn will allow you to play nasty mind games whenever you have a tempo lead. But if this early aggression can be stopped, Coldsnap, Lightblade and Building Protects might be problematic. Thunderstorm can be extremely good in this matchup as Frost often stacks up big armies. Especially a large T2 push against a seemingly greedy T3 can be shut down by a Thunderstorm potentially turning the tides in this matchup. (6) Twilight vs Pure Fire (-) Twilight shines during the early T2 stage with Twilight Minions + Sykfiredrake, while Pure Fire will outscale in late T2, where Scythefiends + Ravage + Wildfire take over. Since Pure Fire scales with high void power you should actually try to play your T1 accordingly to avoid this. Playing a short, but aggressive T1 is highly beneficial. Try to get a small advantage, but then don't hesitate and make your fast transition into T2, ideally on 3-4 wells. Also look out for a timing where your enemy binds too much energy into Thugs, because this unit scales poorly into T2 in particular. With a small tempo lead in T1 you can consistently snowball and finish the game. If you still struggle in this matchup consider the addition of Vileblood in your deck, because pure Fire struggles against L units, especially the ones with high dps against buildings. Burning spears need to be respected and either need to be focussed or cc’d. Twilight Brute can be a strong addition as their trading pattern against Scythe Fiends is very strong which reduces the amount of counter pressure on the long run. Avoid T3 unless you are far ahead, Juggernaut can be scary. (7) Twilight vs Lost Souls (-) I think this is one of the most intense matchups in the game. You have the upper hand in later stages of T2 due to the efficiency of Burrower + Skyfire Drakes during attacks, but once the game reaches T3 Shadow Frost can turn the tides and straight up outscale you with its Timeless One T3 based set up. This really puts a very high emphasis on the early stage of the game, because a small lead can determine whether the Shadow Frost player is able to hit T3 safely or not. Utilizing your crowd control to win open field trades is very important. When attacking, always consider positioning your units in a way so Coldsnap or Nasty Surprise don’t hit your entire army. Once you reach the high void T2 stage, lots of counter unit setups can be cleared with double Lava Field, because Shadow Frost doesn’t have access to air units. This can be a very efficient way to convert your high power income into pressure at later stages of the game. Shadow Frost probably does have the easier win condition, but once your micro is on point and you get to generate early tempo leads consistently you will be able to produce very good results in this particular matchup. (8) Twilight vs Bandits (↓) After Bandits received changes, this particular matchup was not rated correctly. As your T2 is built around melee units you need to play around Bandit Minefields cooldowns to get something done. Especially before the Bandits nerfs this was extremely opressive combined with Bandit Stalker shutting down beast units entirely. You either had to go for split attacks or try to bait the minefield and launch a strong attack immediately afterwards while facing strong counter units. Bandit Stalker are weaker than before, but still do shut down both Twilight Crawlers and Burrowers effectively and without tempo you can't really use them well during attacks. With Darkelf Assassins being a constant threat to any of your units, you rely on good crowd control usage in order to protect your weaker trading units from running into their counters. Twilight Curse can be useful to shut down Windhunters by surprise to regain air control. It’s most effective right after the enemy buffed the Dragon as this buff would be negated through the forced Transformation. At T3 Mutating Maniac is amazing and the sole reason this matchup is listed in the even category. The unit is amazing against Bandits, because it hard counters Bandits Lancers. The 1vs1 is a stat efficient trade and once multiple ones get used, poison cloud + root straight up annihilates them. With a spammable XL counter for normal trading this directly lowers the impact Soulhunter has, granting a clear win condition. Difficult matchups: (9) Twilight vs Stonekin (-) Stonekin can be extremely uncomfortable to play against as there is little to no room to attack it. Stormsinger + Spirithunter + nature cc is such a brutal combo, that easily wins trades in almost any situation. Stonekin has very powerful tools to convert early leads into victory from constant pressure to building up armies around a Breeding Grounds for infinite value. Crystal Fiends are also quite scary and always need to be removed by Skyfire Drake + Oink/Eruption. Otherwise it will just generate too much free value by applying healing auras over and over. With Burrowers around the corner your power wells are always in danger whenever you lose a trade. To strike back you usually rely on a mistake by your opponent. Fortunately your snowball tools are fairly strong whenever that happens. A well executed Burrower spam usually is your best option and really benefits from a power lead. Stonekin has no strong burst tools and investing power into building protects and cc will leave them with really low dps options, allowing you to keep up the pressure for a very long time. Another way of attacking with a power lead would be the Vileblood + Ravage set up on low energy level, because you should be able to make sure Aggressor can’t be played (or even try to bait the aggressor and cheese it with Mauler). You will get opportunities to gain full control of this matchup, but if your enemy really knows what he’s doing, the stonekin matchup is completely doomed in T2. [ PURE SHADOW ] 1. Deck description Pure Shadow is one of the more unique decks, because it has its own powerful faction carriers with Shadowmage & Harvester in T2. This gives pure Shadow big powerspikes, that can then be utilized to create leads across many situations. You lack hard-cc in this deck, but you have the highest dps/power unit & the only XL unit in the entire T2 as a trade off. While easy to learn, Pure Shadow scales extremely well with execution level and mastering it at the highest level can be extremely challenging. Shadow is a deck with a lot of playmaking potential, as most of your spells and abilities can be combined with Nether Warp in some way. One of the main weaknesses is the T2 charge limitation, since Shadow Mage got only 12 of them. In T3 you have multiple powerful options, which depend on the element of your T3 orb. Staying pure shadow gives you access to Voidstorm, a global removal tool. Satanael has also been buffed to a very powerful state for more offensive set ups. However, splashing towards Frost in T3 can set up things like Lost Grigori taunt + Nether Warp combos, which can be deadly as well. 2. Matchup discussion Easy matchups (1) Pure Shadow vs Pure Fire (↑) Not too much changed about the matchup dynamic, but we rated this into the easier range considering it is easier to execute from the pure Shadow side. As already mentioned in the Pure Fire section, this matchup is all about timings. As long as you play for a Harvester spike attack there is not a lot of counterplay left for your opponent even with the addition of Burning Spears. The can not be ignored easily, but with some support spells like Nether Warp and Life Weaving is will be really difficult for your opponent to remove him without losing at least one power well. In order to reach this particular power spike Shadow Mages and Darkelf Assassins will be able to buy time in the early T2. Let your opponent come to you and invest the extra energy for a Rallying Banner, then try to warp mispositioned units into your base. This makes it much easier to keep a good unit split and avoid getting targeted by a strong lava field. Another option to take out pressure is an extended trade around the Rallying Banner finished by a well timed Corpse Explosion. If you get ahead you do not want to well up, but wait for your Harvester. Pure Shadow might be winning at T3, but in late T2 you do not stand a chance against Enforcers supported with Lavafield and Wildfire. You want to get ahead substantially before this stage hits. Using leads to set up a Harvester attack is the best way to achieve that. If that isn’t enough to win the game, try to stabilize and play for the next Harvester. If you run out on Harvester charges before the game is over (unlikely), you can still fall back to a very strong T3 as Voidstorm harcounters Juggernaut & even Netherwarp could straight up cancel a Stampede. While this matchup is still winnable on both ends, it is now listed as an easy matchup for pure Shadow as a straightforward Harvester attack is much more forgiving and easier to execute. Skill matchups (2) Pure Shadow vs Fire Frost (-) Fire Frost shouldn't be the biggest threat to you. Shield Drakes and Icefang Raptors are not too hard to play against and as long as you respect the potential of a well placed Lavafield, Fire Frost shouldn't really give you too much trouble. Harvester can be really effective, but this depends on deck building and requires your opponent to play without Lightblade. However, most of the time you will face combinations around Stormsinger, Gladiatrix & Skyfire Drake and with any tempo lead your Harvester won't be stopped anyways. Coldsnap can be countered as it has a cast animation, which is long enough time to dodge it with a Nether Warp. This can be great in trades or simply get a Harvester in a position to destroy powerwells and orbs with the enemys cc being put on cooldown. But in many games you will end up in a T3 position, where you can utilize Cultist Master for pressure and combine the dead Nightcrawlers with either Shadow Insect for strong follow up trades or Corpse Explosion to blow up the economy buildings, even against buildings protects. Always try to attack well clusters and make good use of you high AoE burst. Voidstorm can negate any counter pressure, which lowers the risk of high energy investments during your attacks even when they don't succeed immediately. (3) Pure Shadow vs Bandits (-) Pure Shadow has clear counterplay to Bandit Minefield, which immediately reduces the pressure in this particular matchup. Whenever the spell is played you just warp away from any danger. As a result it is important to not waste Netherwarp and use this spell reactively. Most of the time you will be trade into a mix of Bandit Spearmen, Darkelf Assassins and Windhunters. Removing the air units from Bandits is a tough task and you always want to look for opportunities to either attack them with motivated Shadow mages, Nightcrawler + Nasty surprise or straight up remove them with Aura of Corruption whenever they get double or even triple buffed. Knight of Chaos (b) can always buy time against heavy Rallying Banner attacks and Corpse Explosion or Shadow Phoenix can annihilate stacked ground units effectively after any extended combat. If you defend successfully, power level will rise and Harvester or T3 become an option. While it can be tought to get something done with Harvester from an even position, because Windhunter ability and Bandit Minefield are fairly powerful tools to keep him away from wells, the card is excellent whenever you have some tempo. Bandits neither has hard cc nor can protect its buildings in any way, which is ideal for your Harvester. T3 is another reliable win condition for you as Bandit Lancers are not that impressive against Cultist Masters and Voidstorm is a hard counter for Soulhunter. If you even play something like Satanael, you will be unstoppable at this stage of the game. (4) Pure Shadow vs Amii (↓) The release of Tranquility gave Harvester a hard time in this matchup. As the unit can be cc'd permanentely, you need to be a little bit more creative in order to win this matchup. Shadowmage functions decently well as an all round counter, but her usage is limited by her charges. Avoid giving away too much tempo, Amii Phantom spam can be a serious threat. The unit might be more expensive than your ranged ones, but she can heavily outduel them due to the antimagic melee form, which snowballs whenever the amii player gets a significant lead. Split your units against nature cc and play for high energy skirmishes. Once more units get involved into trades, there will be more opportunities for you to make use of Corpse Explosion. More targets to hit and higher corpse counts are highly beneficial here. On the other hand you need to respect Shadow Phoenix + cc combos for the same reason. This matchup will mostly come down to some sort of outplay, may it be strategic or mechanical, as these factions are matched rather equally now. Shadow might have the upper hand at T3 due to more slots and voidstorm, but Amii's cc and healing spells scale well enough into later tech stages and definitely shouldn't be understimated. (5) Pure Shadow vs Lost Souls (-) Lost Souls can be difficult to play against. Darkelf Assassins & Stormsinger with Frostbite support are hard to deal with, even when using Shadowmages. Both factions like to work with higher power levels and as both factions tend to play on a lot of wells for that reason, Harvester will be usable frequently. Sometimes you even get to set up a double Harvester attack, which overloads building protects in seconds. Since you can dodge Coldsnap with Nether Warp there is absolutely no time left for the Souls player to recover unless Lightblade is available. After Nightguard got nerfed this is not the most unlikely and might have made this strategy a little bit more difficult for you. Fortunately Knight of Chaos ability cost reduction tremendously helps against Lost Reaver pressure and allows you to counter any brute force siege attempts, where the Souls player just buffs the unit constantly. You usually want to set up a close base scenario to reduce the impact of your mobility disadvantage and maximize your combat advantage (Shadowmage vs Stormsinger). Try thinking about this during your power well selection, even at T1. Close base scenarios often end up being played out very aggressively, leading to high value Corpse Explosions. Be a little bit more careful with Shadow Phoenix as the card is more foreseeable and Lost Reaver could soak up all the corpses denying the revive ability. T3 is somewhat similar, you want to play around short distances to maximize your Cultist Master efficiency, while the Souls player will try to outrun you with Silverwind Lancers and attack with Tremors if they find a good opportunity. Try to overload the protects with burst damage if you can. If you manage to take down a power well it leaves you in a great spot, because Voidstorm always allows you to reset the tempo. In such high energy level matchups Satanael scales really well and definitely should be considered. (6) Pure Shadow vs Pure Nature (↓) Any pure Nature matchup is about defending Energy Parasites appropriately. Shadow Mage seems to be an excellent counter due to her ability to oneshot the bug, but her low mobility is a concern. A good nature player will just hover from base to base forcing a lot of bound power. This will slow you down in terms of tempo, but keep in mind it’s one of your enemies most powerful win conditions. Preventing Energy Parasite abilities with a high investment is much better than ignoring them. Apart from that your early trades are fine, just keep in mind that heavy unit stacking will be punished by cc + parasite combos. Unit micro and a good unit split are crucial in the matchup. Knight of Chaos (b) is a solid tool against pure Nature as the faction is fairly reliant on melee units when it comes down to dealing damage against structures. He is even more important now after Nightguard received a hefty nerf and lost her position as a Deep One hard counter. Harvester can be strong from ahead, but with Parasite Swarm being fairly good at countering XL units now, you need to look for a good timing rather than playing the unit whenever you get to 300 power. If you want to play it safe you can always try to scale towards T3 and win this matchup there, considering pure Shadow has really powerful options at this stage and nature will not be able to keep up with that most likely. Difficult matchups (7) Pure Shadow vs Pure Frost (↓↓) With Nightguard being less powerful, this matchup got much more difficult to play. You can aim for strong Darkelf Assassins + Netherwarp play to catch opponents off guard, but apart from that Frost has the better trading tools in T2 and a strong defense against Harvester on top of that. Your best win condition would be a strong and aggressive early game with heavy open field trading where you contest as much map control as possible followed by a rather defensive mid T2. Attacking against Eagle/Mountain Rowdy is rather pointless with your unit set up. You try to use a better position on the map in order to endure the mid game. Use Netherwarp to dodge Coldsnap or War Eagle screams and Aura of Corruption to punish strong single area attacks. If you manage to reach T3 your chance will be better as Cultist Master generates early pressure and your late T3 scaling is exceptional with powerful options like Satanael. Another niche way to attack pure Frost in T3 would be the newly buffed Nox Carrier as the unbound Rippers can build up constant pressure which is working nicely against the Amii Ritual design. (8) Pure Shadow vs Fire Nature (↓) Skyfire Drake + Twilight Crawlers in combination with cc is difficult to deal with as a pure Shadow player. There is quite a large amount of playmaking you can do around your Nether Warp to make advantageous trades, like warping out of Lavafield, catching high priority units off guard or using the spell on your Harvester to dodge Ensnaring Roots by prediction (if this works you literally win the game off that). Splitting your units against cc & Lavafield is criucial. As long as your Shadowmages are well positioned you can take down the Skyfire Drakes (a motivated Mage oneshots a Skyfire Drake). Knight of Chaos can slow down heavy Vileblood attacks and upon getting a tempo lead you can transition towards very explosive attacks. Corpse Explosion usually grants many opportunities to finish off a damaged power well. That said you play a very risky matchup here as one mistake will allow Fire Nature to start a snowball you can not control anymore. If the match goes to T3 you should be in full control again regardless of your T3 color choice (Shadow or Frost). Lost Grigori + Netherwarp can shut down any attempts of ranged unit kiting (just activate the ability and port the units towards your Grigori), Nightshade Plant can be stopped by Aura + Netherwarp or Voidstorm. This matchup is quite challenging for you to play, but you've still got a very good chance to win it as long as your micro is on point. (9) Pure Shadow vs Stonekin (↓) The difficulty in this matchup is pretty much card choice depended. Stone Tempest & especially Razorshard can give your Shadowmages trouble and make this matchup close to unplayable. The high mobility, extra range & M-knockback of Razorshards are a real threat for your slow Shadowmages, especially in the later stages of T2. Teleport and knockback immunity also grant even more power against Netherwarp. It feels like the card was built to counter your deck. Numbers quickly add up and you need to be really good at trading to win this matchup, considering Stonekin has much more breathing room in T1 compared to the past. Removing big Stonekin attacks can be pretty annoying too, because Aura of corruption is a double edged swort in this matchup. The Stonekin player might just use the Aura for himself as protection to build up offensive Cannon towers (Corpse Explosion can be useful as a counter measure). Forcing a close well scenario in the early stages of T2 should be your best move because it makes Shadowmages much more efficient, similar to the Lost Souls matchup. It is easier to split them during an attack and you can always retreat with low hp units to heal them up quickly. On top of this you can utilize Darkelf Assassins and Nightcrawlers with their active damage abilities in a much more aggressive manner, considering you can react quicker once CC sources are on cooldown since you don't have to deal with the summoning sickness in these scenarios. Stonekin does not have strong burst tools, making the faction a little bit more vulnerable to constant pressure than others. Since Lightblade (purple) is a more and more established tool in Stonekin due to the increased popularity of pure Shadow, Harvester is not a good choice in this matchup and won't pay off, unless you are already ahead and look to close out the game. Most of the time you want to slow down the tempo in this matchup and look for an economy game leading to a T3 win, since Voidstorm can be a hard counter for T2 only decks (Stonekin often cuts T3 to play around more powerful T2 set ups) and even against a large T3 your tools are good enough to compete. [ FIRE SHADOW / BANDITS ] 1. Deck description Bandits is one of our top decks right now and very popular around high silver/low gold elo. The T2 is explosive with powerful rallying banner attacks and a wide arsenal of single buffs and damage spells to strenghten your attacks. On top of that the faction has an appropriate counter tool to almost any unit in the game, making it very effective in unsupported skirmishes. Major downsides are the lack of cc and building protection spells, which will make you vulnerable whenever you are behind in tempo and Minefield is cooldown. Due to its strong set of previously released core cards, there is more room for different deckbuilding options. This grants a lot of freedom to individualize the deck based on your personal playstyle. Alternative deck 2. Matchup discussion Favorable matchups: (1) Bandits vs Fire Frost (-) With Windhunter you have superior air control in this matchup even when facing shielded Skyfire Drakes. Your T2 trades very well into anything besides Stormsinger and Lavafield, which probably will be your biggest threat. Minefield can zone the Stormsingers and a Bandit Sniper in the backline can always generate strong value by sniping them with the ability. Once you get a lead you should be able to snowball it quickly by setting up a Rallying banner and spam Darkelf Assassins with instant ability activation. Overall a really good matchup for you due to the strong tools for converting tempo leads and since your T3 should perform quite well too it will be easy to break through defensive setups. (2) Bandits vs Pure Frost (-) A Bandits favored matchup, because Windhunter contests air control, limiting the impact of War Eagles. Pure Frost might have strong defensive capabilities with Templar, Stormsinger and White Rangers, but can’t really break out from its defensive formation during any stage of T2. Whenever you get a good trade you can use this position to snowball with air superiority and extra pressure from Minefield for zoning. Adding Bandit Spearmen to the unit mix can be a good choice as they attack Stormsingers and are rather durable against any War Eagle attempt. You want to accelerate the game as much as you can. Once you have enough energy to set up a strong attack, put down a Rallying Banner, chase down the War Eagles with Windhunters and walk up to White Ranges with Darkelf Assassins making sure your opponent has no room to recover anymore. You can keep up pressure forever and even if the Frostplayer manages to survive to T3 the matchup dynamic does not change here. Pure Frost usually lacks a good M counter here, which is ideal for Bandit Lancer split attacks. The ability can cancel Timeless one Freeze and Soulhunter can seal the deal, but keep in mind he requires Disenchant support to deal with the Freeze + Lightblade cc chain. (3) Bandits vs Amii (↓) As Amii is more reliant on small units than most factions, Bandit Minefield is absolutely cruicial to control this matchup. The cooldown nerfs had an impact as a result. Bandit Stalker shuts down Nightcrawler/Burrower pressure effectively, making this matchup fairly comfortable to play. Lavafield alone grants a scaling advantage against Amii. Getting outmicrod during low energy trades is your biggest threat, because with strong unit split and cheap cc Amii tend to win these. The Amii Paladins can be dangerous if you don't respect their active ability, the unit needs to be kited. They can reflect minefield damage and also counter your Bandit Stalkers when combined with Amii Phantoms. Windhunter can be a great addition to your unit mix even though Amii does not have any L units. The faction is fairly weak at contesting air on open field, giving you much more options to play with in trades. Diversifying your unit compositions makes it harder to counter in most situations and Bandits has a plethora of powerful units to do so. A good strategic approach in this matchup is a rather passive and prolonged early game (T1) with many power wells. Great energy income will be highly beneficial for your faction. Once you get to spam your spells, it will get incredibly difficult for Amii to keep up through unit micro. Due to the nature of this matchup it will rarely go to T3, which should be slightly in favor of Amii due to cc scaling and a fairly similar pool of meta units. Skill matchups: (4) Bandits vs Twilight (↑) Due to the previous lack of playdata the matchup wasn’t very well rated on our previous list. We had predicted this matchup to be rather even, but Bandits used to be a strong counter to Twilight the last time we updated the guide. A T2 faction reliant on expensive melee units got shut down by the area control Bandit Minefield established. With a double beast target (burrower + scythe fiends) for the Bandit Stalker it was quite an oppressive combo. With Minefield and Bandit Stalker receiving small sized nerfs and Twilight Minions +Twilight Crawlers being cheaper options than old Ghostspears + Scythe Fiends, the matchup is less oppressive than before. You can quickly break the map wide open by attacking multiple locations at once to reduce the impact of cc. Darkelf Assassins can deal fairly well with Twilight Minions. With Twilight Transformations being stronger now, Twilight Brute might also show up, which is a strong response to Bandit Stalker. Windhunter should beat Skyfire Drake and limit the pressure from any Vileblood attempt. Gladiatrix doesn’t really contest the air matchup as she loses horribly against Bandit Sniper. Be careful with double buffing Windhunters as Twilight Curse counters that otherwise. Avoid T3 at all cost, because Mutating Maniac + cc can turn this matchup on its head. Try to win this matchup at T2 by setting up powerful Rallying Banner attacks whenever you get ahead and only use T3 as a game finisher from ahead. (5) Bandits vs pure Fire (-) With Windhunter you can straight up reduce the zoning presence of Skyfire Drakes. As a result you will face a very ground unit oriented unit composition most of the time, which is an ideal set up for your AoE damage spells like Lavafield or Minefield. With Bandit Spearmen as a main trading unit you have a very strong tool to match the Enforcer and with Windhunter in the mix you also keep yourself safe from getting burned down by a really efficient Wildfire. The melee bonus damage is also useful against Burning Spears, that can not be ignored due to their ramp up damage. You can add Darkelf Assassin to counter them properly. Making good use of Ravage and Live Weaving to support your units against the high dps from Fire cards is crucial. You can keep up the pressure in T2, but this is a necessity in order to win. Even though you have the upper hand in T2, your units are straight up outmatched against Juggernaut. The XL counter is a threat for Soulhunter, Bandit Lancers get knocked around and you lack tools to protect you from Stampede. (6) Bandits vs pure Nature (↓↓) This matchup used to be one of the most brutal ones last patch. With recent changes to Deep One you are much more reliant on playing around Windhunters to gain control over the map. Playing around nature's strong poison and DoT effects here is crucial. Bandit Minefield is good against Ghostspears and Spirit Hunters, but fairly weak against Deep One. He can keep distance and take one of your units with him negating the zoning effect and limiting usage during siege. Bandit Stalker doesn’t counter Deep One anymore and Rallying Banner attacks are weak against Creeping Paralysis. In order to win the matchup you need to fall back to a much more dynamic approach by winning open field trades with a good unit split and utilizing your wide pool of units with strong combat power. Whenever you get ahead you can still make a strong transition towards a powerful Rallying Banner siege attempt. You can get a better position on the map most of the time, which can ultimately give you small advantages for trading. But always track the opposing Energy Parasites as they easily negate your tempo if you don't pay close attention to them. Zone them as effectively as possible and accumulate small advantages rather than brute forcing too early. Nature's defensive capabilities should not be underrestimated and if you lose a Windhunter to a Parasite Swarm, you will be in trouble. Late T2 is in your favor, but avoiding T3 should be a wise choice. Pure Nature could make use of Mutating Maniac, which is a big threat to your entire T3 (see Twilight matchup). Cultist Master is also less of an option against pure Nature with how many crowd control tools are available within the faction. (7) Bandits vs pure Shadow (-) Trading into pure Shadow can be tough, Minefield can help to force the use of Nether Warp and put pure Shadow’s most powerful spell on cooldown. Bandit Minefield can also be used as a tool to defend your power wells against the Harvester attempt, so the spell has great value here to buy time. Your trading units are solid and Lavafield is another precious AoE spell that pure Shadow often struggles against. Their smaller units usually lack high hp or reliable sustain options. Attacking against well splitted Shadow Mages can be difficult and pure Shadow has many ways to force them into good trading positions across the game, so this probably ends up being one of the more difficult matchups. Minefield nerfs might hurt your Harvester defense, but you can still fall back to Aura of Corruption for zoning in this matchup as buffs can just be removed. T3 will be very dangerous, because Voidstorm easily deals with Soulhunter and Cultistmaster gives Bandit Lancer a hard time. Pure Shadow can easily opt into T3s with 5 or even more cards, which will be hard to match with 2-3 T3 cards at best. (8) Bandits vs Lost Souls (↓) You do have a lot of tools to neutralize Lost Souls in T2. Bandit Sniper can deal with Stormsinger heavy compositions, Bandit Stalker out-trades Nightcrawler and the Minefield performs well against heavy Darkelf Assassin compositions. Attacking souls in T2 can be tough on the other hand even though Bandits are really good at it in most matchups. Rallying Banner attacks often get deflected by a strong Nasty surprise and without a strong siege unit you might be unable to punish a Souls player taking more and more power wells throught the game. To break through the Souls defense the early T3 stage has a high priority. Bandit Lancer will be a key factor to win this matchup, because even though Shadow Frost has an amazing T3, the faction lacks a proper M counter. Therefore you can put up insane amounts of pressure in T3 by spamming them at multiple locations. Use their ability to block Timeless One from activating the ability. Rallying Banner attacks can also be supported with Cultist Master spam to overload Timeless One defenses. Don't let the void level rise that much, you really need to put up the pressure to win. Soulhunter can help to finish games, but ideally requires good setup since Shield Building can delay attacks forever. If Grigori tries to disintegrate your Soulhunter, cancel the channel with your Bandit Lancers. Never let the Souls player stabilize, because he will win an extended fight in T3 due to charges and limited answers to Tremor attacks. Difficult matchups: (9) Bandits vs Stonekin (-) In T2 you will have problems to stand a chance against a good Stonekin player. Stormsinger stacking + Heal/CC can be really difficult to trade into and with its high tempo stonekin has some really brutal options to snowball from winning initial trades. Utilizing your Bandit Sniper well will be a key factor to survive this matchup and avoid being overwhelmed by a Stormsinger spam. Fortunately proper Stormsinger spam execution is not that easy when playing Stonekin and any other unit compositions in Stonekin end up being significantly weaker. This makes this matchup a little bit more playable outside of upper echelons of play. Minefield shuts down small and immobile units fairly well. Once you get ahead you can set up pressure by Rallying attacks, because Stonekin lacks AoE burst damage options to counter heavy single area attacks. The knockback and cc tools still need to be respected here and might shut everything down. As long as you split a little bit against crowd control you can keep up the pressure. Your scaling with high energy level is good and winning through T3 can work as well, but Lancers can be stopped by extended T2 + Stormsinger spam, so you rely on fully buffed Soulhunters to break through. This works against T2 heavy decks, but can also backfire when facing Stone Warrior + Timeless One T3. Always keep an eye on the amount of different cards your opponent uses during the game to assess whether you play against T3 scaling or full T2 decks. The effectiveness of some units rises drastically dependent on card choice (i.e. Windhunter priority increases dramatically if Aggressor isn't used). [ FIRE FROST ] 1. Deck description Fire Frost despite having no own faction cards so far is a very unique deck, that lives around its interesting synergy between Frost Sorceress and Skyfire Drake. It has received some buffs towards its current playstyle, which can be really rewarding once you get to play around the bigger shield setups, but with additional improvements to other deck still seems to be on the weaker end as it lacks a little bit of siege potential in T2. Warlock purple received a change to its buff mechanic and now increases damage against Frozen targets, which ends up being a good scaling tool, which synergizes well up to the T3 stage, where Timeless One might take over. Overall Fire Frost is a very unique deck and also has some specific matchups, where it performs exceptionally well making it worth to play. Alternative deck 2. Matchup discussion Easy matchups: (1) Fire Frost vs pure Fire (↓) A really valuable strength in Fire Frost is its excellent matchup against pure Fire. Shielded Skyfiredrake grants superior air control and you have a really strong mid T2 power spike, whereas pure Fire doesn't have the units to react properly. Stormsinger adds some safety to the matchup, because you can kite Enforcer in the early T2. Stormsinger hit + Frostbite + Eruption also is a good way of bursting Skyfire Drakes. Burning Spears can be hard to remove and Mountaineer lost priority in this matchup as a result, but as long as you win the air battle you are set up to win in T2. It is very important to stay proactive to avoid getting outscaled, because once pure Fire starts turning the pressure onto you it can be rough. You might get forced to trade before your units can receive their shield, so you either lose them to the opposing Skyfire Drake or your Frost Sorceress gets overrun by Enforcers. Losing Skyfire Drakes charges or a T3 (Juggernaut) are turning points in this matchup, so don’t lay back and allow your opponent to play towards his win conditions. A good rule of thumb is to avoid exceeding a well count of 6 as inflated energy income makes it harder to play a methodical and controlled mid game. Skillmatchups: (2) Fire Frost vs Amii (↑) Fire Frost has solid tools to match Amii on higher power levels as Lavafield provides an inherent scaling advantage over small and medium sized ground unit stacking. The most critical part is the early T2 where you can not win open field fights. Amii Paladins can be fearsome opponents and you have to kite their reflect ability at all cost, keep it mind it circumvents any ice shield. Icefang Raptor is a very valuable defensive unit to zone the Shadow Nature army from your powerwells and keep up with Amii Paladins + Darkelf Assassin combos. At a certain unit count you can always look for a moment, where the hostile army is not well positioned, allowing you to catch them with a coldsnap. Warlock can be a strong reinforcement to hold your ground at this point. Amii Phantom can be matched with Stormsinger, but you should only engage combat proactively if you have enough power for Lavafield support. Try to use your Lavafield combined with unit damage to make small burst combos on a target. This removes potential Surge of Light counterplay. If you hit multiple targets and remove at least one of them, Lavafield is almost guaranteed to generate value. At a higher void level you can also add your Frost Sorc + Skyfire Drake combo to apply a lot of pressure. As long as you don’t run into a strong cc + aura combo you have good chances to take down some power wells. In T3 you need to make sure that you keep your distance to the enemy's base. Cultist Master is very powerful on close well scenarios and applies an enormous amount of pressure. Frost Shard can be a niche counter to Cultist Master stacking as Amii loves to play for that particular win condition due to the strong synergy with cc and healing. Removing 2 Cultist Masters with a single Frost Shard can be worth it even though it’s not energy efficient. The same applies for Backlash, but this one requires roughly 500+ void to function properly. If you manage to drag out the game, you are most likely favored as the standard Amii T3 quickly burns out of steam from charge issues. That said Amii T3 can function extremely well on low energy levels, which is why you should avoid very early T3 transitions. (3) Fire Frost vs Pure Frost (↑) Pure Frost needs to be respected because of the powerful air control, but with Frost Sorceress you can match this with your shielded Skyfiredrakes most of the time. On the other hand Warlock + Freeze can push off almost any attack pure Frost might throw at you. Try to utilize cliffs during combat if possible to make sure your Skyfire Drake doesn’t get targeted by any type of Gravity Surge (Spell or Stormsinger ability). Defenders or White Rangers can be dangerous too as they help contest air control and you need to target them with Icefang Raptors if possible. If you get ahead Frost Sorc shield supply with 2-3 units (i.e. Skyfire + Stormsinger + Icefang Raptor) can be very powerful. On higher energy levels you want to add more Skyfire Drakes, but keeping up shields on many units is fairly micro demanding. In many cases Frost vs Fire Frost ends up being played on high void leading to T3 on both ends. Timeless One + Silverind Lancers + Coredredge has seen lots of success in this particular matchup mainly due to the strong Warlock synergy creating overwhelming trading advantages long term. But at this rate you might find yourself in trouble due to slot issues dependent on your choices across other gamestages. Finding a well balanced allrounder Fire Frost deck can be tough and you often find yourself in a matchup that would be much better under the right circumstances. (4) Fire Frost vs Twilight (↓) Twilight Minions can give you a hard time in the early game, but with Icefang Raptors or Lyrish Knight you should be able to stabilize more often than not. Fire Nature can play a strong mid game around the newly buffed transformation tools (buffed vileblood+skyfire combos) combined with the cheap nature crowd control spells. Stormsinger will be essential to trade well and keep Burrowers away from your base, but be careful with trading on an open field. Shielded Skyfire Drakes + Stormsinger can be essential to secure air control in the mid game and after winning trades your Shield value will allow you to set up strong counter attacks. Twilight Curse might slow down pushes by transforming Shield Drakes, but with Frost Sorc in the backline you should be able to protect the unbound bug and build up even more pressure with your next push. T3 should be primarily used as a game finisher and help you close games from favorable positions. Tremor spam is your best option here, because Fire Nature has the damage to stop Giant Slayers even from T2 (Skyfire Drake + Root). (5) Fire Frost vs Pure Shadow (-) Shield Drakes with Lavafield support are rather decent against pure Shadow, but with severe scaling issues and lacking siege damage it can be rough to apply enough pressure to destroy power wells before you end up getting outscaled by a superior T3. Harvester can be a serious threat to deal with, but as long as you carry either Disenchant, Lyrish Knight or Lightblade in your deck you should be good to go. Also make sure you don't waste your Coldsnap for a Nether Warp dodge. Wait until the Harvester gets close to your powerwell so the Shadow player is forced to warp away from your base. You generate additional time and ideally follow up with another Frostbite to restrict movement further. Skyfire Drake can also be used to counter Harvester, because they are faster and also transition well into counterattack after a successful defense. With Lavafield and Frost Sorceress you can put up some solid support for them to break the enemies defense and turn this matchup. This is fairly essential as in T3 your chances are significantly lower due the high variety of options pure Shadow has. Voidstorm can clear out the map, Satanael + Bloodhealing creates insane high energy scaling, Cultist Master and Shadow Insect can be used for tempo and Corpse Explosion adds a permanent threat of burst to negate the value of building protects. It is not unwinnable on perfect execution, but the amount of threats alone and the potential map reset that voidstorm provides is very threatening. As the void level itself raises as a result, Backlash can be used as a strong counter in this particular matchup to withstand the strong pure Shadow attacks. Difficult matchups: (6) Fire Frost vs Lost Souls (-) Lost Souls usually doesn't feel that hard to play against during T2, but its scaling is vastly superior leading to a very uncomfortable position, where you end up being forced to attack your opponent at some point even without an advantage. With nerfs to Mountaineer you need to rely much more on shield synergies to get ahead despite the Nightguard nerfs. The constant micro load around shielding up units while allocating resources ideally is a very tough task. Stormsinger & Darkelfassassins are really strong in a defensive position, because they trade well against the Skyfire drake. Icefang Raptor can help here to deal with Darkelf Assassins, but even if you get ahead you always need to respect strong damage tools of Nasty surprise and Aura of Corruption. In T3 Souls usually has access to better synergies as a lot of the lower tier cards scale better compared to the Fire cards. Nasty Surprise & Life Weaving are exceptional when combined with high hp Frost units. On top of that, Lost Souls usually offers more room to put additional slots into T3, building up to this powerful late game setup without opening up weaknesses in T2. Warlock can help to counteract to a certain degree, but isn't enough to turn the current matchup dynamic entirely. (7) Fire Frost vs Bandits (-) Bandits are very hard to play against, especially in T2 as Windhunter can contest air control even against shielded Skyfire Drakes. Stormsinger + Lavafield is your best setup to keep up trading wise, but you mostly have to find an answer to Bandit Spearmen as they can trade up against Icefang Raptors on an even power level. With no unit that trades up against Bandit Spears it is really dangerous to give up tempo against Bandits at any given point. You can stop Rallying Banner + Darkelf Assassin spam from even power by using Icefang/Lyrish Knight, but if you fall behind the endless spawns and immediate unholy trance activations can be extremely annoying to deal with. You need to play a really slow and controlled mid game and kite units with Frostbite to accumulate small advantages over time. For counterpressure try to play around your mobile units as they can outmaneuver the Bandit Minefield. T3 scaling usually isn't a win condition, because a well executed Bandit Lancer split attack can be overwhelming, but if you manage to stabilize at T3, you might have a reasonable chance to strike back. Frost Shard can be very strong to stop Rallying Banner + Cultist master pushes entirely and Shield Building or Lightblade can buy an enormous amount of time against Soulhunter. Try to play for late T3, because your enemy will most likely run out of charges first. (8) Fire Frost vs Stonekin (-) Stonekin is a very tough matchup as Stormsinger supported by Stoneshards and Spirit Hunters are really hard to trade into. The faction has better tools to trade and you main advantages lie around shield Drakes and defensive Warlock + Coldsnap set ups to potentially scale towards T3. But if Stonekin manages to acquire power leads, they will be snowballed by Burrowers, Stoneshard spam or even a Stonetempest. The variety of tools stonekin has in order to generate advantages is really wide and it’s hard to be prepared against each of them. Which stonekin version you end up facing solely depends on the deck choice your opponent made. Therefore, identifying the deck structure during the match is a key factor to determine your win condition, because you either might deal with additional trading and siege tools in T2 or a large T3 built around Timeless One and Stone Warrior. Stonekin won’t be able to provide everything at once. A T2 heavy stonekin deck can be beaten by a passive scaling approach, where you use defender’s advantage to trade better until you can get to T3. If you face a multi-slot T3 you should be better off by playing aggressive during T2 as the potential lack of important cards like an Aggressor i.e. could amplify Shield Drake value. Making the right call here is tough and it still doesn't guarantee success, but once you get to know your opponent you might be able to guess what he wants to do depending on his playstyle. (9) Fire Frost vs pure Nature (↓) Pure Nature was already hard to deal with and now received buffs on top of this. Trading into Ghostspears is extremely difficult as they are more stat efficient than Icefang Raptor, Deep One + Spirit Hunters is a strong combo on its own and with Parasite and Parasite Swarm your air units aren’t safe either. You usually have less siege options compared to other Firesplashes when it comes to taking down power wells early. This is problematic as you will get outscaled rather often. You can deal well with Energy Parasites, because with Stormsinger and Skyfire Drake you do have two counter tools granting a little bit of flexibility, but trading well into Deep Ones at the later stages of T2 is problematic anyways. Your best way of staying in the game is a strong defense against Energy Parasites, a ranged unit heavy composition to avoid high value cc and shield support for your air units whenever you attempt to attack. Try to kite the melee units and focus priority targets like Deep One or Spirit Hunters with Frostbite. If you get pushed back you can always try to look for a strong Coldnsap + Warlock combination that helps to keep up with nature’s scaling for some time. T3 is not your best option either, because Parasite Swarm can take care of your L units (you might consider adding Gravity Surge as an extra tool to prevent this, but deck slot issues arise again) and Mutating Maniac/Fathom Lord are powerful answers to any XL unit based strategy. In order to win this matchup you most likely need to acquire a lead by outmicroing your opponent at some point. [ NATURE FROST / STONEKIN ] 1. Deck description Stonekin probably has been the biggest winner out of all balancing changes, since Frost and Nature T1 are both playable by now. Playstyle wise you have great units and spells to win trades and accumulate small advantages by building up large and powerful armies to the point where you can overwhelm your opponent entirely. It arguably has the most powerful T2 in the game and the combination of crowd control and building protects leaves you with insanely defensive options. You only lack burst damage to quickly break free from large attacks when being down in tempo, but that should be the only true weakness I can think off. Anyone who likes to experiment with deckbuilding will find find a lot of options, because stonekin probably has the most amount of viable cards you can play. Also playstyle wise you can do almost anything from micro based snowbally gameplay to super slow cannon tower stacking decks, that will throw opponents into despair. Alternative deck 2. Matchup discussion Easy matchups: (1) Stonekin vs pure Shadow (↑) With Lightblade (purple) being more and more of a standard pick in Stonekin your matchup against pure Shadow has gotten better and better with every patch. Due to its basic design Razorshard still is an amazing tool to face off against pure Shadow. It is immune against Netherwarp in its ranged stance, counters unit stacking due to the strong AoE, can outrange Shadowmage & Darkelf Assassins and also ends up being immune against knockback. Since Shadowmage is not as mobile as the Stormsinger it can't outrun the Razorshard attacks really quickly. This also makes the matchup simple to play from a strategic pattern. stack Razorshards, add stormsingers against Nightcrawlers and intercept Harvester with Lightblade (purple). At this rate you only have to play around the enemies AoE spells (Aura of Corruption, Corpse Explosion, Nasty Surprise) and accumulate advantages up to the point where power wells start dropping. Due to Nightguard nerfs Stonetempest and Crystal Fiend are strong snowball options in this matchup again. You usually get a time window to attack the enemies base once all 12 Shadowmage charges are depleted, because the power level of pure Shadow T2 drops significantly at this rate with void level being too low to take a T3 successfully. It’s best to play around choke points and small areas to increase the efficiency of cc spells and Razorshard AoE. If you get ahead you should always consider blocking T3 positions if possible (use Ice Barrier when starting Frost T1), because Voidstorm will be really annoying to play against in the later stages of the game. (2) Stonekin vs Fire Frost (-) This is a great matchup for Stonekin after your T1 options got buffed to secure an even early game. Stoneshards and Spirithunters can support your Stormsingers in this matchup to outtrade the Fire Frost player in any situation. You need to respect shielded Scythe Fiends, but with Aggressor this shouldn’t be a major threat. Stoneshards trade well into any ground unit besides Icefang Raptor, which gets attacked by Stormsinger. Your setup to find good open field trades is excellent and once you find them you can start leveraging your tempo leads by including L units into your composition. Stonetempest is a great option in this matchup due to its powerful M-knockback. Due to the stonekin passive + surge of Light synergy Tempest can also outlast extended trades against shielded Skyfire Drakes to overwhelm your opponent on the long run. Aggressor would be another great tool in multi unit compositions because the L knockback is just amazing against Skyfire Drakes and as long as there are enough damage sources you even get value from his knockback without any L units around. Once Skyfire Drakes are out of the way you can also add an uncontested Crystal Fiend. This should help overwhelming your opponent by outtrading him at his own base and countering the entire Fire Frost kit on the long run. Once your enemy can’t use his unit spell combos to burst your units, the Crystal Fiend healing will generate endless value over time. Playing for T3 is also a possibility, but keep in mind that Timeless One mirror scaling might favor Fire Frost due to the access to Warlock. (3) Stonekin vs Bandits (-) The most valuable advice we can give in this matchup is to play the correct units. Bandits has great tools against Stoneshards, Spirit Hunters and Stone Tempest, but absolutely no answer to Stormsinger + CC support. Playing around this simple pattern is the most reliable way of generating an advantage against Bandits. Bandit Stalker and Spearmen can be kited, Darkelf Assassins can’t be stacked due to Hurricane and Minefield is way too slow to catch Stormsingers in time. Leveraging tempoleads from this trading advantage should be easy by adding Burrowers considering Bandit Stalker can be zoned off by your Stormsinger army. Bandit Sniper always needs to be pressured considering the ability can oneshot Stormsinger if left uncontested. This shouldn’t be a major concern due to your mobility and strong cc options. Your only enemy in T2 will be energy scaling. If the void level rises, high tempo execution gets more and more difficult over time, whereas Bandits have amazing tools to dump energy without losing significant value. Rallying Banner spam attacks are incredibly strong on higher energy counts and with more units to take care of across the map it is much more likely to walk into a Minefield or get caught by an Aura of Corruption. If constant spell weaving allows Bandits to trade towards a stage where T3 is a possibility, the matchup also starts to be much closer again. Bandit Lancer split attacks are very powerful and can only partially be matched by using your M-knockback tools from T2. Combined with the threat of facing a double buffed Soulhunter this can be really tough to deal with. Timeless One + Stone Warrior would be the best response here. Overall it might not be the easiest matchup in terms of execution, but you can dominate it with some practice. (4) Stonekin vs Twilight (-) Twilight is a melee unit heavy T2 faction which is countered by Stormsinger stacking with CC support. This will be the core feature of your unit army, apart from that you can just adapt based on your enemies unit choices. Try to split well in order to avoid getting hit by Lavafield or CC and stack up advantages by using your own spells. Spirit Hunters & Frostbite can provide some extra dps against ravaged units and with either Lightblade or Aggressor you have solid counters for Vileblood. You usually struggle the most when falling behind in the early T2 stage, because Siege attacks might force you to invest all your power into crowd control and building protects, so you can't really start stacking units to generate value. Once there is 1 Vileblood or 2 burrowers the dps often is high enough to outvalue your defensive capabilities. Avoid taking risks in T1 to avoid such scenarios. You need to be proactive and win on T2, because at T3 Nightshade Plant mind games might be very dangerous to play against. Skill matchups (5) Stonekin vs Pure Nature (↓) Stormsinger stacking is a great tool to deal with nature, because the unit is immune to most of its crowd control sources. Nature often has to rely on Deep One (+ability) to get any good trades done, which rarely ends up being power efficient if you kite well. Zoning Energy Parasites with Stormsingers is the highest priority, because you will need some time until you have a critical mass that can push the nature player back into his base and threaten power wells. Blocking Energy Parasites from getting their ability off needs to be prioritized as it’s the only option for pure nature to come out ahead. Crystal Fiend can be a great addition to the unit mix, because pure nature does lack burst damage leading to much higher healing values. But playing the card early is very risky because it dies to a single Parasite spell after the card received some buffs. It requires Surge of Light support in return to stay alive. As Nature often relies on Deep One scaling to stay relevant, Lightblade can be really useful on higher unit count. In T3 the player with more slots usually ends up being favored, but Parasite Swarm can be annoying if you play without XL units, so finishing the game in T2 usually is preferred. On a side note: Even though you might start in a mirror matchup in T1, Stonekin T2 is much better at dealing with larger T1 armies than pure nature T2, making it much more flexible and forgiving in the early game. (6) Stonekin vs Shadow Frost (-) This matchup favors you on T2. Considering most trading patterns consist of Stormsinger versus Stormsinger it ends up being beneficial, because you have superior crowd control. Using this to build up small leads by constant trading you can accumulate these small wins and increase the pressure constantly. Once you get to remove all units from your opponent you can start adding Burrowers for increased Siege potential to finish the game. Shadow Frost often tries to play defensive and utilize undazed Darkelf Assassin spawns as well as Nasty Surprise. Playing with tempo is extremely important, because if you fall behind heavy use of Lost Reaver + Stormsinger can be difficult to deal with. You often lack dps to remove the Reaver in time when utilizing the Aggressor against tempo deficits. Aura of Corruption needs to be respected, but when playing around mobile units you can avoid it, offensive Cannon Tower might be a niche counter too. Don’t let the game go to 6+ wells quickly, because Souls T3 usually ends up being problematic to deal with unless you invest at least 4-5 deck slots into your own T3. But even then you aren't favored, so opting for a win at T2 usually produces the best results. Force open field trades by contesting T3 spots and put pressure on your opponent if he tries to well up. If you get ahead try to take map control and stay close to your opponent. A greedy T3 attempt is a great opportunity for you to close a game with a Burrower spam. (7) Stonekin vs Amii (↑) This matchup often results in a traditional Stormsinger vs Amii Phantom micro war. The M/M ranged unit management really determines the outcome of this matchup and if Shadow Nature gets ahead the deck can be an overwhelming force rather quickly. But as long as you play very controlled, split your Stormsingers against cc and don’t make major mistakes you will be able to win in later stages of T2. First of all Stormsinger does have more charges than Amii Phantom and on top of that a few extra Razorshards get really strong at later stages once many Stormsingers are on the board. The extra range on Razorshard allows you to root down Darkelf Assassins and Amii Phantoms and with heavy unit stack it is so difficult to dodge the AoE damage and M-knockback leading to great trades. With enough Stormsingers to protect them from Amii Phantom’s melee disable mode this usually leads to an overwhelming force that ultimately wins you the game. After Nightguard received a nerf you also can consider playing Crystal Fiend in this matchup now, which works incredibly well during such extended trades. Do not get baited into Stonetempest as Amii Phantom still hard counters it. Amii Paladins are not a big threat to you as long as you play around the ability cooldown. T3 should be avoided as Shadow Nature has various options to apply strong pressure from split pressure to fully buffed XL unit. (8) Stonekin vs Pure Frost (↓) Usually the T2 is played in a very slow manner, which is good for you to establish very powerful unit setups, but also problematic as you might struggle punishing well stacking to a point, where T3 becomes a realistic option. Frost usually has more slots available to build a powerful T3, therefore wins these types of scaling games. Winning T2 is very important due to that and requires very aggressive gameplay at some point, where you ideally contest T3 positions or cut off map control by attacking Frost’s mobility restrictions. Stormsinger + Spirit Hunters usually do trade very well on low energy count, but get outscaled by War Eagles. Once you get ahead or establish map control, Aggressor or Stone Tempest might be valuable additions to deal with War Eagles, especially when you get to force the enemy to trade with you. Crystal Fiend is a great tool in this matchup to leverage leads, because Frost doesn’t have very reliable tools to burst it down. Avoid close bases at all cost, because it strengthens War Eagle gameplay and also supports White Rangers. Burrowers are not an option during T2, but can be strong at punishing both a long T1 and an early T3 giving you an edge during transitions. T3 will be difficult to play unless you invest little slots into T2, Thunderstorm is very useful for such strategies as it enables faster T3 timings. The high AoE damage can remove T2 pushes easily and effectiveness is even amplified due to War Eagles being too slow to outmaneuver it. Difficult matchups (9) Stonekin vs pure Fire (↓↓) The introduction of Burning Spears highly changed the dynamic of this matchup as pure Fire now has an entirely new option for early game trading. This makes it much harder to establish leads and snowballing with low dps L-units is not an option either. Stoneshards remain as your best trading tools in this matchup as they outvalue Scythe Fiends and counter Enforcer, but to beat pure Fire entirely you will need ranged and spell support. If pure Fire manages to survive the early gamestage by utilizing defenders advantage the matchup dynamic quickly turns around, because the traditional s-sized melee units lose their value at higher power counts due to limited focus fire options upon being spammed and their weakness against zoning dps spells like Wildfire. At some point you may collapse to the relentless aggression pure Fire can throw at you. To prevent this from happening you need to be proactive during T2 and constantly acquire advantages by trading around your powerful cc tools. With many small wins you might be able to opt for a power well focus as long as you avoid high value wildfire or Lavafield. Your decision making and micro needs to be on point here as your Siege damage in this matchup is rather low, Burrowers against Enforcer is definitely not advised. In T3 you need to stabilize around Stone Warrior and try to match the Juggernaut pressure by playing around the Disenchant cooldown to utilize the Shatter Lance ability. This can work, but isn’t a guaranteed success, because one misplay around the Stampede ability is game over. [ SHADOW FROST / LOST SOULS ] 1. Deck description Lost Souls was one of the most played decks in PvP... for a good reason! The deck is the most solid one with no big weakness and an outstanding defence. A wide pool of units allows you to adept to any situation. With a fantastic T3 as backup you can play a very controlled game, whenever you get ahead in a match. You can constantly stay ahead in powerwells (the +1 game) up to a point where you can afford to switch into the T3 stage, where you'll most likely win. Alternative deck 2. Matchup discussion Easy matchups: (1) Lost Souls vs Fire Frost (-) Fire Frost is rather easy to play for you, because you aren't forced to make proactive decisions in T2. You just need to defend incoming attacks and scale into your superior T3. As long as you stay even in T2 there is nothing you need to fear in T3. In T2 you can defend Scythe Fiends & Skyfire drakes easily with a combination of Darkelf Assassins and Stormsinger with Frostbite support. Try to split well against Lavafield at later T2 stages and try to target Frost Sorcs during skirmishes. This will heavily limit the amount of pressure Fire Frost gets to apply on the long run. Try to utilize your spells for burst oriented trades (Frostbite, Nasty Surprise) rather than extended ones (Coldsnap) to avoid maximized shield synergy and Warlock value. If you get ahead during trades, you can try to utilize Lost Reavers to launch powerful counter attacks. T3 will be in your favor as you have better units, more slots and superior spell synergies. Skillmatchups: (2) Lost Souls vs Twilight (-) You can defend Burrower attacks with a very high efficiency in the early game and establish a very solid lead, that can be used to transition into a T3, where Fire Nature doesn't stand a real chance. If you get strong leads you can either opt for split attacks or Lost Reaver to apply pressure. The latter one might struggle against Slaver though, who is powerful against melee L units specifically. The most dangerous game stage is late T2, where double Burrower + Skyfire attacks with massive nature cc support are powerful enough to overload your building protects. Make sure to respect their mobility and try to take down Skyfire Drakes as early as possible. Try to split your units well when defending because once the void level gets really high, double Lavafield is a dangerous tool to remove all your small units (Stormsinger, Nightcrawler and Darkelf Assassins die to it). Try to find a good time window in order to tech up to T3 as this is your main win condition in this matchup. On a sufficient energy level Timeless one can withstand a massive Burrower push, if the Fire Nature player decides to rush you at that point. At T3 Mutating Maniac and Nightshade Plant both need to be respected but your T3 trading is superior and you will come out ahead in the long run. (3) Lost Souls vs Pure Nature (-) You are slightly favored in T3, but at a disadvantage in T2. Therefore, it is important to play towards your win condition in order to come out ahead. Deep One is really hard to deal, especially with Parasite being a cost effective counter to Nightguard. On top of that you always need to zone Energy Parasites with Stormsinger. This has to be your number one priority before you start thinking about anything else. If you want to attack nature you need to make sure to either split attack or surround your enemy. A good unit split will allow you to catch the more expensive nature units by using Frostbite without running into a cc spell with your entire army. This concept is extremely helpful to get rid of Spirit Hunters quickly. A strong split attack is the best setup for any Motivate -> wellfocus plays. L units aren't a reliable option against Parasite Swarm or Deep One, so generally try to stay away from Lost Reaver when facing pure Nature. T3 remains in your favor, but be careful whenever your opponent splashes towards Fire here. Mutating Maniac, Parasite Swarm, Disenchant is not as easy to beat and Nightshade Plant can overload your building protects. Apart from that Timeless One dominates the field and buffed Lost Grigori is very strong at taking out structures. Always track how much Surge of Light got used during T3 as this heavily impacts your chances of winning T3. You win the game whenever Surge of Light charges are depleted. (4) Lost Souls vs Bandits (↑) Bandits are fairly challenging to play against nowadays. You can't really utilize Nightcrawler against Bandit Stalker, Windhunter + Minefield limits the impact of Lost Reaver, Stormsinger always runs into the danger of getting targeted by the Bandit Sniper and Darkelf Assassins might struggle with the Minefield. Getting ahead against this setup is really difficult, but if you manage to do so the lack of cc and building protects will allow you to take down power wells very quickly. In return your defensive tools are fairly solid. Bandits do not have access to Siege units and Rallying Banner attacks are not as threatening due to Nasty Surprise, especially when combined with any high hp targets (lyrish knight, phalanx, lost reaver). Even though your T2 is a little bit more stable overall, T3 is very scary to play. Bandit Lancer spam can be really annoying to trade into, because you usually don't have a very powerful M counter in T3 and the active ability can prevent Timeless Ones from using theirs. Pressure only gets amplified if your enemy plays Motivate or Rallying Banner + Cultist Master. As all of these units are rather low hp ones, Frost Shard could be a strong addition to limit the early game pressure and enable scaling towards the later T3 stages. Bandits will run out of charges way before Lost Souls and Soulhunter is only a real threat whenever your opponent is far ahead. On the other hand Tremor can always build up pressure against Bandits even despite being matched by strong L counters. (5) Lost Souls vs Pure Shadow (-) You do have solid tools to deal with pure Shadow, especially when playing Lyrish Knight. He is a great target for Nasty Surprise, an XL counter for the Harvester and also withstands the M-knockback of Shadowmages due to being steadfast. Darkelf Assassins + Frostbite are always good at trading and in combination with Stormsinger you can defend against most attacks. Once you get ahead, Lost Reaver is a strong option for attacking. Try to play him with Stormsingers, because pure Shadow likes to use the Knight of Chaos as an L-counter and protect the Lost Reaver with Liveweaving from incoming burst damage sources like Shadowmages or activated Darkelf Asssassins. Harvester needs to be respected, but its effectiveness is limited, unless the Shadow player has a lead beforehand. Frost Bite is really valuable against him and a combination of buildings protects and Coldsnap usually can buy enough time. If you have problems countering Harvester you can always add Lightblade (purple) to your deck. You ultimately want to build up towards 6 wells and a T3, but avoid having a power well close to the enemy's base. In close well scenarios pure Shadow is heavily favored because Shadowmage reaches its maximum potential at these kinds of fights. On top of that, close well fights end up getting really bloody increasing the risk of running into a super high value Corpse explosion. As the damage aoe damage cap is extremely high, it often pays off to avoid building full well clusters and expand at different positions. Your T3 usually is a little bit better, this pays off the most on large maps, whenever Cultist Master value is reduced. If you expect a Voidstorm to be played either try to save some power or force counter units beforehand if possible so you avoid a huge negative trade allowing you to apply pressure with your Tremors once the Voidstorm is on cooldown. Keep in mind Voidstorm only has 4 charges and spell cooldown is vastly increased afterwards. (6) Lost Souls vs Pure Frost (↓) Nightguard nerfs were very strict nerfs to Lost Souls in this particular matchups. You mainly need to rely on Darkelf Assassins and Frostbite when trading against War Eagles, but it will require further support whenever you want to break throught the strong Frost defence. Avoid cliff areas to make War Eagles more vulnerable overall and be careful with activating the unholy trance ability from Darkelf Assassins when near your opponents base, because the immobility can be heavily punished by White Rangers. After accumulating unit advantages you can throw in Lost Reaver to build up pressure, but without Stormsinger support he won’t perform well against Mountain Rowdy and Lightblade. Overall beating pure Frost at T2 is difficult, but as Frost T1 will be unable to contest map control, you can stall games to T3 more often than not. Aura of Corruption is a basic tool to punish the slow War Eagles. You can also make use of Nasty Surprise defenses when comboing the spell with Lost Reaver. Phalanx + Nasty is even more effective at one-shotting up to 3 War Eagles, which is a niche combo worth considering in this matchup. This matchup has a very defensive play pattern at T2 because both factions do have severe advantages when playing around their own power wells. On open field trades you usually do have the upper hand, which can be used to establish a good position on the map. Combined with the higher mobility in T1 you might be able to block all T3 positions from your enemy. If the game goes to T3 vs T3, you mostly need to respond to Tremor attacks by using Timeless One + counter units and protecting your buildings with spells. Lost Grigori can shine in this matchup as he beats Tremor, Lancers, Timeless One combos with his taunt and also hard counters any cheese attempts around Avatar of Frost. Nasty Surprise tends to scale very well in this matchup, because it often adds the needed extra burst to take down power wells. (7) Shadow Frost vs Stonekin (-) Stonekin can be a really uncomfortable matchup, because its defensive capabilities match yours in T2 and with superior cc their Stormsingers usually are better on open field. Avoiding these types of trades is really important for that reason. Utilize defenders' advantage to adapt based on the enemies unit composition and set up some efficient trades by surprising your opponent with a good Nasty Surprise. If you get to achieve this you can well up as quickly as possible. You want the energy level to rise as quickly as possible considering you win at T3 most likely and attacking in T2 is not an option. Nightcrawlers get hard countered by Stoneshards and Reaver attacks only end up being an option when your opponent takes a greedy power well. In T3 your odds of winning are most likely higher considering Stonekin suffers from slot restrictions. But don’t tunnel into passive scaling whenever your opponent allows you to do so as stonekin could also play a large T3 and sacrifice deck strength elsewhere. But most people cut their T3 in Stonekin to have a more powerful and flexible T2. Whenever you play T3 vs full T2 Silverwindlancer + Nasty is a very important burst combo and will grant you incredible value. Difficult matchups: (8) Shadow Frost vs Pure Fire (-) Pure Fire is really difficult to deal with, especially when you end up falling behind in this matchup. Enforcer is superior to Nightcrawler and Stormsinger which allows the Fire player to protect a Firedancer who constantly throws fireballs at your power well. This forces you to spend many resources into protecting your buildings. If you don’t break free by finding a good nasty, this leads to very inefficient trading patterns. In case the Firedancer is able to use a cliff as protection you are in serious trouble so avoid taking any of these positions when facing a pure Fire player. Your best chance of getting good trades is a powerful nasty surprise and good use of Frostbite during trades. If you get ahead you can try utilizing your Lost Reaver to destroy a powerwell. It is ideally paired with Darkelf Assassins as they can help deal with Burning Spears without getting hard countered by Enforcer like most M units. Lifeweaving will help against Wildfire, especially when you are aware that your opponent has not enough energy to follow up with an immediate disenchant. In addition to that Juggernaut is insanely strong, even strong enough to break through a Timeless One T3. Tremors do not keep up in tempo and whereas Aura might be enough to remove one Juggernaut, experienced Fire players will fully commit once they have two. Double Juggernaut can not be matched unless you are very far ahead to counter them with the Lost Grigoris disintegration spell (not reliable due to significantly higher upfront costs. (9) Shadow Frost vs Amii (-) Amii has a distinctive advantage in the early T2. The faction has similar units (Nighcrawler + Darkelf Assassins + Amii Phantom vs Night Crawler + Darkelf Assassins + Stormsinger) and superior cc which allows your opponent to set up better trades all the time. This leads to a survival game, because low hp unit spam can be removed through AoE tools (Nasty Surprise, Aura of Corruption) and split Lost Reaver attacks get more value over time. Try to spawn him very close to the enemies base, because Shadow Nature likes to play Darkelf Assassins or Amii Phantom + Root against them. Do not send your Reaver alone as Tranquility might lead to constant cc rotations which are really hard to break otherwise. Your main goal isn't necessarily kicking power wells, it is more about relieving pressure and buying time. T3 stage is highly beneficial for you as Timeless One can minimize the impact of Cultist Master attacks unless you play a close base scenario and Amii straight up collapses to Tremor spam whenever you get to set up a counter attack. Conclusion This overview is getting longer with every overhaul. I hope this wall of text is not too intimidating (>27.000 words) and provides helpful information to you! What to expect in the future and last words: We will keep this guide updated every few patch cycles (tier list at the start will be adjusted more frequently). We all know PvP is difficult to get into, but we will try our best to lower some of the barriers whenever possible. If you have any questions feel free to ask us in this thread or on one of the skylords discord servers. If you are entirely new to PvP, test some of the free PvP decks, look for a deck you like to play and adjust it until you find your own playstyle. External ressources (guides, videos etc.) can help a lot to understand the basics quicker and get to the point where PvP starts to be the fantastic and enjoyable game mode, that kept us playing for so many years. Hope you enjoyed reading, let's keep the PvP community active and see you in the Forge! Best regards, Hirooo & RadicalX


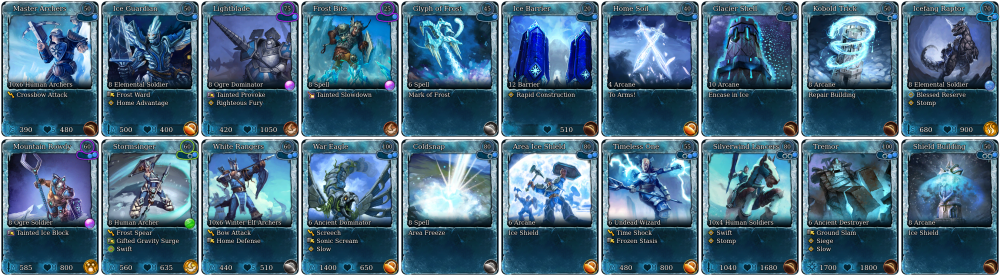
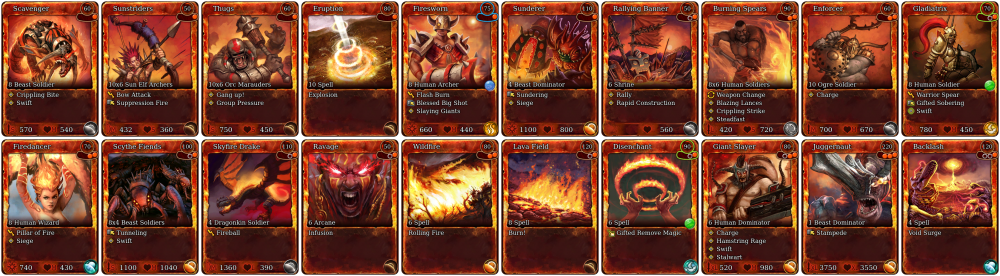
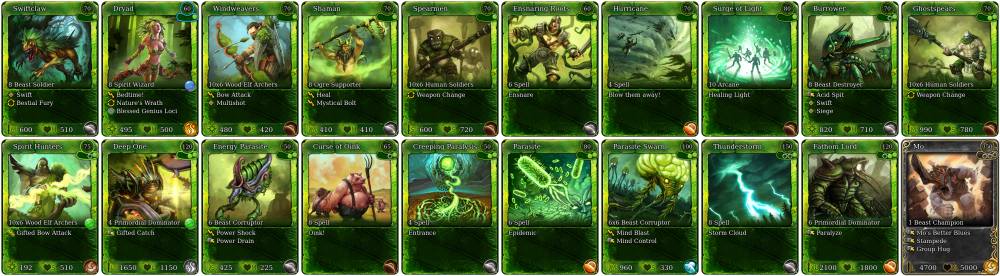
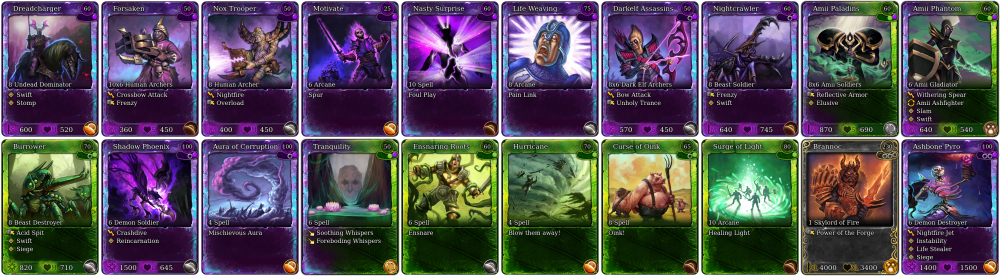
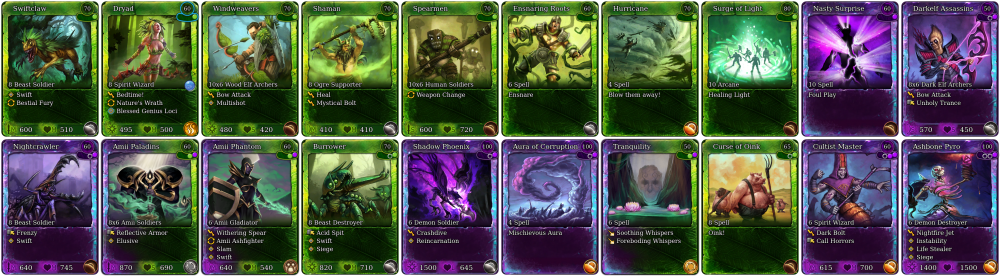
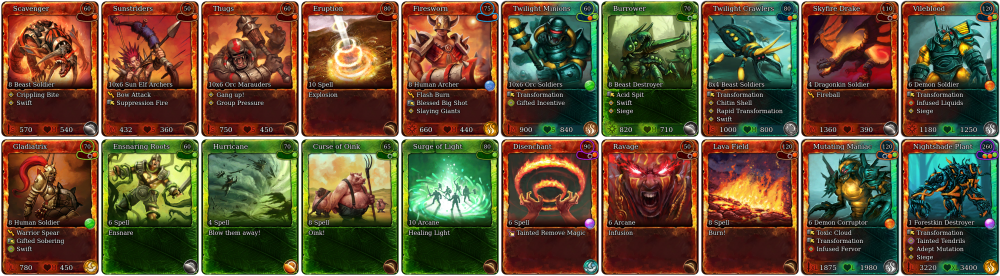
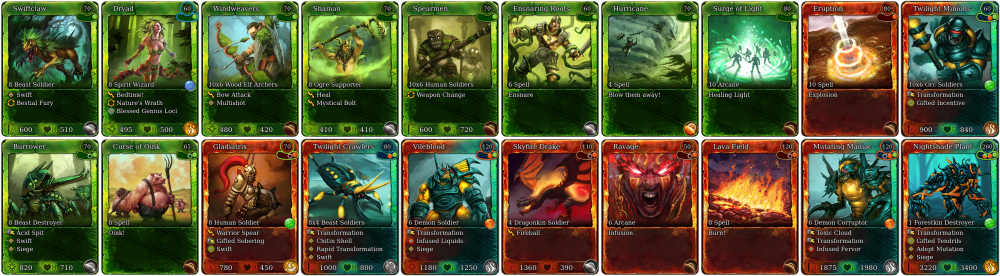
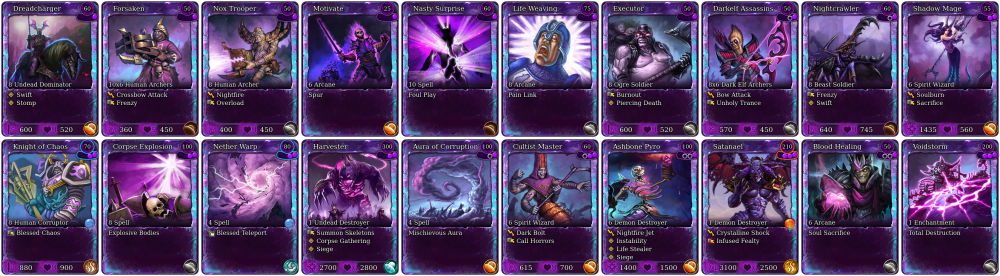
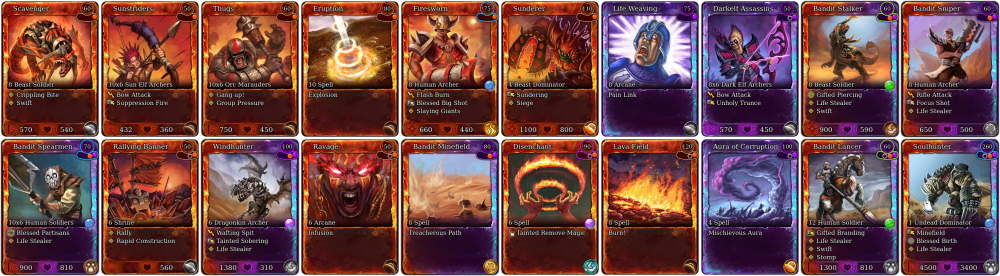

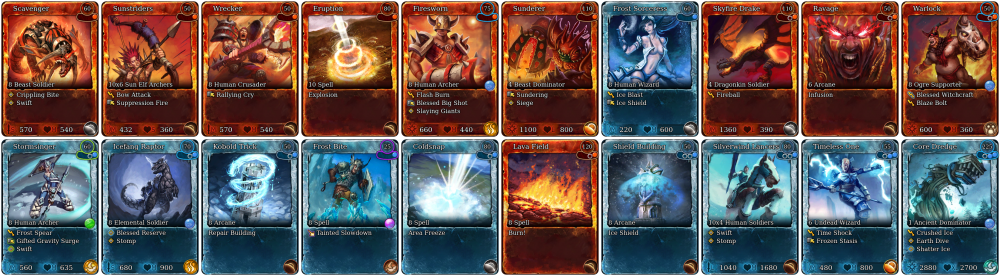
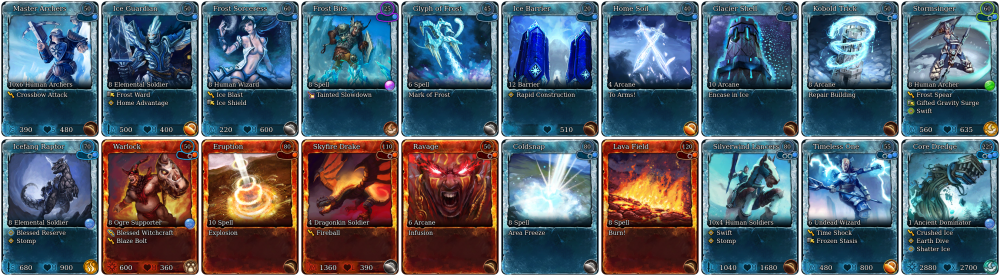

- 18 replies
-
- 19
-
-
Responsible members of the Skylords Reborn team recently met to discuss possible changes to campaign maps. What is outlined here are the proposed changes to the map Nightmare Shard. These changes are not final and are only proposed. As a warning, other map projects such as more RPvE presets and Defensive RPvE have a much higher priority for our team. As such, these, or any campaign map changes, may not happen for a very long time. Some changes here are firmer than others, all italicized proposals have accompanying explanations for why we are considering them, but they are the most tentative of all the proposals. Proposed Changes: 1. Potentially decrease difficulty of waves on lower difficulties given how many new players struggle even with standard difficulty on this map. 2. Increase starter wells from 2 --> 3 3. Increase well capacity of T2, T3, and middle power wells from 600 --> 900 4. Remove Fog of War in a 30m radius over infected camps once the goal to destroy the Twilight spawns is activated. 5. Change the effect radius of all spell effects spawned from the wild magic zones to correspond to the 15m radius shown for the zone on the map. 5A. Separate map spell effects from players spell effects (ie. revert damage buff to player's Maelstrom which has also increased the damage of the Maelstrom cast by the wild magic zones). Nightmare Shard is one of the hardest maps in the game, especially on expert difficulty. It can also be fairly long with a slow start. To alleviate both issues, we are considering increasing starting well capacity, which would increase their lifetime from 20 to 30 minutes. Also, our proposed increase to starting void power will mean less waiting around and more playing the game. Figure 1: 3rd Starting Well Figure 2: Infected Shadow Camp Figure 3: Infected Frost Camp Figure 4: Infected Fire Camp Figure 5: Infected Nature Camp

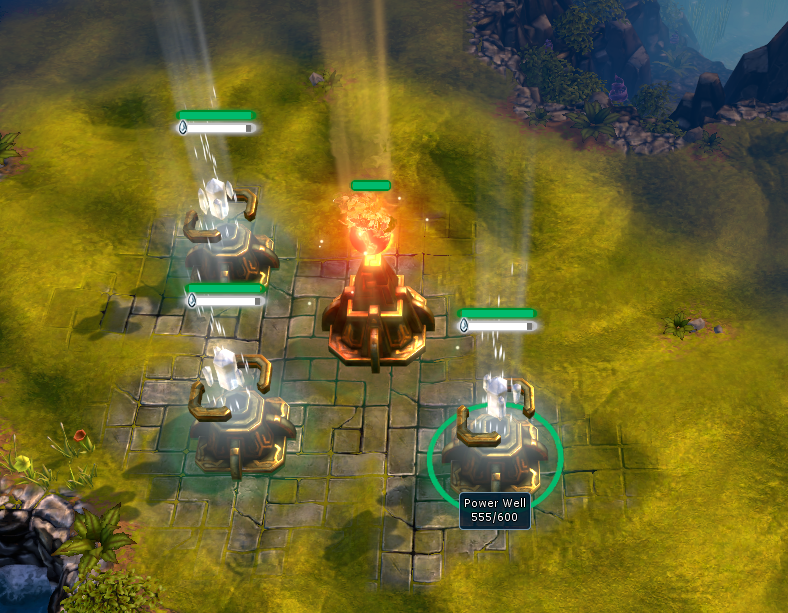
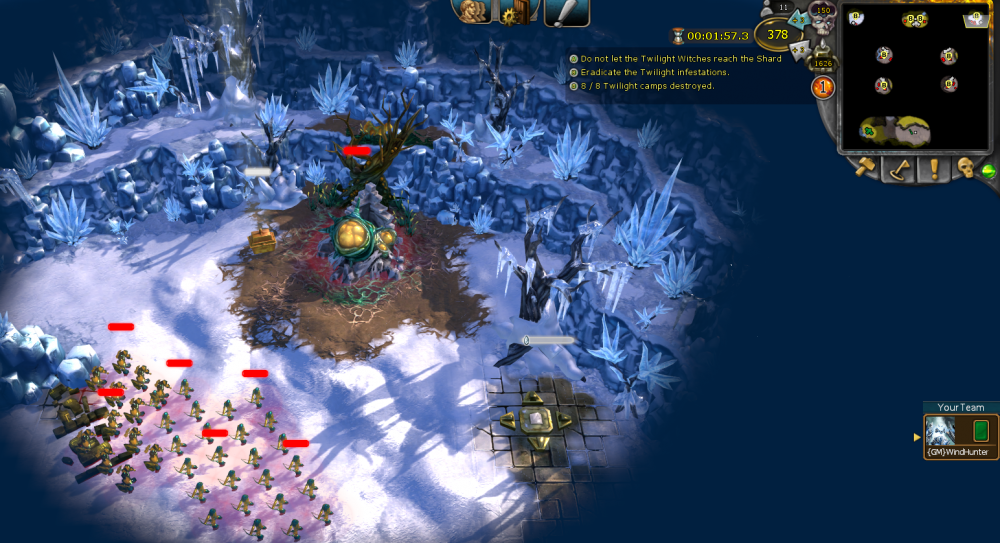

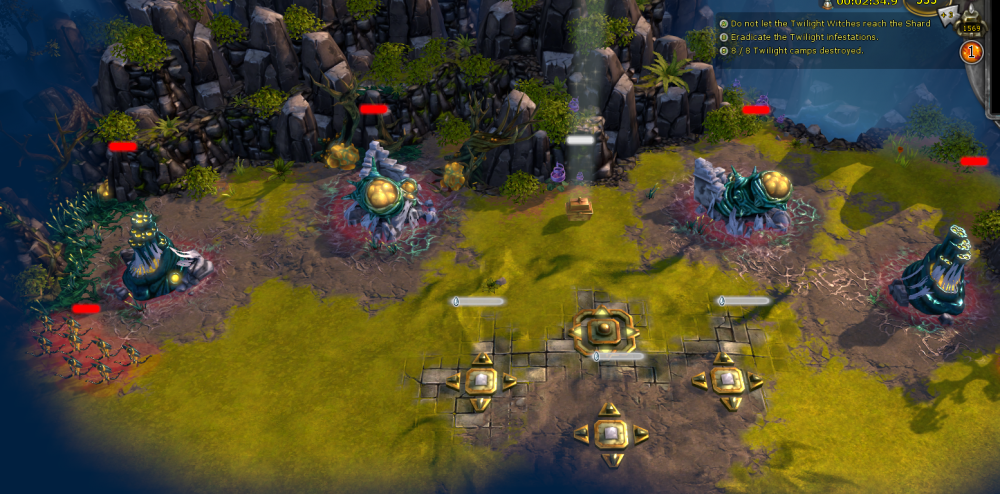
-
 *In progress ***** slot list being reworked. I've been referring to wrong things. ****Kubik posted the actual melee slot numbers in his 2nd post below. To prevent further loss of game info, I have posted this guide on melee 1st off, split melee creatures into two types. And then split them by size. 1. Standard Spears 2. Small/ Medium Large/ XL For melee to kill even faster, you need to exploit the melee slot system to make use of your superior hp and dps. All units have melee slots. To fight a unit in melee, your unit or squad will go up and slot themselves into a slot and fight. Depending on the size of the melee unit you send and how many squad members your card has, the number of available slots changes Each squad member in a squad takes 1 melee slot and allows your enemy extra melee slots to attack you in melee. Standard melee and Spear melee use separate types of melee slots. Small/ med size unit melee slots are separate from Large/ XL size unit slots >As an example to see this in real time, in forge. Spawn 3 north guards, 3 imperials. Use the auction house click and play into forge for free if you don’t have. Now spawn the twilight crab from the twilight enemy menu and let them fight. >>Now spawn 2 Deep ones or an Overlord. Observe how you can now Triple dogpile an enemy. This is because the game currently counts all melee slots in units of Standard Small: Spear Small: Standard Large : 1 small squad member uses 1 standard melee slot 1 medium standard unit uses 2 standard melee slots 1 small spear type squad member uses 1 spear melee slot 1 medium spear type unit or squad member uses 2 spear melee slots. 1 large standard unit uses 1 large standard melee slot 1 XL standard unit uses 2 large standard melee slots. ----------------------------------- **numbers not accurate. See kubik's post below >> Still wrong. lets try another term fix. >>> This better? ---------- Standard melee slots: aka how many standard melee units of a size you can dogpile on your enemy *You attack them ---------- >Your size : Enemy size, Number of slots. S: small squad of 6 (24 slots), Medium ( 6 slots), large (8 slots), XL (12 slots) M : small 12, medium 3, large 4, XL 6 <M size squads: There's only witch claws. Im not doing one just for witch claws. L : small 12, med 2, large 4, XL 6 XL : small 6, med 1, large 2, XL 3 -------- Enemy dogpile you chart, Standard melee slot list. *They attack you. You victim. The winner is you. ....... >Your size. Assumed 1 card : Enemy size, number of slots. S: Squad of 6 example. (24 small slots), (12 medium), ( 12 large), ( 6 XL) <Squad of 4 example. (16 small slots), ( 8 medium), ( 8 large), (4 XL) M: 6 small slots, 3 medium, 2 large, 1 XL <M squads: Squad of 4 example. ( ) ( ) ( ) ( ) L: 8 small (due to knockback, probably more), 4 medium, 4 large, 2 XL XL: 12 small slots (due to knockback, probably more), 6 medium , 6 Large, 3 XL --------------------------- Spears again, use their own special spear separate melee slots and also have more slots. Meaning, you can more than double the possible melee slots for fighting an entity by using spears also or just use the spear type unit, who have more melee slots anyways. Unfortunately, this melee type is much rarer. ------------- Spear melee slots: aka how many Spear melee units of a size you can dogpile on your enemy *You attack them *not finished **numbers not accurate anyways. See kubik's post below ----------------- XXX Not done yet S M L XL ----------------- Enemy dogpile you chart, Spear melee slot list. *They attack you. You victim. The winner is you. .......... >Your size. Assumed 1 card : Enemy size and number of slots S: Squad of 6 example. (30 small slots), (10 medium), (Large +),( XL +) <Squad of 4 example. ( ), ( ), ( ), ( ) M: 6 small slots, 3 medium, 2 large, 1 XL <M Squad of 4 example. ( ) ( ) ( ) ( ) L: *** No spear type here I know of. XL: *** No spear type here I know of. ------------------------ ----------------- So to review Standard normal: uses standard slots. dmg capped Spears: Uses spear slots. Better than standard type. much Rarer. Can double possible melee spots by using both melee types. S/M and L/ XL sizes have their own separate unique melee slots in addition to Standard and Spear slot system. You can thus triple melee a unit with S/M Standard slots+ Spears slots, then L/XL standard slots. -------------- >>>False spears. False standard unit.<<< ----------------- Now, here’s the rub. What is a spear type unit, what isn’t? You can not just eyeball the unit model. Nomads are not spear type despite them holding a spear. Wreckers are spear type. Spearmen are spear type. Amazons.... are not. Eliminators are spear type. Knight of chaos is not. Imperials are a VERY good spear type. Light blades . . . . are not. Basically, this guide is not finished yet because it would require me listing every melee unit in the game and classify it. Btw, off topic. Meme worthy Slavers.... are not spear type. Amazing how shitty slavers are. All XL and Large size units are standard melee type to my knowledge. All spear melee types must be S or M sized. After t3, there are none I know of. ---------------------------- List of all spear types I know of. As of Jan 2022. Dec patch 2021 *EA meticulously gave every color orb in t1-t3 combination a standard type and spear type unit except t3 fire, where they get a 2 fire orb Giant slayer. -- t1 -- F Imperials F Ice Guardians (Wow really? Weird discovery) G Spearmen R Wreckers P Executor -- t2 -- F phalanx F Lyrish Knight FF Mountain rowdy P Eliminators PF Lost Wanderer R Scythe fiends RR enforcers RP Bandit spearmen RG Twi Brute G ghost spears G mauler GF Earthkeeper (Yes. At least they're better than Slavers.) RG **Infected tower's Twilight Pest unit (Unique case) -- t3 -- F Silverwind lancers RR Giant slayer G Drones P shadow insect RP bandit lancer RG ** Fleshbender's Twi pests (Impractical case) (Actually produces the strongest spear type in game if you fleshbend correct unit, but you would need promise of life or second chance revive for permanent version of unit and fleshbender is just so troll.) >>>> To test small size slots, i used Wintertide blue and thugs a lot. Thugs have unity passive and are small size, Wintertide blue gives 40% dmg resist. *life currently in way, will get back to this later
-
 As someone who loved to play with root-Units and building since original Battleforge i think the way you changed how the root-support works to “only get support from not in combat units” generally an interesting change which makes playing roots a little more challenging, even if you more or less force the users to put Thornbark to the deck. One problem with this change is, however that the Treespirit-units became worthless. The ability of the rooted Treespirits of firing a volley which deals 75 dmg /max 115 an this every 10 seconds compared with lets say Dryad (50 dmg/max 70 every 2 sec) or the Windweavers (6x10dmg all 2,5sec / 12x10 if two enemy units are in range) is simply put not worth the effort. And since on most, if not all maps you’ll have to quickly make a t1 army with enough punch to challenge whatever the map throws at you treespirits are simply a not usable since you lack the time and power to make a decent attack army with them AND make the necessary support for them to be actually usefull To make them an actually quite interesting unit I would suggest tree changes for treespirits 1. Make it, that the Root support of the Treespirits works the way it used to, they provide support to the Root network even if they are in combat 2. Let them provide two Support per unit and give the support to all units in the range BUT they only support units and Buildings which are effectively in their own range, not in the complete Root network 3. Reduce the range of the Root support they give by roughly 50% or probably even reduce to only 25% of the original Support range The benefits I’ll see in this changes would be as follow: Regarding change 1: this way you are actually able to use this unit from start since now they can support themselves even I combat. A fully supported a treespirit’s damage becomes a little better than the damage of similar t1 range units from nature but not massively better and from orb two and rising the damage they deal in combt becomes more and more only “background noise” Regarding change 2 and 3: giving two support per unit would make a decent alternative to the Thornbarks as support units since from midgame on one of the, if not the most valuable resource is Unit-Cap and a Thornbark with 3 support at 5 Unit-Cap cost vs Treespirit with 2 Support at 3 Unit cap means you’ll get full support at nearly the same Unit-Cap cost (10 Thornbark vs 9 Treespirits) By allowing the Treespirits to support every unit even in combat, but only the Units/Towers who are effectively in range of the rootsupport of tis specific treespirit and not supporting over the whole Rootnetwort you’ll also create a new way to “Focus Support” a specific unit or building in the Root network without the need to cut this entity from the rest of the Root network. It gives the possibility to greatly strengthen a specific area but with the reduced range (lets go with only 25% Supportrange) you can support more than one Unit but not to many and only in this exact location. And since you only have limited unit Capacity you wont doo this on a Wide area. I think with those changes Treespirit would become a quite fun unit without becoming overpowered and it gives the player a support alternative to the Tornbarks so players can decide: go with Thornbark for Complete network wide support or go with Treespirit for focus support
 -
[ Card Changes ] Amii Monument: 1. Power Cost: 250p ➜ 125p 2. Ability Cost: 140p ➜ 100p 3. Orbs granted by Amii Monument no longer increase a player’s tier. Players still gain access to cards within their current tier that require the orb granted by Amii Monument. For example, if a player has 3 Fire orbs via normal Monuments, and builds a Nature orb via Amii Monument, they will still be T3, but will be able to summon Juggernauts and heal them via Equilbrium. A. Description - “Switch into this mode to gain one tierless Shadow Orb. This orb will not increase a player's tier, but will allow the player to play cards within their current tier that would require this Orb. The Orb will be ready and functional after 10 seconds. It cannot be switched back for 30 seconds.” Amii Monument in its existing state is a cheat card. It breaks a map's design, allowing players unfettered access to T4 cards when the map is balanced around the player only having access to T3 cards and creating a persistent toxic effect on the normal game experience. Amii Monument removes an entire tier from the game. This has a disruption impact on the game experience by changing deckbuilding at its core. In decks without Amii Monument, the player needs to consider how many cards they can budget for each tier and choose accordingly. With Amii Monument in a deck, the player can simply remove all T3 cards from their deck besides Amii Monument itself (spells like Infect which scale well into T4 are the exception), opening up more deck slots for T1, T2, and T4 cards. Consider also that nearly all PvE maps are functionally finished before the player ever reaches T4. Combined with the fact that T4 cards are significantly stronger than T3 cards (the power difference between T4 and T3 cards is the single largest increase in card strength between tiers) means that the player requires fewer T3 and T4 cards in their deck, allowing the use of more card slots for T1 and T2. This heavily warps the game experience by making the player stronger than the map is designed to account for at all tiers, not just once the player reaches T3. There is also the psychological effect Amii Monument has upon players. Since we first started balancing cards in Skylords Reborn, players have asked us to nerf Amii Monument, not just because of the balance issues, but because they felt compelled to always include it in their deck regardless of the situation. This is unsurprising as many game studios have recognized that players in general will choose the most efficient option, even to the detriment of their own enjoyment. And who of us have not experienced this? How many of us have not used mind-numbingly boring methods to grind in games just because it is the fastest way to procure loot, even if it ends up making us hate the game? Who has not included Amii Monument as a default deck option at some point in their time playing Skylords Reborn? To briefly summarize, Amii Monument undermines map design, deckbuilding, and possesses a factor that makes players feel compelled to include it in their decks, even when they know it undermines their own enjoyment. While designing our new maps, including not just the two maps releasing with this patch but the multiple additional maps currently in development, we found ourselves face to face with these issues in a way that made the card's problems no longer ignorable. For all these reasons and more, we felt that the time had finally come to nerf Amii Monument. Yet we do not want to destroy the card. The new design is tailored towards enabling unique, previously impossible, deckbuilding possibilities, in direct opposition to its previous design. We also realized that many T3 cards were not generally strong enough to be satisfying to use, so we dedicated almost the entire last patch to adding new T3 options through buffs, reworks, and new cards, and we are dedicated to continuing this project next patch. Lastly, we understand that this change will upset many people, but we hope you will see that we did not make this choice lightly. We do not enjoy nerfing cards players like, but we do it because we think it is the best choice for the game. At the same time, we think that the time of major nerfs is now at an end with these changes to Amii Monument, and we as a team commit to no further nerfs on the scale of Amii Monument or the previous Batariel nerf from 2 years ago to existing cards going forward. NP : However the bug where you build amii monument & orb, then try to make an orb switch but the game require you to pay 300 power instead of 100 still exist.
-
Patch #400024 Greetings Skylords, Skyladies and Skyfolk, with this patch we bring an end to the promotional code and booster discount from the shop which lasted from release until now. We also added a DND feature and slow-mode to public chat. Most of the remaining changes and bug fixes are minor as we are focusing more on the server with the sudden increase of players. Event Removed promotional code PROM-OMOU-NTAI-NEER from the shop. Ended 100BFP discount to all boosters in the shop. General changes Added Do Not Disturb (DND). This can be toggled in the Contacts window in-game. When a player is in DND they don't receive any requests, cannot be whispered and cannot receive mails from other players. More specifically, the requests they don't receive are: Trade requests Show deck requests Request deck requests Group invites Added slow-mode to public chat channels in-game. Players can now only send messages every 10 seconds. This does not apply to whispers. Adjusted the description of some achievements in French. Improved error messages received when purchasing a booster fails. Added localization for the match desynchronization message. General fixes Fixed error when certain characters were used to search for achievements by name in the achievements window. Fixed map goals not updating when changing slots. They now change accordingly to reflect the goals of the player in that slot. Post patch notes There seems to be an issue where slow-mode also applies to group/team/match channels. Until this is fixed, the slow-mode time has been decreased to 1 second.
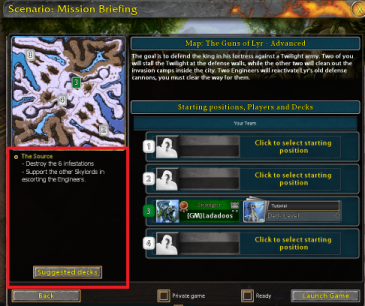
-
Map Balance Changes PvE Map Changes Behind Enemy Lines: increased initial power wells from 2 to 3. All three have a capacity of 1200, equivalent to a 40 min lifetime. Behind Enemy Lines is a map with a high failure rate with non-Nightguard strategies, and is none to have substantial periods where the player is forced to wait. The primary goal is to keep the map strategic and difficult, while removing the tedious moments. A secondary goal is to buff non-Nightguard strategies in preparation for the upcoming changes to mind control. Convoy: buildings are now properly blocked from being built in the canyon in the center of the map in all locations. Nightmare Shard: increased initial power wells from 2 to 3 and increased the capacity of the T2 & T3 power wells from 600 (20 min) to 900 (30 min). Once the goal is activated to destroy the infected Twilight spawns (which occurs either after the player has reached the Shard or the first Twilight Witch spawns, whichever is first) the fog of war over each infected camp is cleared in a 35m radius. The average completion time for this map on expert is 48 minutes. The idea is to increase early power generation to reduce waiting, and to increase well capacity in-line with how long the map actually takes. Additionally, many players do not have a good idea of the strength of the various Twilight camps. The choice to remove the fog of war over the camps should help the players to make a better informed decision of where next to attack. Nightmare's End: increased initial power wells from 2 to 3 and increased initial well capacity from 900 (30 min) to 1200 (40 min). Increased the capacity of the T2 power wells from 600 (20 min) to 900 (30 min). Nightmare's End has an average completion time of 72 minutes. This makes it the longest map in the game, and it is notoriously frustrating, leading to low replayability. Initial power generation and well capacity does not match the map's actual difficulty or length, so we are hopeful these changes can help bring about a smoother gameplay experience. There are other issues with the map in need of changing, but they will need to wait for a future patch. The Dwarven Riddle: added a monument and 3 power wells on each side of the map, regardless of number of players. This change will allow both players to go T4. It should only affect players who play the map in a more "standard" method, in contrast to the speedrun method. Standardized all official single player campaign maps to have 4 gold chests. Defending Hope: added 2 gold chests to match the standard. Ocean: removed 2 gold chests to match the standard. The Soultree: added 1 gold chest to match the standard Introduction: added one gold chest to introduce new players to the concept of gold chests. PvP Map Changes While PvP has been moving steadily towards a more and more balanced state, a major issue we still face is the maps themselves. Just like we previously made changes to the 1v1 maps, we are happy to finally unveil our changes to all the 2v2 PvP maps (and Yrmia). These changes should create a more competitive and fair play environment, with many existing imbalances and cheese opportunities removed. All minimaps have been adjusted to reflect the changes and to be more accurate in general. [ 1v1 Maps ] Yrmia / Yrmia (Spectator Map): Decreased the capacity of all power wells with 900 capacity to 600 capacity (1). Decreased the capacity of all power wells with 1500 capacity to 600 capacity (2). [ 2v2 Maps ] Danduil: Removed the 4 fortification walls surrounding the Monuments on both sides. Added 1 power well of 600 power capacity at each of the 4 monument positions in the corners. Fixed an issue where it was not possible to spawn non-S-sized units by the ground presence solely provided by the outer power wells (2 and 3). Swapped the starting positions including the power wells and monuments of the teams, whilst preserving previous symmetry. Fyre: Increased the construction cost of the 4 outer fortification walls from 25 to 50 energy. Decreased these wall's distance to the power wells. These walls can no longer be built by enemies if the player or ally own the power well closest to the wall. Additionally, slightly narrowed the layout of the respective area around the wall in the bottom left to enable the same effect there. Added flying blocking at the 2 big lakes in the center to prevent sieging across them with long-ranged flying units. This is now visualized by permanently present clouds in the area. The power wells in the top left of the upper starting base now provide spawn presence for units and buildings. The power wells in the bottom right of the lower starting base now provide better spawn presence for units and buildings. Fixed various other minor blocking issues. Swapped the starting positions including the power wells and monuments of the teams, whilst preserving previous symmetry. Gorgash: Increased the construction cost of the fortification walls at each starting position from 25 to 50 power. These walls are no longer pre-built at the start of the game. Increased all player's starting void power from 400 to 425 to compensate for wall changes. Decreased the power cost of the walls at the central northern and southern bases at the border of map from 75 to 50 energy. Adjusted the position of the monuments and power wells in all 6 bases in the north and south of the map to decrease distance to the wall. These walls can no longer be built by enemies if the player or ally owns the power well or monument closest to it. Removed the 2 walls around the northern and southern bases in the center of the map. Changed the layout of power wells and monuments in these bases by rotating each cluster by 180 degrees. Moved the power wells and monuments in these bases outwards, hence further away from the center of the map. Removed the northern and southern power well in the well cluster in the middle of the map. Moved the 4 power well clusters near the outer left and outer right bases closer to the center. Swapped the starting positions including the power wells and monuments of the teams, whilst preserving previous symmetry. Koshan: Swapped the starting positions between players, whilst preserving previous symmetry. Added 2 ramps to the sides of the new start positions, granting access to the plateau behind. Opened up the plateaus in the corners by creating connecting ramps towards the diagonal of the map. Adjusted the positions of wells, so that they are further away from the nearby wall, and thus hostile units mounted on the wall cannot attack the wells anymore. Nadai: Added 1 power well of 1200 capacity at each side of the center monument position. Adjusted the positions of monuments and walls, so that 4 of the walls cannot be taken anymore if an enemy has taken the adjacent monument. Adjusted the positions of monuments, so that they are further away from the nearby wall, and thus hostile units mounted on the wall cannot attack the orb anymore. Swapped the starting positions including the starting power wells and monuments only within teams for consistency, whilst preserving map symmetry. Turan: Opened up the middle of the map by creating 4 connecting paths between the power well clusters and the central monument. Swapped the starting positions including the power wells and monuments of the teams, whilst preserving previous symmetry. Yshia: Adjusted the positions of the 4 outer fortification walls to prevent offensive walling, by moving them outwards and thus closer to the power wells and monuments there. Opened up the plateaus by adding 2 ramps to each of them. Widened one of the ramps leading up to the two small plateaus. Increased the cost of the plateau walls from 25 to 50. Moved the well clusters more towards the center of the plateau, but keeping them close to the wall to prevent offensive walling. Moved the monuments previously located off the plateau to add to each of them 1 power well of 600 power capacity. Swapped the starting positions including the power wells and monuments of the teams, whilst preserving previous symmetry. Zahadune: Added flying blocking at various places at the borders of the bodies of water to prevent sieging across them with long-ranged flying units. This is now visualized by permanently present clouds in the area. Fire Random PvE Balance Changes Fire was added as an enemy faction in rPvE in our Anniversary Patch. While we are currently working on adding Nature as the next faction to fight against, we have been keeping a close eye on the balance and player experience against Fire among all skill levels. With this patch, we will be making some changes to improve the experience. [ System Changes ] - Significantly reduced the difficulties 6 and below. - Volcano now only spawns in level 4 camps and beyond.* - Incoming attack waves should now be less oppressive on higher difficulties. [ Bosses ] Removed fire class from all fire boss units - Protector's Seal no longer blocks the damage of Fire bosses. Abaddon: - Rage: - Reduced the damage bonus from the second stage from 300% to 200%. - Gates of Hell: - Reduced the initial damage from 800 (2400 in total) to 400 (1200 in total). - Reduced the eruption damage from 2000 (6000 in total) to 1000 (3000 in total). Aspect of Summer: - Global Warming: No longer prevents ice shield from being applied to target units. Brannoc: - Reduced life points from 65000 to 60000. - Fire Sphere: - Increased channeling time from 3 to 5 seconds. - Reduced damage from 2000 (10000 in total) to 1500 (7500 in total). - Reduced the radius from 25m to 20m. - Reduced the casting range 30m to 25m. Fireback: - Increased life points from 30000 to 40000. Fiend of Fire: - Flamethrower: Reduced damage per second from 600 to 500. Molten Golem: - Blazing Surface: Reduced damage returned from 50% to 25%. Vulcanos: - Unit is now XL. - Can now damage air units. [ Units ] Emberstrike: - Fire Lance - Reduced damage from 1200 (3100 in total) to 1000 (2500 in total). - Only deals 50% damage to structures. Firesworn: - Fixed a bug that prevented the unit from attacking units other than L-sized units. Fire Dragon: - Rage: Reduced the damage bonus from the second stage from 300% to 200%. Fire Worm: - Earthquake: - Reduced the damage per hit from 1000 to 500. - Now properly deals L counter damage. Magma Spore: - Ground Blast: - Reduced the damage from 720 (1120 in total) to 350 (1050 in total). - Reduced the area Radius 15m -> 10m. Spitfire: - Fire Bomb: Reduced range from 50m to 35m. [ Buildings ] Pyromaniac: - Reduced the duration of the damage over time debuff from 10 seconds to 3 seconds. Tower of Flames: - Volcanic Ground: - Reduced the damage from 6 times 200/1000 to 6 times 150/750. - Reduced the range from 25m to 20m. Volcano: - Reduced life points from 5000 to 3500. - Reduced the size by 10%. New Building: Flame Crystal - Spawns in Level 4 and Level 5 camps* and will periodically remove debuffs and cc effects from allied units Fire can be extremely strong, but due to its high attack and low defense, it is extra vulnerable to Crowd Control spells. We want to counter this weakness with a brand-new building, while some major enemy damage dealers have been rebalanced * Level 3 camps are usually right behind the T3/T4 camp; Level 4 camps are the row behind Level 3; Level 5 is always the last row. Map Editor Changes Increased maximum allowed file size of community maps from 64 to 512 megabytes. Added optional verbose logging for LUA. This is relevant for mapmakers and can be enabled in the debug section of the configuration file at `/Battleforge/config.json` using the `lua` configuration. The logs can be found in the `/Battleforge/Diag` folder. Increased max brush size in the map editor. Fixed crashes for the height map generation for Random PvE in the map editor in certain cases. Allowed selection of the fire Random PvE preset in the map editor. Bugfixes Fixed issue related to character names becoming too long with the added `{GM}` prefix and not being able to be whispered. Fixed issue with deleting community maps while they are being downloaded by another player. Fixed incorrect ordering for all time rankings in the leaderboards. Fixed ability to add 21 cards or 21 boosters to trade, instead of 20. Fixed too large scroll step size for upgrade view when trying to scroll through the upgrades. It now scrolls with the same steps as the cards scroll view. Fixed inconsistencies in the Amii card frames. Card descriptions will no longer overflow into the card artwork. Fixed walk speed mismatch between respawned squad members and existing ones, causing the group as a whole to move at an unfavorable speed. This could be noticed for example with Werebeasts and Strikers. Fixed wrong displayed remaining card charges for Offering in rare cases Fixed incorrect handling of overkill stampede damage when destroying buildings. In general, this has a nerfing effect on stampede. Improved error handling and logging for issues related to starting BattleForge with DirectX10. and many more!

- 24 replies
-
- 17
-
-
Regarding Gemeye, I think it makes more sense to consider his dp20 as 4250, not 5250. It's not always easy to keep many enemies in poison for the entire duration of the poison. "bypass any protection" part is quite niche and it is rare that you will be able to get good value from it. While you think I underestimate him, I think you overestimate him. And I think the percentage of Gemeye's usage is more on my side. Regarding the Nightshade Plant as an example of good changes... I don't think that's a good argument. I didn't see him much more often than the Deepfang. About 3 games out of 200+. I think he needs another 500 hp and a buff to the twilight transformations (as a whole) to be a good option. Now about my version of Gemeye. You need to invest quite a lot of power to scale his defense that high. It's more of an option for people like "Devs changed the only good card I enjoyed playing and now I'm uninstalling the game." For the same reason, I didn't touch the attack number, but yes, perhaps the poison damage could be reduced. And along with this, we can raise his power cost to 300. But we really can't touch his other stats and abilities. Otherwise, many players will be unhappy and/or he will also lose the competition. I agree that this concept of attack and hp distribution is not very suitable for a stonekin unit. But there's nothing we can do about it, in my opinion. I could change his new ability to +300 hp instead of +6% defense to make it look better (f it's technically possible to implement it in the game), but nothing more than that. Regarding "wrong cards for comparison". So if you want a fast army, Deepfang is bad. If you plan on defending or slow pushing, Razorleaf can do the same thing, but better. If you have enough power to summon two Deepfangs, then Enlightenment + t4 unit will be better economically (If you don't plan on keeping Deepfang in your t4 army, which doesn't seem so bad). Of course there are situations when you have about 250 power and you have to act now, but they are quite rare. Even in the case where you need to push from T3 to T4 in rPvE, Deepfang is not very good because of how its damage is split between targets. You can right click a spawning building and start dealing 0 damage to it in half of the games. So generally, you can use other cards that cost the same amount of orbs and get a better result. I guess that's what competition is. No? And now I think that's what I'm going to do. I'm going to force myself to play a stonekin deck with Deepfang and I will take every opportunity to test him out. And after that I will find 3 slots in the deck to put a Razorleaf with the root system. And I'll be completely honest about the outcome of this test. And god forbid if it turns out Razorleaf is better than Deepfang in a stonekin deck... But this test will not take less than a week I think. In the meantime we can continue our discussion =D Edit: I was wrong. I have revised my views on some individual things and the situation as a whole.
-
No I did understood you (mostly ^^, see B), I just disagree with what you said and gave you the reasons : A. Deepfang was not great until recently. He got significantly buffed on 22th decembre. It takes time for people to try new things they have previously discarded. It took something like months before people realise how strong plague was after the rework, and over a year to realise that emberstrike was actually meta in rPvE. Deepfang got reworked a month ago. And I've experienced that people playing stonekin are even more loath to try new things. As said, deepfang isn't really in the same bath as root defense, this thing is really map dependant. Stone launcher & deepgorge are more in competition with root defense for the same slots in your deck than deepfang is. As explained, deepfang compete for space in your deck with enlightment & stonewarrior + rageflamme combo (& the 2 color worms), and particularly with enlightment in rpve. And until his buff, he was a lesser option. Now, he competes seriously (meaning it is not longer an obvious choice). But people need time to start integrating him back into their decks. B & C. Sorry I misunderstood deepstone fusion as bonus dmg instead of bonus armor. But the point I made stand. You can't keep gem eye P & G passive effect on its attack at T3. Again, when you see 3250 DP20, the truth is that gem eye P is 5250 dp20 with 50m range & 100% true damage (bypass any protection). You simply can't keep that at T3, it's T4 power level. And the damage reduction you gave him allows too much scaling at T4. You're creating a 5250 / 4700 T3 creature at T4. You're making a T3 unit better than a good number of T4 range units. The power level difference between T3 & T4 is supposed to be the biggest power level jump in the game, and you are basically making a T4 creature at T3. And at T3, your unit has almost twice the effective dp20 than it has effective health. For a stonekin unit, it is not part of the faction design, where your units (outside buff & combo) effective dp20 should be inferior to its effective health. D. Deepfang is dependant on an ability for that damage boost (you can get silenced, you can leave the area of effect, ...). Active effects > passive ones in the game, for obvious reasons. So you're comparing a 3300/3500 L counter slow creature with short range and a damage buff ability to a 5250/2340 true damage creature with 50m range, which can scale into a ~4700 equivalent hp creature into the late game. That is the problem. Just to give you an idea, when nightshade plant was moved from T4 to T3, its cost stayed the same, but its stats went from 6380/5800 to 4100/3400. It did gain siege & a transformation cost reduction, but still it lost ~2300~2400 stats of attack and defense for moving down 1 tier. Right now, both cards are fine. Gem eye main attack could use a small buff at most (650 -> 700 , so 3250-> 3500), and even there I'm not sure it is necessary for its viability.
-
I disagree with your analysis. Both cards are fine in their tier right now (talking with recent deepfang buff in mind) : 1) Deepfang : contrary to what you say, deepfang is not in a competition with thornbark and razorleaf. These 2 are great in root network defense, and outside of slow razorleaf push with sylvian gate and a thornbark battery in some Cpve situations, are really not good on the offense. In rpve root network is just too many card slots for some defense. In offense, deepfang main weakness is his speed. So in T3 Cpve scenario where your army needs to move, he will be replaced by stonekin warrior + rageflamme. But deepfang has a place in rpve where he’s adapted for the T3 push to T4. His speed is no longer a problem in this situation. In term of damage, the red one offers you 5940 dp20 with L counter. Few things can hit that hard in T3 for 250 power. He is in competition with enlightment, as well as deep coil worm and the frost worm. Vs the worms, deepfang outperform them completely. With enlightment, I used to prefer it instead of deepfang, but since the buff it’s the contrary. Deepfang will come faster, and if it’s not enough, by the time you can accumulate the power to cast enlightment + stonekin T4 , I’ll have 2. He’s better vs an eventual boss at your T4 orb. He’s a bit worse if your facing a close camp to your T4 and need to snipe the spawner in the back. Overall, in stonekin T3 Rpve, where before enlightment > deepfang , now it is no longer the case and the choice is ~50/50. 2) Gem Eye : You are overlooking a number of facts when analyzing the card. 1st, in the case of gem eye, the 2 affinities are really different. In term of stats, you are overlooking the massive part the poison plays with the overall damage of the card. If the damage dealt by it is included, then the P one has a dp20 of 5250, not 3250. And it is true damage, which can be exceptionally powerful in some situations (some boss, moloch vs rpve fire, …). And the poison effect stack. Gem eye P is considered a good range damage dealer overall. Another thing you’re missing is the range, 50m ain’t no joke. That allows you to snipe building easily. For your rework, remember stonekin identity is tankiness, you should not give your units more damage than they have health/ resistance. 1) Gem eye : No way you keep a 5250 dp20 unit with 50m range in T3, even more with the potential damage buff you are giving him. And no way you give a stonekin unit that much more damage than health. Overall a terribly bad rework. 2) I don’t like the passive damage buff based on numbers of units/deck slot, it is not in stonekin identity. The ability is cool, though 35m is too much, it would be 25m if implemented.
-
I was thinking about increasing the population limit in order to attend to make viable squad (men battalions) builds because there are many intresting squad units that are not being played for obviouse reasons and i woulds like to see them being viable in game and not just being played by beginners for a short ammount of time. I'm sure there are many other ways of making squads more viable but I think increasing the pop cap maybe just for them is worth a try. What do you think?
-
Patch #400048 - Echoes of the Amii Welcome to our newest patch. This update contains our fourteenth balance patch for the game, 4 brand-new cards, 2 new campaign maps, a new PvP mode, four new achievements, and much more! Patch Preview Four new cards are now available! Jump in-game to collect Amii Sentinel, Skydancer, Energy Core, and Umbabwe! Added two new campaign maps! Continue the story of Skylords Reborn in the first two maps of our new campaign. BattleArena has arrived! Play against your friends in 2v2 or 3v3 battles in this casual PvP mode. Four new achievements and cosmetics to go along with the new maps and game mode. A few balance changes and major card reworks mostly to previously unviable cards. General Changes The Shadow enemies found on the summoning menu in the Forge have been swapped with their NPC versions. Amii enemies have also been added to the Forge's summoning menu. A new section has been added to PvE leaderboard to account for potential speedrun changes arising from changes to Amii Monument without wiping the rankings. Upgrades have been redistributed, you can find more information in-game by using the "Show Upgrades" option on each map. All Rebirth edition cards have had their U2 and U3 upgrades moved to the new maps. The Lost Souls Forge skin is now available. Complete the new achievement "After All These Years" on expert difficulty to unlock it. Deleted players are now displayed as <deleted> rather than empty. New setting "Force create unit group when holding SHIFT key" added to options. Reverted previously undocumented changes to attack-move command (shortcut Q), that were causing issues with unit responsiveness. Added Map of the Day info to the "Daily Rewards" section. When a player completes the Map of the Day in a given day, the flame on the world map will be grayed out. This change is to help players remember if they have already completed a particular Map of the Day for achievement progress. Players can continue to play the Map of the Day for extra upgrade rewards as normal. Re-enabled the chat command export collection. Re-enabled the explore replay button. New Campaign Maps At long last the Skylords Reborn story continues with the addition of two brand-new fully-voiced (in English) campaign maps. These maps continue the story after Dwarven Riddle and are the product of hundreds of hours of our team's artists, designers, community map testers, translators, and voice actors. Both come with new achievements and rewards to encourage you to dive-in and explore. Unexpected Visitors, 2-player campaign map Journey into the northern wastes to find the secrets hidden within the Riddle of Gnaur. Discover the last enclave of the elusive Amii and save them from certain destruction. Into the Jungle, 2-player campaign map Brave the jungles of Viridya's island to find a new home for your Amii allies. New Cards Amii Sentinel - 260p T4 Amii Unit You will find the upgrades for this card on the map "Into the Jungle." Our goal for Amii's T4 is to create a micro-intensive deck where most of the damage is unit-based. With Amii Sentinel in particular, our goal is to create a frontline tank that functions as a perfect conduit for Shadow's single-target buff cards. Volatile Body's 120% reflect turns Sentinel's health into a damage resource, which synergizes perfectly with cards like Regrowth, Transcendence, and Skydancer. Energy Core - 140p T4 Amii Unit You will find the upgrades for this card on the map "Unexpected Visitors." Energy Core's original design came from the Community Card Contest we held over a year ago. The idea behind Energy Core is to create a unit which is more of a mobile spell than it is a traditional unit. It has no auto-attack, but it has two active abilities. Both abilities damage Energy Core, one more significantly than the other, requiring the player to pay close attention to unit health and weigh their options over what is possible for them and whether or not risking losing the unit is worthwhile. Skydancer - 120p T4 Amii Unit You will find the upgrades for this card on the map "Unexpected Visitors." While Sentinel and Energy Core fit the roles of tank and damage dealer respectively, Skydancer functions as the supporter. Skydancer has two different mode-changes, one debuffing enemies and one buffing allies. The debuff functions as a kind of anti-rage effect, while the buff increases allied life points by a set amount. The health buff effect directly synergizes with Sentinel and Energy Core who both has health-based damage mechanics. Umbabwe - 200p T4 Legendary Unit You will find the upgrades for this card on the map "Into the Jungle." Blight's infamous witch doctor is finally making his player card appearance. As a standalone legendary unit, he is intended to function as a spellcaster type unit. To accomplish this, the card has a lot of built-in flexibility via its spells. Umbabwe has an auto-attack which is a meteor from Inferno, the ability to cast his signature spell Oink, and an active ability to summon a fiery tornado which applies a painful burn effect. BattleArena - New PvP Mode For a long time, we have been developing an alternative PvP mode called BattleArena which we feel is finally ready to release. In this game mode, players do not use cards from their deck. Instead, they are given spell devices and progressively stronger creatures which they must use to overcome their enemies. The mode can be played 2v2 or 3v3 and comes with a new achievement to reward players for trying it out. Go to Sparring Grounds in-game to play BattleArena. Voice Actors Many of the above new features would not be nearly as enjoyable without the help of our volunteer voice actors. In this patch, the following players have lent their voices to liven up the Skylords Reborn universe. We thank them greatly for their help! Vox - Gaeron (new Frost Skylord) Ultralord - Burning Spears Edgelord - Skydancer Edgelord - Amii Phantom (includes the card's voice lines and the unit's appearance in the new maps) Elijah - Amii Sentinel Dreamlord - New map loading screen narration Achievements As part of the release of the two new campaign maps and BattleArena, we have released four accompanying achievements. There is a normal achievement just for beating the new maps, which rewards the player with the new Amii Sentinel on advanced and the Lost Souls forge on expert, as well as two achievements for mastering the maps. BattleArena has a new progressive achievement for playing the mode. We are also adding new Amii borders to the existing endless achievements for playing Amii decks in PvE and PvP. [ New Achievements ] After All These Years [Card: Amii Sentinel; Forge: Lost Souls] Win the 2-player scenarios Unexpected Visitors and Into the Jungle on Advanced / Expert difficulty or higher. Evacuation Expert [Progressive Banner: Bronze rank ➜ Ember rank] Win the 2-player scenario Unexpected Visitors on Expert difficulty in under 35 / 33 / 31 / 29 / 27 minutes. Earth, Wind, Fire [Avatar: Tribal] Win the 2-player scenario Into the Jungle on Expert difficulty after defeating all 3 bosses in a single match. Honor Bound [Booster: 1 General; Avatar: Mo Ocean] Play BattleArena [3 matches & 10 matches] [ Existing Achievement Changes ] Giver and Taker of Life (PvE) & Path of Insight (PvP) Both achievements now grant progressive Amii borders in line with the requirements of other faction borders. Borders will be added to the player's account retroactively based on achievement progress. Legacy Server While we are happy with the game's development since its revival, we understand that there are some parts of old BattleForge that players might miss. In response to this feeling, we have created a legacy server. This legacy server is equivalent to BattleForge the day it was shut down, with none of the balance changes, new cards, or new maps that have occurred as part of Skylords Reborn's continued development being included. The legacy server functions similarly to the public test server in that the player already has all cards and upgrades. To access the legacy server navigate to the game folder, in standard installations the game folder is be found at C:\Games\Skylords Reborn, and start StartBattleForgeLegacy.bat. From there, you login with your normal account information. Game Balance Changes [ Global Balance Changes ] Amii faction passive scaling: Amii's faction passive Elusive now scales based on the unit's tier. Tier 2: 10% less Freeze and Paralyze duration. Tier 3: 20% less Freeze and Paralyze duration. Tier 4: 30% less Freeze and Paralyze duration. Legendary building restrictions: Legendary buildings are now one-per-player, not one-per-team. Random PvE 1p starting void power: Starting void power has been changed to account for the Amii Monument changes. Standard / Standard+ (Difficulties 1-2): 600 starting void power Standard++ to Expert+ (Difficulties 3-8): 700 starting void power [ Card Changes ] Amii Monument: 1. Power Cost: 250p ➜ 125p 2. Ability Cost: 140p ➜ 100p 3. Orbs granted by Amii Monument no longer increase a player’s tier. Players still gain access to cards within their current tier that require the orb granted by Amii Monument. For example, if a player has 3 Fire orbs via normal Monuments, and builds a Nature orb via Amii Monument, they will still be T3, but will be able to summon Juggernauts and heal them via Equilbrium. A. Description - “Switch into this mode to gain one tierless Shadow Orb. This orb will not increase a player's tier, but will allow the player to play cards within their current tier that would require this Orb. The Orb will be ready and functional after 10 seconds. It cannot be switched back for 30 seconds.” Amii Monument in its existing state is a cheat card. It breaks a map's design, allowing players unfettered access to T4 cards when the map is balanced around the player only having access to T3 cards and creating a persistent toxic effect on the normal game experience. Amii Monument removes an entire tier from the game. This has a disruption impact on the game experience by changing deckbuilding at its core. In decks without Amii Monument, the player needs to consider how many cards they can budget for each tier and choose accordingly. With Amii Monument in a deck, the player can simply remove all T3 cards from their deck besides Amii Monument itself (spells like Infect which scale well into T4 are the exception), opening up more deck slots for T1, T2, and T4 cards. Consider also that nearly all PvE maps are functionally finished before the player ever reaches T4. Combined with the fact that T4 cards are significantly stronger than T3 cards (the power difference between T4 and T3 cards is the single largest increase in card strength between tiers) means that the player requires fewer T3 and T4 cards in their deck, allowing the use of more card slots for T1 and T2. This heavily warps the game experience by making the player stronger than the map is designed to account for at all tiers, not just once the player reaches T3. There is also the psychological effect Amii Monument has upon players. Since we first started balancing cards in Skylords Reborn, players have asked us to nerf Amii Monument, not just because of the balance issues, but because they felt compelled to always include it in their deck regardless of the situation. This is unsurprising as many game studios have recognized that players in general will choose the most efficient option, even to the detriment of their own enjoyment. And who of us have not experienced this? How many of us have not used mind-numbingly boring methods to grind in games just because it is the fastest way to procure loot, even if it ends up making us hate the game? Who has not included Amii Monument as a default deck option at some point in their time playing Skylords Reborn? To briefly summarize, Amii Monument undermines map design, deckbuilding, and possesses a factor that makes players feel compelled to include it in their decks, even when they know it undermines their own enjoyment. While designing our new maps, including not just the two maps releasing with this patch but the multiple additional maps currently in development, we found ourselves face to face with these issues in a way that made the card's problems no longer ignorable. For all these reasons and more, we felt that the time had finally come to nerf Amii Monument. Yet we do not want to destroy the card. The new design is tailored towards enabling unique, previously impossible, deckbuilding possibilities, in direct opposition to its previous design. We also realized that many T3 cards were not generally strong enough to be satisfying to use, so we dedicated almost the entire last patch to adding new T3 options through buffs, reworks, and new cards, and we are dedicated to continuing this project next patch. Lastly, we understand that this change will upset many people, but we hope you will see that we did not make this choice lightly. We do not enjoy nerfing cards players like, but we do it because we think it is the best choice for the game. At the same time, we think that the time of major nerfs is now at an end with these changes to Amii Monument, and we as a team commit to no further nerfs on the scale of Amii Monument or the previous Batariel nerf from 2 years ago to existing cards going forward. Dying Breed: 1. Power cost: 100p ➜ 90p 2. Orb cost: 1 Fire, 2 Neutral (T3) ➜ 2 Fire, 1 Neutral (T3) 2. Tainted Plunder (p): A. Description - Target enemy unit is filled with plunder. If the target enemy dies within the next 30 seconds, all friendly fire units in a 25m radius gain Looter for 25 seconds. Units with Looter harvest the bound power of enemies. Up to 10% of an enemy's original power costs can be harvested relative to the amount of its maximum life points received as damage. Reusable every 30 seconds. 3. Gifted Plunder (g): A. Description - Target enemy unit is filled with plunder and takes 30 damage per second. If the target enemy dies within the next 30 seconds, all friendly fire units in a 25m radius gain Looter for 25 seconds. Units with Looter harvest the bound power of enemies. Up to 7% of an enemy's original power costs can be harvested relative to the amount of its maximum life points received as damage. Reusable every 30 seconds. 4. New FX to go with the new card effect. One of our long-term design projects is trying to give other factions besides Pure Shadow, with its Resource Booster, the ability to accelerate their power in higher tiers. We started this with changes to Nature's power flow via Forest Elder and Promise of Life, and now we are turning our eyes to Fire. Most Fire players are responsible for building 2 Shrines of War as soon as they get T3, immediately putting them behind by 300 power. Combined with high power cost units in T4, this gives Fire a painfully slow start with a frequent reliance on hoping your allies brought a Breeding Grounds for you to use. After carefully considering our options to accelerate Fire's power gain, we decided to bring back the Looter mechanic, but have it applied only temporarily with moderate percentages. We choose Dying Breed as the rework target because its previous effect was unsalvageable. The changes should allow Fire to use Dying Breed in early T3 to accelerate the transition into T4, or to payoff the bound power invested into Shrine of War, without being so strong as to cause Fire's power gain to grow out of control. Fire Force (Formerly Girl Power): 1. Change name: Girl Power ➜ Fire Force 2. Power cost: 50p ➜ 80p 3. Blessed Morale (b): A. Description - Target own melee unit will be designated the champion of Fire. All friendly melee units in a 30m radius will take 20% less damage. If at least 2 enemies die within a 30m radius of the champion within a 10 second period, the damage reduction increases to 50% for 15 seconds. Lasts until the champion dies, or until a different champion is chosen. There may only be one champion of Fire per player at a time. Reusable every 60 seconds. 4. Infused Morale (r): A. Description - Target own melee unit will be designated the champion of Fire. All friendly melee units in a 30m radius will deal 25% more damage. If at least 2 enemies die within a 30m radius of the champion within a 10 second period, the damage buff increases to 50% for 15 seconds. Lasts until the champion dies, or until a different champion is chosen. There may only be one champion of Fire per player at a time. Reusable every 60 seconds. 5. New FX to go with the new card effect. Girl Power was an odd card that did not fit within the game. It was never clear to the player what cards were men, which were women, and which were neither. We did not see a way to salvage the card as it was, so we reworked it into a tool to enable new melee based strategies in Fire decks. The newly minted Fire Force is a permanent spell effect that you apply to a single unit which transforms that unit into a leader type unit. Allies around the leader are buffed, either with increasing damage reduction or increasing damage dealt, when enemies around the leader unit die. Our hope is that this card enables previously niche T2 and T3 melee units to become viable options in PvE. Grove Spirit: 1. Movement speed: 4.8 m/s ➜ 6.4 m/s (normal L/XL-speed) 2. Life points: 1100 ➜ 1600 3. Healing Song cost: 90p ➜ 60p Grove Spirit has found itself a niche in a deck which uses it alongside Offering to cycle Mind Control. The idea of this deck is to use Grove Spirit as ground presence while you build yourself an army out of your enemy's units. The issue is that Grove Spirit itself is slow and dies in one-shot to artillery buildings. We have given the unit a booster shot of life points and made her undulate her tentacles faster, alongside a discount to the Healing Song ability. Pending any further rework to the unit, we hope in the meantime that this helps the unit in the one niche it has found for itself. Lost Dancer: 1. Tainted Blast affinity effect: 50% more damage against humans ➜ 30% more damage against humans Lost Dancer has proven too strong in PvP and we are toning down the extra damage against humans to bring her back in-line. Lost Manabeast: 1. Immortalize requirement: 7 enemy life essences ➜ 3 enemy life essences Immortalize's enemy requirement is too strict, making it overly difficult to make good use of the ability. We are substantially reducing the requirements to hopefully give Lost Manabeast a better synergy with Revenant strategies. [ NPC & Map Changes ] Spearmen (NPC): 1. Toggle ability Defensive Formation: 25% damage reduction now applies properly Fire Emitter (Slavemaster version): 1. Power cost: 2000p ➜ 200p New NPC Entities: Available for use by official and community mapmakers. Added Frost NPC entities: Units: War Eagle, Tremor, Mountain Rowdy, Northland Drake, Icespike, Avatar of Frost, Construct, Dreadnought, Core Dredge, Dredgling, Mountaineer, Tempest, Winter Witch Buildings: Ice Launcher, Frost Crystal, Frontier Keep (large spawner), Kobold Inc. (small spawner) Added Amii NPC entities: Amii Crossbowmen, Amii Paladins, Amii Phantom, Amii Sentinel, Amii Keep Bad Harvest: Both orbs near the Treasure Wagon now spawn when a player in position 3 is playing solo. The Soultree: The map now requires all 5 normal orbs to be built or under construction to fulfill the map's victory requirement. Amii Monument no longer counts towards this goal. [ Bugfixes & Miscellaneous Changes ] Fixed card descriptions in various languages. The longstanding issue which caused players' games to slowdown substantially when they destroyed multiple frozen air units at once, has now been fixed. The most well known occurrence of this bug was connected to Shatter Ice. Dropdowns for rankings are no longer scrollable.


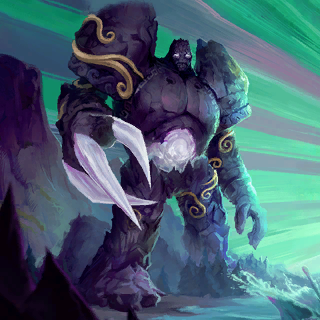
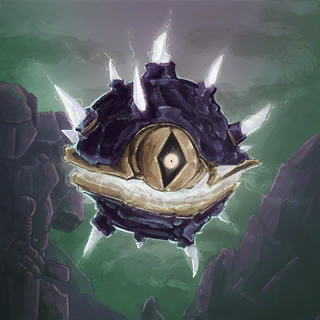


- 23 replies
-
- 15
-
-
Greetings Skylords! A new month; a new Community Update! It's time to bring you up to speed with everything going on in Skylords Reborn! • Echoes of the Amii Nearly 15 years have passed since the original BattleForge story concluded. When we revived the game through Skylords Reborn, two questions kept coming up: Will we get new Amii cards, and will we see new story or campaign maps? One of the final cards released for the original game was Amii Phantom, offering a glimpse of what might have been. Over the years, our team has carefully expanded the mysterious Amii faction with new cards like Amii Paladins, Tranquility, and Transcendence, gradually shaping a distinct faction identity. With our upcoming patch, we're accelerating this effort by introducing three late-game units: Amii Sentinel, Skydancer, and Energy Core. These new units provide players with exciting options for building a dedicated Amii deck. We are incredibly proud of how far this project has come, and we're grateful for the opportunity to expand the Amii faction with these new cards. Rest assured, we have more cards in development for the faction, some of which you can expect to see before the end of the year. In addition to new cards, our next patch marks a significant milestone by adding new campaign maps. And what better way to do so than by properly integrating the Amii into the story? These new maps take place during the original story's timeframe, filling in some of the gaps and answering lingering questions, while also introducing a new Skylord and bringing the ancient Amii into the present-day narrative. Our next patch will feature two new maps, with more in development. We've dedicated significant time and effort to these campaign maps, carefully refining the balance, map art, story, and gameplay. We hope players will appreciate the passion that went into their creation. After all this time, we want to ensure that these maps stand proudly alongside the original campaign. These maps are the product of hundreds of hours of our team's artists, designers, community map testers, translators, and voice actors. We hope you are looking forward to them! We are excited to announce Echoes of the Amii will release on September 21st. • New Card Reveal - Energy Core With the patch release imminent, we have another new card to show you that will be included. Crackling with energy, Energy Core is powerful, but unstable. By overloading the core, it can deal massive amounts of damage, but doing so comes at a heavy cost. Let's break down the card! Please note: We are still finalizing the card. While we are generally happy with it, numbers and effects might still change before release. Pulse Activate to unleash an electric shock through enemies in a straight line that deals 1200 damage to enemies in a 20m radius, up to 3000 in total. The shock damages Energy Core by 1150 life points points. Must have at least 1000 life points to activate. Reusable every 15 seconds. Overcharge Activate to overload the unit, dealing 2000 damage to enemies in a 25m radius, up to 6000 in total. The overload damages Energy Core by 2300 life points. This self-inflicted damage ignores damage modification and cannot be warded off with the help of damage reducing abilities because it is able to circumvent every buff or protective shield. Must have at least 2000 life points to activate. Reusable every 30 seconds. Elusive Units with Elusive have the duration of the immobilizing effects of Freeze and Paralyze reduced by 30%. Sharp eyes might have noticed a change in the percentage of the Amii passive ability "Elusive". Starting with our next patch, the Elusive ability will be different depending on the tier of the unit. The current cards, Amii Phantom and Amii Palladin, and any future tier 2 Amii units will remain at 10%. Meanwhile, tier 3 will move the percentage up to 20%, and tier 4 units will have a 30% reduction to the duration of Freeze and Paralyze. Design notes: Energy Core's original design came from a player in the Community Card Contest we held over a year ago. At the time we were fleshing out the basic design of Amii's T4 and we thought that Energy Core was the perfect fit for what we envisioned regarding this faction's playstyle. The idea behind Energy Core is to create a unit which is more of a mobile spell than it is a traditional unit. It has no auto-attack, but it has two activatable abilities. Both abilities damage Energy Core, one more significantly than the other, requiring the player to pay close attention to the unit's health and weigh their options over what is possible for them and whether or not risking losing the unit is worthwhile. It synergizes directly with Skydancer, whose buff increases a unit's base health, allowing Overcharge to be used without directly killing Energy Core. The damage to enemies is modifiable by Shadow's buffs, allowing the card to work directly with Shadow's buffs and Nature's healing spells. Energy Core will release alongside our next content patch on the 21st. • Art Spotlight - Energy Core As the creators of Monuments and Powerwells in Nyn, the Amii seemed like the perfect faction for a unit embodying the essence of a monument's core. For the initial concept of the card, our artist, SpiritAlpha, took the model of Magma Spore, and incorporated faces in its design—a direction we've explored before with the spell Tranquility. From the start, we knew we wanted to move away from the iconic chains of the Magma Spore, aiming to make the design feel more distinctive. While we're limited to the models from the original game, it was important to us that this unit didn’t come across as just another simple reskin. We were drawn to this next concept art, evoking the feeling of soldiers stumbling upon an ancient construct in a temple-like setting. However, we were concerned that it resembled a spell too closely and weren’t entirely convinced by the facial design. To refine the concept, we revisited other Amii structures in the game for inspiration. We noticed that the Amii Shrines featured a unique eye in their design, which we felt was worth exploring further. We paused work on the card art to ensure this idea could be executed well in the model. Once the model was finalized, we resumed work on the card artwork. We were thrilled with the direction we took. The core not only looks powerful, but it also brings a distinct personality to what could have been a rather plain model. With its ominous eye watching over the battlefield and its rhythmic hum, the Energy Core is something truly unique in the lineup. We hope you love it as much as we do! • Amii Monument Changes One of the most anticipated—or depending on your perspective, feared—changes will be implemented in our next patch. After careful consideration and years of discussion, we have decided to change the card Amii Monument. We are fully aware of the controversy surrounding this topic, so we want to take the time to explain our reasoning and the thought process behind it. The following changes will be made to the card: 1. Power Cost: 250p ➜ 125p 2. Ability Cost: 140p ➜ 100p 3. Orbs granted by Amii Monument no longer increase a player’s tier. Players still gain access to cards within their current tier that require the orb granted by Amii Monument. For example, if a player has 3 Fire orbs via normal Monuments, and builds a Nature orb via Amii Monument, they will still be T3, but will be able to summon Juggernauts and heal them via Equilbrium. New Description - “Switch into this mode to gain one tierless Shadow Orb. This orb will not increase a player's tier, but will allow the player to play cards within their current tier that would require this Orb. The Orb will be ready and functional after 10 seconds. It cannot be switched back for 30 seconds.” 4. Once built, Amii orbs attack as if they were a normal orb. 5. Legendary buildings are now one-per-player, not one-per-team. Reasoning Amii Monument in its existing state is a cheat card. It breaks a map's design, allowing players unfettered access to T4 cards when the map is balanced around the player only having access to T3 cards and creating a persistent toxic effect on the normal game experience. Amii Monument removes an entire tier from the game. This has a disruption impact on the game experience by changing deckbuilding at its core. In decks without Amii Monument, the player needs to consider how many cards they can budget for each tier and choose accordingly. With Amii Monument in a deck, the player can simply remove all T3 cards from their deck besides Amii Monument itself (spells like Infect which scale well into T4 are the exception), opening up more deck slots for T1, T2, and T4 cards. Consider also that nearly all PvE maps are functionally finished before the player ever reaches T4. Combined with the fact that T4 cards are significantly stronger than T3 cards (the power difference between T4 and T3 cards is the single largest increase in card strength between tiers) means that the player requires fewer T3 and T4 cards in their deck, allowing the use of more card slots for T1 and T2. This heavily warps the game experience by making the player stronger than the map is designed to account for at all tiers, not just once the player reaches T3. There is also the psychological effect Amii Monument has upon players. Since we first started balancing cards in Skylords Reborn, players have asked us to nerf Amii Monument, not just because of the balance issues, but because they felt compelled to always include it in their deck regardless of the situation. This is unsurprising as many game studios have recognized that players in general will choose the most efficient option, even to the detriment of their own enjoyment. And who of us have not experienced this? How many of us have not used mind-numbingly boring methods to grind in games just because it is the fastest way to procure loot, even if it ends up making us hate the game? Who has not included Amii Monument as a default deck option at some point in their time playing Skylords Reborn? To briefly summarize, Amii Monument undermines map design, deckbuilding, and possesses a factor that makes players feel compelled to include it in their decks, even when they know it undermines their own enjoyment. While designing our new maps, including not just the two maps releasing with this patch but the multiple additional maps currently in development, we found ourselves face to face with these issues in a way that made the card's problems no longer ignorable. For all these reasons and more, we felt that the time had finally come to nerf Amii Monument. Yet we do not want to destroy the card. The new design is tailored towards enabling unique, previously impossible, deckbuilding possibilities, in direct opposition to its previous design. We also realized that many T3 cards were not generally strong enough to be satisfying to use, so we dedicated almost the entire last patch to adding new T3 options through buffs, reworks, and new cards, and we are dedicated to continuing this project next patch. Lastly, we understand that this change will upset many people, but we hope you will see that we did not make this choice lightly. We do not enjoy nerfing cards players like, but we do it because we think it is the best choice for the game. At the same time, we think that the time of major nerfs is now at an end with these changes to Amii Monument, and we as a team commit to no further nerfs on the scale of Amii Monument or the previous Batariel nerf from 2 years ago to existing cards going forward. • Battle Arena Next patch will also bring the release of a new PvP mode called Battle Arena. In this game mode, players do not use cards from their deck. Instead, they are given spell devices and progressively stronger creatures which they must use to overcome their enemies. The mode can be played 2v2 or 3v3 and will come with a new achievement to reward players for trying it out. • Events In between our monthly Community Updates, we host various events and tournaments, so be sure to keep a close eye on the in-game event tab and the forum calendar to stay informed and not miss out on any exciting events! Current events: • UPCOMING - Release Event Once the patch is out, we will have an event to celebrate the release of the new campaign maps. In this special event, you'll have a chance to win some of the new cards or boosters! More details will be shared on patch day. • NEW - Seven Strategy Showdown 3 - Wrecking Time The 3rd event in the series is now live! The tables have turned, and this time Skylords are the ones destroying buildings. Destroy as many buildings as possible within the time limit and win some great prizes. More information. • IN PROGRESS - Seven Strategy Showdown Every two weeks there will be a new event in this series of seven events, each bringing a fun handcrafted challenge or mechanic! Be sure to check them out, as there are some great prizes to be won! More information. • FINISHED - Seven Strategy Showdown 1 - The Salesman Problem For this event players had to kill all the units on the event-map as fast as possible. It wasn't long before people broke the one minute mark, but after that the real competition kicked off. You can now watch the winners on Twitch. More information. • FINISHED - Seven Strategy Showdown 2 - The Last Fortress One building is all that stood between players and the leaderboard. Watch how the fierce competition concluded in the winner reveal stream on Twitch! More information. • SECOND PHASE EXTENDED - PvP AI programming contest Get ready for an AI Programming Tournament, where the submitted programs will face off in an epic showdown to find the ultimate AI strategist! Players are still able to join this programming contest. More information. • Host your own tournament / event Want to host a tournament or event? Please reach out to our Event Organizer @Metagross31. We can help you out with various topics and are glad to discuss potential ideas. We can also sponsor the prize pool for your event. If you have a cool idea for a PvE event, or want to host a PvP tournament, please don't hesitate to reach out to us, we will gladly assist you. • Team Changes Two team members have concluded their roles; Piskr as Client Developer, and Xanatoss as Card implementer. We would like to thank them for their contributions to Skylord Reborn. Meanwhile, Titan has transitioned to help us with audio, alongside the role of 3D-artist. • Contribute to Skylords Reborn Skylords Reborn is a community-driven project fueled by the passion and dedication of over 50 volunteers. We are always on the lookout for like-minded individuals. If you have a passion for gaming, programming, design, or marketing, we invite you to have a look at our open positions! If you have any experience with e-mail newsletters, we could especially use your help as we move towards the release of our latest patch. Please take a look at this new role. Don't have time to formally join the staff, but still would like to help out? Please check out this guide on how to support Skylords Reborn as a community member. • In Conclusion That's all for this Community Update! We appreciate you taking the time to read through it. As is tradition, we're including a scratch code as a small token of our appreciation for your support. The code will reward you with an Amii booster: ISPY-WITH-AMII-EYES The code is valid until October 1st, when we will bring you another Community Update. We're always looking for ways to improve and value your feedback. If you have any questions, comments, or suggestions, please don't hesitate to share them with us. We'll be back next month with more updates on our ongoing projects and upcoming features. You can also sign-up to our e-mail newsletter here. Archive • Skylords Reborn Documents (Deep Dives, Behind the Scenes, PvP Guide) • Overview Community Updates • Community Update August 2024

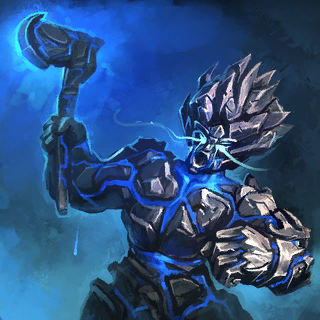
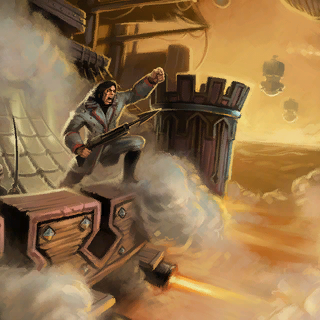


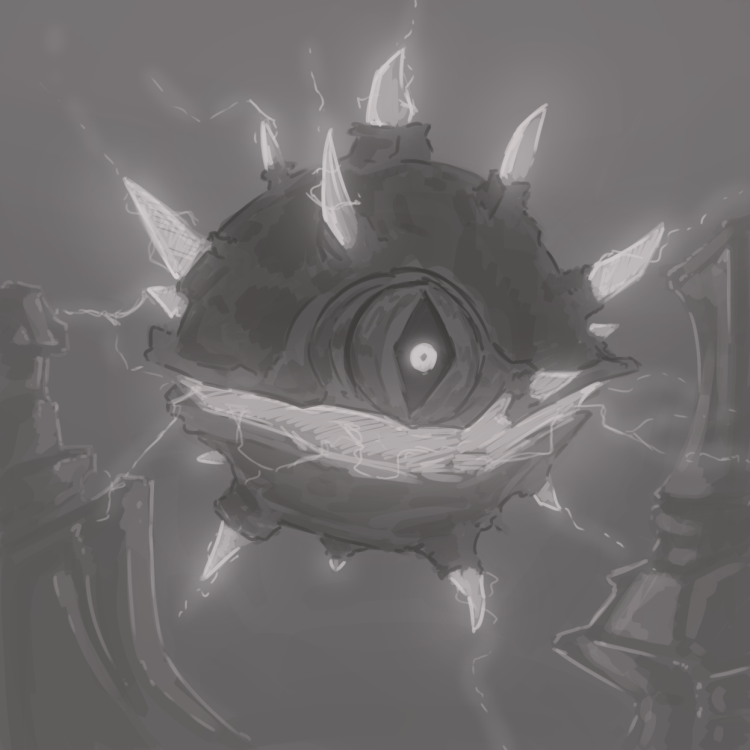
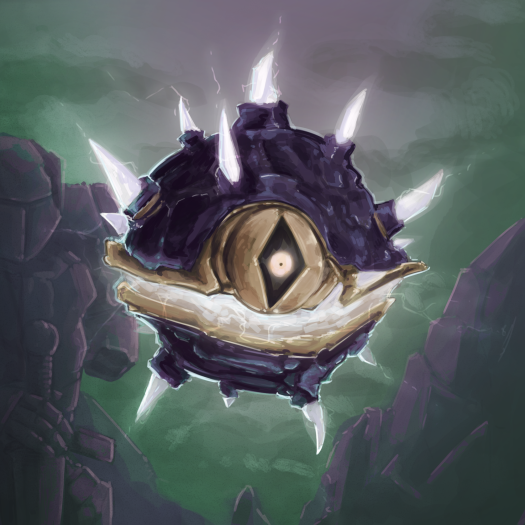
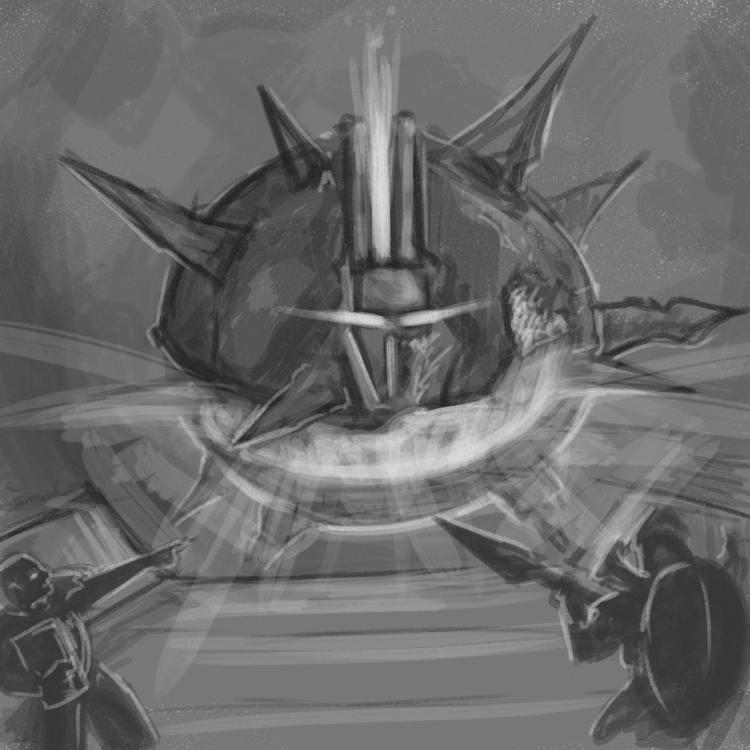
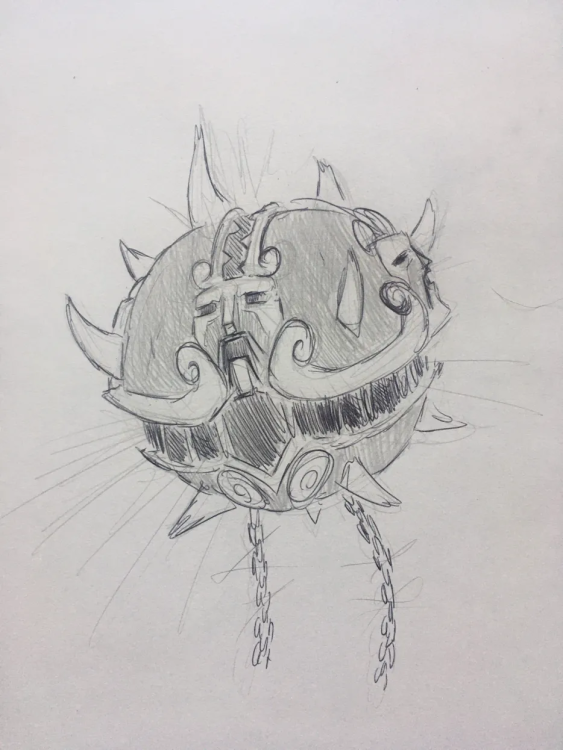
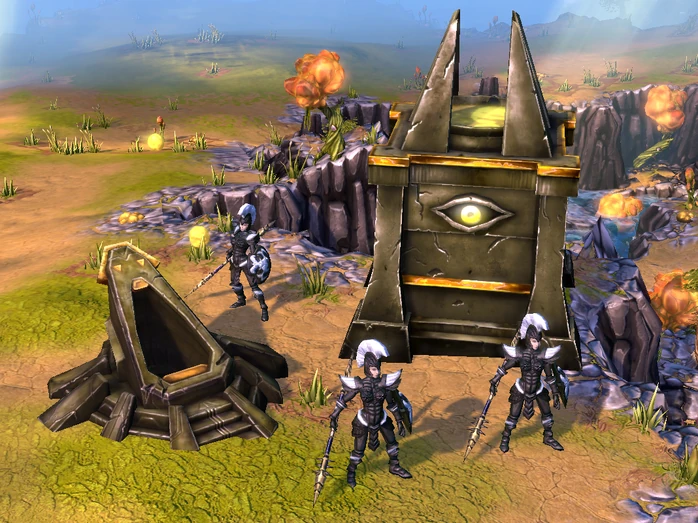
.webp.3a9cf30bf62452c333bac6b41b2094ef.webp)

.png.f04164221de567eb719fd8bb4e348c1c.png)

- 118 replies
-
- 12
-
-
Greetings Skylords! A new month; a new Community Update! It's time to bring you up to speed with everything going on in Skylords Reborn! • Yearly Feedback Survey Every year, Skylords Reborn has a Feedback Survey. While it is typically released in the summer, we decided to give players more time to explore our new Campaign Maps before inviting you to share your invaluable feedback. Because Skylords Reborn is a community project, we want to understand what our players enjoy and what could be improved. Your input is vital to helping us refine the game and expand our player base. We hope you’ll take a moment to answer the survey questions, as your responses will directly shape our development priorities. As a thank-you, everyone who completes the survey will receive two boosters. Your feedback will be anonymous. • Christmas Event & Anniversary This year, we have something very special planned to close out the holidays. Check back later this month for the official announcement of our Christmas celebration! We are hard at work finalizing the challenge, but the special reward is already prepared. Players who complete the achievement will receive a new Promo Frost Mage card! More information is coming soon, so stay tuned! The 4th anniversary of Skylords Reborn is also coming up. Traditionally, we celebrate this milestone with an announcement stream and a large content patch. But with a significant patch in September, the Halloween Event in October, and our plans for Christmas in December, it has been an incredibly busy period, and we are not sure if this will be feasible this year. Rest assured that we are still hard at work on the second batch of new campaign maps, new cards and other features we are sure you will enjoy, but we feel rushing ourselves to release a content patch just to fit the anniversary window this year, is not the right approach. We would still like to celebrate this milestone with you however, so we will explore our options and let you know. • New Card Spotlight - Molt We already talked a bit about Molt in our Twilight deep-dive last month, and are now ready to reveal the latest spell coming to the Twilight faction. Lets break down the card and share some of the thoughts behind its design. Shed Trigger a unit’s latent capacity for transformation. Target an own Twilight unit and trigger its transformation effect as if it had used Twilight Transformation. Reusable every 40 seconds. Design notes: Twilight Transformation has seen a number of improvements, such as reduced transformation time and a built-in cost reduction. At the same time, we have been steadily adding more transformation effects to the Twilight units to give the ability more strategic depth. Still, we are largely restricted by the fact that we cannot lower transformation costs without also lowering bound power costs in units. So as units scale in costs, our only choice is to make transformation effects scale in strength. We do not think this efficiency arms race is rightly achievable, so we are moving in a different direction through the introduction of Molt. For a low fixed cost, Molt will be able to trigger the transformation effect of any Twilight unit, meaning we can now design transformation effects with Molt in mind and not solely based on bound power costs. This also allows for more flexibility as players can now trigger transformation effects quickly and easily without having to make use of the often clunky Transformation process. Molt will release alongside our next content patch, date to be announced. • Art Spotlight - Molt The artwork for Molt (originally called Evolution during development) was created by SpiritAlpha. He envisioned Twilight creatures shedding their old skin, transforming into even greater monstrosities. SpiritAlpha quickly produced two early sketches: We liked the early concept, and work continued on the one involved the Mutating Maniac. To ensure the artwork fit well within the card frame and kept the focus on the main design, we removed the extra characters. At one point, we considered depicting old skin transforming into new body parts, but we quickly discarded the idea, as it didn’t enhance the artwork. We were pleased with how the artwork was progressing but concerned it wasn’t clear enough that this was a spell rather than a unit. We explored several options but weren’t satisfied with the results. The first attempt made the card feel like a binding spell, while the second clarified it was a spell but faced contrast issues when displayed in the deck bar. Wherever possible, we aim to ensure players can quickly identify cards at a glance. We spent some time tweaking the base artwork, experimenting with various intensities of the blue glow to emphasize the spell aspect of the card. We also ensured the toxic Twilight clouds, iconic to the faction, were present to highlight the transformation effect being triggered. Ultimately, we chose a strong blue contrast against the creature and mirrored the artwork to further distinguish the card from its creature counterpart when viewed in the deck bar. We are happy with how the artwork turned out and would like to once again thank SpiritAlpha for his incredible work and contributions to the game. Our art department is severely understaffed, and it’s almost entirely thanks to him that we’re still able to add new cards to the game. If you’re an artist or know someone who can create art in a style fitting for BattleForge, please don’t hesitate to reach out to us! You can apply directly here, or contact Majora or Dutchy on the Forum or on Discord. • "How Does It Work" series - BFP We recently launched a new video series on our YouTube channel, How Does It Work, where we dive into various topics that often raise questions. So far, we’ve released a video on Void Power, the Root Network and a guide on how to install the game. Another topic that often comes up is ''How do I earn BFP?", the topic of our latest video! We’d love to hear feedback from the community on this series. These videos take quite some time to create, but we’re more than happy to continue if they’re appreciated. Are the videos clear and interesting to watch? Are there any other topics you would like to see covered? Please let us know your thoughts in the comments below! • Contribute to Skylords Reborn Expanding on a game like BattleForge requires a lot of enthusiastic and skilled volunteers. While we are very happy with how the game shaped out to be, over the years we have struggled filling certain roles that are now truly becoming a problem for the health of the project. We would like to highlight a couple of positions that we could really use (more) people for. Critical: Artists Despite multiple calls for help, we have unfortunately not received any applications for the artist role. Due to the remote nature of our team and current global challenges, both of our artists have been heavily impacted, with one now completely inactive. This has significantly slowed the release of new cards and placed immense pressure on our sole remaining artist. We would like to stress our appeal: if you know any skilled artist who might be willing to contribute to Skylords Reborn, please forward them our way. Your support is vital to keeping the game alive and thriving! For more information, click here. Critical: Marketeer One of the most common pieces of feedback we receive from players is, “You should market the game more.” While we completely agree, this is easier said than done. Our options are greatly limited—paid marketing is off the table—and more importantly, we currently don’t have a dedicated marketer. Unfortunately, no one with the necessary skills or experience has applied for the role. If you’re motivated, have a strong network, and believe you can help us spread the word about Skylords Reborn, we’d love to hear from you! For more information, click here. Map Testers With our increased focus on map-related content, we are looking for more Map Testers to help identify bugs and ensure balance. As a Map Tester, you’ll gain early access to new maps and game modes, with the responsibility of playtesting and providing valuable feedback to the map development team. This includes evaluating the balance and fun factor of maps, identifying exploits, suggesting areas for visual improvements, and ensuring overall quality. The availability of dedicated Map Testers not only improves the game’s quality but also significantly speeds up the release of high-quality content. This is a non-staff contributor position. Tasks for these roles come and go, and they are a great way to help without receiving too much responsibility. For more information, click here. Other roles Skylords Reborn is a community-driven project fueled by the passion and dedication of over 50 volunteers. We are always on the lookout for like-minded individuals. If you have a passion for gaming, programming, design, or marketing, we invite you to have a look at our open positions! Don't have time to formally join the staff, but still would like to help out? Please check out this guide on how to support Skylords Reborn as a community member. • Events In between our monthly Community Updates, we host various events and tournaments, so be sure to keep a close eye on the in-game event tab and the forum calendar to stay informed and not miss out on any exciting events! Current events: • FINISHED - Seven Strategy Showdown 7 - Egg ball The last SSS-event finished past Friday, and was one of the most unique events we have seen in Skylords Reborn. Find out the winners in the event stream, or play it yourself in a versus mode that is being developed in the future! More information. • COMING SOON - Christmas Challenge While not technically an event, be sure to check in for our Christmas challenge later this month! • SECOND PHASE - PvP AI programming contest Get ready for an AI Programming Tournament, where the submitted programs will face off in an epic showdown to find the ultimate AI strategist! Players are still able to join this programming contest. More information. • Host your own tournament / event Want to host a tournament or event? Please reach out to our Event Organizer @Metagross31. We can help you out with various topics and are glad to discuss potential ideas. We can also sponsor the prize pool for your event. If you have a cool idea for a PvE event, or want to host a PvP tournament, please don't hesitate to reach out to us, we will gladly assist you. • In Conclusion That's all for this Community Update! We appreciate you taking the time to read through it. As is tradition, we're including a scratch code as a small token of our appreciation for your support. The code will reward you with a general booster: GIVE-FEED-BACK-TIME Please note: Filling out the feedback survey also rewards you with 2 boosters. The code is valid until January 1st, when we will bring you another Community Update. We're always looking for ways to improve and value your feedback. If you have any questions, comments, or suggestions, please don't hesitate to share them with us. We'll be back next month with more updates on our ongoing projects and upcoming features. You can also sign-up to our e-mail newsletter here. Archive • Skylords Reborn Documents (Deep Dives, Behind the Scenes, PvP Guide) • Overview Community Updates • Community Update November 2024


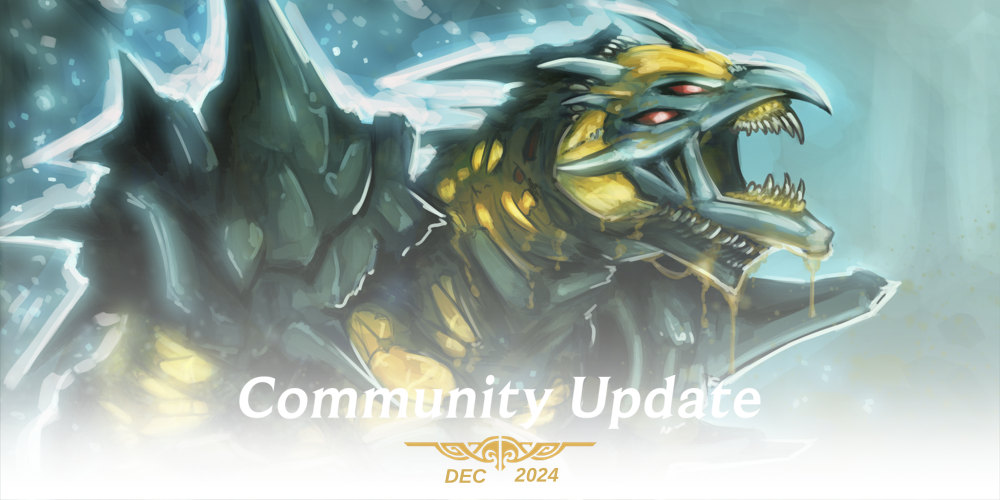


.png.b02bcbee8b8918920ea700f4893b1e21.png)

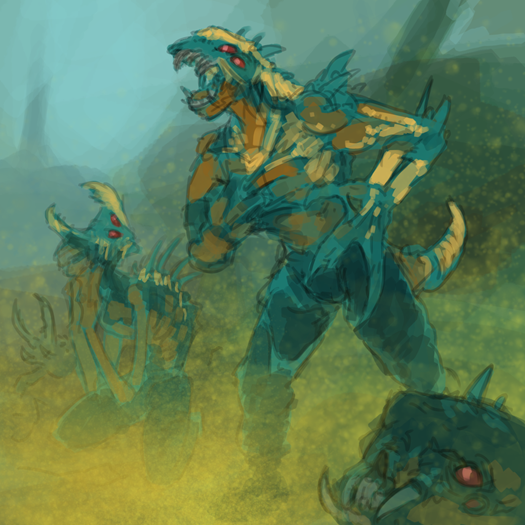
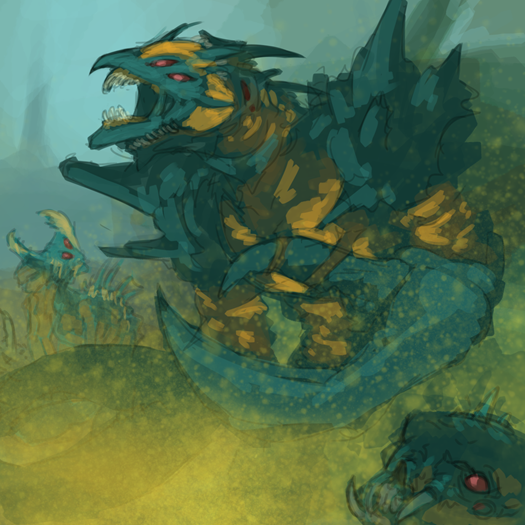

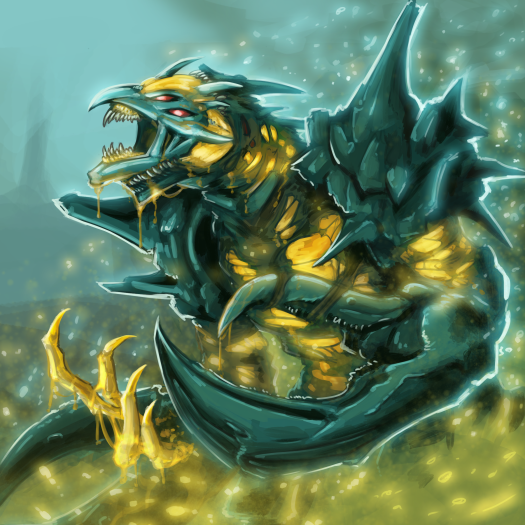
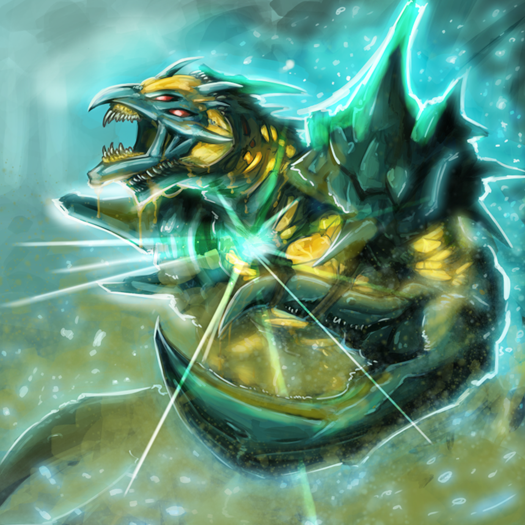
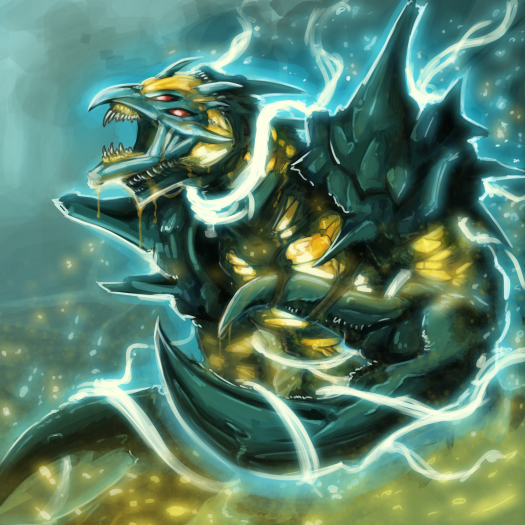
.thumb.png.96bd38d979d08ce692b1a77c9d11dbdb.png)


- 3 replies
-
- 17
-
-
Patch #400047 - Summer Swarm Welcome to our newest patch. This update contains our thirteenth balance patch for the game and two brand-new cards! Patch Preview Two new cards are now available! Jump in-game to collect Swarm and Icespike! A large amount of balance changes, mostly to T3 cards, in preparation for our release of the new campaign maps later in the year. General Changes Synced Map of the Day reset with Daily Quests, the achievement tip for Map of the Day now displays the full date with time when last completed. Added the statistic "time spent in matches" to the in-game profile. Using the text search in the achievements window will now also look for missing maps and missing cards. For example, if you search "Crusade," it will return all achievements related to the PvE map Crusade that are still incomplete. Added friend list and ignore list capacity indicator to the UI. Increased the friend list limit from 200 to 300 total accounts. Added more information to logs when getting errors or crashes, which should help us better diagnose the cause of game instabilities. Added "Don't show again" to multiple Yes/No dialog boxes in the game. General Fixes Fixed game connections not being properly closed when the match ends. This should hopefully improve game stability. Fix AFK players BFP reserve drain considering more playtime than up to the last action. Fixed context menu items showing as white when clicked. Fixed visual bug of charge count not decreasing when removing upgrades. New Cards Icespike - 110p T3 Frost Unit You will find the upgrades for this card on the map "Siege of Hope". Active - Frozen Blanket: Activate to bestow up to 5 friendly units within a 20m radius with an Ice Shield. Each Ice Shield absorbs up to 620/620/680/800 damage for 30 seconds and can be strengthened to absorb up to 2000 damage. Reusable every 30/20/20/20 seconds. Passive - Brrrr!: Attacked units are frozen for 15 seconds. After freeze wears off, targets are immune against Freeze for 10 seconds. For more information, check out Community Update - May 2024. Swarm - 90p T3 Nature Spell You will find the upgrades for this card on the map "Titans". Spell - Beetle Infestation: Summons a swarm of 4 Burrowers at the target location. The Burrowers have a lifetime of 20 seconds and do not provide ground presence to play out cards or claim structures next to them. Additionally, they are immune to revive effects and cannot be infected with the Twilight Curse. Reusable every 25 seconds. For more information, check out Community Update - June 2024. Card Balance Changes [ Tier 1 Changes ] Mark of the Keeper: 1. Removed enemy player card play block. Since the introduction of Tectonic Shift, Mark of the Keeper + Tectonic has become a PvP combo capable of completely disabling the enemy player's ability to respond and defend themselves. We are removing the card block ability to allow players to still summon cards inside a MotK aura. This will have no effect on PvE and this change does not affect the NPC version of Mark of the Keeper. Thugs & Strikers: 1. Add "Marauder" tag to the game and add to Thugs and Strikers. 2. Change "Gang Up!" from "orcs" to "marauders." We have been quite happy with the Gang Up! ability on Strikers and Thugs, but it currently has some weird interactions with Twilight Minions who are orcs but not part of the gang. We would also like to expand the Gang Up! ability to other cards, so we are swapping the effect from the species tag "orcs" to the new "marauder" tag both Thugs and Strikers already possess. [ Tier 2 Changes ] Banditos (incl. Corsair summons): 1. Alliance friendly unit requirement: 3 per stage ➜ 2 per stage 2. Blessed Alliance Rework: A. No longer based on nearby enemies B. Now grants increasingly more damage reduction based on number of friendly units nearby. C. Description - The unit will be incited to resist more damage when being surrounded by friendly units within a 25m radius. Per every 2 friendly ground units around them Banditos will receive 20% less damage up to a maximum of 6 units that will spur them on. Part of our focus in the next 2 patches is to enable melee-based PvE strategies in the lower tiers. As part of this, we are enhancing Banditos' swarm identity by reducing the total number of Banditos needed to activate their bonuses. This will also indirectly buff Corsair. The new Frost affinity will grant scaling defensive bonuses, allowing Banditos (b) to act as a powerful frontline for Bandit armies. Befallen's Curse: 1. Power cost: 100 ➜ 90 2. Tainted Disease (p) damage reduction: 25% ➜ 40% 3. Both affinities: Fix the last infection's damage to properly match infection duration (180 dmg ➜ 200) Burrower: 1. Active ability Tunneling: - Change availablity from only U1/U2/U3 ➜ all upgrades. 2. Active ability Acid Spit: - Decreased damage from 850/850/1000/1100 (2550/2550/3000/3300 in total) ➜ 800/850/950/1100 (2400/2550/2850/3300 in total). - Fixed incorrect handling of overkill damage. - Fixed missing damage against mounted units on affected wall segments. - Added a preview of the ability radius that is displayed on hover over the activation button. - Changed display order on card visualization and tooltip from first ability to second ability to match activation icon order. Deep One: 1. Tainted catch debuff strength: 25% ➜ 40% Gladiatrix: 1. Sobering (both affinities) cooldown: 20 seconds ➜ 10 seconds Icefang Raptor: 1. Blessed Reserve (b) damage reduction: 30% ➜ 35% 2. Infused Reserve (r) damage reflection: 35% ➜ 60% Knight of Chaos: 1. Chaos range increased 20m ➜ 25m 2. Life Points: 900/900/950/950 ➜ 970/970/1020/1020 3. Fixed an issue where the aura would not affect units currently already affected by another instance of the debuff. 4. Added a preview of the ability radius that is displayed on hover over the unit, but only while the ability is active. Pure Shadow is on the weak side in the current PvP meta. As a result, we are buffing Knight of Chaos to provide more reliable crowd control and to function as a better high health target for spell/ability combinations such as nasty surprise, mage bomb, and corpse explosion. Lost Dancer: 1. Blast damage: 80, up to 120 in total (670 dp20) ➜ 100, up to 150 in total (830 dp20) 2. Blast auto-cast range: 30m ➜ 40m 3. Tainted Blast human damage: 100% ➜ 50% 4. Infused Siege: 50% ➜ 30% The +10m auto-attack range increase and +25% damage increase should improve Dancer's viability in both PvP and PvE. We reduced affinity specific damage bonuses to compensate for these other buffs, though the specific damage to structures and humans relative to each affinity remains largely the same. Lyrish Knight: 1. Surge of Strength frozen damage buff: 50% ➜ 80% more damage Rageclaws: 1. Class: "Human Soldier" ➜ "Human Marauder" 2. Add "Gang Up!" to Rageclaws 3. Add “Group Pressure” to Rageclaws Rageclaws now have Gang Up! and combo with Thugs and Strikers. Revenant's Blessing: 1. Infused Immortal (r) damage buff: 30% ➜ 50% more damage 2. Bugfix: Now properly stacks with Lost Manabeast's Immortalize ability. Previously Revenant's Blessing, when combined with Manabeast's Immortalize ability, would cause Lost Wanderers and Lost Shades to instantly die. While we have fixed this instant-death issue, we have introduced an alternative issue where Immortalize, when combined with Revenant's Blessing, now makes the revenants of Lost Wanderer and Lost Shade live forever. While neither issue is ideal, we think it is better for the bug to benefit the players until we can figure out a permanent solution to the problem. Stone Shards: 1. Blessed Fury: Ignore freeze damage reduction ➜ Ignore freeze damage reduction and deal 50% more damage to frozen targets Stone Tempest: 1. Stone Wrath damage: 30/32/36/41 (45/48/54/62 in total) [840/890/1000/1140 dp20] ➜ 35/37/41/46 (52/55/61/69 in total) [870/920/1020/1150 dp20]. [ Tier 3 Changes ] Aura of Pain: 1. Power cost: 100/100/100/90 ➜ 90/90/90/80 2. Duration: 30 seconds ➜ 40 seconds 3. Card charges: 6/8/10/12 ➜ 10/14/17/20 Slight changes to Aura of Pain to encourage stacking the spell on own melee units. Backlash: 1. Power cost: 120p ➜ 110p 2. Cooldown: 30 seconds ➜ 25 seconds Small buff to Backlash to allow Fire decks to counter Swarm in T3. Corsair: 1. Assistance cooldown: 90 / 90 / 60 / 60 seconds ➜ 45/45/30/30 seconds. - Toggle ability Concentrate of summoned Commandos (Shadow): - Increased the activation cost from 10 power ➜ 20 power. Infect: 1. Total targets: 7/7/10/10 ➜ 6/6/8/8 enemies affected Infect is one of the strongest spells in the game. We are slightly reducing the total targets to reduce its strength in ideal scenarios. Lost Banestone: 1. Bugfix: Everlasting: No longer extends the lifetime of other temporary entities, but only Revenants. Lost Manabeast: 1. Bugfix: Increase attack speed to 3 seconds Lost Manabeast has a slower attack speed than listed on the card, making the card deal around 25% less damage than originally intended. Lost Vigil: 1. Celestial Blast damage: 90, up to 135 (1125 dp20) ➜ 108, up to 162 (1350 dp20) 2. Invigoration damage: 135, up to 200 (1675 dp20) ➜ 162, up to 243 (2025 dp20) Lost Vigil has languished ever since its nerf soon after the release of the Lost Souls edition in Phenomic times. It was nerfed at the time due to being overpowered in PvP. Since then, we have significantly buffed T3 anti-air units in PvP, so we now feel safe to give her a 20% damage buff. Magma Hurler: 1. Life points: 975/1000/1130/1270 ➜ 900/940/1020/1140 Slight tamper down on Magma Hurler’s life points. Magma Hurler has long been the go-to unit for Fire in T3 and it became more so when we buffed its damage several patches ago. While we are buffing up other Fire options in this and the next patch, we are slightly nerfing Magma Hurler to make space for those other options without killing the card. Northland Drake: 1. Tornado general changes: A. Duration: 15 seconds ➜ 8 seconds B. Damage per second: 108, up to 162 ➜ 232, up to 348 C. Tornado length: 30m ➜ 35m 2. Blizzard power cost: 70p ➜ 50p 3. Blessed Blizzard (b) freeze speed: Every 3 seconds ➜ Every 1.5 seconds 4. Infused Blizzard (r) extra damage: 100 damage ➜ 200 damage. The goal with these changes is to double the speed of the tornado and to adjust the other numbers accordingly to maintain existing damage and freeze numbers. The hope is that this will make the tornado more usable through higher responsiveness. Nox Carrier: 1. Infused Necrostrike (r) Ripper count: 2 ➜ 3 Rippers summoned 2. Tainted Necrostrike (p) poison damage 40 ➜ 50 damage per second Sandstorm: 1. Power cost: 140p ➜ 100p Sandstorm remains well outside of general viability despite the previous buffs. Instead of increasing card damage, we have reduced the card’s power cost again to encourage using it as a crowd control alternative. Shadow Insect: 1. Damage: 1200 dp20 ➜ 1440 dp20 Sleet Storm: 1. Spell duration 10 seconds ➜ 15 seconds Soulhunter: 1. Minefield damage: 80/80/100/100 against units and 21.25/21.25/25/25 against structures (240/240/300/300 in total) ➜ 160/160/200/200 against units and 20/20/25/25 against structures (480/480/600/600 in total). Buffing up Soulhunter's ability to not be outcompeted by its T2 spell equivalent. Spitfire: 1. Ground Bomb damage: 270/290/320/350 (405/435/480/530 in total) [5510/5610/5760/5920 dp20] ➜ 376/396/426/466 (565/595/640/700 in total) [5880/5980/6130/6330 dp20] 2. Siege: 100% ➜ 50% Move damage out of siege and into the ground bomb itself to improve Spitfire’s usability outside of building siege situations. Damage to buildings remains identical while damage to non-buildings increases by 33%. Stronghold: 1. Power cost: 200p ➜ 230p 2. Passive ability To the Last!: A. Both stages of internal damage buff and damage reduction are now stackable with external sources of damage modification. B. Both stages of internal damage reduction can no longer be disenchanted. Since the buffs and the release of Tectonic Shift, Stronghold has been too strong in both PvP and PvE. We are slightly increasing its cost to fit its new strength. Tectonic Shift: 1. Initial spell application timer (cooldown): 20 seconds ➜ 10 seconds A. This is the spell application timer, not the teleport ability timer. Allow players to apply Tectonic Shift to multiple towers more quickly. Transcendence: 1. Orb cost: Shadow, Nature, Neutral, Neutral (T4) ➜ Shadow, Nature, Neutral (T3) Give players access to Transcendence earlier, enabling more T3 army strategies. Unity: 1. Card charges: 6/8/10/12 ➜ 8/11/14/16 Unstable Demon: 1. Demonic Rage: A. Movement speed bonus and acceleration 60% ➜ 100 B. Duration 5 seconds ➜ 4 seconds C. Cooldown 15 seconds ➜ 5 seconds 2. Critical Mass damage : 560/700/900/900 (2000/2500/3000/3000 in total) ➜ 560/700/900/900 (4000/5000/6000/6000 in total) - Fixed incorrect handling of overkill damage. Virtuoso: 1. Trumpet of Jelicoo building damage: 600/675/750/825 (1700/1800/2000/2200 in total) ➜ 600/675/750/885 (1700/1800/2000/2200 in total) We are currently reworking Girl Power into a melee-support card, and once it releases, it will, alongside this minor buff, allow Virtuoso to one-shot small spawn buildings with its ability. Vulcan: 1. Flamethrower damage: 120 per second (2400 dp20) ➜ 140 per second (2800 dp20) 2. Conflagrate damage: 265 per second ➜ 280 per second Wrathgazer: 1. Power cost: 220p ➜ 200p 2. Disintegration speed: 150/150/150/165 ➜ 170/170/170/185 life points per second [ Tier 4 Changes ] Colossus: 1. Thunderous Roar Rework: A. Releases a bloodcurdling roar that riles up Colossus. The unit will deal 75% more damage for 25 seconds. Additionally, Lumbering Step is activated for 25 seconds. Reusable every 30 seconds. 2. New ability, "Lumbering Step": A. Turn Speed - Increase turn speed by 50% for the duration. B. Damage: 200, up to 1000 in total. D. Description: "While moving around unit knocks back small and medium units dealing 200 damage, up to 1000 in total to enemies. Affects ground units only. " 3. New Ability, "Colossal Birth": When being spawned the unit is undazed and displaces the earth, knocking back small, medium, and large units. Can be spawned nearby enemy units and structures excluding walls. Affects ground units only. Colossus's rework design was previously decided upon with community help, but the final implementation never managed to happen due to a lack of implementation capacity and a later shift in priorities towards other factions. This rework will finally see the light of day and provide the long promised melee-partner for Forest Elder (b). Colossus's Roar gives it a major self-damage buff, allowing it to kill bosses quickly, while the Lumbering Step gives it a Thunder Wagon-esque ability to damage enemies just by walking through them. Kobold Inc.: 1. Orb cost: 3 Frost, 1 Neutral ➜ 2 Frost, 2 Neutral 2. Blessed Speed-up (b): A. Speed-up & Description: 50% faster ➜ Construction time is reduced by 66% 3. Tainted Speed-up (p) drawback: 400 damage ➜ 25% of maximum life points lost on spawn 4. Add Construction Hut cost reduction effect (-25% power cost) to both affinities. 5. Initial cooldown: 60 seconds ➜ 0 seconds As part of our continual focus on creating a new building archetype, we want to propose several changes to Kobold Inc. As a T4 Frost building, Kobold Inc. should be the ultimate building support. One issue is its orb requirements. All other Frost buildings and their support requires only 2 orbs (this is similar to how all root network cards are available for 2 orbs), but Kobold Inc. uniquely requires 3 orbs. We think this unnecessarily constrains the card and limits what is actually available to use with Kobold Inc, which right now it really only Stronghold or WBG unless Kobold Inc is enlightened. After this change, other cards like Volcano, Deepgorge, Hatecaster, Artillery, or Comet Catcher when player's orb swap for Sages will become available for use with Kobold Inc. Next, we want to equalize the different affinities. We are increasing the frost affinity's speed-up while making the shadow affinity's penalty percentage based. This will make it a choice between rapid construction or instant construction with health loss. It also removes edge cases like U0 Altar of Nihil which is instantly destroyed by Kobold Inc. because it only has 400 life points. Additionally, we are adding Construction Hut's discount to Kobold Inc., which seems like an obvious addition. T1 cards shouldn't outcompete T4 cards in the same role. Last, we are removing the initial cooldown from the card as it functions as an unneeded time penalty. This is only step one of the changes to Kobold Inc., as we have more changes planned for the frost affinity to ensure it is a compelling choice instead of players defaulting to the shadow affinity. Lost Evocation: 1. Power cost: 140p ➜ 110p 2. Blessed Revenant damage reduction buff: 50% ➜ 60% 3. Infused Revenant damage buff: 100% ➜ 120% 4. Affected units can now receive the buff again if they re-enter the area of effect and the previous buff's duration has expired. Lost Warlord: 1. Add affinity effects to revenant's spawned by Revenant's Doom. Spore Launcher: 1. Remove slow, now moves at normal XL speed (6.4 m/s). 2. Remove Siege, add XL-counter 3. Add L-knockback to Explosive Spores We are trying out a minor identity change for Spore Launcher, making it more mobile with stronger built-in crowd control. We realize this is unlikely to make it the preferred choice for root network absent changes to Razorleaf. Tortugun: 1. Eruption: A. Remove affinity effect from Eruption, change both Eruption affinities to current Fire affinity with the Fire affinity description (50m range). 2. New Devour Affinities: A. Blessed (b) Devour: "Additionally, unit receives 50% less damage for 20 seconds after consuming a unit." B. Infused (r) Devour: "Additionally, unit deals 100% more damage for 20 seconds after consuming a unit." Tortugun's affinities are wildly unequal with one having 30m range and the other having 50m range. We are making both affinities have 50m range and moving the affinity effects to Devour. Players are now encouraged to strategically time feeding their Tortuguns to gain access to a large damage reduction or damage increase buff for a short time. Map Changes Uro (PvP Map): Removed both red-colored fortification walls (incl. official spectator version of the map). King of the Giants (PvE Map): 1. The unlikely event of Jorne dying now results in game over instead of soft-locking the players into the map. 2. Increased the detection range for both Rogan and Jorne near the final cave to end the map by 15m. This should decrease instances of players failing to complete the map despite successfully guiding Rogan to his objective. Blight (PvE Map): Fixed a rare crash that occurred when players were destroying the objective spawn buildings as the timer ended.


- 22 replies
-
- 14
-
-
Stone Warrior (b) works well together with Timeless One, especially in PvP, since TO has a super cheap freeze and the lance oneshots Juggernaut. Tbf, I also don't see the green affinity being all that useful now, since there are barely any paralyse effects in the game, one being Creeping Paralysis, which has to compete with Oink for slots and has awkward orb requirements, and most others are at T4, where Stone Warrior is most likely outshined anyways.
-
As we announced in our Towers Deep Dive, our faction design team has been working on performing a balance pass across all attack buildings in the game. Some of these changes are relatively minor, while other changes are more substantial. This thread will function as the main thread for our second round of building changes. The original master thread can be found here. Minor changes are included here, while major changes have their own threads linked to below. Please note that all changes proposed here are provisional and as such as subject to change. Substantial Reworks and Balance Changes The following buildings have significant enough changes to warrant their own threads. Previously Announced: Rocket Tower Stronghold Newly Announced or Updated: Armored Tower Ice Shield Tower Fortress Changes One category of towers we spoke of in our Deep Dive were Fortresses. Fortresses are expensive towers from T3+ that have large models. Due to the way space works in BattleForge, larger towers should have higher stats in comparison to other towers as you can build less of them in a given area. We have decided, outside of the unique case of Church of Negation, to make 200p the base cost of Fortresses. This allows us room to pack more stats into a single building. Our goal is to move Fortresses in the direction of self-sufficient defenses that can hold positions even in those locations where you might only be able to build one or two. Deepgorge 1. Cold Clutch radius: 25m ➜ 30m. While Deepgorge has substantially increased in strength since the most recent changes, particularly in connection with North Star(b) with which it naturally synergizes. Unfortunately, due to the tower's large size, its ability radius is still too small when the tower is placed behind a wall making it difficult even for a well-placed Deepgorge to hit all melee attackers on long walls. Howling Shrine 1. Essence Bolts damage: 600, up to 900 in total ➜ 750, up to 1125 in total (3750 dp20) 2. Crowd control duration (both affinities): 10 sec ➜ 15 seconds Howling Shrine is feeling better after the buffs both to itself and to the root network in general. When the initial changes were proposed, some people suggested larger buffs to the card but we urged caution due to the difficulty in account for how things would change once the full set of root network changes came through. Now that we can evaluate the changes more fully, it appears that Howling Shrine is still a tad on the weak side. To remedy this, we are giving it a +25% damage increase and increasing the duration of both its root and paralyze to help it keep dangerous melee units at a safe distance. Volcano 1. Power cost: 150p ➜ 200p 2. Damage: 581, up to 872 (3990 dp20) ➜ 766, up to 1149 (5270 dp20) 3. Life points: 4390 ➜ 5690 4. Infused Eruption's (red affinity) Rage: A. Rage scaling: 100%/200% ➜ 75%/150% B. Rage timer: 7 sec ➜ 10 seconds C. Attacks per stack: 4 attacks ➜ 3 attacks 5. Lava Sea A. Radius: 25m ➜ 30m B. Bugfix the ability so that it works Making Volcano more "dense" by increasing its power cost and then adjusting its stats accordingly. Total damage when enraged is slightly increased despite the nerf to Rage's percentile damage increase (12,000 --> 13175 dp20). Additionally, the rage should activate substantially sooner. Previously it took 29 seconds in combat to full scale, now it should only take 22 seconds. One thing we learned in the wake of Volcano's previous changes is that its Lava Sea ability is bugged and does not work. Fixing the ability to function as advertised should do much to make Volcano a larger threat. Worldbreaker Gun 1. Life points: 4500 ➜ 5400 2. Descriptive: Add "Has a long range of 50m" to its Ground Attack description. WBG is the best defense in the entire game, but that is achieved primarily through its Heavy Snowball ability augmented by Skyelf Sage. In terms of functions as a tower, it is still good but has uncharacteristically low life points for its cost and tier. We are giving it a slight bump in total health, which should help it when functioning as a tower while leaving it unchanged as a long range artillery piece. Minor Changes It is the general principle of the faction design team not to change abilities or introduce complex mechanics needlessly. Cards should generally perform a single function and perform that function well. A lot of the buildings in the game are already well-designed but lack sufficient stats or possess too strict of requirements. As such, we have opted wherever possible to introduce simple changes to bring the tower to the appropriate power level. All values below are U3. Artillery 1. Range: 50m ➜ 60m 2. Increase turret turn speed. Allow Artillery to damage siege units even when placed behind a wall. Fire Bomb 1. Damage: 715 up to 1650 in total ➜ 720, up to 1800 in total 2. Add "Fast Construction" - Construction time is reduced by 50%. 3. Allow to hit air units & enable splash overflow fix. Hammerfall 1. Increase turret turn speed. 2. Breeze of Life (g) / Breeze of Strength (b): A. Maximum capacity: 1500 ➜ 3000 B. Recharge rate: 15 per second ➜ 40 per second C. Radius: 20m ➜ 25m 3. Breeze of Strength, Ice Shield cost: 495 capacity ➜ 600 capacity Increased turret turn speed should increase damage output due to faster target tracking. Change to affinity effects: Higher maximum capacity should make both affinity effects better, but especially the healing one which is only drained as required. Higher recharge rate means that a new Ice Shield can be bestowed every 15 seconds instead of every 33 seconds, even with the higher cost. Range increase to make it easier to place units around it. Total charge time is now 90 seconds. Additionally, Hammerfall's shields do not decay while within the aura. This makes them a stable source of extra health for allied units. Hammerfall's recharge and healing is still less than Healing Well's, a T2 60p card, with the same maximum capacity. Infected Tower 1. Damage: 114, up to 172 in total (1215 dp20) ➜ 138, up to 207 in total. (1466 dp20) 2. Splash Radius: 5m ➜ 8m +20% damage increase and small splash radius increase. Changes to Infected Tower's ability have been postponed until we can properly rework it. Kobold Laboratory 1. Mason Mastery radius: 25m ➜ 30m 2. Material Research: A. Changed buildings ➜ buildings and walls B. Allow repairing while in combat C. Radius: 25m ➜ 30m D. New description: "Friendly buildings and walls in a 30m radius have 50 / 50 / 50 / 70% lower repair costs and are repairable in combat." Allow Kobold Laboratory to have a niche use in defense and to provide something beyond what Glaciation is capable of providing. Change is meant in preparation for DRPvE and will also be useful in maps with prolonged defenses, especially near walls. Lost Converter 1. Add Soul Splicer's "Soul Suction" ability to the card, allowing it to gather corpses outside its passive range. 2. Corpse cost to freeze: 200 ➜ 250 stored life points Morklay Trap 1. Enable splash overflow fix 2. Explosion Blast total damage: 2640 in total ➜ 4400 in total Increase total targets from 3 to 5 and enable splash damage properly transferred even when units die. Stone Hurler 1. Damage: 100 damage, up to 150 in total (834 dp20) ➜ 120 up to 180 in total (1000 dp20) Align actual damage with stated damage on the card. Twilight Bombard 1. Remove "Siege" from Infused affinity 2. Add "Rage" to Infused affinity. A. Stage 1: +25%; Stage 2: +50% damage B. Attacks per stage: 3 C. Reset timer: 10 seconds 3. Increase turret turn speed. Twilight Bombard (r) has Siege as its affinity effect, which is largely useless. By changing it to Rage instead, we make the choice between the two affinities one of increased damage versus crowd control. Waystation 1. Add Soul Splicer's "Soul Suction" ability to the card, allowing it to gather corpses outside its passive range. 2. New passive, Fast Construction: Construction time is reduced by 50%. 3. Infused damage buff: 30% ➜ 40% 4. Tainted poison damage: 30 life points every second ➜ 40 life points every second 5. Corpse storage: 2500 total ➜ 4500 total 6. Corpse cost per potion/poison (both affinities): 180 ➜ 400 stored life points will be used up. 7. Radius: 25m ➜ 30m The first step in what will eventually be a full rework of Waystation. For now, the addition of fast construction means it can be set up offensively as its name suggests and the addition of Soul Suction means it should be able to easily gather corpses to fuel itself. Gave a small boost to both affinity effects and increased the radius to require ranged units to enter its effective radius to damage it.


-
i recently retook this game on and after playing a few games with each elements and faction my head is full of ideas for new cards, most are meh but i finally think i got a few decent one. probably OP right now but still it'll be fun to share them. my ideas stem from a stray thought i had, why not give each base elements a T2 xl units like the harvester? ones that each embody the elements core mechanic like how the harvester is a units that work using corpse and hordes of temporary summon. but also shore up some of the elements weak spot. so i did a bit of brainstorming and come up with three cards to pitch, tell me what you think. first is ice : Bear Bastion 2 frost orbs / 300 power a giant polar bear (using forest elder model) carrying four section of walls as a castle on its back, it cannot attack itself but small units can climb on the walls on its back like on normal ones getting all the usual advantages, those units can then attack enemies even while the bear bastion move like how battleship or corsair can. the bear Bastion has three passive abilities and one active. >>>passive x Lumbering step: knock back and damage small and medium enemy units around it when moving, only affect ground units. x slow: this units is 50% slower x rally: units summoned within 25meter of this units are not dazed. >>>active x the new frontier: the units turn into ice making it into a static building and cannot move anymore 'but mounted units can still attacks) until the power is deactivated, it is now a valid target for of spells and effect applied to or around buildings. this power can only be deactivated after 30 second. cost 50 power to activate / 30 second cooldown after turning off. 0 attack / XL 4000 hp second is nature: cornucopian monolith 2 nature orbs / 300 power a moving temples (using the construct model) made of green stone and tick brown roots its tower is replaced by a small livestream that create healing rays (like church of negation) but targets both enemy and allies, stealing health from enemy to heal allies continuously at about 15 hp per second drained per enemy units then spread across all allies in range. the cornucopian monolith has three passive abilities and one active. >>>passive x selfless: this unit cannot heal itself, it also cannot be healed by any other mean while in combat. x organic flow: wells within 25 meter of this units will produce 25% slower but deplete 100% time slower x slow birth: this units does not appear instantly and instead need to be constructed over 30 second. >>>active x feast aplenty: drain a friendly well of 300 power sending it to the void pool and shutting it down for 30 second. cost 0 power to activate / 60 second cooldown after use. -------attack / XL 3000 HP third is fire: sunspear vessel 2 fire orbs 300 power a flying ship built around a small sun, (death ray model with a fire orb inside the brazier and the skull replaced by banners and the prow of the ship by the shrine of war skull) this ship attack is an active ability athat affect all units and structure in front of it in a 25 meter range 45° cone but said damage is very low at first and ramp up the longer it attack. the catch is that it also hurt allies and has limited fuel that recharge when out of combat. the sunspear vessel has three passive and one active. >>>passive: x explosive: when killed this unit explode dealing 2000 damage to all units allies and enemy in a 25 meter radius knock back small medium and large units. x siege: deal 50% more damage to strucutres. x astral mass: this unit is slower the more fuel it is holding. fully empty it is swift and completely full it is slow. >>>active: x liquid sunlight: the ship store the fire of the dwarf star it carries as fuel to attack it appear with an initial capacity at 1500 and can store up to 3000 and recharge at a rate of 50 per second, consume 150 per second to attack all units and structures into a 25 meter long 45° cone in front of the ship, the first second of attack deal 50 damage to all units and buildings in range and increase by 100% pf the base damage every second for a total of 1000 damage for the last second after 20 second of continuous attack, the sunspear vessels cannot move or cancel its attack once it start firing. cost 15 power / 20 second cooldown.
-
Wish granted, but the playerbase becomes so large that we have to do major server updates because of a too small capacity. I wish all nice wishes in this thread would come true once and for all.
-
Mapmaking Fundamentals - Spawn Design (Cont.) Practical Considerations In the course of testing and balancing new maps, a number of important questions have arisen regarding practical considerations which must be taken into account. Here we will examine the various practical concerns which have appeared during the development process regarding both spawn and camp design. Small vs. Large Spawn Buildings Each faction should have a small and a large spawn building. As a standard practice, the small spawner should have 1200 life points and the large spawner 3200 life points. There are a few exceptions to this rule, such as the Fire and Nature gateways in Titans, which have 2000 life points, and Lost Temple, which only has 1000 life points. In the case of Lost Souls, a large spawn building is currently in the process of being developed, after which the small spawner Lost Temple will likely see its health pool standardized. There are a few ways to utilize the different spawn buildings. The most straightforward method is to use small spawners for T1 and T2 camps, and large spawners for T3 and T4 camps. This creates a sense of progression and ensures that later camps are not easily cheesed through Eruption spam. On this topic, it is important to position primary spawn buildings within camps such that the player cannot easily destroy them without interacting with the camp itself. Spawn buildings, particularly the primary ones, should be the most protected things within standard camp arrangements. Another way to use the spawners is to differentiate them by purpose, such as objective spawners being of one type while standard camp spawners are of another type, though it is also common to use a spawner as a camp and an objective spawner simultaneously. Some maps alternative between small and large spawners as a way to differentiate between the type of units being spawned. A good example of this would be Encounters with Twilight. The various lodgement areas of Encounters are punctuated by small spawners which only spawn weaker units, while the main spawner is a large spawner which generates the main threat in each respective area. Beyond lodgement areas where the aforementioned type of design is common, some individual camps include both types of spawners with a similar goal, small spawners for weaker units and large spawners for stronger units. Higher tier camps with increased levels of complexity can create a sense of strategic depth and player progression by having a large spawner nestled in the back, with various minor objectives, such as small spawners and artillery buildings, placed in easier to access locations for the player to focus on and destroy. This allows the player to move forward and destroy an objective, thereby permanently weakening the camp's defenses, without requiring that he destroy the camp outright all at once. An example of this might be that in a Twilight map, the primary large spawner generates Abominations and Evil Eyes, while a small spawner closer to the player's expected point of entry generates Whisperers and Mindbenders. While the majority of damage comes from the large spawn units, the destruction of the small spawn would be a major win for the player because it would substantially reduce the camp's CC capacities. Time to Respawn & Player Downtime Imagine playing a Twilight map and moving forward into a well fortified camp. You destroy the frontline of Vilebloods, move forward to wipe out the archer line, and then just as you are about to kill the spawner a second wave of Vilebloods spawn and destroy your army. By the time you return, the entire camp has respawned and because none of it was towers or support structures, you essentially achieved nothing. What I just described is how a normal player experiences trying to destroy the Shadow camp on Nightmare Shard. In the face of this frustration, the player often chooses to learn how to cheese the map, or they decide to suicide their army for the spawn building from the beginning so they can feel like they actually achieved something. What this example illustrates is the problem of camp respawns and how they relate to camp design. A typical spawner in BattleForge has a time to respawn of 15 seconds. This is universal and encompasses nearly all maps and spawners in the game. It should be fairly obvious that the lack of granularity in what is an essential component of map design is a fundamental issue for the balance of both individual camps and maps as a whole. Time to Respawn Considerations: 1. Individual unit strength - If the individual units are weaker, the camp might be balanced around more frequent respawns. This can create a pleasure experience of fighting through waves of the enemy. If the camp's units are relatively strong compared to the player, such as our example of the player fighting Vileblood's with T1, the respawn timer should be longer because each unit that respawns is a substantially bigger threat. 2. Unit to building ratio - If the camp is entirely made up of units, thereby providing no ability for the player to permanently degrade its strength except through killing the spawner, it might be appropriate to exclude some key units from respawning at all or to increase the overall time to respawn. If a camp's strength is mostly concentrated in buildings, a faster respawn timer for units can be used because only a small percentage of the camp's total strength will be reviving. 3. Player Tier - In lower tiers, it is harder for players to reach and destroy spawn buildings due to a lack of available tools. In higher tiers, players have numerous options for disabling units and destroying key buildings, including spawners. This suggests that longer respawn timers are better for lower tier camps, because in these camps players usually have to fight through a significant portion of the camp to be able to begin damaging the spawn building. The same is not true for higher tier camps and therefore the respawn timers can be shorter. In general, the higher the tier, the more complex a camp can be in its design, and faster respawn timers are a component of camp complexity. 4. Distance to Spawner - In a simplified form: time to respawn + travel distance from spawn = player downtime. The farther the distance to the spawner, the longer the player has to recuperate. This is particularly important for defensive scenarios to allow time for healing, respawning, and repairing player defenses. Closer spawn locations will often correlate to longer respawn timers, and vice versa, but the map designer should really balance downtimes based on wall and building repairs and adjust according to the intended feeling of pressure. Group vs. Individual Spawning The general rule is that attack waves should be spawned as a group while units within a camp should spawn individually. By placing attack waves into groups, it means that the player does not have to deal with a constant trickle of units which either preclude any repairs because of a lack of downtime or fail to cause sufficient pressure due to lacking the critical mass needed to challenge player defenses. On the other hand, group spawning often leads to clever players trapping a few units to prevent the group as a whole from respawning. This will be discussed more below. Individual spawns in camps are necessary to allow the camp the dynamism to respond to player attacks. Group respawning, the timer for which only begins after the death of the last member of the group, would mean that the camp will likely never respawn any units before the player can destroy the spawner, but if the group can respawn, the entire camp, or at least a major sub-group, would respawn all at once. Neither of these options are desirable, so camps should use individual spawning. Preventing Spawn Trapping The majority of respawns in the game are based on timers that only begin after the unit which will be replaced has died. The standard timer throughout the game is 15 seconds. As mentioned above, some spawns are group and others are individual, with in-camp respawning typically being individual-based and attack wave respawning typically being group-based. Given that group-based spawns will not respawn until the entire group (or a particular percentage of the group) is dead, this leads to a situation where the player can "trap" units within the attack wave and prevent further respawns from occurring, functionally turning off the defensive aspect of the map. While this mechanic has been normalized on most existing maps and therefore will likely remain unchanged, the same need not be true for future maps. The best way to get around spawn trapping is to make the respawning of attack waves multi-conditioned. For example, if an attack wave takes 30 seconds to reach its destination and lives on average 30 seconds once it has reached its intended location, the average respawn time for that given wave would be once every 75 seconds (15 second respawn + 30 sec travel time + 30 sec fighting to death time). This means, when accounting for slow decks and the player being overrun, it might be appropriate to make the attack respawn on death of the group OR if 120 seconds have passed, whichever is shorter. That way if the wave gets trapped, a second attack wave still spawns after 120 seconds regardless. Another key point to consider with spawn trapping is abuse of waypoint markers. When attack waves progress towards their target location, they act by moving from one waypoint to another, wait for the entire group to arrive, and then proceed to a third waypoint. If a player is able to block one member of the group from successfully progressing to the next waypoint, the entire group will fail to progress. This is what allows the MotK spawn trap trick on Nightmare's End. When a ranged unit enters the spellbane aura, it immediately retreats in an attempt to move far enough away to attack. If the unit's attack range is less than or equal to the spellbane aura radius, it ends up in a loop where it continually moves in and out of the aura. If the waypoint location is within the spellbane aura, such that the other units can progress to it, but not so close that they will aggro on the source of the aura, the looping ranged units will fail to reach the waypoint marker and therefore lead to the entire group remaining permanently stuck (it should be noted that not all ranged units act like this. The flying units on Mo continue to patrol back and forth despite any spellbane aura, so their scripting ought to be studied to learn how to achieve a similar result). There are a few ways to avoid this. One is to include at least one long range unit within the attack wave, which can then destroy the source of the spellbane. A second, if the spawn trap is discovered pre-release, is to add a patrol along the path where the spellbane will be placed to destroy it and free the normal attack wave. A third is to look at maps like Mo and figure out how to circumvent the issue and allow the units to patrol regardless. Tier Emphasis & Camp Design by Tier Nearly all campaign maps will take place over all four tiers, but the emphasis of each map is different. Some maps will have long T1 sections, while others, such as Bad Harvest, will skip T1 entirely. While it might initially seem best to spread the map out equally between all tiers, this is often less ideal than it might initially seem. One of the largest limitations in BattleForge is the 20 card deck limit. By requiring the player to be able to respond to threats equally at all tiers, the designer encourages the player to opt for more generalist deck options. For example, if the map required the player to be able to respond to ranged, melee, and flying units at T3, the player would forced into using cards which can respond to all three threats. If that player were playing Fire, they will likely default to using Magma Hurler with Unity. If he wanted void return and had to defend a wall, he is also going to include Shrine of War and Tower of Flames. At that point, since the player needs to be flexible on all four tiers, he will only have 1 slot left for T3, which he might want to flex into other tiers given Magma Hurler can take care of most threats. If, instead of designing the map to have equal threats at all tiers. the designer instead decided to shorten the T2 and focus on a larger T3, the player will now have more deck slots to specialize versus any challenges the map might include. If there were large amounts of buildings in T3, the player might be able to include Virtuoso or Juggernaut as a response. If there were no flying units, the player could opt for Vulcan or Giant Slayer. If the camps had weak AA or if there were a lot of hard to reach flying units, the player could choose Spitfire. On their own, each of these options is unlikely to be the sole choice of unit for a Fire player, but each can easily become supplemental options when the camps a player faces in a particular tier allow for such specialization and the other tiers do not use up all available deck slots. The key takeaways here are that it is often better to focus on 1 or 2 tiers in a given map, so as to allow for more interesting deck building options within those tiers, and that unifying camp and spawn design across a tier can allow for and push players towards less typical options, for example, not including flying units but giving camps strong AA, can open up space for melee units to succeed. Defender's Advantage When fighting against camps, the general principle is to balance the camp's composition as equivalent to being 1 tier higher than the player (on expert, advanced can be equal strength). The reason for this is that players have an adaptability that NPCs do not. This is seen both in the fact that players can cast spells while NPCs must rely on unit abilities or inflexible events via map scripts, and that NPCs cannot rebuild their own camps. If the artillery piece keeping the camp together dies, it cannot come back. In contrast, if a player loses a unit or misplaces a tower, they can just summon a new one. So if the entities in an NPC camp are typically one tier stronger than those currently available to the player, what about when it is the player defending and the NPCs attacking? It would be nice if we could provide a simple rule here stating that attacking units are always one or two tiers stronger than the defending player, but it is not that easy. Defending scenarios are simply too varied for a one-size-fits-all approach. Instead, let us consider some factors that might change the player's strength while defending. Defense Considerations: 1. Location Fortification Potential - Whether or not a player can easily fortify their location substantially changes the relative strength of incoming attack waves. Fortification potential is related to two key factors, (1) Are they buildable walls, and (2) how wide is the enemy's angle of attack? Buildable walls increase the relative defensibility of a location more than any other single factor. Walls add effective life points to the defending towers and units, while also impeding enemy progress, therefore providing the player with more strength depth. Attack waves which might overrun a player in an open field can become a joke to him when he is sitting behind a set of Amii walls. The width of an enemy's attack angle attacks in a similar way. If, similar to Guns of Lyr, enemies attack into a narrow chokepoint, even giant waves become trivial to defend against. At the same time, if the enemies can spread out such that area of effect spells and abilities cannot hit large portions of the attackers at once, the wave's overall threat increases. Therefore area with narrower angles of attack and buildable walls need stronger attack waves, while areas with wider angles of attack and no buildable walls need weaker attack waves. 2. Length of Defense - The longer a player is allowed to sit in a single location, the larger the attack waves will need to be to dislodge him. While small, low tier waves might threaten a player initially, even waves one or two tiers higher than him will seem insignificant if he has been given a large enough time to prepare. In general, if a player has only been given a short time to begin preparing his defenses, attack waves could be sufficiently strong even at tier and unit count parity. But once he has been allowed to settle in and build a layered defense, attack waves will likely need to be both stronger and more complex to overrun him. 3. Player Tier - Lower tier players have less defensive options than higher tier players. The higher the player's tier, the stronger the attack waves will need to be in comparison to the players on paper strength. 4. Total Areas to Defend - A key point discussed at length in this guide has been that the fewer areas a player needs to defend simultaneously, the easier it will be for him to succeed. While even the equivalent of a Tier 6 attack wave from a single direction might fail to overwhelm a player with T4 protected by a wall, even T3 units from enough different directions could overrun the same player. Creating multiple areas where a player must defend taxes not only his power pool, his charges, and his cooldowns, it taxes his mind. It becomes exponentially more difficult to respond to major threats that could undermine your defenses, when these threats are coming from different directions, and particularly if they are far enough apart to not be visible on the same screen. Particularly at higher tiers, where the tools available to players are so strong, it is essential to create multiple avenues of attack. At the same time, a map designer must be careful not to overwhelm the player's mental capacity with an excess of attack directions simultaneously.
-
Here I am with another behomoth of a post The idea of a 25 card deck has come up now and again, and with recent interest in heavily reworking nature/frost t1 I think it's time to put together a full case of pros and cons, as well as gameplay analysis. I am personally in favor of increasing card slots, although I could certainly be convinced otherwise. Also, I'm not suggesting that we add 5 extra cards immediately; in the balancing discord there is some talk of a complete rework of multiple core cards in nature/frost t1--such a rework would take at least a year to get right, and if we are ready to tackle such a long-term problem, I'd like us to know if 25 cards is a possibility. For example there is talk of buffing the card tunnel. If you spend a deck slot for it, you need to get value from the card in every game. So the card is a bit underwhelming atm. But if you had room for it to be useful in the right situation, perhaps a buff isn't needed. Another example in regards to the swift problem that frost has, we might add a "shrine of swift" and "spell of swift," the spell only works if the shrine is built up so you would be sacrificing 2 deck slots in t1 to get 10-15 seconds of swift. Spending 2 deck slots in a 25 card deck is much different than spending them in a 20 card deck, so I think we should decide if a 25 card deck is something to consider when looking at super-long term balancing discussions. Pros of a 25 Card Deck It allows more balancing tools. In some cases, certain factions don't have good allround counters (stormsinger, wildfire, shadow mage, etc). To address this situation, we are usually either 1) buffing a card to be more multi-purpose, or 2). buffing a new card to fill the gap. Option 2 is often unsatisfactory because it requires a new deck slot which may not be affordable. With more deck slots, we can fine tune balancing without resorting to giving all buffs to the same essential cards. It allows more deckbuilding freedom. Most decks have, say, 2 cards that aren't required to avoid autolosses. Without the slots to try some crazy combo, you usually just spend those spots on extra t3 options, or a tech card which helps against a specific faction (like global warming). It allows more anti-meta plays, and counters to anti-meta plays. Suppose you play a church camp shadow. That's not a common playstyle (although in our small community we know which players are likely to play it) and it can be extremely effective if your opponent is not aware that you have a giant t3 and tiny t2. With more deck slots, you could play this anti-meta deck more safely because you'd have slots that aren't being sacrificed in the hope that your opponent thinks you have it. (I often skip firesworn because people assume it's in my deck and don't rush with sundy). Additionally, your opponent would have more tools to counter anti-meta plays. Earthshaker, inferno, and backlash are not used in fire decks, but with 5 extra slots, it may be worth taking one to stop church camping. It allows more consistent plays. If you are pure shadow going against pure fire, you would probably like to play undead army. However, that card is mostly useless against the rest of the decks, so most shadow players wouldn't waste the slot on a card that is strong in 1/10 games. However, with 5 more slots, this card might suddenly be very appealing: you have all the cards you need to avoid autolosses, and you could play a card that is extremely strong against one of the most powerful factions. On the other hand, fire players would know that undead army is a likely option, so they will play more proactively to avoid it, rather than being surprised when they see it. The same is true for scorched earth--scorched earth is not super common, so players will often gamble whether their opponent has it. If they guess wrong, the game is instantly over. With more cards, scorched earth will be normal to have, so taking an orb in range of scorched earth would be considered a stupid play, rather than a calculated risk. It allows more interesting t3 fights. Most factions can have about 3 units in t3: an offensive nuke, a swift unit, and probably another nuke that's used as defense. Some factions have more slots available for t3 which gives them an advantage, but the gameplay is still largely straightforward. A richer t3 experience, where both sides have 5+ cards (and defense is not so strong) would be exciting imo. And players could have the possibility for richer t3 fights without sacrificing their t2 or t1. Cons of a 25 Card Deck Possibly more intimidating to new players. Imo, 20 cards or 25 cards doesn't really make a difference here UI issues? I don't think there are any UI issues, although hotkeys would be a concern. Again, not an issue imo, but I'm curious if anyone else cares that much about hotkeys PvE will change. Zyna has mostly confirmed that 25 card decks would be a global change, not something he can change just for one game mode. I am not that qualified to speak about PvE, although I understand that speedrun strats rarely require even 20 cards (and imo it wouldn't be bad if this allowed better speedrun strats). For casual pve, I think more cards is strictly more fun, except for the new player. But I think there are much bigger issues facing new players. PvP balancing. Obviously I hope this is not a con, since the idea is that we'd start balancing plans for the long-term future were 25 cards is normal. However, adding 5 extra cards in the current pvp environment would affect things quite a bit. It would probably require at least some reworks to every deck. For example, stormsinger would be a good target for a nerf, since her role can be covered by 2 cards if deck slots allowed. PvP Changes If the devs suddenly changed the deck size tomorrow, how would PvP differ? Pure fire: this is pretty much a nerf. There are not enough pure fire cards worth using, so this deck gets less value than all others. Possible additions: global warming, red nomad, girl power, rageclaws, wrecker, spitfire, vulcan, virtuoso, magma hurler, earthshaker, inferno. None of these are especially interesting. I'd probably take global warming, magma hurler, wrecker, virtuoso, and rageclaws. These would help with pure frost, the worst matchup for pure fire. Wrecker would also be good against frost (and nature). Otherwise I'm not sure that the extra cards adds much, unless the meta shifted and I needed counter for a new meta card in a different deck (like mine, if undead warriors became meta?) Bandits: more cards would mean that bandits can use some of their overpowered combos (embalmers + phoenix +rallybanner, or super buffs) without sacrificing core defense. The deck would still need help, but it would be better able to use some of its extremely powerful combos. Fire Nature: this deck would get a full t1, mauler to counter stonekin, and maybe an extra t3 card or two, although it would still have the weakest t3. These changes would largely be QoL. Fire Frost: this deck would finally get to use some of the interesting combos like wintertide+ rageclaws, warden's sigil +termite, or tower of flames+architect's call. None of these cards are played in a regular fire frost deck because of slot issues. Additionally, there might be some fire frost players who start frost t1 to take advantage of a super large t1 where 1/3 of the cards translate into t2 (ice barrier, homesoil, wintertide, frost sorceress, lightblade, possibly even frost mage). Pure Shadow: this deck would get to use shadow phoenix, maybe embalmers for nice combos. It could have a 5-card t3 while also having room for knight of chaos and possibly undead army. Although church decks would be empowered, if they became more common then other factions would be able to afford 1 slot for t4 earthshaker or something, to close games. Shadow Nature: this deck is in a pretty nice place with 20 cards, but lifeweaving, burrower/ghostspear, and some t3 cards would make play a bit more consistent. Enlighten earthshaker might become a possibility! Shadow Frost: this deck has tons of good cards to choose from, but these cards would mostly be tech choices. Lyrish would be an obvious addition, maybe an extra t1 card and homesoil+rallybanner. I'd expect to see stormsinger nerfs coming, (stormsinger is not only a great card, but it saves deck slots) which would force this faction to spend slots on maybe templar or gravity surge. I'm not sure if 6 or 7 t3 slots would be much better than the standard 5 card t3. Pure Frost: glyph of frost would be standard, and possibly wintertide. that would be good for making frost a bit better in t1, and it would also feel like less cheese when you are surprised by one of these cards. In general pure frost doesn't currently benefit from extra slots as much as other decks though, in my opinion. Stonekin: more t1 for consistency, but this faction would become the strongest in the game, hands down. Currently there is a style of playing stonekin where you don't use t3 at all, just rely on superior t2 units to overwhelm your opponent when he goes t3. Stonekin has superior t2, so it's not like another faction can simply add a tech card to even the t2 matchup (mauler would help though). This incredible t2 combined with a solid t3 (stonekin also has a very strong t3, but usually not enough slots for it), would be oppressive in the current balance patch. Pure Nature: I'm not sure if deck slots helps this faction that much atm. It would allow root decks though, which would be a nice change option. It would also allow tunnel plays, and maybe timeshifter spirit. I made this post here so it can have a lot of thoughts in one place, since this will probably be a conversation that takes a long time. I'm curious what other people think, and if there are any pros/cons that I missed. TL;DR Let's talk about changing the number of deck slots from 20->25
-
Ironclad looks absolutely dope on the artwork but in-game it has a bunch of muted, muddy and ugly colors. Unfortunately, with limited capacity for artworks, it's a bit tricky to squeeze that inbetween some other priorities. But Ironclad specifically has been my pet peeve for a long time.
-
Card Balance Changes Global Balance Changes Ranged attack delays standardized: - Towers and ranged units are now assigned a standard 0.5 second delay on spawn instead of a semi-randomized number between 0.1-1 second in 0.1 second increments. This only modifies cards affected by the bug, many ranged units and towers will be unaffected by the change. If a tower or ranged unit's attack has a longer resolve timer than its attack speed, a number is assigned to said tower or unit on spawn between 0.1-1 seconds, which is permanently added to its attack speed. For examples, this means that while a certain tower might be capable of attacking every 2 seconds, if it is affected by this mechanic any particular instance of this tower spawned has an actual attack speed of between 2.1 seconds and 3 seconds. This means all affected towers are not created equal, even among towers of the same kind, and can have widely varying performances. Ranged cards with high attack speeds are impacted more strongly than ranged cards with low attack speeds, but all affected towers and units are inconsistent. Given that we have already begun to balance around the average attack speed of each ranged attack after we previously discovered the discrepancy, we did not want to simply remove the attack delay as it would potentially require us to once again rebalance all affected cards. Instead, we have opted to standardize the delay timer to 0.5 seconds, which is on average a slight buff to all affected cards, and which will henceforward make all ranged cards consistent with themselves. Card attack speed descriptions do not currently reflect the change. We will work to slowly remedy this over time as we continue our work to fix existing descriptive issues. PvE Balance Changes While changes are split here between PvE and PvP sections, many of the changes have important consequences for both game modes. Our PvE and PvP balance teams work closely together to ensure that the impact of all changes are evaluated for both game modes. Below, we have listed both the changes and our reasoning behind them. [ Tier 1 ] Nightguard: 1. Damage: 60 damage (450 dp20) ➜ 90 damage (675 dp20) 2. Add "Swift" ability to both affinities. 3. Gifted affinity ➜ Infused affinity: A. Add "Infused Fury" - Deals 50% more damage against elementals. Give swift to both affinities and make their difference be in species damage type. Substantially increased combat stats to make the unit more valuable when unable to immediately swap, but still primarily useful for swapping. Amazon (g): 1. Wildlife Protection healing amplification: 50% ➜ 65% Minor buff intended to make combinations like Amazon(g) + Werebeasts more rewarding. Strikers: 1. Remove "Looter" ability 2. Add new passive "Gang Up!": When being surrounded by at least 3 friendly orcs in a 25m radius, all incoming damage will be spread among all gang members relative to each unit's current life points. Additionally, affected units take 15% less damage. 3. Add new passive "Group Pressure": Unit is immune to Unity and its effects. We are giving Thugs' "Gang Up!" passive to Strikers and changing both Strikers and Thugs' abilities to work based on friendly orcs instead of just friendly Thugs. This will allow Strikers and Thugs to form a gang together, creating a new Fire T1 combo. Additionally, we are fully removing "Looter" from Strikers. Our balance team is currently in the beginning stages of reintroducing a rebalanced Looter ability to the game for higher tier units as part of a project to allow each faction to have a power acceleration mechanic. Shadow's Resource Booster is the most obvious example of such an acceleration mechanic. Nature also has existing acceleration tools in the Breeding Grounds effect (unit cost reduction) and Promise of Life (unbinding units). We think Looter could be a good tool to enable a unique acceleration mechanic for Fire. More details will be announced on this topic when proposals become more concrete. [ Tier 2 ] Earthkeeper: 1. Back Up ability rework: A. Can now be knocked back while ability is active. B. Duration: 30 seconds ➜ Until interrupted C. Power cost: 0p ➜ 25p Earthkeeper has a very powerful ability, particularly the blessed (b) affinity. By making it last indefinitely absent interruption, Earthkeeper can be used by Stonekin decks to set up incredibly durable defenses that do not need to be constantly maintained. We removed immobile to allow Earthkeeper to be knocked back, requiring good positioning, and added a 25p cost to increase initial set up cost in exchange for the indefinite duration. [ Tier 3 ] Abyssal Warder: 1. Power cost: 250p ➜ 240p 2. Crystal Spikes ability damage: 725, up to 2175 in total ➜ 800, up to 4800 in total 3. Class change: Giant Destroyer ➜ Ancient Destroyer Abyssal Warder has been much more viable since the buff to Promise of Life. Players can send Abyssal Warder on a suicide mission, cast Promise of Life just before death, and be rewarded with 2 L-sized warders and a new XL-sized one. This same Promise of Life can then be used in T4 to quickly unbind the player's initial Forest Elder. Even so, Abyssal Warder remains a weak option, and it struggles greatly against masses of weaker enemies. We are over doubling the total damage of its Crystal Spikes ability to allow it to clear crowds of weak enemies quickly and slightly decreasing its power cost to make it more efficient. Deepfang: 1. Damage: 150 damage per second (3000 dp20) ➜ 165 damage per second (3300 dp20) 2. Life points: 3200 ➜ 3500 3. Stonekin Critter (unit): A. Damage: 60, up to 90 in total (500 dp20) ➜ 72, up to 108 in total (600 dp20) B. Life points: 550 ➜ 750 Deepfang is currently underwhelming, particularly as a good portion of its strength relies on the continued existence of two weak support units. Once they die, Deepfang has worse stat efficiency than the almost pure support unit Rageflame. We are giving a general buff to the damage and life points of both Deepfang and its Stonekin Critters. In the future, we also intend to rework the unit's summoning mechanic and to allow Deepfang to cast Union even if its Critters have died. Rageflame: 1. Frostshower (both affinities): A. Now able to target air units. B. Freeze duration: 10 seconds ➜ 15 seconds 2. Blessed Frostshower (b) new affinity effect: Units frozen by this ability will receive full damage when attacked. 3. New passive, "Shatter Ice" (both affinities): The unit is able to ignore the usual damage reduction of frozen targets. Rageflame is meant to be a hybrid damage and support unit, but it does neither well. We are leaning more into its support aspects, while also removing the card's built-in anti-synergy by allowing it to always deal full damage to frozen targets. The unit's freeze duration has been increased, and it can now target air units, removing one of its major weaknesses. Additionally, the blue affinity's freeze allows all units to continue dealing full damage, giving players a choice between ignoring freeze's damage reduction or disabling buildings when choosing between affinities. Unity: 1. Gifted Sharing (g) regeneration: 40 life points every 2 seconds ➜ 50 life points every 2 seconds 2. Blessed Sharing (b) damage reduction: 25% ➜ 20% After the recent Fire changes, Unity(b) has proven too strong. The damage reduction double stacks (once when the initial unit is attacked, once when the remaining damage is transferred). This means that the actual damage reduction granted by the blue affinity is often substantially more than 25%. On the other hand, the green affinity has been the weaker of the two since the beginning. We are giving it a slight boost to hopefully make the decision between which affinity to bring more meaningful. Ward of the North: 1. Units under the effect of this spell can no longer be knocked back. Minor buff to the card to give players a reason to use it over its competitors Revenge and Stone Shell. [ Tier 4 ] Batariel: 1. Stage Duration (both affinities): A. Stage 1: 4 sec ➜ 5 sec B Stage 2: 4 sec ➜ 5 sec 2. Stage Threshold Value (both affinities): A. Stage 1: 1200 damage ➜ 800 damage 3. Damage per Stage Batariel (fire affinity): A. Stage 1: unchanged (100 dmg) B. Stage 2: 150 dmg ➜ 200 dmg C. Stage 3: 200 dmg ➜ 300 dmg Follow-up on previous changes which left Batariel's fire affinity too weak. Death Ray: 1. Leech Guns ability: A. Damage buff: 100% more damage ➜ 150% more damage B. Stored life point cost: 1 additional damage per 1 stored life point ➜ 1 additional damage per 0.66 stored life points Death Ray is a well-designed card which currently demands a substantial amount of deckbuilding cost and in-game micromanagement to make it work. While decent, Death Ray should give more to justify its high investment costs. This change increases Death Ray's damage buff while charged with life points, without otherwise increasing the amount of life points required to be harvested via Leech Guns. This should leave the current experience of the deck unchanged, except that it is now stronger. Fire Sphere: 1. Cooldown: 10 seconds ➜ 20 seconds The last round of buffs left Fire Sphere too strong. Instead of taking away from the aspects of the card that have quickly made it a top tier option, we are reverting a previous change to its cooldown. This should reduce the ability to spam the card, making its initial 10 second wind-up a more important factor to account for when using the spell. Forest Elder: 1. Pest Plants is now a basic ability that exists on both affinities of Forest Elder. A. Radius: 30m ➜ 20m B. Damage: 30 damage per second ➜ 40 damage per second 2. Forest Charm ability rework: A. No longer applies an effect to allies. Now functions more like a mobile Regrowth. B. New ability description: "Activate to release the power of the forest, creating a regenerative zone of 30m radius. Every 2 seconds, friendly units within restore up to 300 life points, up to 3000 in total. Also affects the caster. Lasts for 30 seconds. Reusable every 60 seconds." 3. Gifted Flower Power: The +25% damage buff now also applies to Forest Elder itself. Also affects Pest Plants. 4. Shadow Affinity (p) ➜ Frost Affinity (b): A. Blessed Flower Power effect: Friendly units now ignore slow caused by unit collision in a 30m range. Also applies to Forest Elder itself. 5. Class change: Beast Dominator ➜ Beast Commander Our testing found that Pest Plants was an essential component of Forest Elder's ability to clear early T4 camps and for all melee army compositions to succeed. As such, we added it to both affinities as a basic ability and adjusted its power level accordingly. To enable the all melee deck styles that arose during our testing, we added the ability for the new blue affinity Forest Elder to enable its allies and itself to ignore unit collision based slows. This makes melee armies substantially more dynamic. In general, the green affinity Forest Elder works best combined with Primeval Watcher, while the blue affinity Forest Elder works best when combined with Colossus and Grimvine. Finally, we reworked the Forest Charm healing ability. It is now substantially stronger than previously, as well as much more consistent in terms of expected healing. With these changes, the changes to Mind Control, and the release of Sanctuary, Pure Nature should be comparable in strength to other pure deck archetypes. Gemeye: 1. Damage: 550, up to 825 in total (2750 dp20) ➜ 650, up to 975 in total (3250 dp20) 2. Tainted Spit (p): A. All damage is now piercing B. Contamination damage: 55, up to 165 in total every second ➜ 50, up to 150 in total every second 3. Gifted Spit (g): A. Paralyze targets: 4 ➜ 5 B. Paralyze duration: 10 seconds ➜ 15 seconds Minor buff to Gemeye in general. Gemeye's two affinities widely vary in usefulness. The purple affinity can deal up to 3300 additional damage over 20 seconds, increasing its actual attack value to 5450 dp20. This damage also stacks if there are multiple Gemeyes. By contrast, the green affinity can paralyze up to 4 targets after a 5 second wait period for up to 10 seconds. 10 seconds is already a short duration for crowd control in T4 and the 5 second wait timer makes it even worse, as it is actually much longer when accounting for Gemeye's attack animation and projectile travel time. Additionally, paralyze effects cannot stack, and they quickly run afoul of crowd control's diminishing returns penalty if the player casts spells such as Curse of Oink or a freeze effect. Overall, this leads to the situation where in the vast majority of situations the purple affinity is far superior. The goal here is to break the two affinities into two different deck paths. By allowing the purple affinity to always pierce through damage reduction, it means that its damage will not be reduced when attacking frozen targets. On the other hand, the green affinity's built-in crowd control will synergize with splash options lacking CC and Noxious Cloud which deals a lot of damage but needs time to work. The changes should also allow the green affinity to do a better job when utilized as part of static defenses for its built-in crowd control. Grimvine: 1. Strangling Vines ability radius: 20m ➜ 25m Quality of Life change intended to make Grimvine's ability slightly better. Mind Control: 1. Power cost: 300p ➜ 250p 2. Charges: 4 ➜ 8 3. Takeover limit: 300p ➜ 350p 4. Allow to be used past population limit 5. Now cleanses all debuffs and makes mind controlled unit immune to all major debuffs for 15 seconds after cast. Mind Control is one of those cards which initially seems awesome because it enables you to take over your favorite enemy units, but soon after results in frustration. NPC enemies mostly lack abilities making them no more than stat sticks, charges are extremely limited, the card becomes useless when you hit population cap, your ally's Incredible Mo permanently debuffs the unit even when it becomes yours, and taking over major threats inside a camp usually results in almost instant crowd control into death. We have tried to address all of these issues at once. After the changes, Mind Control should provide a strong incentive to use 3 Nature orbs as well as provide a means by which Nature can bolster its unit-based strategy without binding power in the process. Shadow Worm: 1. Damage: 400, up to 600 in total (4000 dp20) ➜ 440, up to 660 in total (4400 dp20) 2. Life points: 3500 ➜ 4400 3. Mass Disintegration ability targets: May only disintegrate units ➜ May now disintegrate units and buildings 4. Earth Dive ability damage: 250, up to 1000 in total ➜ 325, up to 1300 in total Shadow Worm is the only T4 Pure Shadow unit in the game. While the previous buffs helped the card a lot, Shadow Worm remains by itself an insufficient payoff to give up a splash orb. It also, despite the buffs and its high orb restrictions, remained one of the lowest stat efficiency units in T4. With these changes, we are both giving a general buff to Shadow Worm's stats and making some changes to enable the two unique aspects of the card, its Mass Disintegration and its Earth Dive mechanic. Mass Disintegration will now be able to target buildings (but not spawns which have building immunity), giving the ability much needed flexibility. Shadow Worm's life points increase will also allow the unit to survive 5 seconds longer when disintegrating the maximum number of targets simultaneously. Additionally, the 30% damage increase to Earth Dive damage will enable a particularly unique playstyle given that Life Stealer also affects Earth Dive. Thunder Wagon: 1. Remove "Tainted Death" from shadow affinity 2. Change Shadow affinity (p) ➜ Frost affinity (b) A. Blessed Flamethrower (b): Now able to target air units. [ Building Changes ] It is the general principle of the faction design team not to change abilities or introduce complex mechanics needlessly. Cards should generally perform a single function and perform that function well. A lot of the buildings in the game are already well-designed, but lack sufficient stats or possess too strict of requirements. As such, we have opted wherever possible to introduce simple changes to bring the tower to the appropriate power level. If you would like to learn more about our thought process behind the tower changes, please head to Skylords Reborn Documents to read our design Deep Dive on Towers, as well as other design documents. Artillery: 1. Range: 50m ➜ 60m 2. Increased turret turn speed. Allow Artillery to damage siege units even when placed behind a wall. Bandit Launcher: 1. Flame Arrow splash radius: 5m ➜ 8m 2. Life points: 1500 ➜ 800 3. Add "Fast Construction" - Construction time is reduced by 50%. 4. Firebug: A. Radius: 20m ➜ 25m B. Power cost: 20 ➜ 25 Energy C. Infused Firebug damage: 400, up to 1200 in total ➜ 600, up to 1800 in total D. Tainted Firebug damage: 600, up to 1800 in total ➜ 800, up to 2400 in total Differentiate Bandit Launcher from its more defensive oriented brother Rioter's Retreat by focusing it around attacking and using its suicide ability to quickly and cheaply clear enemies. Deepgorge: 1. Cold Clutch radius: 25m ➜ 30m. Deepgorge has substantially increased in strength since the most recent changes, particularly in connection with North Star(b) with which it naturally synergizes. Unfortunately, due to the tower's large size, its ability radius is still too small when the tower is placed behind a wall making it difficult even for a well-placed Deepgorge to hit all melee attackers on long walls. Fire Bomb: 1. Damage: 715 up to 1650 in total ➜ 720, up to 1800 in total 2. Add "Fast Construction" - Construction time is reduced by 50%. 3. Allow to hit air units & enable splash overflow fix. Small buff to Fire Bomb that should allow it to be used more aggressively. Hammerfall: 1. Increase turret turn speed. 2. Breeze of Life (g) / Breeze of Strength (b): A. Maximum capacity: 1500 ➜ 3000 B. Recharge rate: 15 per second ➜ 40 per second C. Radius: 20m ➜ 25m 3. Breeze of Strength, Ice Shield cost: 495 capacity ➜ 600 capacity Increased turret turn speed should increase damage output due to faster target tracking. Change to affinity effects: Higher maximum capacity should make both affinity effects better, but especially Hammerfall (g) which is only drained as required. Higher recharge rate means that a new Ice Shield can be bestowed every 15 seconds instead of every 33 seconds, even with the higher cost. Radius increase will make it easier to place units around it. Total charge time is now 90 seconds. Additionally, Hammerfall's shields do not decay while within the aura. This makes them a stable source of extra health for allied units. Hammerfall's recharge and healing is still less than Healing Well's, a T2 60p card, with the same maximum capacity. Howling Shrine: 1. Essence Bolts damage: 600, up to 900 in total (3000 dp20) ➜ 750, up to 1125 in total (3750 dp20) 2. Crowd control duration (both affinities): 10 sec ➜ 15 seconds Howling Shrine is feeling better after the buffs both to itself and to the root network in general. When the initial changes were proposed, some people suggested larger buffs to the card, but we urged caution due to the difficulty to account for how things would change once the full set of root network changes came through. Now that we can evaluate the changes more fully, it appears that Howling Shrine is still on the weak side. To remedy this, we are giving it a +25% damage increase and increasing the duration of both its root and paralyze to help it keep dangerous melee units at a safe distance. Infected Tower: 1. Damage: 114, up to 172 in total (1215 dp20) ➜ 138, up to 207 in total. (1466 dp20) 2. Splash Radius: 5m ➜ 8m A +20% damage increase and small splash radius increase. Changes to Infected Tower's ability have been postponed until we can properly rework it. Lost Converter: 1. Add Soul Splicer's "Soul Suction" ability to the card, allowing it to gather corpses outside its passive range. 2. Corpse cost to freeze: 200 ➜ 250 stored life points All corpse support buildings should have a way to gather corpses from further away. As such, we are adding Soul Splicer's Soul Suction ability to both Lost Converter and Waystation, as well as any future buildings of this type. Morklay Trap: 1. Enable splash overflow fix 2. Explosion Blast total damage: 2640 in total ➜ 4400 in total Increase total targets from 3 to 5 and enable splash damage properly transferred even when units die. This should make Morklay Trap a viable option to clear T3 camps or defend against incoming waves. Stone Hurler: 1. Damage: 100 damage, up to 150 in total (834 dp20) ➜ 120 up to 180 in total (1000 dp20) Align actual damage with stated damage on the card through an approximately +20% damage increase. Twilight Bombard: 1. Remove "Siege" from Infused affinity 2. Add "Rage" to Infused affinity. A. Stage 1: +25%; Stage 2: +50% damage B. Attacks per stage: 3 C. Reset timer: 10 seconds 3. Increase turret turn speed. The red affinity of Twilight Bombard has Siege as its affinity effect, which is largely useless. By changing it to Rage instead, we make the choice between the two affinities one of increased damage versus crowd control. Waystation: 1. Add Soul Splicer's "Soul Suction" ability to the card, allowing it to gather corpses outside its passive range. 2. New passive, Fast Construction: Construction time is reduced by 50%. 3. Infused damage buff: 30% ➜ 40% 4. Tainted poison damage: 30 life points every second ➜ 40 life points every second 5. Corpse storage: 2500 total ➜ 4500 total 6. Corpse cost per potion/poison (both affinities): 180 ➜ 400 stored life points will be used up. 7. Radius: 25m ➜ 30m The first step in what will eventually be a full rework of Waystation. For now, the addition of fast construction means it can be set up offensively as its name suggests and the addition of Soul Suction means it should be able to easily gather corpses to fuel itself. Gave a small boost to both affinity effects and increased the radius to require ranged units to enter its effective radius to damage it. Worldbreaker Gun: 1. Life points: 4500 ➜ 5400 2. Descriptive: Add "Has a long range of 50m" to its Ground Attack description. WBG is the best defense in the entire game, but that is achieved primarily through its Heavy Snowball ability augmented by Skyelf Sage. In terms of functions as a tower, it is still good, but has uncharacteristically low life points for its cost and tier. We are giving it a slight bump in total health, which should help it when functioning as a tower, while leaving it unchanged as a long range artillery piece. PvP Balance Changes [ Twilight Follow-up ] After the first round of Twilight buffs and the new introduction of Twilight Crawlers, the faction did not reach the level of performance for which we had hoped. Making good use of Twilight cards and transformation mechanics in a dynamic environment turned out to be too difficult. We will buff some cards to add further incentive of mastering Twilight decks. This might not be the last Twilight iteration as we will continue to monitor the situation moving forward. Slaver: 1. Life points: 780 ➜ 820 Increased durability to make Slaver better when used on open ground, where the unit is prone to kiting. Twilight Brute: 1. Life points: 780 ➜ 820 2. Bloodlust ability duration: 20 seconds ➜ 25 seconds Increased stat efficiency and also extended buff duration upon Transforming, making it a little easier to utilize. Twilight Crawlers: 1. Damage: 940 dp20 ➜ 1000 dp20 2. Chitin Shell ability damage reduction: 20% ➜ 30% Whereas Twilight Crawlers scale decently well into high energy game stages, they don’t provide enough stability in early game. They had problems dueling some units they were supposed to counter making it incredibly difficult to play from behind. Increased stat efficiency and higher absorption rate on their passive should settle this and make Twilight Crawlers a worthy S-counter. Twilight Minions: 1. Incentive ability duration (both affinities): 20 seconds ➜ 25 seconds Extended buff duration upon Transforming, making it easier to make use of the effect. Vileblood: 1. Power cost: 130p ➜ 120p 2. Damage: 1400 dp20 ➜ 1250 dp20 3. Life points: 1350 ➜ 1250 4. Transformation ability cost: 111p ➜ 102p 5. Infused Liquids (r) ability: 130 damage per wave (520 total) ➜ 150 damage per wave (960 total) 6. Gifted Liquids (g) ability: 250 healing per wave ➜ 300 healing per wave Reduced unit cost and adjusted stat efficiency to reward multi-unit set-ups and transformation effects. The decreased damage ratio will limit the impact Vileblood has on its own, but with less bound power, there are many more options to combine it with other cards and abilities. [ Tier 1 ] Executor: 1. Burnout ability: A. Damage buff: 60% more damage ➜ 80% more damage B. Damage debuff: Now 60% less damage on all upgrades C. Damage buff duration: 20 seconds ➜ 30 seconds D. Damage debuff duration: 30 seconds ➜ 20 seconds on all upgrades After Nightguard received nerfs, Executor's performance as a compensation tool has been a bit underwhelming. These changes should address early L-counter issues and diversify Shadow’s defensive options in T1. Forsaken: 1. Frenzy ability initial cooldown: 0 seconds ➜ 7 seconds With this patch, we intend to distribute the power of Shadow T1 more evenly and improve faction design overall. Shadow T1 is very Forsaken centric against Fire T1 and in the mirror matchup. The Frenzy ability allows them to be good in skirmishes, defense, and siege at the same time. While this can’t be changed fundamentally for slot reasons and due to available design options, we can shift a bit of Shadows' defensive strength from Forsaken to Wrathblades and Executor. This should add a bit more depth to the mentioned matchups and goes more in line with what would be expected from the counter system. Thugs: 1. Damage: 720 dp20 ➜ 750 dp20 2. Gang Up! ability: Now works based on nearby friendly orcs, not just friendly Thugs. As newly buffed Wrathblades will have a certain impact on skirmishing against Fire T1, Thugs will receive a slight damage increase as well. Warden's Sigil (g): 1. Gifted Sigil Ice Shield regeneration: 25 strength per second ➜ 35 strength per second Providing clear identities to both Sigil affinities and granting more reasons to pick anything besides the frost one. Wrathblades: 1. Burnout ability: A. Damage buff: 60% more damage ➜ 80% more damage B. Damage debuff: Now 60% less damage on all upgrades C. Damage buff duration: 20 seconds ➜ 30 seconds D. Damage debuff duration: 30 seconds ➜ 20 seconds on all upgrades [ Tier 2 ] Moon: 1. Necroshade ability cost: 50p ➜ 40p Moon has access to fairly strong abilities, but very high upfront costs put her into a very niche position, especially for a legendary card. Necroshade cost being reduced should add more room for skill expressive gameplay and reinforce her identity as an assassin type unit. Ripper: 1. Cannibalize ability regeneration: 25 life points per second ➜ 35 life points per second Buffed the corpse interaction for increased card value in extended combat and better survivability of dazed summons. This change will also affect the Rippers spawning from Nox Carriers. Viridya: 1. Damage: 90, up to 135 in total (750 dp20) ➜ 108, up to 162 in total (900 dp20) 2. Unit's attack radius now applied around the unit hit instead of the squad's center. Viridya’s autocast is nothing but frustrating to use. Attacks apply such a widespread knockback against squad units, to the point where she stops dealing any damage to them after a single attack. These changes should alleviate the mentioned issue and add a fair reward for utilizing her as an S-counter overall. [ Tier 3 ] Amii Ritual: 1. Power cost: 150p ➜ 80p 2. Duration: 20 seconds ➜ 25 seconds 3. Cooldown: 60 seconds ➜ 100 seconds In the past, Amii Ritual has been underwhelming as its high cost made it fairly difficult to use the spell when needed the most. With this change the drawbacks of the card will be shifted to a long cooldown instead. This puts more emphasis on good strategic usage. Payoff can be significantly higher, but additional time between activations makes it easier to punish a mistimed use. Mo: 1. Mo's Better Blues ability: A. Duration: 20 seconds ➜ 30 seconds 2. Group Hug ability: A. Minimum healing: 500 life points ➜ 1000 life points B. Maximum healing: 3000 life points ➜ 4000 life points Whenever Mo sees occasional play, it is due to Stampede being one of the most valuable abilities in the game. More often than not, the cost and cast animation of his remaining abilities make it better to just not use them at all. These buffs should address this without reinforcing his base-nuke oriented play pattern. Nox Carrier: 1. Power cost: 180p ➜ 80p 2. Charges: 8 ➜ 16 3. Life points: 1500 ➜ 1050 4. Necro Strike ability (both affinities): A. Initial cooldown: 10 seconds ➜ 15 seconds B. Damage: 3400 damage ➜ 900 damage 5. Tainted Necro Strike (p) poison duration: 15 seconds ➜ 10 seconds Nox-Carrier has been fairly problematic due to its one-dimensional design. The ability to destroy full health orbs turned the unit into a raw stat check, especially when combined with cards that can remove the downside of heavily reduced movement speed. In order to buff this card to a viable state, we needed to get rid of this pattern. As a result, we strictly nerfed the siege ability followed by a drastic cost reduction. This puts higher emphasis on Ripper spawns instead of ability damage. With Rippers also getting buffed, this should add a lot of room for creative card usage and remind everyone that Nox Carrier is actually carrying something. Queek Queek: 1. Damage per attack: 76 (610 dp20) ➜ 80 (640 dp20) 2. Attack range of normal Queek Queek: Now always 9m 3. Superpig ability damage buff: 120% (1340 dp20) ➜ 150% (1600 dp20) Pushing unit stats to at least match other flying units in T3. The opportunity has also been used to clean up damage numbers. Shadow Insect: 1. Soul Shock ability damage: 500 ➜ 600 Shadow Insect is a strong unit with a rather unique ability design, but often requires too much micromanagement to outweigh the cons of having weaker stats compared to most other T3 units. We will strengthen the ability a little for that reason. Vulcan: 1. Conflagrate ability cost: 50p ➜ 30p With buffs to many T3 units across the board, Vulcan was left somewhat behind in comparison. With lowered ability cost, it should be easier to make use of his strong damage spikes.


- 45 replies
-
- 14
-


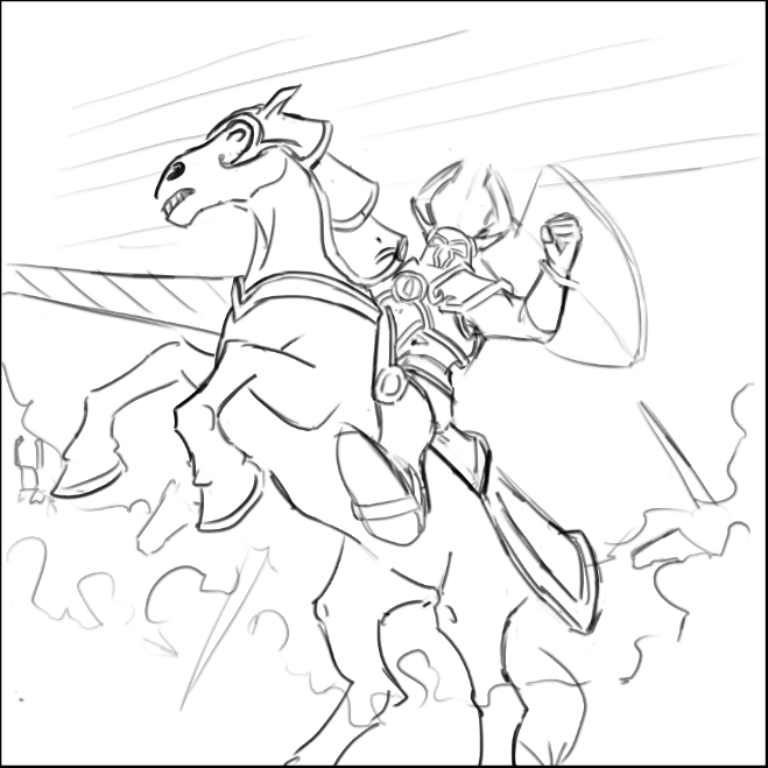

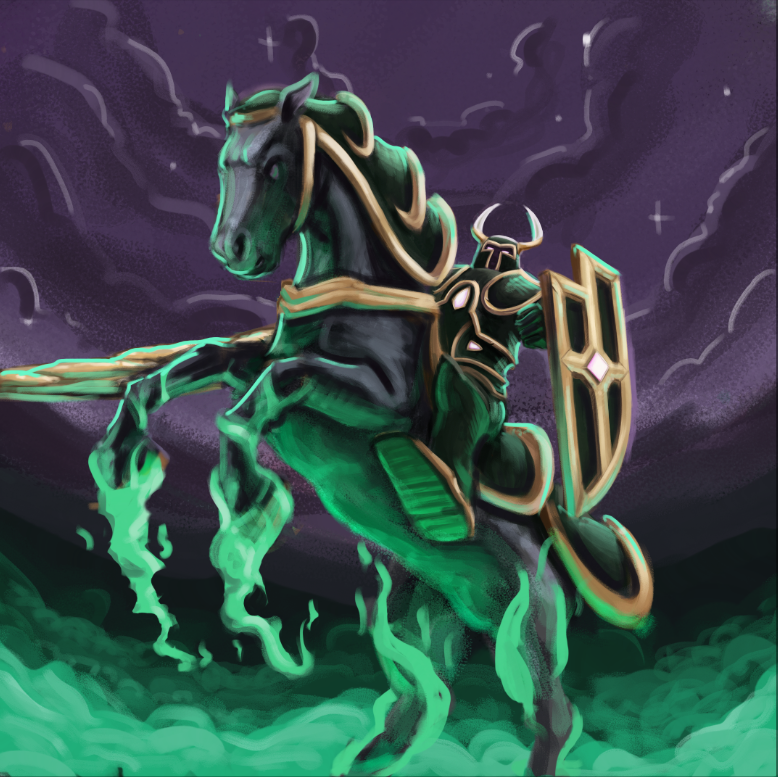
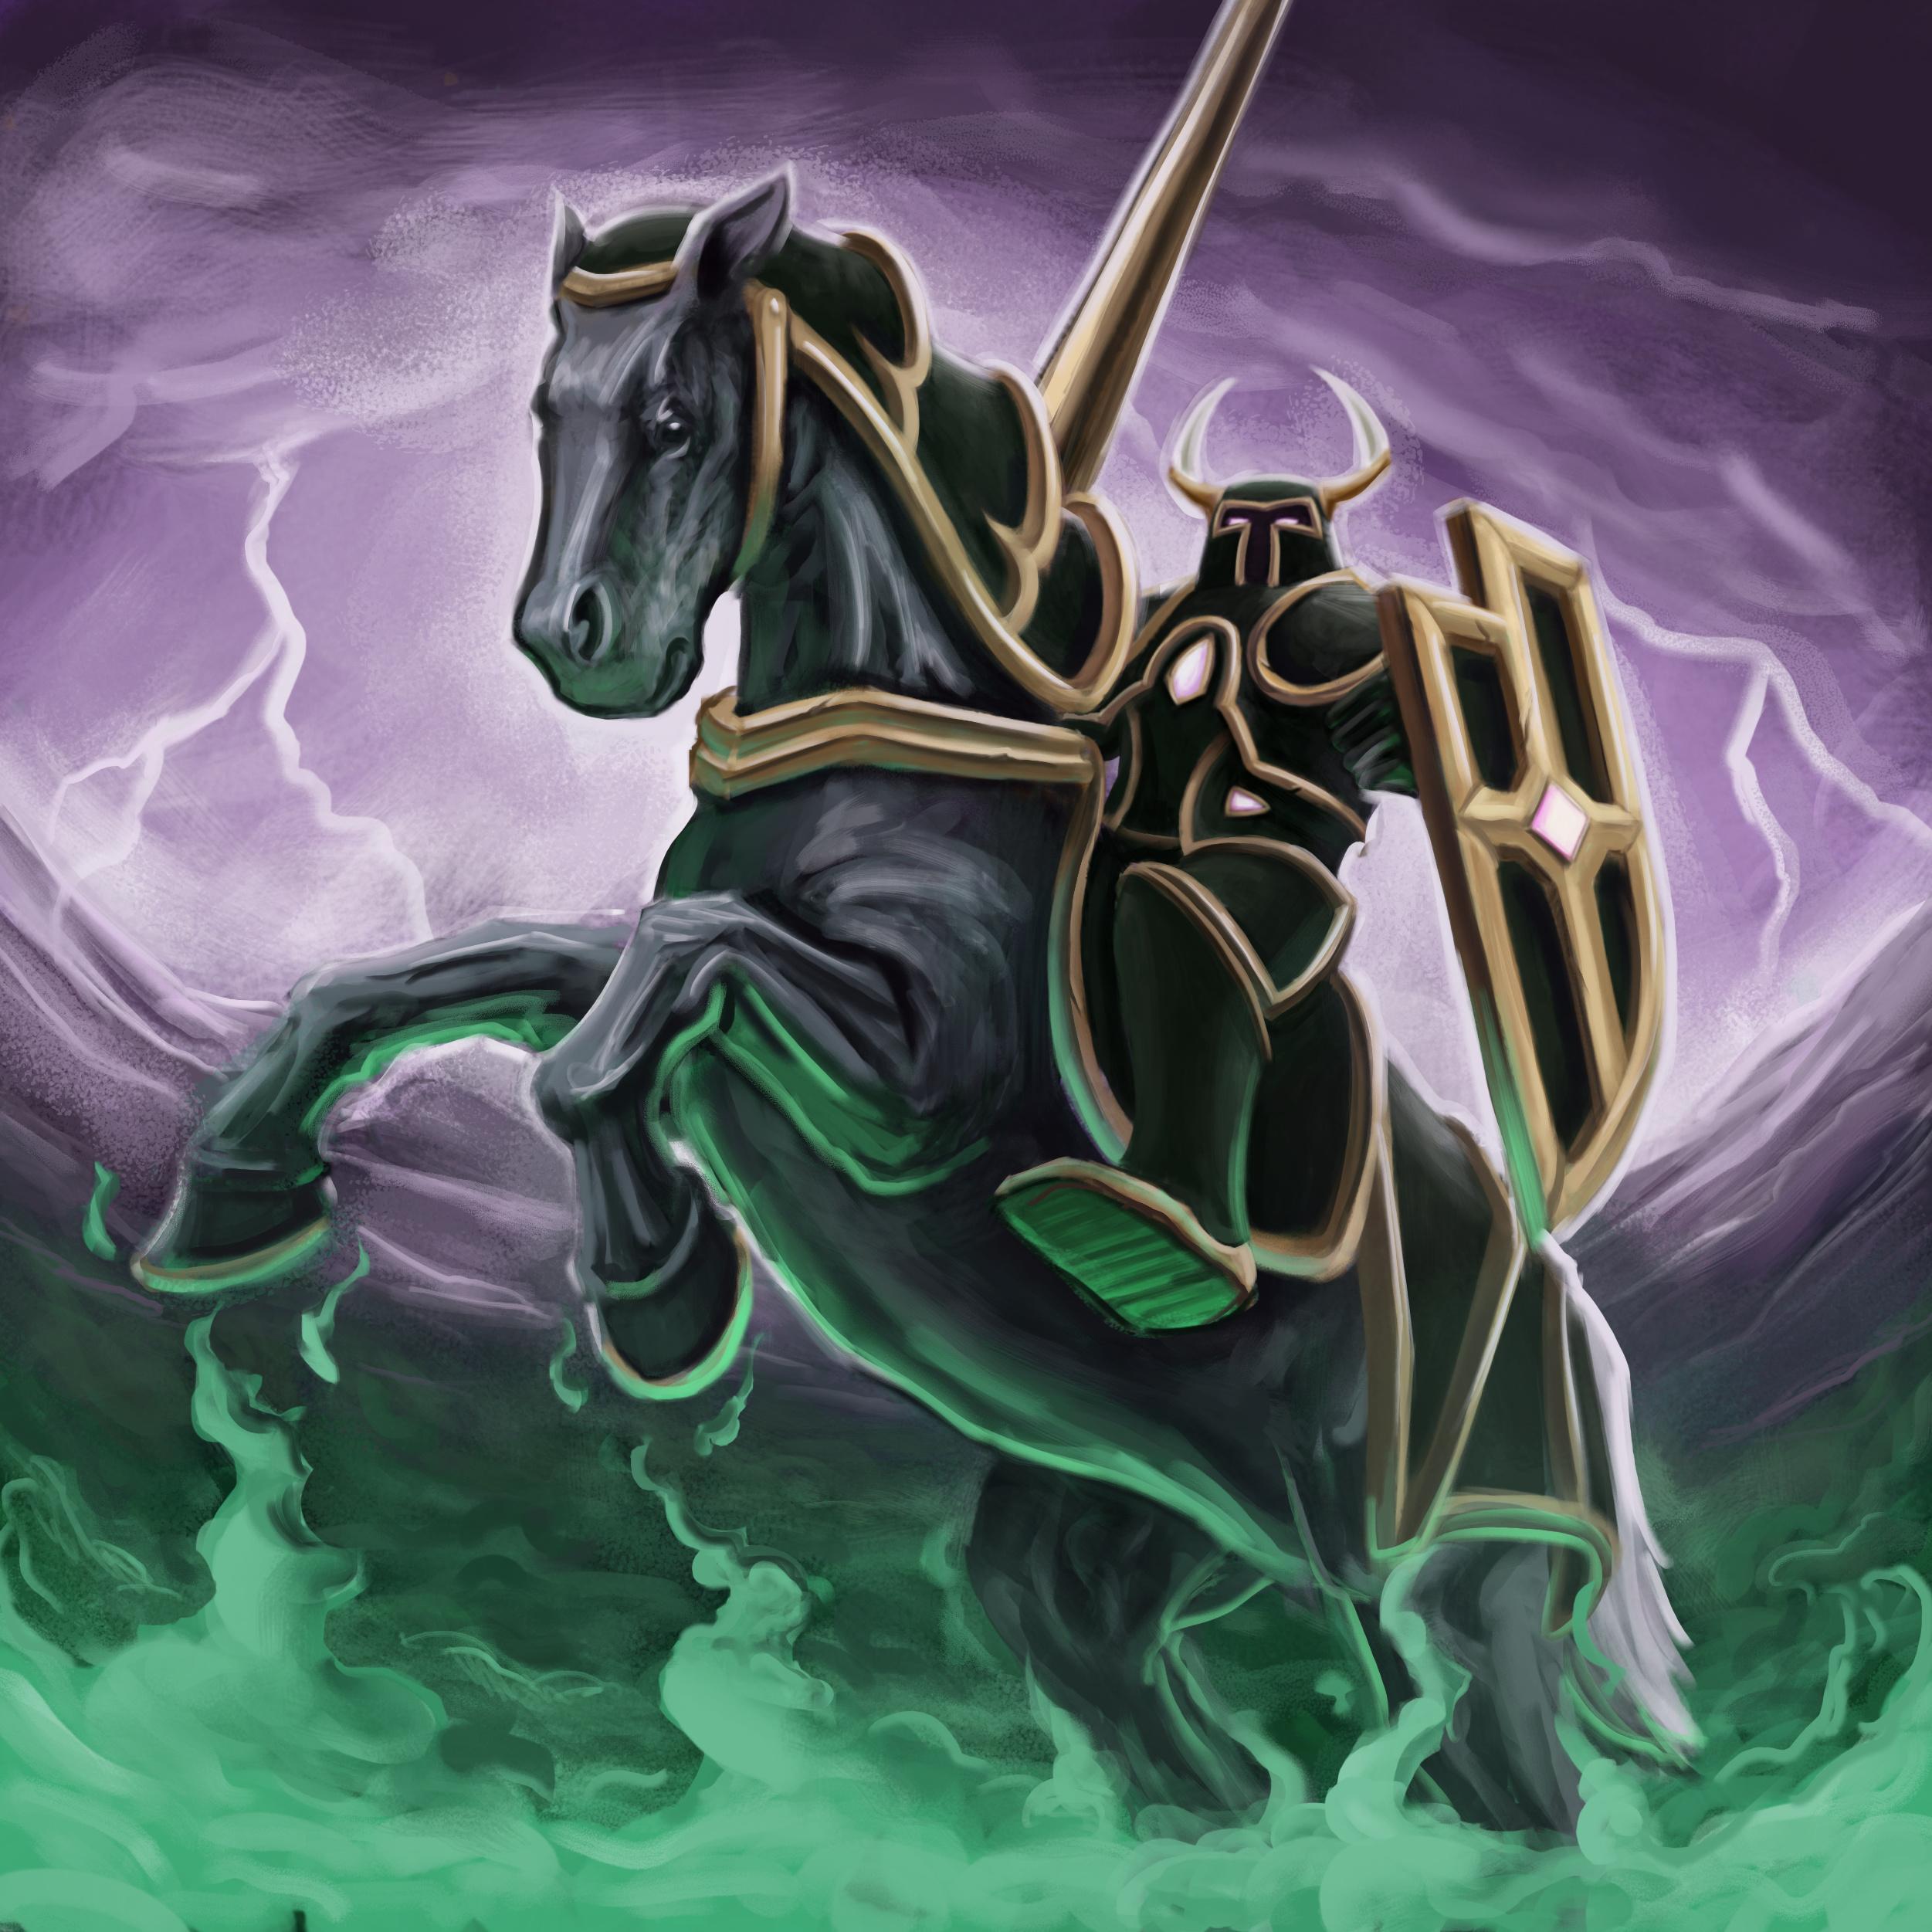
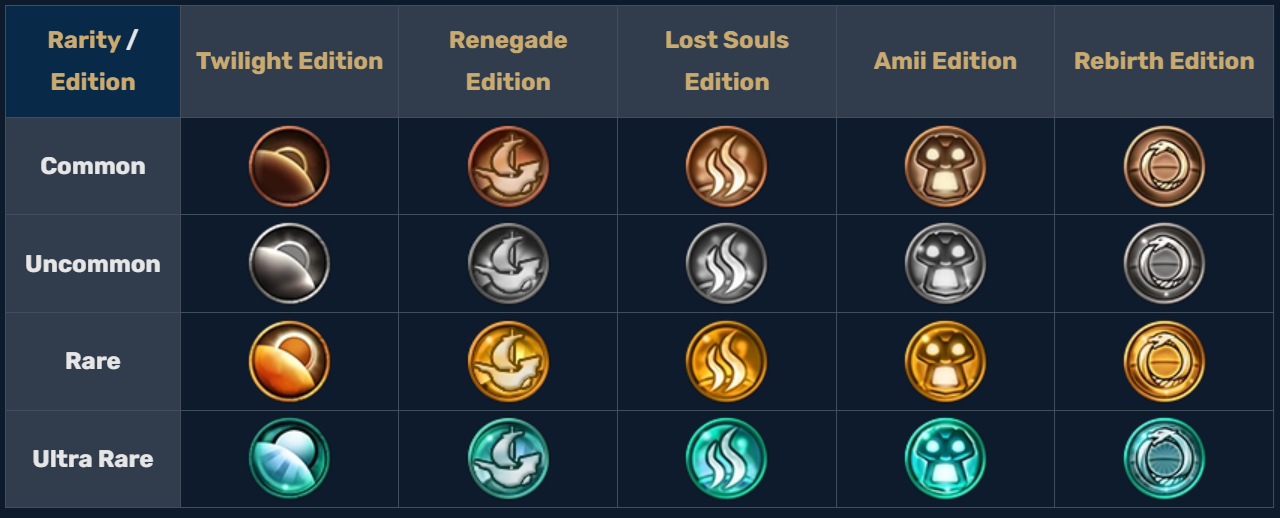


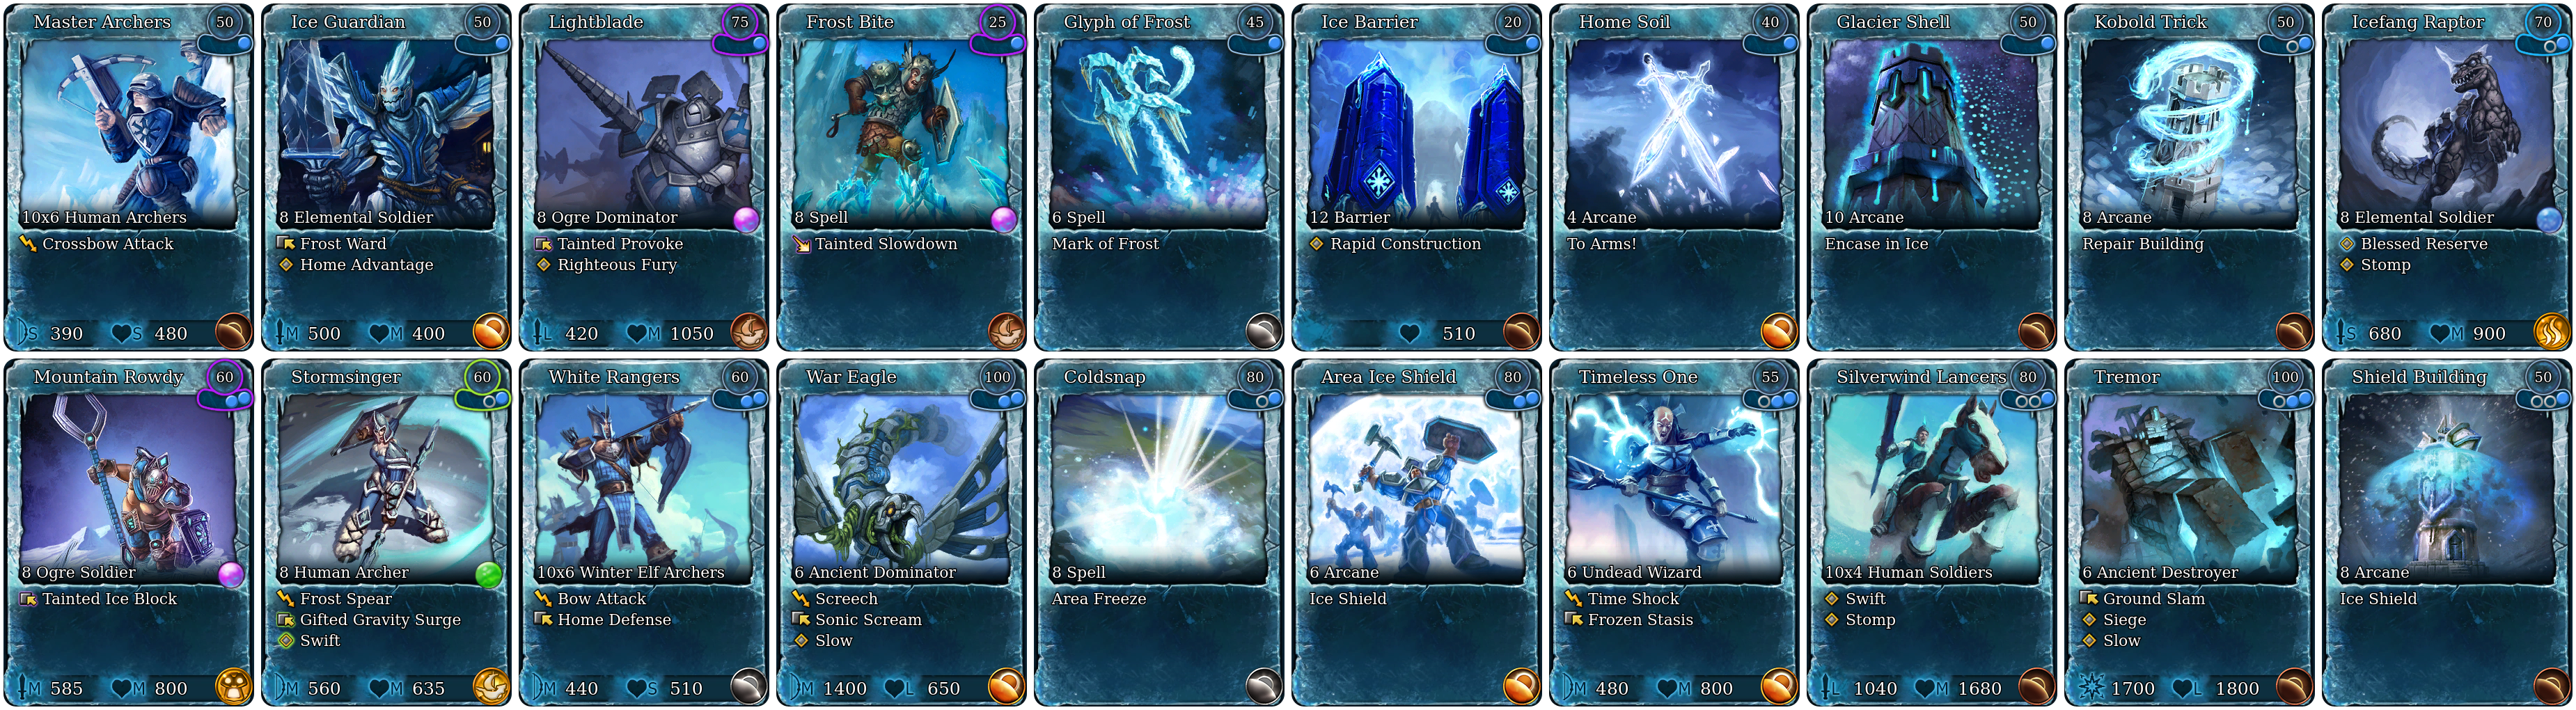
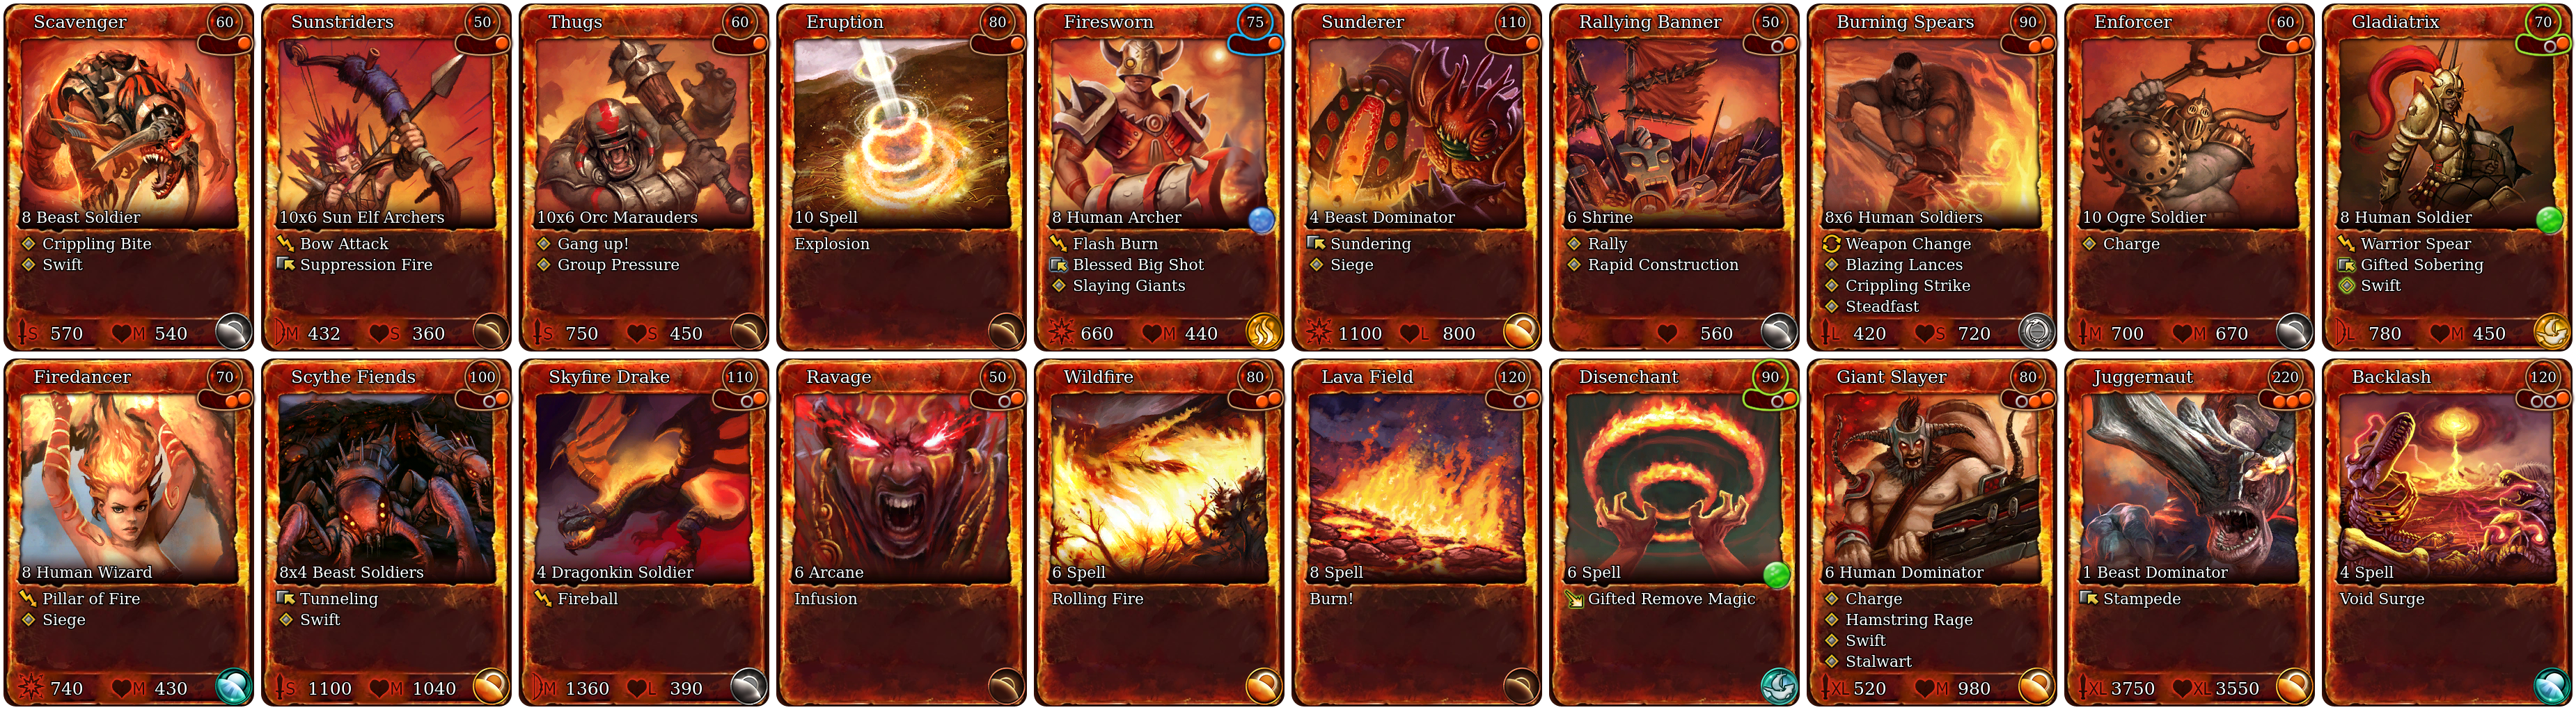
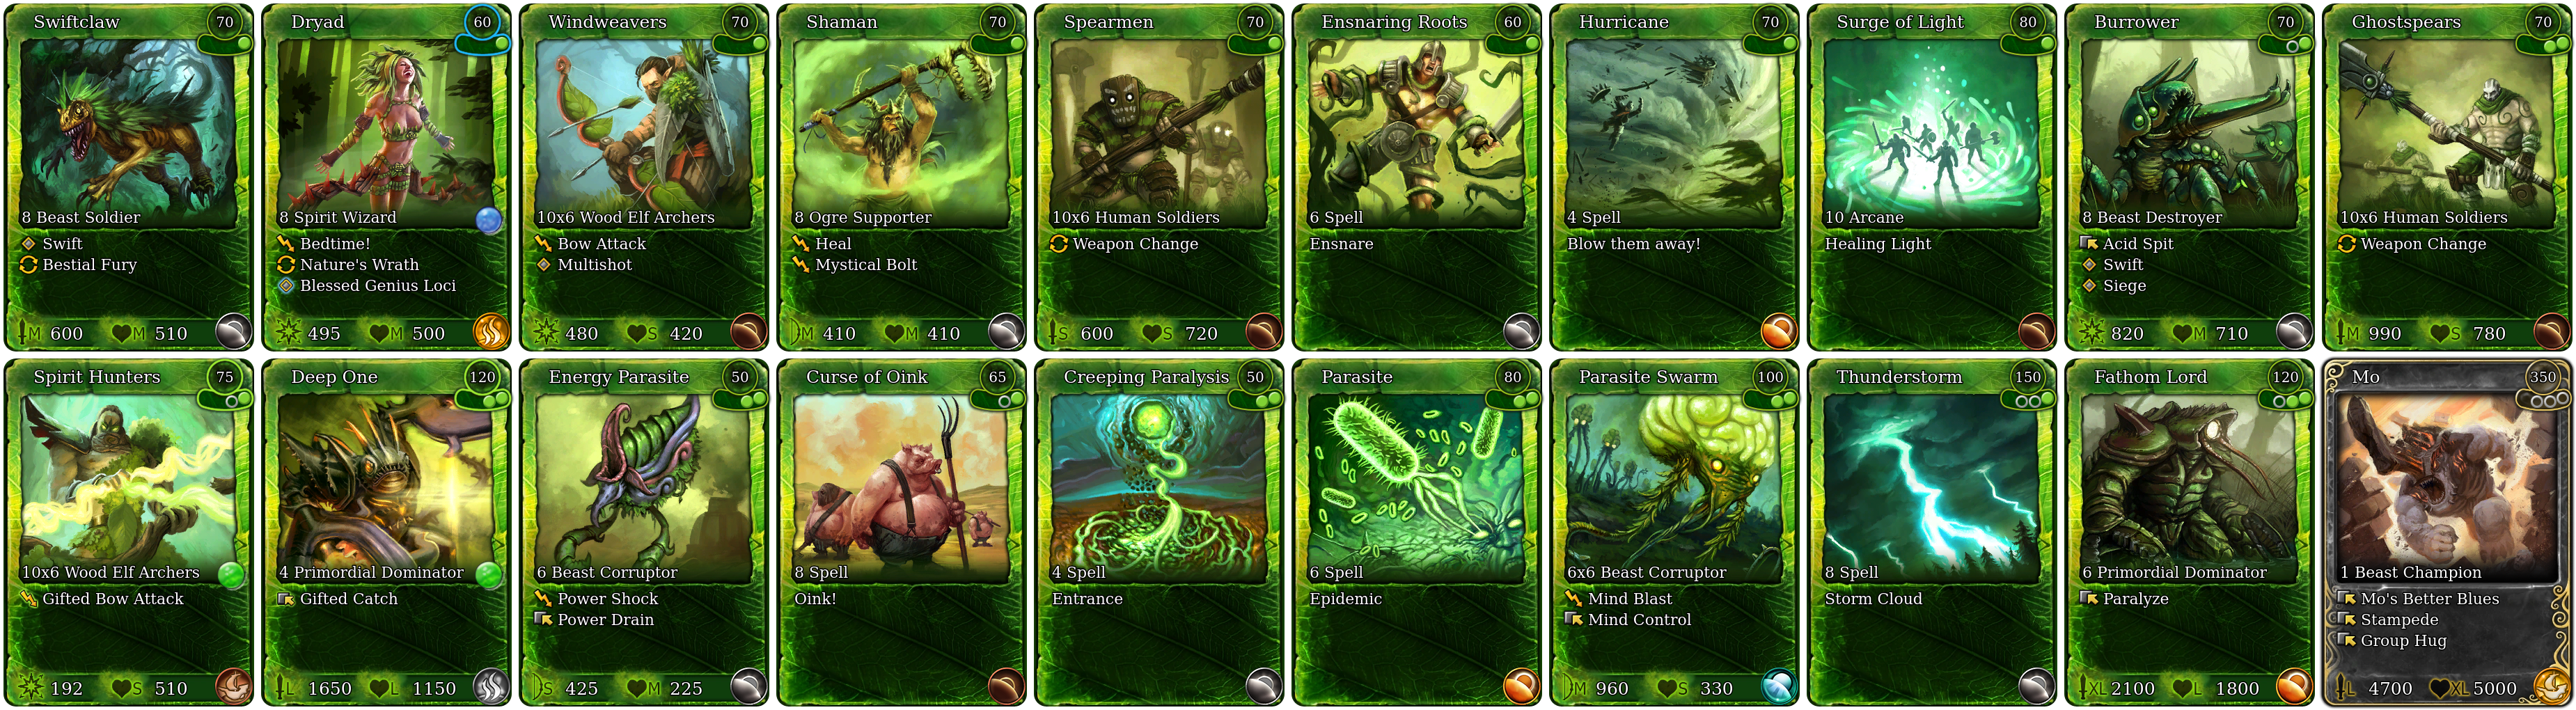
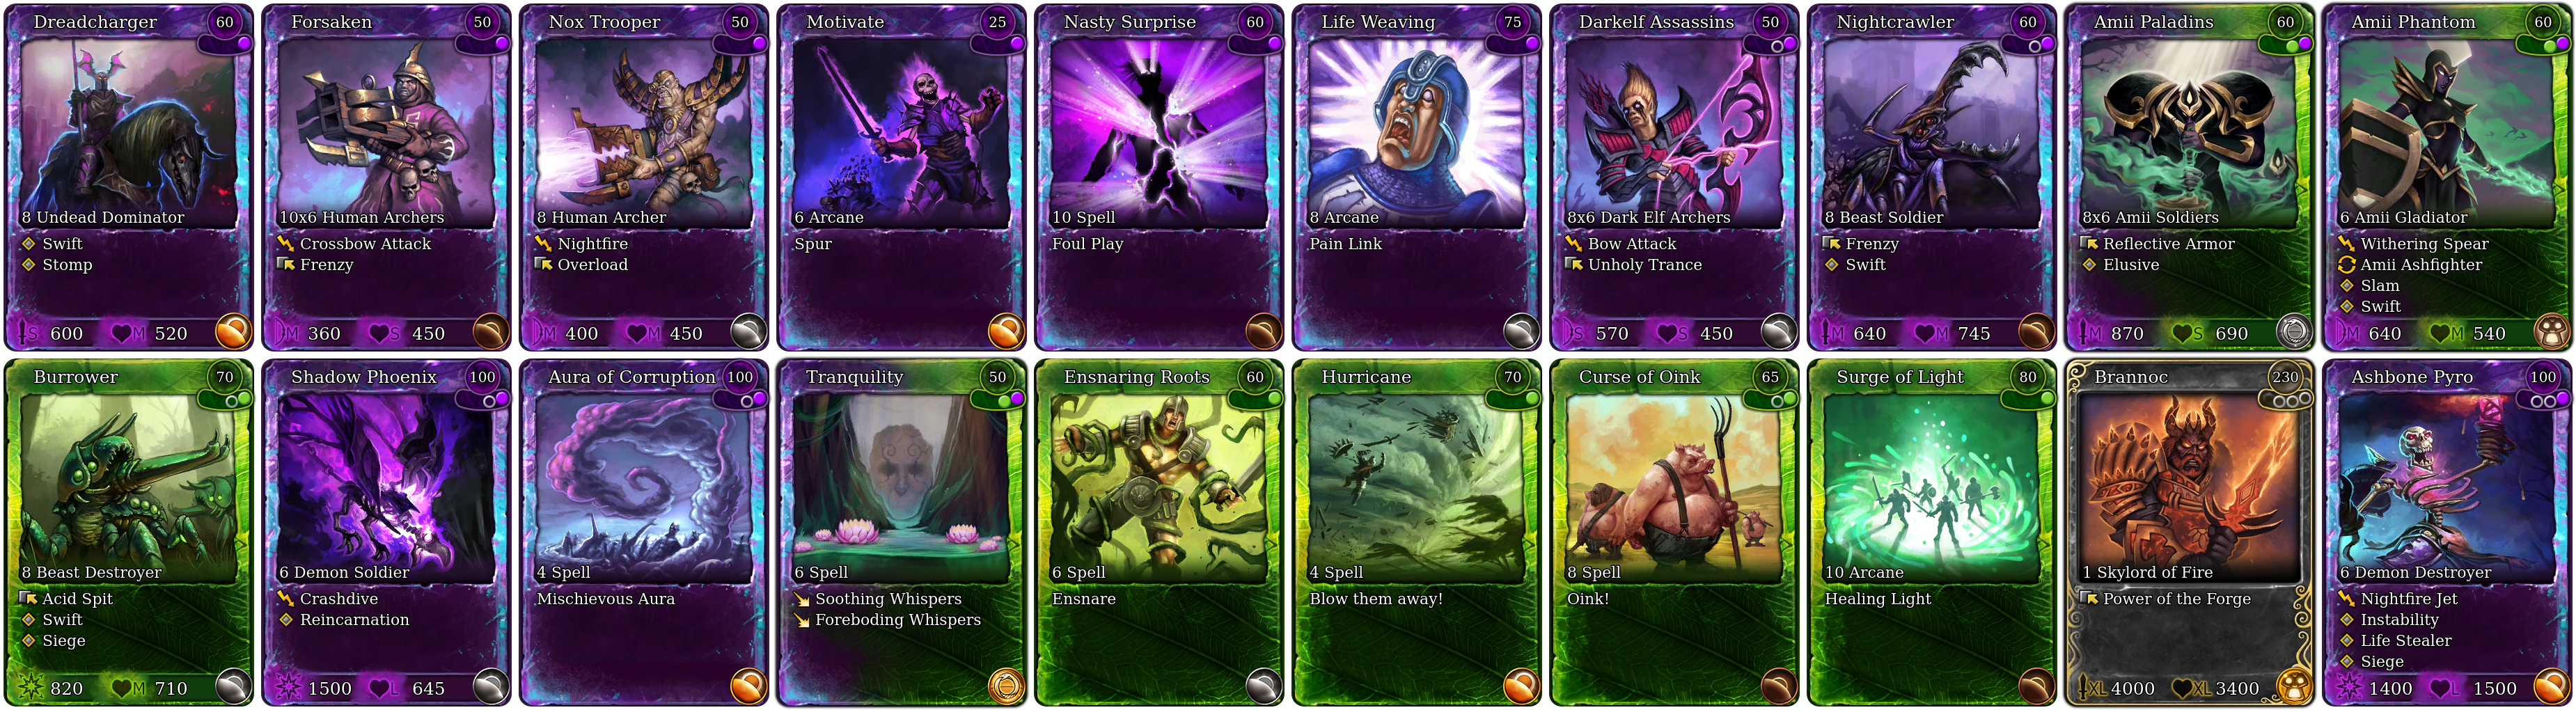

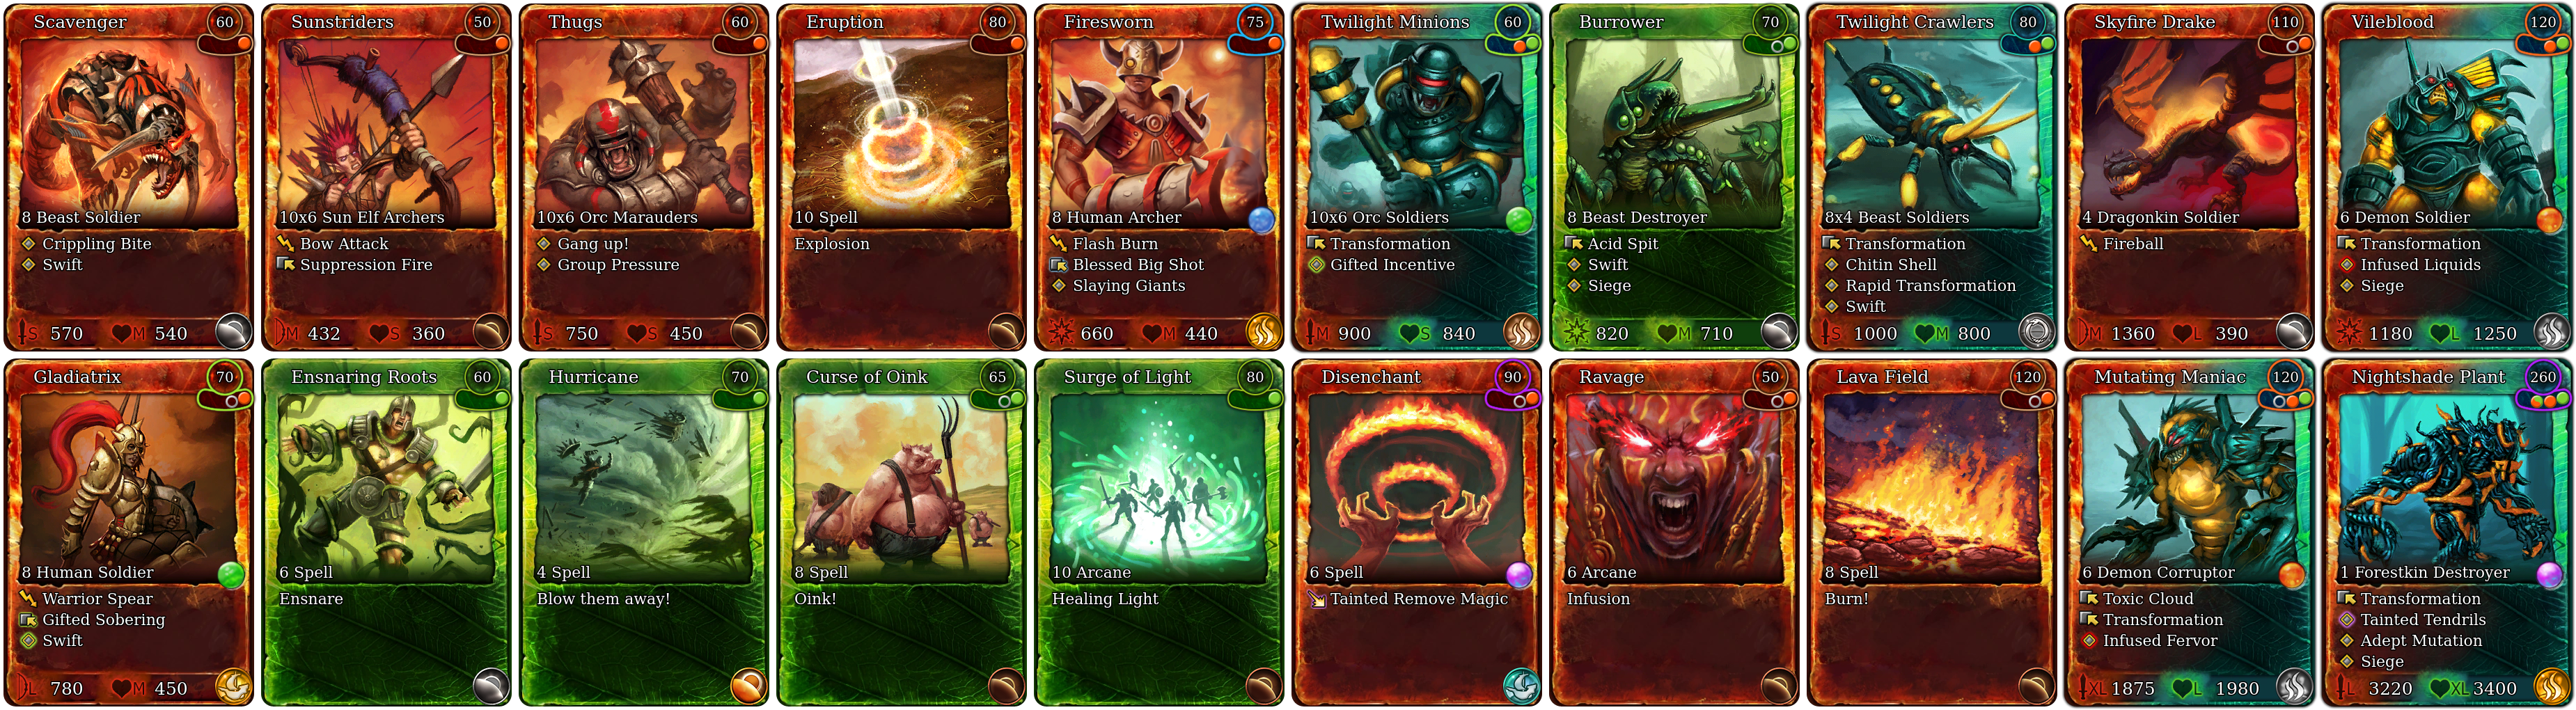


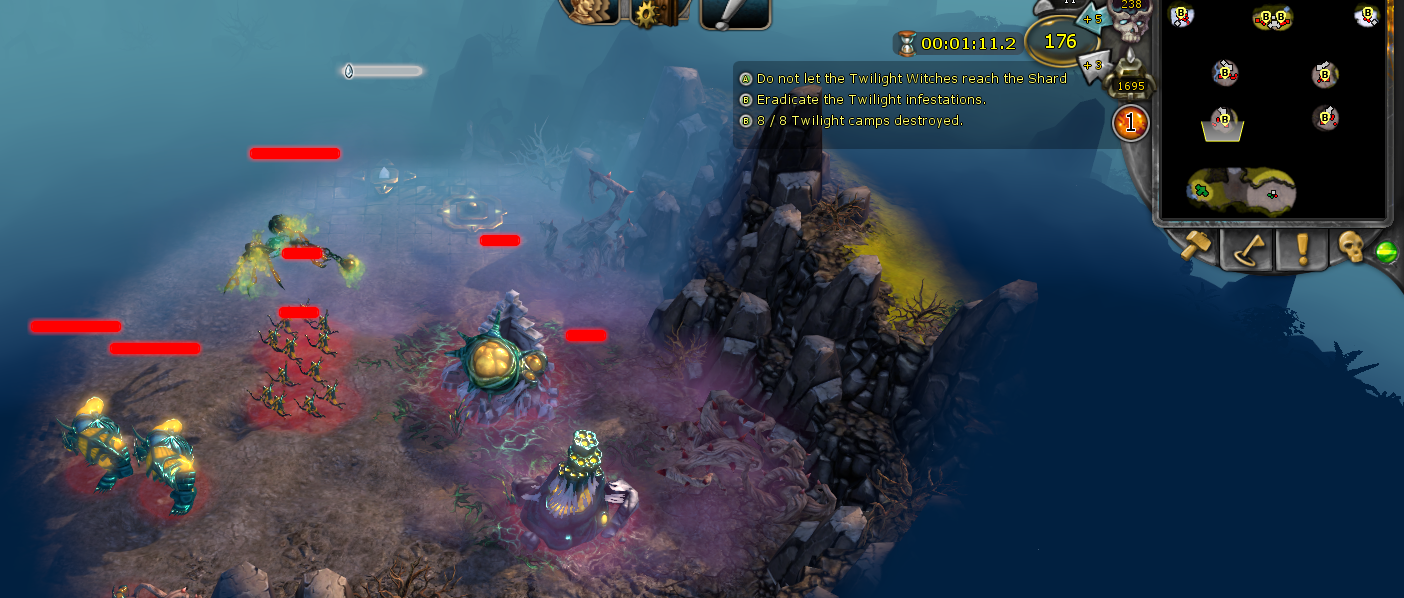

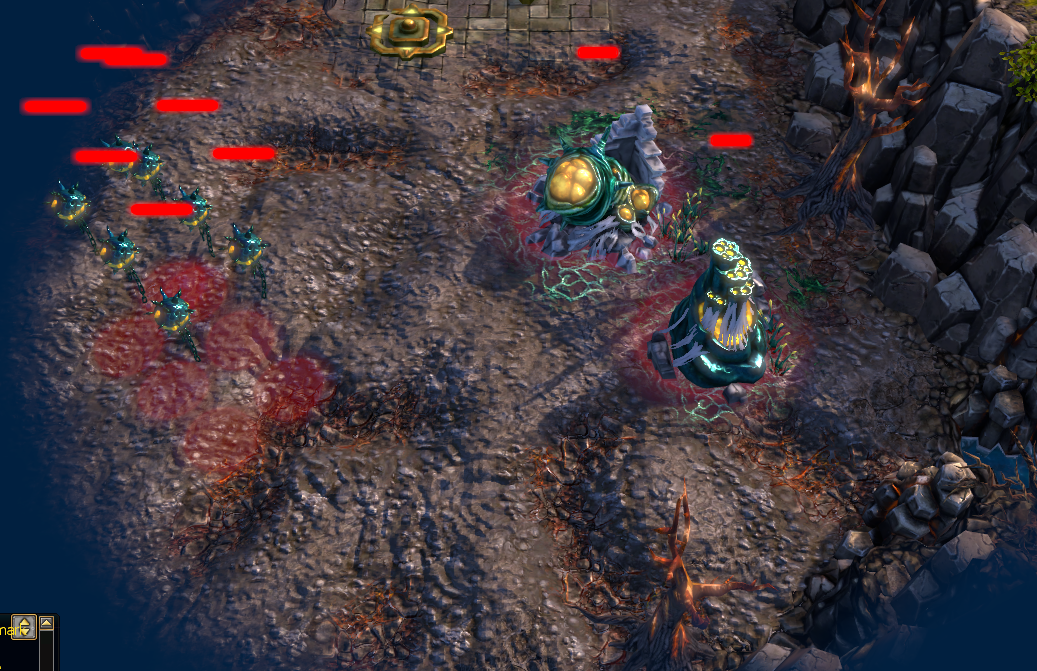


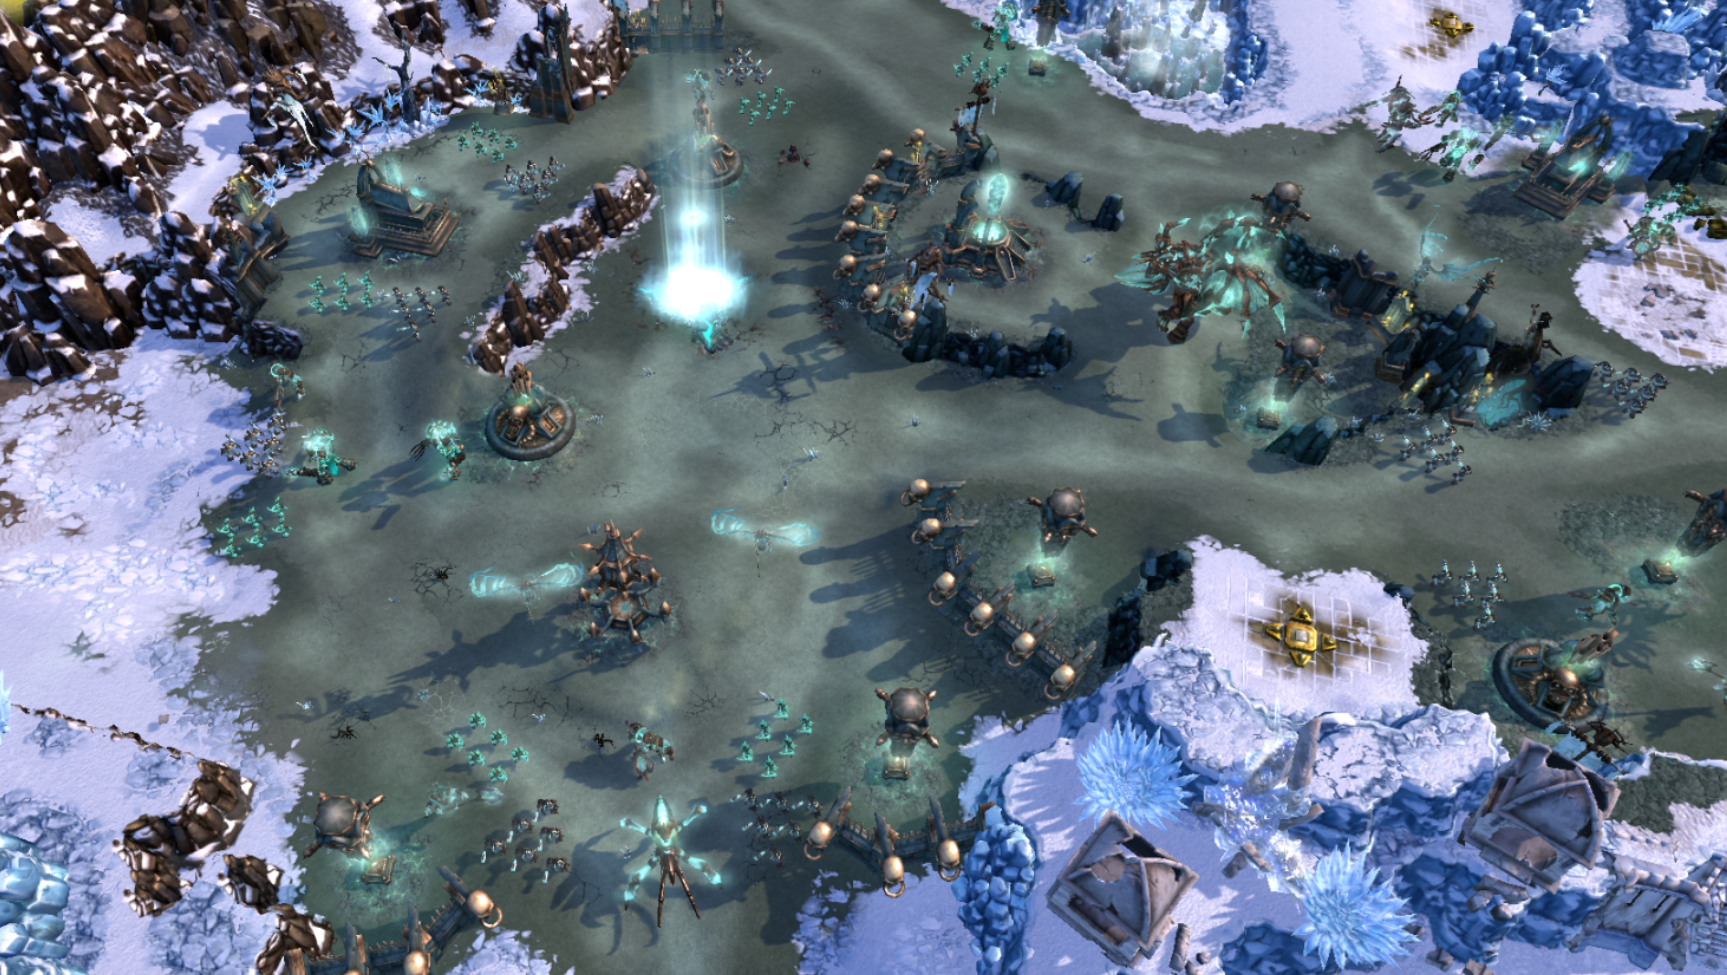
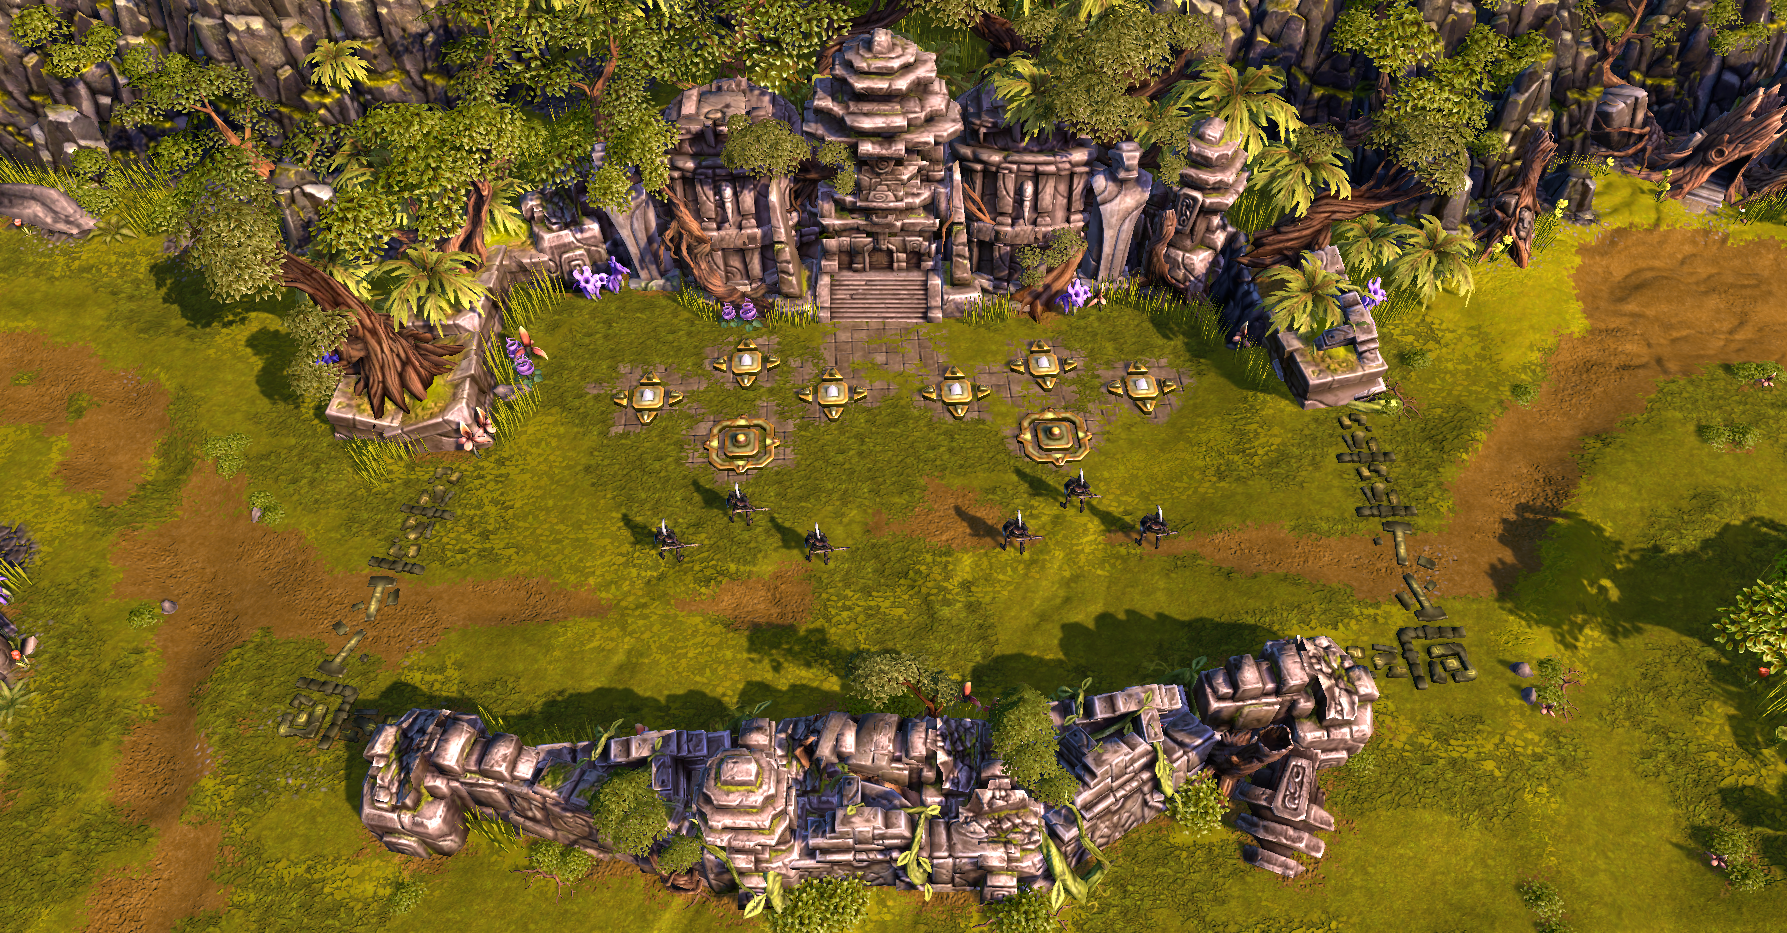
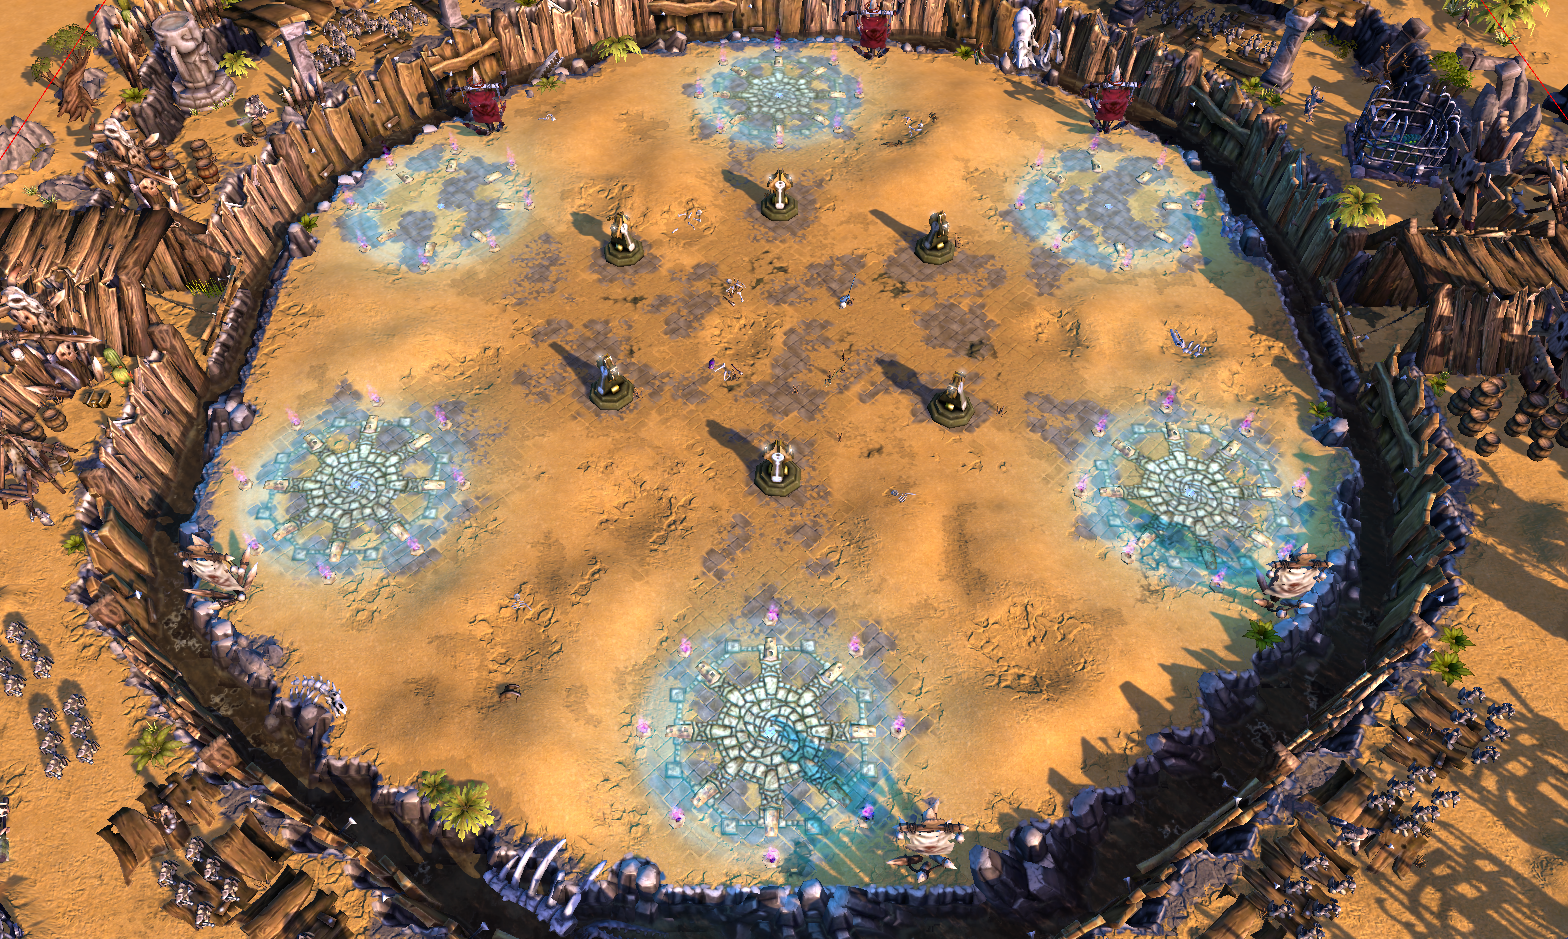

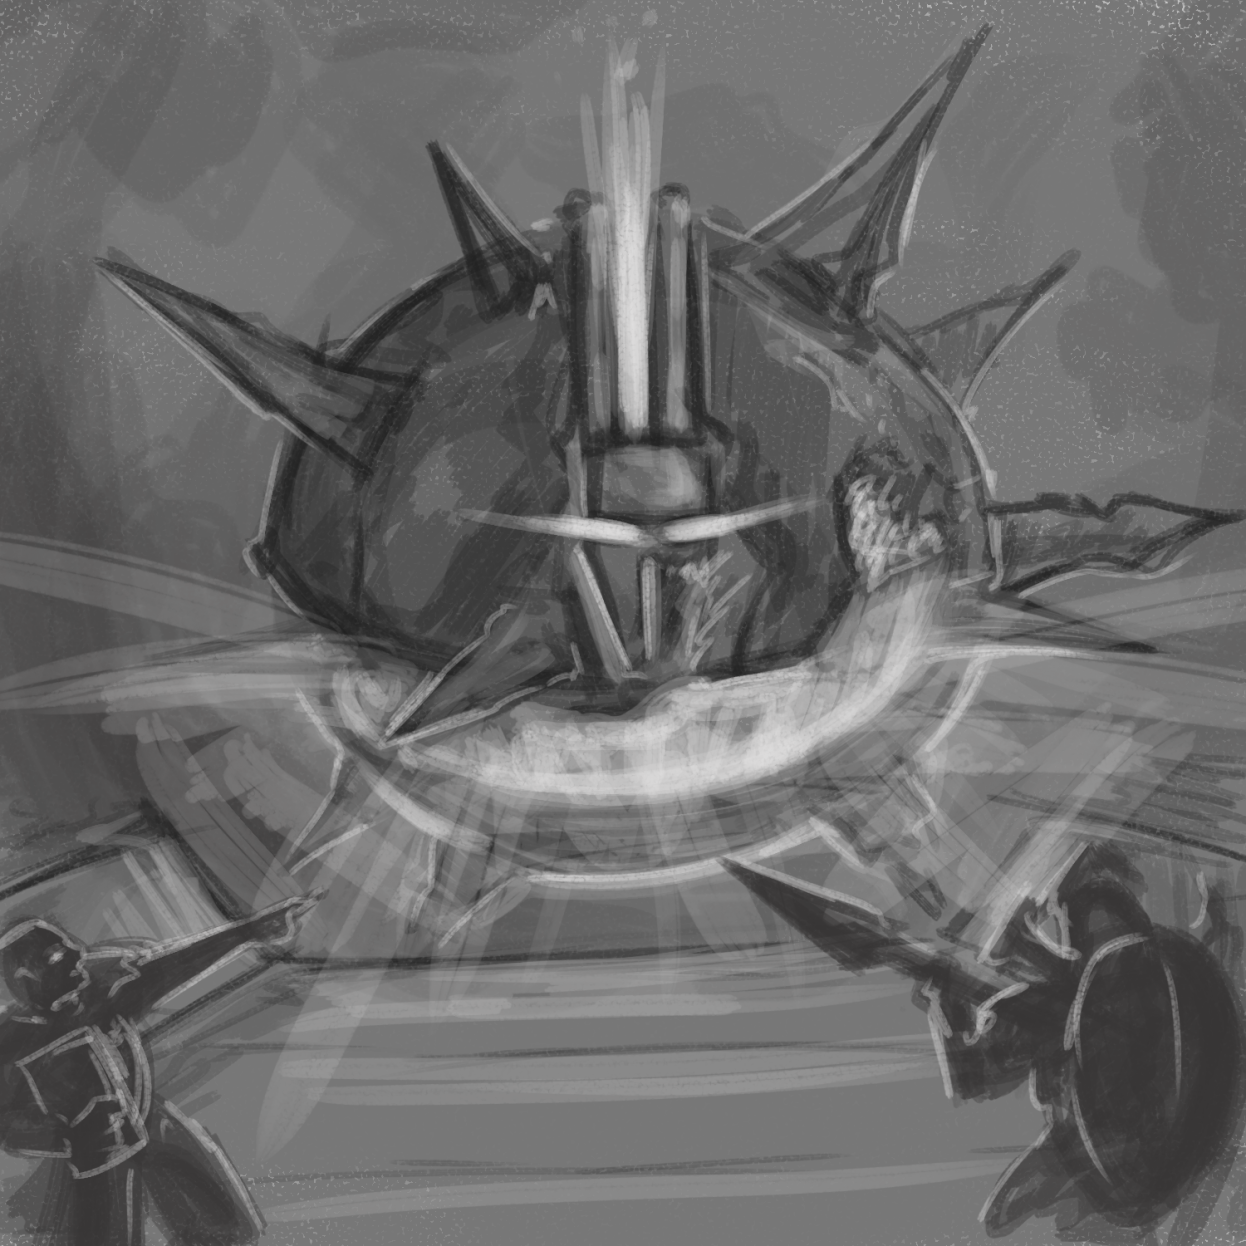
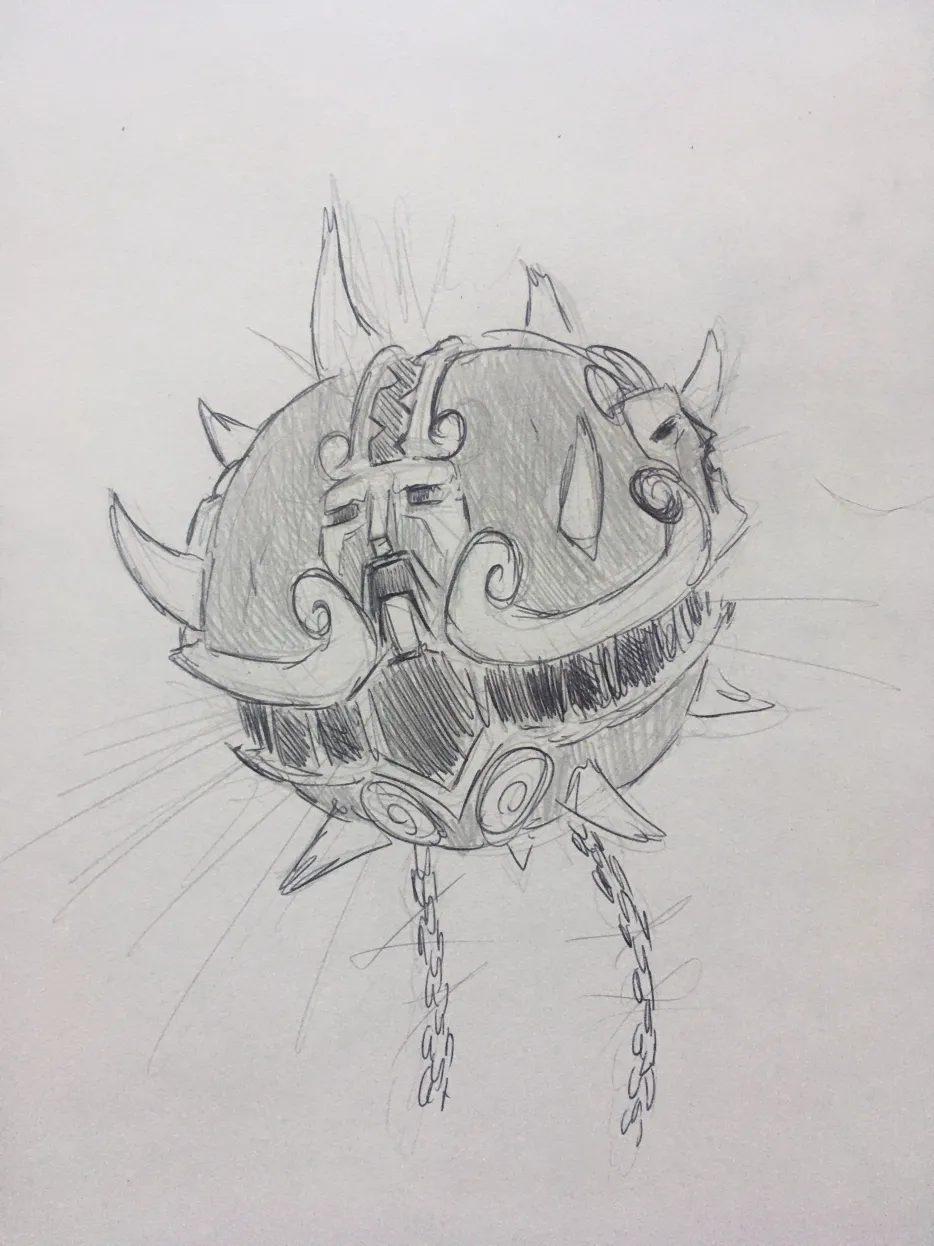

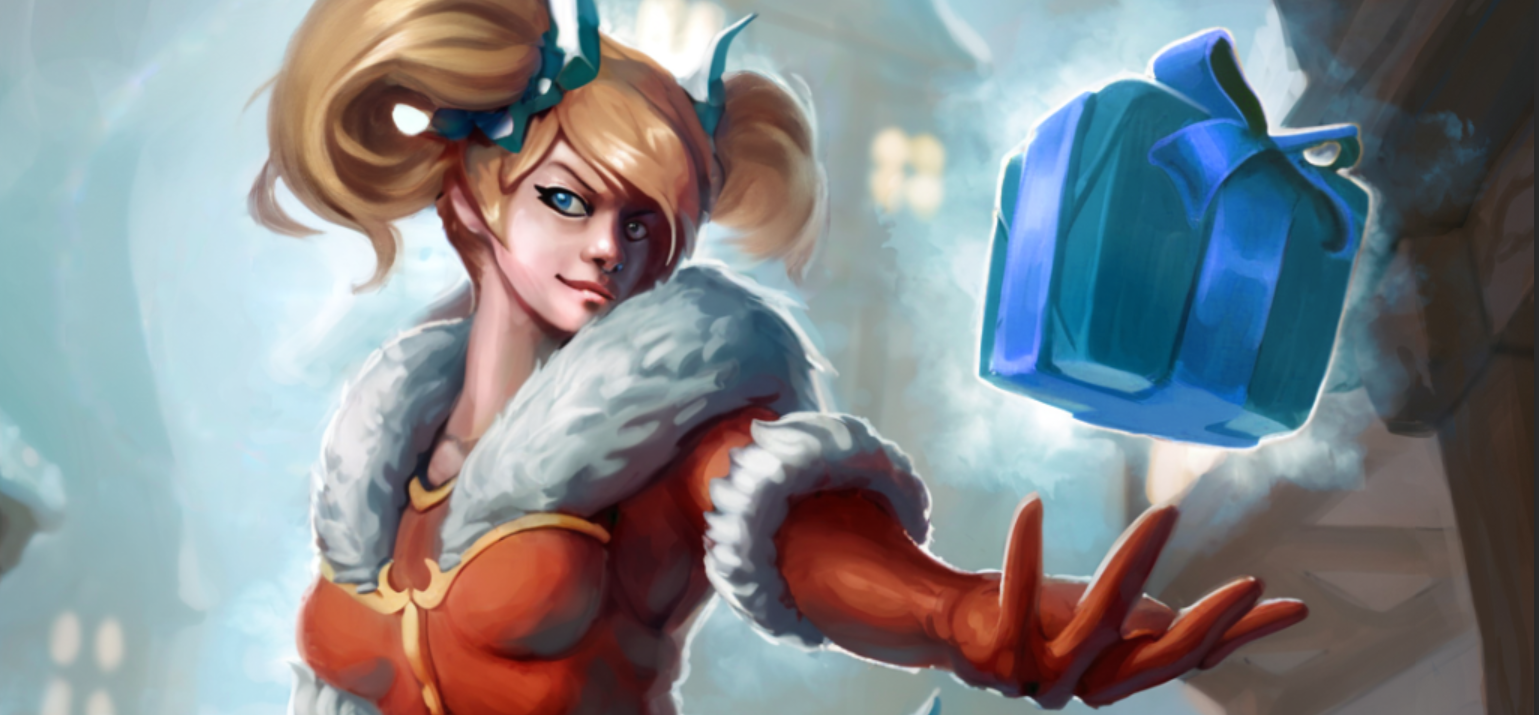
.png.440fbb612ec38dcc1903d90e53a9869b.png)