Search the Community
Showing results for tags 'RPVE'.
-
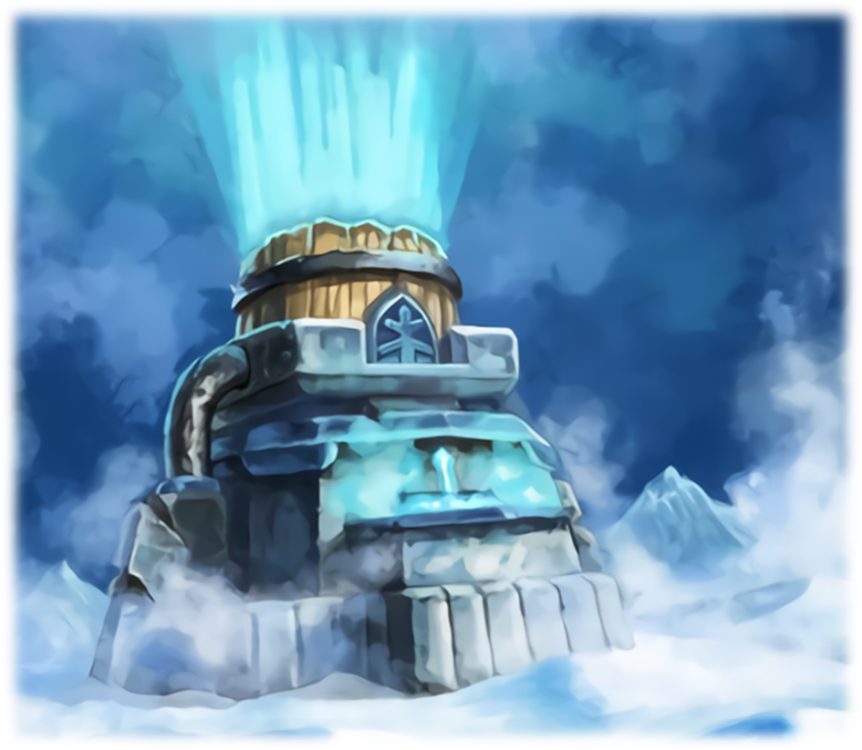
Why does X suck... I guess it can be called a series now. To read "Why does Wheel of Gift suck", please click here: https://forum.skylords.eu/index.php?/topic/9219-why-does-wheel-of-gifts-suck/ Juice Tank is a Tier 2 building (device). It costs 50 power and passive ability that does the following: "Within a 25m radius the remaining capacity of own and friendly Power Wells takes 40 / 45 / 50 / 55% longer to deplete. Production per time increment remains the same." To explain in simple terms, if you build a Juice Tank near a Power Well, it will take longer for that Power Well to run out, resulting on more total power gained from that Power Well. Maps that take a long time to clear, or where your Power Wells have low capacity, Juice Tank is a card to consider. The only reason you want to put this card in your deck is if you run the risk of running out of power. Running out of power on a map is extremely rare. There are only a handful of maps where this is realistically possible, Nightmare's End comes to mind. Because Juice Tank takes a while to get usage out of it, it is not recommended to use in maps where there is a strict time limit. Prime example of this is Random PvE maps. In none of the difficulties will the Power Wells run out before the timer does. This makes Juice Tanks completely useless in Random PvE. To make matter worse, if you build a Juice Tank on all your Power Well clusters, you bind 200 power. This is the equivalent of (almost) a Tier 4 unit. Considering all of the aforementioned, I earnestly ask everyone to review their Random PvE decks and remove the Juice Tanks. Thank you 🙂 -------------------- Juice Tank can be played in Lost Spirit decks to fuel their ability, destorying the Juice Tank in the process.
-
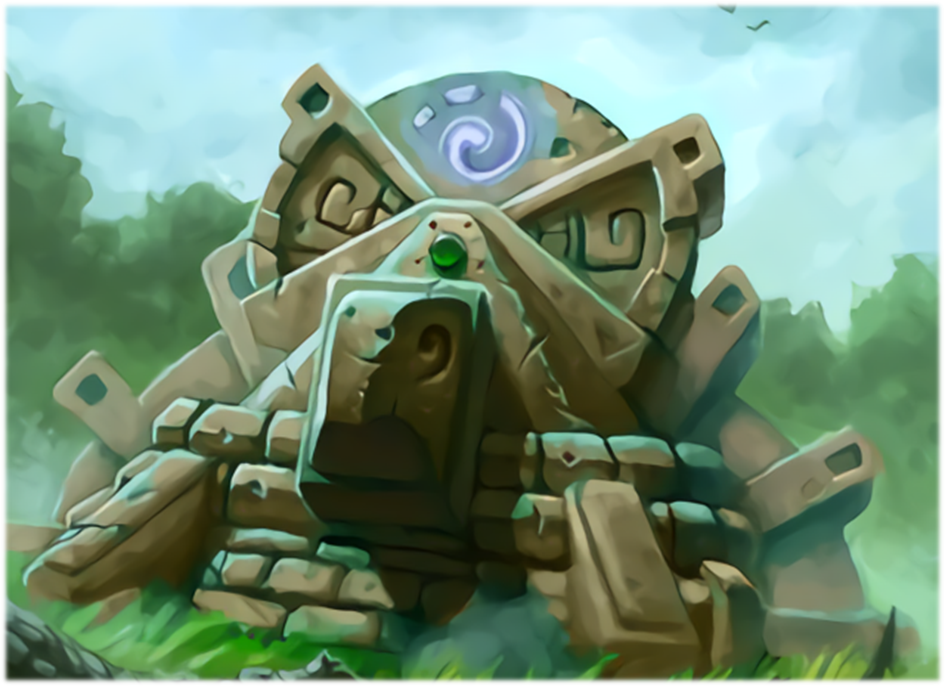
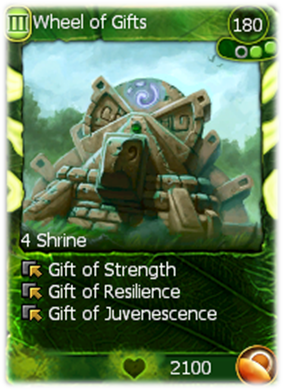
Why does Wheel of Gifts suck... – that's what the title suggests. Now, give me a moment to explain why many in the community share this viewpoint. Let's start with the fact that this card has a bit of a bad reputation, and not for the right reasons. In the early days, there was a bug that allowed stacking the same buff multiple times. Combined with the ease of using Lost Spirit Ships, any map became super easy. This was especially true for Random PvE maps. Since the Skylords Reborn team revived the game, this bug is fixed, but the notion that this card is "good" still sticks around, especially among casual or older players. Now, let's understand what the card does before jumping to the present. Wheel of Gifts is a Tier 3 Shrine with a rare rarity. When you build it, you get to pick one of three global buffs. The first one boosts your and your allies' units, making them deal 20% more damage. The second one lets you and your allies take 20% less damage. The third buff heals every friendly unit, yours and your allies', for 3% of their total health every 4 seconds. If you build three of these buildings, you can have all three buffs active simultaneously. On paper, these buffs sound very impressive. This is even further enhanced when considering that the buffs are “free”. You pay 180 power upfront, and you get a global buff. However, this plays perfectly into why it is not as great or efficient as most people think. Since this card is mainly used in Random PvE matches, this topic will mainly focus on that area. In Random PvE you have to kill all enemies within a certain time alone, or with a group of two or four players. This time limit is part of the difficulty for the higher-difficulty maps, especially in four-player maps. These maps are also where Wheel of Gifts is commonly found. The idea behind this card is to buff up all friendly units in the game, including those of your teammates. It's a great deal because, for just 180 power, about 20 Tier 4 units can deal 20% more damage. Spending another 180 power makes these units also take 20% less damage. Imagine adding a third building that makes all friendly units heal for a percentage of their total health – it would be even better! Spending 540 power on building three Wheel of Gifts might not be the best move in Random PvE. For the same amount of power, you could build two Gemeyes, enough to handle earlier camps. With the strict time limits in Random PvE, investing in Wheel of Gifts can slow down your progress on the map. Here's why building them right after getting Tier 3 or Tier 4 is not a great idea: - You use up 540 power on a building that doesn't directly help you clear the map. - At this point in the game, there aren't enough friendly units to make the buff worthwhile. - Many spells can handle earlier camps by themselves (Maelstrom, Frenetic Assault, Cluster Explosion). - Your teammate has to defend and attack on their own for the first few minutes/camps, while you are stacking Wheels. - The buffs don't stack with other external buffs, like Unholy Hero. - Building Wheel of Gifts right after Tier 3 denies you two power wells and leaves your partner alone to capture the Tier 4 camp. On the topic of buffs. Often Wheel of Gifts is played in a single-unit deck, like Batariel or Bloodhorn. Because of the high initial investment, it is just not worth the effort to place them down. Besides that, single-unit decks can not utilize the buffs from the Wheel of Gifts as they do not stack with other external buffs. (For more information on a Batariel deck, click the link at the bottom.) Now, you might be wondering if Wheel of Gifts has a place in Random PvE. It does! In the last rows of a Random PvE map, you often have excess power that's hard to use. This is the perfect time to set up Wheel of Gifts for that extra boost needed to tackle the toughest camps. Also, in scenarios without a timer and plenty of power, Wheel of Gifts can be a decent card to buff up your army.
- 27 replies
-
- nature
- Wheel of Gifts
-
(and 1 more)
Tagged with:
-
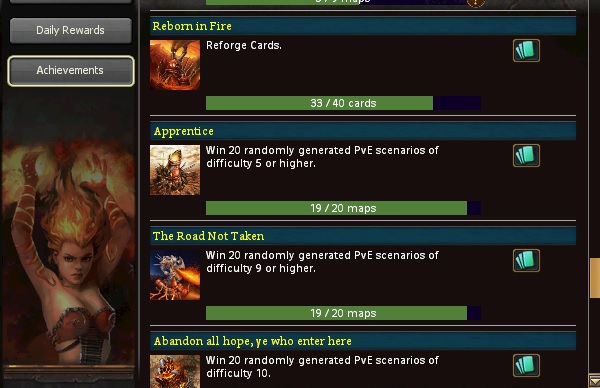
The 3 RPVE Achievements "Apprentice", "The Road not Taken" and "Abandon all Hope, ye how enter here" all stop at 19 games played. Im at 22 maps won so far and the non of the Achievements trigger. And i'm not the only one with that issue.
-
UPDATED to match 1y-patch from 18.12.21 Hey all, since we have many requests here, but few decks are shown pro-actively, I would like to show some of my RPVE decks (deck kits) over the next few weeks. Each of the decks will be limited by a "theme", they will prolly not all be end-to-end meta approaches - especially since they are relatively simple to get to the point in the BG: Bata = Meta And the rest will run behind. But since I'm a little bored with the Batariel right now - let's take a look at what other fine decks for rpve are out there. This first will touch the meta hard anyways 😄 Theme/Scope: In any row , as much meta as possible and as independently as possible from other players help/heals. Playstyle: Micro > Macro Budget: most expensive Addresses to advanced/expert players Core Deck: - Unity (B) and Bloodhealing give the needed sustain - Heavy spell dependent - the meta makes dmg, distracts enemy via Frenetic, Infect gives dmg and meatshield, the dmg spells clean up most of the units - heavy voidmanipulation via Shrine of War or Cultist Master/Furnace of Flesh enables you to perma use of your spells and abilities - strong T4 options unit wise, with mass Bloodhorns as main carry - T3 is carried by spells and can handle ANY situation - T1/T2 is very flexible and can be designed according to taste T1 - Either or Fire: Nomad (G), Mine, Eruption (possible BG10 addons are Blaster Cannon, Suppression or Sunstriders if needed) Shadow: Forsaken, Soul Splicer (G), Motivate (possible BG10 addon is a good mate supporting your t1 with fire :P) T2 - in any case No matter what your t1 has been, your want a shadow orb as your second. If you started fire you want now to move asap to your double shadow, if you started shadow you want to raise your Boosters NOW 🙂 Isn't shadow T1 better then? Perhaps sometimes but not in general. Every start has its own pros and cons, the pros of a fire start is that it is lean, fast, self healing, team-friendly and due to its spells strong and flexible. I often prefer to run into a BG9 T3 camp with 3 nomads and my fire spells rather then having a few Forsaken and almost no support. Cool-kids-t2-stuff is - Best-in-Slot solution is probably Shadow Phoenix/Embalmers Shrine (almost mandatory for BG10) - Gladiatrix (Gladis shine only really with Green Support, but mass Gladis with good positioning can do the job, more an advanced players solution I assume) - Windhunter is the T2 alternative to Gladiatrix now (Bithday Patch) and outshines Gladiatrix in stats - Firestalkers (nice siege, cheap throw-away t2) - Harvester or Shadow Mages can be pure Shadow options if that suits, Undead Army can scale quite ok'ish with Bloodhealing into T4) - Skyfire Drake is not big carrier, but can do an insane job on some maps - Bandit Minefield is okish, but usually not worth the slot in this meta approach. If you come from Fire T1 to Shadow T2 you already bring your mine and if you start Double Shadow ... you get it 😄 - Undead Army shines with Blood Healing and is almost a must-pick for harder situations. This combo is way more flexible as the Grim Bahir option that I posted in the first run Be aware that map depending is one of the weakest (not weak, only in relation) options aviable but usually not much of a problem. T3 - you want to have now - time to shine! At the T3 stage Void Manipulation and your -spells kick in the door! Though some nice T3 units are aviable the only options for this deck are imo Cultist Master (if you prefer Culstist/FoF over SoW) and Fallen Skyelf (as boss-killer support in T4). T4 Camps can be taken out with Nomads/Forsaken and spells and so can be handled a possible close camp. As far not mentioned interesting T3 cards are: - Incredible Mo (not really needed here but always nice to have one) - Soulshatter (if there is a possibility to take it, do so! You want to have as much dmg-spells as possible) - Amii Monument (only for solo, but there very handy) Last word on t3: No, I did not oversee Sandstorm - not worth a slot 🙂 T4 - finally Carrier is the Bloodhorn (BH) - fast, strong dmg, heals nice via stampeding buildings. Get out 2 and play more as soon it is possible, if you play a second unit get it in the mix after the second BH. Always let 250+ energy left to have spell energy. Before engaging a camp bind your units together with a Unity (b) First spell when engaging is either Frenetic or Cluster (Amok can do the job too), the other second, asap Infect then further according to the remaining priorities. I like to use Bloodhealing on Undead Army skelletons or Grim Bahir crawlers - that a reason for the Grim Bahir for me, though ofc this is not mandatory. Bloodhealing does a nice job too on a BH with Unity running, it does not loose much HP. Earthshaker is a nice skill, but does not perform as stong as we know it in this deck due to the mass BH spam 🙂 If you have room it can prolly clean up last buildings, but I tended to cut it. Just to say it: OFC you can do various T4 units in the mix here, but naming them all would go beyond the scope of this. Though this is more a deck-kit then a deck, I want to give ideas how to play a faction not to give an overview over the faction as a whole. Any more options: - The classic shadow buffs (Life Weaving, Unholy Power & Hero) do a great job on BH! - Never go out without your Disenchant - Warp is always nice to have - Offering (g) can resett your stong spells, if you decide to do so, prolly cut the Cluster (P) (this will get an even nicer option with the comming Grim Bahir changes (Test Server)) - purple Amok gives a nice damage buff and can either replace one Frenetic or be added. Beware to play it not on your units, as they will take friendly-fire then. Also be aware not to play it on your teammates units (same reason) and this is grief play. Bosses you struggle with ... none that comes to my mind. Any other dangerous situations for this deck: Engaging Twilight Dragons with a spell-protected (Twilight Negator) Willzapper nearby (a ugly situation for most decks). Play your Unity as late as possible and strike HARD with the first engage! If more questions come, please feel free to ask or discuss this, I will edit this "guide" Personal, tested(!), samples of my decks are BG9 allrounder for random maps with random groups: BG10, adapted for 1Player-MOTM 2021-06 BG10, 4player, random maps with random groups, assuming SoW by Mate btw one Joker slot Replays deleted as they are broken due to patches. I attach a few replays to see it in action. Be aware, non of this replays is "perfect" or aim to be that. This are raw takeouts to give you an idea how this can be played. I played this deck a lot in the last weeks and can assure that it can work in ANY BG9 situation completly independent from other players heals and can even carry a group. Even the BG10 performance was not as bad as you may think without the perma present green splash 😄 BG10solo_pureBandittest A random BG10 solo in below 23min, easy Bandit map, but still not bad I think. Lost my t4 orb in the second last camp that forces me to retreat. This was my first test in BG10. Here a pure BH T4 w/o Grim Bahir BG10_4player_Pure_Bandit_Test Super nervous played mess - my first group attempt in BG10. In 14min I ran sleeping into a dragon = thx for the rescure group ^^ But hey, this is normal BG10 random group gameplay, nobody is perfect. Really not a carry here, but neither a total fail. Straight average BG10 shit BG9_Bloodhealing Showcase <- recommended!!! A quite strong performance in a 4player BG9 with Command Walker Boss in the End (for me alooooooone) 🙂 BG10_SOLO_MOTM_ PureBandit_rank7 And as last one the current 1player MOTM. This is a first try, I swear, and far from clean, but still a good perfomance I think and at least for now it is a top10 time. Finally: You have feedback, suggestions, nice replays or storys about this deck, please feel free to post below! I am looking forward to your reactions 😄 Is this helpfull? Want more of this?
- 4 replies
-
- Bloodhorn
- Bloodhealing
- (and 4 more)
-
------------------Disclaimer------------------ I wrote this guide without access to the game and do not intend to update it anytime soon. I apologize for all inaccuracies due to my limited memory. The vast majority of things should be actually correct, but I might've missed a few smaller things that i probably wouldn't now. Also note that the metagame in some areas has evolved since the game has been accessable again. This mostly manifests in the fact that Lost Spirit Ships became a lot more situational and Batariel is often the way to go instead, even against Lost Souls maps. This happened because Batariel is a lot better understood in its limitations and players got better at playing around those limitations which are especially relevant to Lost Souls maps. If you want to see the theories described here in practice you might want to check out following thread where I upload solo speedruns of 1, 2 & 4 Player maps pretty much whenever I play them: https://forum.skylords.eu/index.php?/topic/6281-treims-motm-solo-speedrun-archive/ Apparently images originally attached and referenced in the explanations just ceased to exist for some reason. For the full guide please go to the END of this post and use the dropbox link attached there to get access to the full guide. 2. General Information 2.1. Spawn Mechanics First of all: Spawn mechanics in rPVE are very simple, they are following only 4 rules: Whenever you attack a unit from an enemy base (except the spawns), every camp that has a direct path to that attacked camp will start spawning units. A camp has a direct path to another camp when you can go there without facing any other camp on the way, its direct. You can go from camp A to camp C without the need to go through Camp B. When such a unit is spawned, it will always directly attack your monument, that was the last one you have built at the time the enemies spawned, monuments that weren't built up, but were in progress, when they spawned count as a 'full' monument. Any monument you build after they spawned are not relevant for that specific spawn. Whenever a camp started spawning units, it will not stop until you kill the spawn building. A camp can only spawn new units if the complete previous spawn gets killed. Example: In the picture I have named camps: '1','2','3','4','5' The arrow symbolizes your attack, so the following will happen: When you hit the first units from '1', '2' and '3' will start spawning as their is a direct path from '1' to them. Nothing will happen to '4' and '5' as they do not have such a linkage to '1'. After '1' is cleared you could go to '2' or '3'. In this scenario we will go to '2'. When you attack '2', '4' will start spawning units as they have a direct linkage.'3' will still spawn units, as it can't stop; '5' will still do nothing; '1' doesn't exist anymore. Next step would be to clear '4'. As soon as you attack '4', '5' will start spawning units due to their direct linkage. '3' still spawns units, '1' and '2' doesn't exist anymore. 2.2. Base structure & how to find the 'right' spawnbuilding So a base is always built up like this (with more or less paths to it): First of all you need to know that in every base there is always only 1 spawn building, if there is a 2nd one that could potentially be a spawn building as well (just from the way it looks), one of those is fake and will never spawn any units. There's a way to identify the correct and the fake spawn building with 100% security. In order to do so you need to know following things: You will have several entries and one of them is the 'main entry', you can always recognize the 'main' entry on how the base is aligned. In this case the 'main' entry is 'entry 1'. You can recognize it as 2 towers are directly oriented to that entry (they are always on the left and the right of that entry), even though you might get into the base from entry 2, 3 or 4, '1' will always be the main one. With that knowledge the spawn building that spawns units is not random at all anymore, its 100% predictable which of them will be the 'right' one. When you would run into the base from the 'main' entry, it is ALWAYS the spawn building on the right side of the base. If you ever think it's not, well better check if you have the main entry identified correctly. 2.3. The issue of close camps and trapping spawns. I bet most of you (if not any), already had this: you're into a battleground game and you pull the aggro of the t3 when trying to take t2. This often happens (95% of the time), the spawn of the t3 will somewhat pull the whole t3 base to your t2 base. In very rare cases, the aggro range of the t3 includes the t2. In all the other cases the spawn will just 'ask for ally help'. That actually means that you can avoid those attacks from close camps by 'trapping' the spawn in-between t1 and t2. Every fraction (fire/nature/frost/shadow) can do that, some easier some harder: Fire: Get 3 nomads (green), kill the melee part of the spawn and kill the most part of the archers, you want of the squad of 6 archers that maximal 4 are alive, so your nomads always stay healthy. For the last few hp you need to take away from them, you can just through them. It is very necessary to hold position (press 's'), so that the nomads don't attack the archer squad. Demonstration: http://listenonrepeat.com/watch/?v=g52hV...ade_Expert Frost: Kill the melee units, take aggro of the archers with one unit and run to t2 with another one, you can take a well when the archers are NOT in range of it, otherwise its a gamble, if they switch their focus. After that spam some ice barriers and kill the squad you held aggro with. (if you are confident in your skill, you can try to do the same as with nomads, but its much harder as you can not run through them to do damage. You need to use master archers and stop the attack of them at the exact correct time, so that the bolts doesn't finish off the whole squad, but only parts( that works because every unit of the squad needs to get killed by a single bolt) Shadow: Basically same game as with frost, kill the melees, pull the aggro of the archer squad with one unit and take a well at t2 with another unit, kill that one after. Build Soul Splicer in-between t1 and t2 and kill some units next to it to, to fill it up. Then just press 's' with the squad you have aggro. By the time the soul splicer is empty, your aggro unit is dead and the soul splicer is destroyed, you should have enough energy collected to clear t3 easily. (You can try the same as mentioned in Frost, as it will lower the damage of the squad you gain more time) Nature: Kill the melees or the archers, take aggro of the other one with a shaman and build t2.. done. Extra tip: When you face lost souls and the spawn includes a lost dancer you are the luckiest guy in the world. Use any squad unit (windweavers/forsaken/northguards/master archers, etc.,etc.), kill all other stuff but the lost dancer, and press 's' with your squad unit. When the lost dancer attacks it, the squad will split up and stay like that, any following attack of the lost dancer on that squad will do no damage anymore. This also works for close camps at from t3 to t4. 3. rPVE/Battleground 1 Player 3.1. Map structure and general principles First of all I would like to show you the general structure of a lvl 10 1 player Battleground map, you will need to understand this in order to follow some of my thought process. In this case we start at the bottom of the map. That is because it easier to explain it that way, but it doesn't matter if the map is twisted 90°, 180°, or 270°. The principle stays the same. You see that the way will split up right in front of your t1. The t2 will always be at the end of the way that goes to the edge of the mini map. Notice that the way to the camp that is closer to the centre of the map will always be way shorter and you might get problems with pulling the whole camp and or shamans if any exist in that camp. That is important as you want to avoid attacking anything from that base, because it will force another camp to spawn units as well, it makes it way harder to defend. You always want to rush to t2 with the smallest possible amount of energy being used - in other words as soon as possible. At that rank on the map you will always have 2 camps next to your t2, while t3 is always above on the next rank of the map. You always want to clear that as soon as possible as well, without using to much power in defence for the units that will attack your t2. Next to your t3 you will always find 2 other camps and the t4 on the exact opposite of the map. From that point on you will have 2 more ranks on the map with each 3, rarely 4 camps. That means in general you have to clear 6-7 bases after you cleared the 'real' t4 base. Whenever you reach a base you basically want to destroy the 'right' spawn building before it can spawn any units, as those can respawn the whole base. Which would cost a lot of time. 3.2. Common t1- t4 strategies T1: Enemy - Bandits: Fire: Get 3 nomads (green), kill the melee part of the spawn and kill the most part of the archers, you want of the squad of 6 archers that maximal 4 are alive, so your nomads always stay healthy. For the last few hp you need to take away from them, you can just through them. It is very necessary to hold position (press 's'), so that the nomads don't attack the archer squad. Demonstration: There's some additional information I want to mention: This only works when your monuments can NOT attack the spawn, it will kill them slowly but not for sure. That makes it very important to be careful with the positioning of the spawn. Shadow: Almost always your first choice to go. You will need forsaken or Nox Trooper (I personally prefer forsaken because- of their passive and because Nox Trooper aren't very good against squad units, which you will mainly face at t2). Key cards are forsaken, soul splicer and motivate. You basically want to build up the soul splicer at the exact range, where you don't aggro the t2 and then build just enough forsaken to clear the camp. You want to use 3 frenzied forsaken (in some cases with very bad spawns and unit positioning you might need more) to clear the spawn building, while you focus on taking down towers and those annoying mana wings with the other forsakens first. As soon as the first forsaken (not frenzied) hits a point where he has half of his hp left, motivate them. So the soul splicer can heal the rest up in time. Sometimes its worth/necessary to get a skeleton warrior in front of them to tank up a lot of damage. That is the case when you have a t2 base with bunch of units. Defend with 2 forsaken. Spawn behind the monument and don't worry about enemies focussing on the monument. Frost: If shadow isn't working great against the enemy try frost. Key cards are frost mage, ice barrier and homesoil. If you face those annoying spearmen that can't get knock backed summon 2-3 master archers in order to kill the spawn building, as frost mages aren't really good against those due that they cant attack the spawn building properly. Defend with 1-2 frost mages, if the spawn includes spearmen use 1 frost mage and 1 master archer. Spawn behind the monument and don't worry about enemies focussing on the monument. Fire: Only good in very rare cases. Mostly when you have these windhunter thingies AND you're having a close camp. What you want to do is: Spawn 3 nomads (green) set 1-2 mines and use 4 eruptions to kill the spawn building. You can defend with makeshift tower or 1 mine. Key cards: Nomad (green), mine, eruption. If necessary you can add sunstriders against those mana wings. After that you want to set up 3 blaster cannons (red) and build another nomad. So you have 4 nomads. Then set 2-3 mines in front of the t3 base and pull the whole base into your mines and blaster cannons. You run in the t3 base and clear the spawn building with eruptions. Mission accomplished. I got an example video for you: http://listenonrepeat.com/?v=8EkqkzbuLw0..._von_Treim Nature: Never viable, units and spells are just to expensive and following orb order is not better than frost. Basic information: in 95% of the maps you should be fine with spawning 6-8 units to clear the t2. T1: Enemy - Stonekin: Shadow: Same as Bandits, but you will almost always need to have skeleton warriors on top of the soul splicer. If there are those crystal fiends at t2 you should prefer nox troopers over forsaken as well, just to avoid the knock back, as well as being able to kill them very fast with the 'overload' ability. You will need immediate motivate in order to clear the spawn building with nox troopers though. In general 4 should be enough for that. Frost: You will often need some master archers on top of the frost mages, as they're not very good against the crystal fiends with their non targeted damage. You need to focus on them before killing the spawn building as they do so much damage. It's very likely that they respawn if you only use frostmages as well. I recommend using at least 3-4 master archers to kill the spawn building. Fire: not viable Nature: not viable T2: Enemy - Bandits: Your second orb is always shadow. You always want shadow phoenixes to clear the t3. If you started shadow t1 you can even build up resource boosters already. Those are a must in every deck. If you have those windhunters at t3 use spawn 3 shadow phoenixes use the embalmer shrine (you want to build up 2, so you can have the effect up all the time) and clear the base next to your t2, kill the spawn building in 100% of the cases and find the right target to get all 3 phoenixes back. That way you made those 3 phoenixes 'voidless'. That means they're not binding any more energy in them. You get all the energy back (into the void pool) when they attack. That way you can spawn 2-3 more phoenixes relatively fast and attack. You need 5-6 of them as 2 will get paralysed and might get focussed down before they are able to attack. If there are no windhunters just use 3 shadow phoenixes and enjoy to clear your t3 very fast. T2: Enemy - Stonekin: Basically the same as for against Bandits just with some special cases. You will most likely face constructs and tortuguns and t3 that means you need 11-13 phoenixes. In order to get 13 phoenixes very fast, you need to modify the way you get the phoenixes voidless by a little bit. You want to basically get 3-4 (depending on how many you can get back when attacking) and attack the base next to t2 again. But this time use a unit in the base that is far enough away from the spawn building, that the spawn building will NOT die. You will just fly away with your 3-4 phoenixes and let whole base respawn just to spawn 3-4 more phoenixes and now kill the base entirely (don't kill towers or anything if phoenixes wouldn't revive from it). that way you will have 6-8 phoenixes already and can almost instantly build 4 new and your good 2 go. Pro tip: Some of those tortuguns have a ranged anti air attack (just as the normal tortuguns have). Those will destroy a lot of phoenixes if it hits and your attack will most likely fail. In order to prevent that 'stack' the phoenixes on top of each other. If you tell 12 phoenixes at the same time to go to a certain map point they will automatically get in the formation you can see on the left side of the picture. However you can pick small groups or even single phoenixes and all let them go through a certain point and press 's' to stop them from moving right when they're in that point where you want to stack the phoenixes. If you stacked them correctly there should maximally die 1 or 2 of them to the tortugun, as they will fly in basically the same point all the time. If there are windhunters in that base you might want to consider to send 2-3 units in front of the phoenixes to tank their paralyse and damage. If you started frost you can use coldsnap to just freeze them. In some cases you will face something that is even more annoying: you might have to deal with deepgorge towers that will attack your t2 when you try to build it up. Those bases will get pulled when the spawn hits the t2 definetly. You have to trap the spawn in-between your t1 and t2 as mentioned in 2.3.. In those cases you need to get a bit creatively. You do not want to take the wells and only take the monument. You can either defend it with skyelf templar and trap the spawn with ice barrier spam, what is really expensive though (if you are not able to kill the most part of the archer squad and only leave parts of it alive) as you will need some time to get enough power in order to be able to attack t3 OR you use warden's sigil and just shield the t2 over and over with 2 of those and trap the spam with 2 warden's sigil that give each other a shield. I prefer the green one over the blue affinity due to the healing that helps much against the trapped spawn. T3: Enemy - Bandit: Get 3 cultist masters and a Furnace of flesh (if you didnt build one yet, I recommend building one already at t2) + amii monument. Latest point you get your resource boosters is when you hit t3. T3: Enemy - Stonekin: Should be a nature orb. Get amii-monument with nature aswell. Switch the frost orb into shadow if you started frost t1. Do not build t3 shadow just to get the resource boosters, but rather get it for frenetic assault. Its not worth it if you just build them now as you don't need a whole bunch of power anymore until you're totally fine. Enlight Batariel (red). T4: Enemy - Bandit: Spawn Lost Spirit Ship and clear the map. Use heals and buffs to keep them alive. I recommend to only use Lost Spirit Ship (red) so you can use flame crystal and motivate to buff them up. Use rifle cultists and offering (green) to get enough charges. I recommend to send 1 rifle cultist right behind your frontline so you get ground presence close to your main army and you're able to spawn them without them having to run a very long way to your troops. Extra information: If there is a boss with a lot of hit points you can use a fallen skyelf and his 'tainted disease' to kill those faster . You need to be very careful with the timing though at it gets completely reset if you are not able to kill the boss in the time 'tainted disease' is active. I only recommend using this if you have a free slot in your deck that you don't really need. T4: Enemy- Stonekin: Get 2 shrine of war to permanently have the void manipulation active and just buff it with spells. You can get those by switching the amii-nature orb into a fire orb. You also need that to get disenchant against the windhunter paralyse. Extra information: if there is a boss with a lot of hit points on the map, such as command walker (not sure if he was called like that, I mean that super construct thingy): You can use Bloodhorn(s)(purple) with his 'tainted enrage' and unholy hero to basically kill those in few seconds as batariel is very slow against bosses. So your end orbs would be like that: shadow, nature, nature, fire. This being said I would like to present you some very standard decks for a Lost Spirit Ship and a Batariel deck. I did not explain every card in detail but the one I didn't mention pretty much are explaining themselves. One last shot on this topic: Most of the time you will need to learn how much units you minimally need in order to clear t1-t3 just by trial and error. This is especially true for the fight for t2. You will probably need several tries until you find the correct units to focus and when to change the aggro. Just don't get frustrated if it doesn't work in the first few tries ^^ 3.3. Pathing Okay so at this point it starts to get a bit more complicated. In order to find the optimal path to run you need to always keep in mind these 3 basic variables: The strength of each camp The strength and way spawns will try to run down your base Most importantly the general map structure, that includes the ways you are allowed to run (the ways from base to base) as well as the position of certain camps on the map. To 1.: It doesn't really matter to much for Batariel decks, you can steamroll them anyway and you should always have enough power due to shrine of war. You just need to take care that you don't get to the very high damage bosses to fast as you don't have enough power to support 1 or 2 bloodhorns and a batariel early on the t4 phase. Crucial point for Lost Spirit Ship, you really want to kill the easier camps at first, as some camps are just to strong for few Lost Spirit Ship. Either it takes forever or you will just get wiped out. In order to use that time correctly try to kill easy bases at first. You really want to avoid bosses with high hit points until the very end. I'm talking mostly about the command walker as those literally take forever without at least 7 ships and a fallen skyelf. To 2.: As you want to clear bases with your Batariel and only send your bloodhorns in after the base is dead (except the boss) just try and let them sit back on ways where spawns will pass by. This requires you to study the ways certain spawns will go. Basically you want to avoid spawning too many units at your base to defend as that binds power that might be necessary for buffing and healing. Sometimes you can use Lost Spirit Ship that you would use for motivating in your base anyways to defend, but you need a bit of luck to have the power for that at the exact right time. That means you basically want to defend most, if possible spawn the rifle cultist and spawn a Lost Spirit Ship next to him that can then be added to your troops straight away. Sometimes you need to kite a bit in order to have enough power. In both cases you want to prevent that very strong spawns hit at your t3 as you will often times just loose the game by that. To 3.: With both decks you want to avoid going unnecessary ways. That means you need to find the way with the shortest distance to run by clearing all camps. Often times there is not a perfect solution that would include you running every way exactly 1 time and never run out of a base in order to reach the next one. If you remember the picture of 3.1. (or just scroll up to it again) you have exactly that case given. You need to run backwards from at least camp 7 or 10 depending on which one you want to do first. I played exactly that map in this video https://www.youtube.com/watch?v=8EkqkzbuLw0 (you might remember it 30x15file:///C:\Users\Niklas\AppData\Local\Temp\OICE_BB1A28E5-6F75-4C7E-BE57-31B96B37F208.0\msohtmlclip1\01\clip_image001.png). Even though I didn't use amii-monument in that game due to a challenge I had with a friend you can see the path I took after I had t4. This ones doesn't really give you a big task of finding the best path just because of the limited amount of Lost Spirit Ship I had and the fact that bases on top (8,9,10)of the map wouldn't be possible for me to clear due to their insane strengths. As well as the point that the chance of pulling the whole base 9 while mainly attacking cap 8 is kind of high due to the fact the whole camp is built up in a very small place and Lost Spirit Ship sometimes move weirdly through that. Even if I made it through that one it is likely that if I attack camp 9 I would pull camp 6. Those risks just shut down the only other efficient route in terms of point 3. To sum this one up: Its very necessary to know a map very good in order to be able to combine the 3 above listed variables well enough to find the optimal path. Often times you will need to gain that knowledge just with trial and error even though it will get much better the more experience you have with combining the variables and overall speed run experience. 4. rPVE/Battleground 2 Players 4.1. Map strucutre and general principles So obviously you have 2 starting bases on a 2 player map. These are basically identical in structure. Both have 2 direct ways away from their t1 to 2 outer camps. In-between those you will face a third camp. A nice little fact to take note of: If the t2 is at the left/right side of his t1, it will be on the same side for player 2 as well. This is always the case. There is no separate bases for t3 and t4, but both monuments are in the same base. The T3/4 bases are always directly linked. On the way you will face 2-3 camps (most of the time 3). Rest of the map is split in 2 rows with each 5 bases. The basic concepts of 1 player rpve and what you want to do and avoid are similar: Destroy the correct spawn buildings as soon as possible and try to not use to many resources in defence. 4.2. Common t1-t4 strategies T1 - Enemy Bandits Basically you are doing the same like in 1 Player rPVE, for both players. T1 - Enemy Stonekin Basically you are doing the same like in 1 Player rPVE, for both players. T1 - Enemy Twilight Shadow: Standard t1 with forsaken, soul splicer and motivate. Attack the spawn with 3 frenzied forsaken and kill the units with the rest of your forsaken. If have got Twilight hags at t2 you can use skeleton warriors to absorb the damage and use knock back with them, 1 should be enough though. If you face those annoying parasite swarms, either take them down very quickly or just start with frost. Frost: Standard t1 with frost mages, ice barrier and home soil. If you face twilight hags I recommend some master archers to have an easier time on focusing on them and the spawn building. Parasite swarms are no problem due to the knock back of frost mages. Fire: super situational. I don't recommend it 99% of the time. Nature: Not viable Extra information: This is the case for both players. I recommend one of them to start shadow, so you get some early embalmer shrines for t2 shadow phoenix. T1 - Enemy Lost Souls Shadow: Only viable for 1 player and only if the t2 doesn't include lost vigils. The other player will need to support the shadow player with massive fire spell spam. Use skeleton warriors only. Frost: Not viable Fire: If one player starts shadow support him massively with 2 mines and 4 eruptions on the spawn building at least. That's 440 energy minimum. You can add a defensive mine to defend the spawn near t1 to that if you wish. Notice that this will slow down the fire player massively but will speed up the other player massively. If there are lost vigils though you are forced to play fire with both players. The concept stays the same though. One player will support the other one with spells. You want to support the other player with at least 2 mines and 2 eruptions on the spawn building. Blaster Cannons are a must have. You want to start off with 3-4 nomads (depending on how good you can pull and how fast you can erupt). Start of with 2-3 blaster cannons (when you build 2 you will most likely need to erupt 1-2 times unless you're a bit lucky with the focus). You want to set up 2-3 mines at the place the ground units will attack your blaster cannons. Placement of those can get tricky, depending on which enemies (trees, manabeasts, lost dancers, etc) you will face. After you set up yourself or your team-mate, pull out the whole base into your blaster cannons and let them switch focus, until you run into the base again and kill the spawn building. In optimal case you want to kill the spawn with the eruptions as well. Set a defensive mine to defend t1. You want to basically support the other player with basically ~60% of the total energy costs for spells that is necessary to clear the base. The supporter should NOT build any units or buildings until the t2 of the other player is cleared. The supported player will go t2 afterwards. The supporter will try to clear his base mostly alone, most of the time he will get only 1 mine and 2 eruptions. Notice that you need sun striders to trap those annoying lost dancer spawns. Nature: Not viable T2 - Enemy Bandits/Stonekin Bandits and Stonekin T3/4 is built up identical, so I'll just sum them up. You will face either 2 constructs, 2 tortuguns or 1 construct and 1 tortugun. Sometimes you will face Windhunter's in addition to that. Most of the time you will have at least 1 guy starting frost t1 so you will have coldsnap most of the time for those annoying dragons. You need again ~12 phoenixes to clear the base 100% calculating that you might 1 or 2 before you can attack the spawn. In order to get them fast you will need to make them voidless again, just as described in 3.2 T2- Enemy Stonekin. When you face that long range attacks from tortuguns just stack them as described in there as well. You will most likely have to defend against a bunch of spawns, you can leave some of them alive to defend against that. The rest you can kill near a furnace of flesh to get some void power back. Clear the dragons with frost mages/ master archers/ forsakens. T2 - Twilight Most twilight t3's aren't really strong, you will most likely need 5-6 phoenixes for an easy clear. Just care about those parasite swarms. If they are able to make your unit beyond control you might screw up. Just make sure you give them right target to attack before you lose control. T2 - Lost Souls So this one can get kind of tricky. You will most likely face a lot of units at t3 and I recommend using around 10 phoenixes. In order to do that you will need to make phoenixes voidless. But you need to take care that they don't die when you fly into a base or leave it. Lost vigils kill phoenixes really fast. In order to do that you probably have to fly from weird angle into them or have to attack units that you wouldn't focus on other wise. For example little squad units. Those die basically from 1 phoenix, you need to make sure that all phoenixes you send in attack that unit. Do that by stacking them, so they all reach that unit at the same time. Those weird angles and unit focuses are sometimes even necessary for t3/4 attack. Especially if you use less phoenixes as possible. Try to clear any air units with either a nomad spear, sun striders or blaster cannons. Use your phoenixes to defend the spawns. T4 - Enemy Bandits In 2 player maps you will often face a major amount of bosses. I recommend at least 1 player uses bloodhorns to kill the big bosses. You will probably need to split that one up from the rest of the troops, so that the bloodhorn can take care of bosses that are alone in their base while Lost Spirit Ship clears the rest of the base and just run from boss to boss. Batariel can be an option here as well. You need to decide individually, what is better --> trial and error. T4 - Stonekin Most of the time Batariels will be faster than Lost Spirit Ship against Stonekin maps. But Lost Spirit Ship can be an option for some maps --> trial and error I recommend Bloodhorns as well. T4 - Twilight Hardest T4 in the whole game. There is basically only shit available and you can get wiped out with everything quite easily. You need tons of crowd control. Both players need to have oink and at least 1 freeze (such as coldsnap or maelstrom) to cc those wrathgazers. In some bases you will face 4-5 of them+ spawns. Personally I play bloodhorn and Lost Spirit Ship against that, you can add 2-3 green gemeyes for the extra crowd control. Earthshaker is a must to get rid of the willzapper buildings. I do not recommend to split up at the last rank of bases. You will need every single unit you can get. Sometimes you can't even clear those easier t4 bases alone. Batariel is not an option. Path finding becomes very important at this map, because you can not defend your base with a single t4 unit, due to wrathgazer spawns. You need to kill every spawn on its way to your base with your main troops or it might get messy. If you want even wheel of gifts can be an option. Shrine of war is a must. T4 - Lost Souls Lost Spirit Ship - Spam. Incredible Mo with yellow ability is a must. It prevents the lost dragon debuff and so you got a pretty easy time with your Lost Spirit Ship. You can add a Bloodhorn and send them behind your ships to clear the bosses. Do not run into bases with it though or it will get just get killed instantly. Shrine of war is not a must, but I highly recommend it. Batariel is not an option as you have the anti-spell aura buildings and any spell you use in advance of entering the base will get deleted by those nasty lost dancers (that's true for wheel of gift, incredible mo, spells, etc --> never build those buildings against Lost Souls unless you have a lot of air units). That will cause your batariel to just get destroyed in later bases. 4.3. Pathing This one gets a bit harder than for the 1 Player maps. So what you basically want is both players to clear their last bases at the exact same time. Then you did everything correct. However in order to find both paths that are optimal you always have to keep the 3 variables in mind: The strength of each camp The strength and spawns that will try to run down your base Most importantly the general map structure, that includes the ways you are allowed to run (the ways from base to base) as well as the position of certain camps on the map. However you need to now keep in mind for yourself and your team-mate that it might be an easier or harder to get to t4 due to probably stronger spawns, bases, etc.. So there might be camps that you can clear at a certain time. The map structure will most likely not be mirrored exactly so that one of you will have longer ways to certain key points of the map. Might be easiest if I just explain with the help of the graphic above in 4.1.. I assume that that map is a bandit map and you both decided for Lost Spirit Ship. The camps in-between got cleared by you with 3 Lost Spirit Ship and you both are back at your t4 with 5 Lost Spirit Ship in total.(That's a typical scenario. You clear the easy bases between the t4's while your waiting for enough power to spawn enough Lost Spirit Ships to start fighting the bigger bases). You have similar power and start at the same time running from t4. Notice that this is just a model. So this is basically the perfect situation to plan routes. In this case Player 1 wants to go clear camp 10 --> camp 9 --> camp 11 --> camp 16 and camp 17. Player 2 wants to clear camp 13 --> camp 12 --> camp 16 --> camp 15 --> camp 14. That is because Player 1 has a sub optimal way to go as they have to run a certain amount backwards (out of camp 9) and has an extra camp before reaching the very hard camps. In order to compensate for having a longer way than player 2, player 1 gets 3 easy camps and 2 hard camps to clear while player 2 gets 2 easy and 3 hard camps to clear. This gets even more complicated if you assume that in certain camps are bosses of different strength or only 1 player has a bloodhorn. I hope that the base concept of this got clear with this easy example though. 5.rPVE/Battleground 4 Players 5.1. Map structure and general principles So as you can see in the image above, you will face again the split way at t1 meaning that as soon as you attack you will get attacked at your T1. Notice that the T2 is for all players on the same side of their T1 (in this case right side). T3 and T4 is pretty standard as 2 players share those bases with each other. In-between the T4's of the 2 sides you will face 1-2 bases, and in the 2 ranks after T4 you will have each 4-5 bases. The spawns that will come from T3 always attacks the outer players (1 & 4). Therefore they will have more of a supportive role in the game as they aren't able to build up their t2 army as soon as the inner players (2 & 3). The basic principles pretty much stay the same: Kill the 'right' spawnbuilding as soon as possible and do not use any more power than necessary for defence. 5.2. Common t1-t4 strategies T1 - Enemy Bandits/ Stonekin/ Twilight Player 1 will support Player 2 and Player 4 will support player 3. Therefore the outer positions will start with fire while inner positions start shadow for early access to resource booster. Depending on the strength of the camp player 2 and 3 will get 1-2 mines & 3-4 eruptions on the spawnbuilding. Depending on the map Dreadchargers might be a thing to destroy the spawnbuilding if you 'only' get 3 eruptions. No need for skeleton warriors. After that outer positions can try and clear their t2 by themselves or wait for the inner players to help clearing them. T1 - Enemy Lost Souls This one can get really tricky. If you only get 1-2 manabeasts or treespirits + only squad units, your good to go and just do the same as against Bandits, Stonekin and Twilight. But most of the time you wont be that lucky and face lost vigils in addition. If that's the case you will have to choose one guy who starts shadow, so either position 2 or 3. Who starts shadow depends on how easy the T3 will be and how well he can reach other parts of the map from his side of the map as this guy will have quite significantly more power than everyone else. The other 3 will start fire and just support the hell out of him. Erupt the spawnbuilding (each vigil needs 5-6 eruptions when buffed up, depending on how fast you can erupt). I recommend 2-3 mines and as many eruptions as necessary while the shadow player will tank the damage with 2-3 skeleton warriors (unholy armour obviously active). After that the other inner player will get supported by the 2 outer players and himself. He can take care of the vigils with help of Blaster cannons. I recommend 3-4 nomads for that + 2-3 blaster cannons. Outer players are just defending themselves against the T3 spawn and gather power. T2 - Enemy Bandits/ Twilight Most likely very easy camps. 5-6 shadow phoenixes should be enough to clear T3 and T4, unless you face a boss at t4 or have those nasty windhunters against you. T2- Enemy Stonekin You will most likely face constructs and/ or tortuguns again. Means you need to summon 12 phoenixes again by making some of them voidless in the first place. Pretty much same as in 4.2. T2 - Enemy Stonekin. I recommend not to clear T4 unless you are 100% sure you can do it as some of the spawns can get really nasty, especially if they are coming from the after T4 camps (bunch of shields and those bandit snipers) and you really want to have some shadow phoenixes to defend against that. T2 - Enemy Lost Souls You will most likely need 10-12 phoenixes to clear t3 and help your team mates on the outer positions to clear their t2. Outer positions will spawn a bunch of sunstriders for lost vigils while shadow phoenixes take care of the big ground units (treespirits & manabeasts). I recommend using 4-6 shadow phoenixes for that depending on if those ground units get shielded or not. (Man beasts die from 3 phoenixes and 5 if shielded, treespirits from 4 phoenixes and 6 if shielded). You will most likely get massive spawns from the camps after T4, those can include 2-3 treespirits/manabeasts, 2 lost vigils, several squad units and those shield lost wanderers. That means you will need several phoenixes to defend against that and something anti air. Sometimes a mark of the keeper is worth thinking about. T3 - Enemy Bandit/ Twilight Basically skipped as T4 is already cleared. Outer players building shrine of war. Against twilight healing gardens and wheel of gifts CAN be built. If you want so outer players will do it. T3 - Enemy Stonekin/ Lost Souls One of the inner players will go amii-monument and clear the t4 of his mate (against Lost Souls most of the time the shadow player). The other side can try ashbone pyros with frenetic assault/ infect/ soulshatter. Shrine of war is build by outer players again. Against Lost Souls incredible Mo with 'benevolent Mo' effect is a must, also build by outer players. T4 - Enemy Bandit Lost Spirit Ship Spam supported by bloodhorns(red) for the outer players (they might have some lost spirit ships in the end as well). I highly recommend using red Lost Spirit Ships only as you can use motivate + flame crystal to increase their damage significantly. Use Bloodhorns for the bosses. T4 - Enemy Twilight Mix of bloodhorn and Lost Spirit Ships. You will need a lot of crowd control to be able to deal with the wrathgazers. I highly recommend earthshaker for destroying willzappers. Always run with 2 people (I recommend 1 inner and 1 outer player) or its very very likely that you get wiped out. Batariel CAN be an option for 1 or 2 players (I recommend 1 maximum). You need the ground presence of the bloodhorns but be careful to keep them alive. Same deal with Lost Spirit Ships and flame crystal. T4- Enemy Stonekin I recommend a mix of Batariel and Bloodhorns as Lost Spirit Ships have huge problems with the high hp buildings and units of stonekin. T4 - Enemy Lost Souls Lost Spirit Ships are the only way to go here. Incredible Mo prevents Lost Dragon debuff from them. Have bloodhorns always 1 base behind them and send them in after the base is cleared to kill bosses (be careful at the hellhound as he can 'eat' your bloodhorns) otherwise your bloodhorns will just get killed by necrofurys and even your ships have a harder time as necrofurys can deal damage to them when they focus a ground unit right under them. Batariel is not an option in here as lost dancers will deny all the buffs you want to send at him and necrofurys killing him super fast then. 5.3. Pathing Basically the same as for 2 player maps but now you have to also coordinate 2 more players, which can lead to some weird routes especially for the outer players. Expect to have a power deficit on one side of the map making that side a bit slower by clearing camps and overall starting to clear camps. It becomes very situational in 4 player maps even though basic concept stays the same. Most of the time you will need to change up your original route to go by quite a bit as its hard to calculate strength of each player at every time in the game correctly and you will most likely have mistakes in there which is changing viable routes completely. Learning by doing is the only way to find correct routes in 4 player maps. 6. Cards that can be very useful but are very situational (mostly for 4 player maps) Netherwarp - Porting over walls. Portal Nexus - Viable with ground units only, makes ways shorter to the next base and avoids long ways back out of bases / dead ends - mostly use for stonekin maps Tunnel + Burrowing Ritual - Having few units that are mostly air and in a dead end? use this - mostly useful on twilight maps Mark of the Keeper - Defending against heavy Lost Souls spawn on your T3 Witchclaws (red) - Sometimes good in 2 player maps to clear out the spawnbuilding when its very far back. Stone of Torment - Avoiding to pull out shamans from bases. Matter Mastery (green) - Some Bandit Maps having this nasty Rioter's Retreat towers, matter mastery can be an option if the rest of the base is very weak and you are getting strong spawns. Frost Bite(purple) - Alternative to Fallen Skyelf when not using 2 shadow orbs and having a free deck slot. Used against bosses to increase the damage they take( mostly used in 2 and 4 player). Mumbo Jumbo (red) - Alternative to Fallen Skyelf when not using 2 shadow orbs and having a free deck slot. Used against bosses to increase the damage they take( mostly used in 2 and 4 player) Constructive critics and comments and improvement suggestions are very appreciated. Feel free to ask any kind of questions as well. Leave a reputation if this was helpful At this point a special thank-you goes to @Kiwi, that helped me with my english for this guide and @ladadoos who made the graphics, you are awesome Thanks for reading. P.s. as the attachment upload doesn't work for me i will add a dropbox link where you can find a pdf with the whole guide: https://www.dropbox.com/s/6kgyobccr9u03hd/Treim's Battleforge rPVE Speedrun Guide.pdf?dl=0
-
Hey all, as the last deck that I showed was more an super-expensive expert deck, let's speak about the most beloved beginner faction this time - Stonekin. Prologue: Even though I don't want to present simple solutions with fixed 20 cards, I have to split the Stonekin topic into 3 parts. There are always nice cards that you can not take because of the limited slots, or other cards that offer other options, but that would be just another deck. Stonekin is a great example. So that the tension is not quite so unbearable, already the outlook for you: 1/3 will be a classic Stonekin deck with (any row), a macro deck, with a small budget and equally popular among beginners as well as suitable for them. 2/3 will be a bit more expensive and a bit more advanced, taking advantage of the -meta. The deck becomes (slightly) faster, significantly stronger, but in the same measure becomes more "vulnerable" and requires significantly more intervention from the player. 3/3 will follow with the next patch as I have some changes in view on the test server. Here we will focus on the freeze mechanics and build a nice strong, but even more micro-intensive deck. A great fun! 1/3 Classical Stonekin Theme/Scope: classic Stonekin deck with (any row), prefering Stonekin-Faction over pure Faction where it makes sense, easy to play Playstyle: Macro Budget: low budget Addresses to beginners Core Deck: (as RPVE Decks mostly happen in T4, every RPVE Deck considering should be done from T4 downwards imo - just to explain my approach) - Our scope sets Grinder as core unit as there are only 3 cards in this orb range. The other 2 cards have no value for us here, as they are about defense, a thing that we don't even consider for a second in Battlegrounds. Always forward, never backward. - The Grinder is an incredibly good tank, but unfortunately does very little damage - we need a Damage Dealer (DD) and here Gemeye offers itself, more on this below - Since we don't have good void manipulation ourselves, we rely more on armies than spells in all tiers. ("more" does not mean only) - We use our nice crowd control (CC) spells that we have through all tiers - We use large area buffs and heals for maximum efficiency with only a few interventions - the 2 dmg Spells that we have speed up killing alot T1: Either or Basically, with any deck, keep the T1/T2/T3 as large as necessary and as small as possible Nature Start - A classic, the most common start, and yet something to talk about, many do a lot "wrong" here - Windweavers (WW), Surge of Light and Ensnaring Roots are usually set and enough for any rpve9. This is the gold standard. - Dryad (B) is a great addition, but to me a waste slot as it is not needed. Shaman is a nice Quality of Life (QoL) addition but usually not needed either. If you want to take one of this two cards don't play too much. Usually build not more then 2 Dryads or 2-3 Shamans. For BG10 I would recommend Dryad (B), even more then a Shaman. If you play Dryad (B) I would recommend beginners to switch them to dmg (not using sleeping) it makes them easier to hold in line with your WW. - Treespirits or Mana Wings are Rare, aren't they an option to Windweavers? Not a bit, WW are the superior nature allrounder. Mana Wings can be a rare solution against Lost Souls (if you play a MOTM where you know you face LS) as some of their strong units can't attack flying. But this is a too rare case to use Mana Wings as allrounder - Melee Units or Amazon are simply no beginner options, please just trust me. Most melee T1 units lead to unintended pulls and Amazon is too weak for BG imo. - Other T1 options that are worth mentioning: Mark of the Keeper as Upgrade for BG10, Hurricane is great against S- Units but usually not worth the short T1 stage (nice BG10 Upgrade), Fountain of Rebirth can be a nice addon in 4player groups, solo not worth the pick (BG10 and such... 🙂 ) In BG9 usually bring out 4-6 Windweavers, root smart and have one Surge of Light ready and T2 should be clear. Against LS play 6-8 WW, one of the rare cases where you want to pull enemys to you a bit out of the camp and clean beasts one by one. Fokus your fire a bit and your troops will do better. Frost Start - the underestimated alternative, a shitload more damage but less sustain - Frost Mages mixed with Masterarches in ratios between 1:1 and 1:2 supported by Homesoil/Ice Barrier can handle any BG9. If you choose to go for blue T1 then there is no way around Homesoil/Ice Barrier, use this combination the whole match until late T4 for your Gemeyes - again melee tanks are no option in the scope of a beginner deck, though this is a valid option for more sustain melees usually do more harm then they give a benefit (aka unintended pulls) - Nice BG10 addons can be: Glyph of Frost, one of the Wintertides, Lightblade (very micro intense), Frost Sorc (very micro intense) Use your Homesoil (eventual Ice Barrier) to clear T2, ~6 Units deal insane dmg with that support, Barrier can be used to heal units too in some cases. T2 either or - the opposite of the T1 choice As we want to make a stonekin Deck, lets go Stonekin with our T2, where we get great options in our faction. As both colors come with some great splash cards at t2 too, we will focus on Stonekin and only go for "mandatory" splash cards, like the omnipresent Oink - never go out without your Oink! 🙂 Again we want to have a most lean T2, so pick at maximum 2 of the following considerable Units: - Razorshard (G) is my hidden champion here on the paper he may look not that great (another S-Counter, you need to use ability, delayed damage), but he performs outstanding against most BG9 enemys, he gives your remaining T1 force a nice basic heal that gives a shitload of sustain - Crystal Fiend (B) moooore sustain though is audio sucks - a really strong option, but beware that your army does not only consists of supporters and healers, a common "mistake" - Stone Tempest a bit fiddly but a good M counter and providing nice CC via his knockback, though in some cases annoying - Aggressor - ok'ish unit as L counter if needed, please consider that he is rather a supporter too then a damage dealer From the Mono color units the following might be worth mentioning: Stormsinger (any) as strong air-counter or Burrower as swift sieger. As most of the above mentioned are pure supporters or more-supporters keep some/all of your T1 force alive. Usually at T2 a Breeding Ground is not worth (building). After getting mix in - depending on the T3 situation - 0-4 of the above Units. All your T1 options are still viable and your army supported even with your T2 spells now should be fine to deal with anything and everything. The following spells are nice at T2: - Oink, as said, never have a deck with a that goes without - if you started Frost you still can consider to take a Surge of Light. Usually T1 spells are not worth a T2 slot, this is an exception - Matter Mastery, expensive but strong and fun, can be used in combination with Homesoil if you started frost - in rare cases: Gravity Surge (B) but Stormsinger would be prolly a better T2 choice for most uses here - and finally the big question "to freeze or not to freeze" -> Coldsnap It is a super strong tool in some rare cases but often used brainless, where it hurts more then it helps. I like to have it with me for seldom super hard T3 camps or to stop a frontline in late match when I am completly on my own. Always have in mind, that freezed enemys only take 50% dmg, which is a very significant penalty. Freeze is very strong against Lost Souls T3 camps, Coldsnap while running in and take out spawner + other buildings to weaken the Lost Vigils. And please be very careful about freezing units for others, decks that have high burst damage or also rely on triggering their infects can be put in quite a hassle by a single freeze. As a rule of thumb, if you want to help your mates, buff or heal them, but unsolicited freezes are rarely welcome. T3 (?) Let's speak about void first. Stonekin has two obvious options here, either Shrine of Memory () or Shrine of Martyrs () that both can be made available at T3, if we stay in the scope of Stonekin and mixed T2. I don't consider Shrine of Martyrs to be usefull in a deck that is not build around freezing, and even then it is doubtful. Shrine of Memory is very weak too, and I think leaving it out at all can be an option, but after hundreds of games with and hundreds without I have the weak feeling that the 2x 100 energy are just about worth the investment. I find it very difficult to make an absolute statement here, but my cautious recommendation goes in the direction of SoMem, hence the choice of headline "" As my Stonekin T1/2 units give usually give a very solid mix I tend not to take any T3 units for the usually quite short T3 stage - spells and my remaining force needs to do the job. If you want to take in a unit, it must be something really beneficial like taking in an XL unit like Deepcoil Worm or Deepfang. There are ofc other nice'ish units, but noting that really adds something that you couldn't do with your T1/T2. You may now say "Hey, it's Stonekin, what about Rageflame/Stone Warrior" and you are right, those give an excellent combo. But still in this deck they would be aliens and not really solve any ugly T4 camp situations for which you would take them in now. I will have a close look on those two in part 3/3 of this "guide". Spellwise T3 brings two mandatory ones for me, for this deck: - Revenge - Stone Shell (G) Easy to use, both stack, and make your already strong force almost invincible. Next "mandatory" pick: Thunderstorm - a perfect allrounder you want to have with you if you play a green splash. If there is a Shrine of War from your mates, use your Thunderstorm all the time either for waves (don't stop for them) or when you fight camps. Thunderstorm is as Curse of Oink - this card can't be wrong in most of your decks. Other spells worth mentioning would be - Equilibrium (G) if you feel need for more heal, here it is. Usually this should not be needed but can be a nice filler if you feel better with it Neither Enlightenment nor Frost Shard would add something at T3, so they are not considerable for me. And now comes the part where opinions differ: Support Buildings - Wheels of Gifts are no option for me in this deck whereby I have to emphasize here "for me" just as much as the "no" option. Wheels bind 540 (405 with construction hut) energy that can't be invested in units. Solo even with taking muuuuch time it is hard to reach even the break even point where the wheels are useful. In groups ofc wheels pay out earlier, but are usually not really worth slowing down one player that strong. The problem is compounded by the nature of the Stonekin faction, as individual units are not as strong here, but they become stronger when combined, having almost 2 units less on the field hurts me a lot there. Another reason for me to do without the wheels is that only one wheel buff is very profitable for ourselves, namely the attack buff. On easy maps, a skilled Stonekin player doesn't even need a single heal, to buff this further with Wheels (partly it wouldn't even stack) would be absurd for me. However, I also know my Battlegrounds so well that many factors are no longer random for me, but well predictable, that it is very difficult for me to fully take a beginner's perspective here. 20% is 20% more - and if you feel better to wait 1-2 min and take that 20%, then do it! - Healing Gardens - a great buff! But still I rarely play them, as I consider most content well doable if all decks around are build well, it's a bit the same as for the wheels. But again, of course, if you feel the 300 energy for 2 HG is worth it, then play them (in a group). I would also prefer the HG over the Wheels. T4 We have 2 Units in our Faction at T4, as both work together well, why not build around them? - Grinder is our tank, usually I would only want to have one slot for it and take one of either affinty. Honestly, the fewest will use the skill. But it's not completely useless, though, so give it a try. I therefore slightly prefer the purple. I think having 2 is recommended, the more the better ofc. Grinders benefit greatly from grouping, I would want to set up 2-3 straight up and have 4-5 towards the end, then they are actually almost immortal, especially if you buff them nicely. - Both Gemeyes are great for me, I like to have them both. Usually I play 1 green, put out all my purples and play Grinders or further purple Gemeyes when the cooldown is off. I would recommend to charge the purple Gemeye for this deck sooner or later. Ofc the green can be cut if you have other preferences. - always leave some energy left for 1-2 spells Ofc other Units can support this mix, though I don't feel a need for it. Primeval Watcher for example could go as supporter, Giant Wyrm as super budget DD. The two spells I recommend the most here are Regrowth and Ice Tornado. The former is mandatory in most unit based decks though I don't often feel the need to use it in a Stonekin Deck. The latter is a great damage spell and should be set in the back of most camps, while you fight the frontline. Also it is a nice support for bosses or just as helper to increase dmg on endless crossing fights. Tornado and Thunderstorm should be used all the time if a Shrine of War of a group member is running. Maelstorm can be an option to get even more sustain, but hey, freezing, we had this topic - be smart when you freeze! There are other cool spells in this color range, but none that I would consider for this deck Any more options throughout the the tiers? - Incredible Mo is important against LS, if you play random maps make sure there is one around or take yourself (Yellow buff to avoid anti-range debuff) - Amii Mon for solo purpose ofc possible - construction hut if you considered any of the Buff Buildings or Amii - Frost Bite (P) does work on bosses, usually not worth the slot to me but hey it needs to be mentioned Bosses you struggle with: - Hellhound can be dangerous, avoid to face him with a too small army alone. Keep your buffs up, take out spawner via Tornado and perhaps focus the boss then - fear very early Urzachs and Infester, keep your Gemeyes out of range but close enough for your Grinders to count for their passive heal Any other dangerous situations for this deck: - early bosses, especially when you are on your shitty SoMem. Know your deck and retreat if needed in time - Ugly T4 situations end in quite a "zerg" - even t3 units do not change much about that - usually not a deck I want to bring to BG10 random maps/groups as it is too slow for the given time frame - Willzappers in early match, reason enough for me to justfy Matter Mastery (that is useless against Lost Souls) Personally tested Deck proposals, as always from Spells over Units to Buildings BG9 allrounder BG10 Solo Replays: BG9_4pl_motm_Stonekin_noheals The very easy current motm, I guess I did not even use a regrowth in that match, perhaps one lazy one in the end. If maps are that easy usually this deck cannot ever be beaten. BG10_1pl_MOTM_Stonekin Current super easy motm tempted me to do it with a stonekin - slow but steady, deck above. I will add a replay of a close and ugly T4 situation (current motm 3/4 comes to my mind) the next days. This is noting you want to have with this deck, but still doable. BG9_4pl_MOTM_Stonekin_close_t4_fight As I have seen many people struggling with this Pos3/4 (I am sitting in 4 here) I was a bit afraid to play it with this deck. A very low rank, Deck lvl 7 sat next to me. He touched every next camp in advance to trigger useless further spawn and brought non-optimal units to the field - a perfect stress-test for our Stonekin deck. And what shall I say, have a look yourself, we are super-clean t4 in ~8min. Far from being fast, but for this map and situation still rock-solid imo. If you have feedback, suggestions, nice replays or storys about this deck, please feel free to post below! As always, all information without guarantee and with strong personal preference. See you in the Battlegrounds! Thanks to https://www.deepl.com/translator for helping me with some partly translations BG9_4pl_motm_Stonekin_noheals.pmv BG10_1pl_MOTM_Stonekin.pmv BG9_4pl_MOTM_Stonekin_close_t4_fight.pmv
-
Also available in pdf! Choose the format that suits you best. Disclaimer: The work does not cover all possibilities and is not the highest quality. I am a recognisable Frost player, but certainly not the best one. I do not expect to make any major updates. I am not responsible for any malicious software contained within enclosed files and do not promise that all provided links are safe. Use at your own risk. https://drive.google.com/file/d/1iScntKo6SOFooLC2OO-Qtu3MGf_TcnYu/view?usp=sharing Pure Frost PvE Guide – How to hit hard as hail @Dallarian – author @Weak1ings – substantive support @boots - editor Europe, February 2021 When you enter the cavern, overwhelming noise disappears, leaving only howling wind, allowing you to thought over your situation. You are shivering. You expected Frost part of Forge to be cold, but having to go through Maelstrom to get there was a bit too much. What they were thinking off? Anyway, the cave. It is completely frozen, yet floor is not slippery. As you walk down the corridor, you notice that walls are gently shining, giving just enough blue light to continue the journey. After a while you reach large chamber. There are two people facing formation of crystals under one of walls, something what you think could be a table, and many passages deeper into the cave. Walls are covered by numerous maps, banners and crystals. As you approach, one person turns around and you recognise him as your friend Wazhai, who told you about this place. He comes to greet you, while the other person stays still. Wazhai: Ah, you made it. It wasn’t that bad, was it? I hope you enjoyed your journey. Now officially, welcome to Order of the Battleships. You: It’s a pleasure. I see this place isn’t too crowded. Wazhai: It’s not that bad. We’re mostly active at nights, when Sun is gone. Your friend turns to the person in blue robe. Wazhai: He is the person I told you about. Dallarian: A new disciple? Excellent. Wazhai, please show him Moonlight Chamber. Prepare Skylord, there are many challenges awaiting. The person you suspect to be The Old God of Battleships himself, does not turn toward you until you leave the room. Table of content Dallarian: Your knowledge is questionable. If you are to represent us, you must do so in a professional way. Therefore, your wisdom must be reviewed and unified. You shall practice over and over, until you become confident in those aspects. Basics on chosen topics If you do not understand a word, it may be explained in Glossary of Terms. If you require more beginner advice, check Beginner section in "Guide Navigation" or suggested Beginner guides at the end of document. Gameplay related resources Micromanagement Macromanagement Wazhai: Good. Now you know which way sword should be pointing at. Become familiar with those basic creatures, structures and magic. They are weak yet important, since they are base for your missions. Do not underestimate their importance. We closely cooperate with humans of Lyr and they help us out of their free will, so at least appear to be respecting them. You will need this Frost Shard, take it. It helps manifest Frost Magic outside the Forge, should be useful to you. The moment you touched the shard, you felt connection formed between you and it. Now, you feel pathway to Frost energies deep within your body. Chosen cards and strategies overview Tier 1 cards Wazhai: You know enough. Now it’s time to organise it all together. Did you know you can secure most T2s with Master Archers only? T1 chosen strategies Weakl1ngs: It’s time to introduce you into more advanced options Frost has. There are many interesting creatures and spells you could use at your advantage. And I will teach you to use Coldsnap. For some reason many Skylords like this part the most. Tier 2 cards[2] Weakl1ngs: While War Eagle is a great option, it is not the only valid one. Personally I prefer Mountaineer and White Rangers. Review closely creatures I’ve shown you, there are a few interesting you may use. T2 chosen strategies: Uro: Now you are allowed to use very powerful creatures, blah blah blah. This is the boring part. The only thing you actually need to know, is if your Avatars are facing enemy. That’s it. But I have to explain you in details anyway… ehh… Tier 3 cards Uro: Do you remember when I told you to use Avatars? There isn’t a lot of philosophy in it. Try Core Dredges if you want some fun. T3 chosen strategies Yshia: You have grown stronger and stronger in past months. Finally, you are worthy to see our most powerful magic and best creatures, including the famous Battleship. Learn carefully, and you will have suitable tools to change fate of the world. Tier 4 cards Yshia: After this part you will know everything you need to proceed as a true Frost Skylord. Brace yourself, for today your training is coming to the end. I am proud I could guide you on your last steps. It was a pleasure. T4 chosen strategies Dallarian: You have completed your training. There is one last aspect. You must now choose your path as a Skylord. Which one will you follow? Path of Wind You are like arctic wind, frosty and piercing through your foes. If you are a Skylord in the very meaning of the word. If your armies are free and up in sky, including War Eagles, Northland Drakes and Battleship, the path is for you to take. Path of Shield No troops under your command fear death, for you are their angel, protecting them from all harm. Whether it’s Ice Guardian, Area Ice Shield, Ward of the North or Dreadnought, your armies are always safe while crushing your opponents. Path of Crystal The only who will need protection, is your foe, for your creatures are most durable beings in the whole Nyn. If your army consist of high durable units, like Lightblades, Tremors and Ironclads, none shall shatter your armor. Path of Aurora Both your past and future are a mystery to me. I will observe your career with a great interest. Choose this path if you cannot decide on none of the above. Please answer in provided poll with relevant path, it allows me to keep track of how useful the thread is and encourages more content in the future. It is purely Roleplay choice and does not influence the gameplay, choose what is closest to your heart, not what you actually play. Dallarian: I see. Interesting choice. Anah’shar laje’ura. Accept may blessing and good luck on your new path of life. As Dallarian tells his weird words, you feel chills going through your body. When they end, you are even stronger, and feel like the whole world was on your doorstep. Decks and approaches rPvE Offence rPvE Defence Custom maps / unknown map PvE Campaign Uro: Ssssh. Come with me. You follow Uro into one of less used corridors. Uro: Good, here nobody will hear us. Did you know Togob is hiding many things from you? There is a whole range of possibilities within our grasp, but he will never admit it! Let me show you. Heresy – non pure decks Supporting materials Additional notes on game mechanics Glossary of terms See also: “Expert Campaign – Missions Briefing – Among the Old Gods Achievement” by @Dallarian for Expert maps guidance and almost complete library of pure Frost PvE decks. "Guide Navigation" by @Eirias . If there is any relevant guide on topic you are looking for, you will find it here. Frost T1 PvP Guide by RadicalX by @RadicalX . Awesome source of knowledge for T1 Frost opening, by currently best PvP player. Battleforge undocumented details by @Emmaerzeh. Information about buffs, stacking and more. card attributes & main card types by @Ilsyde. Beginner guide. interface and game mechanics guide by @Ilsyde. Beginner guide. References: RadicalX. Frost T1 PvP Guide by RadicalX. 2017; Available at: https://forum.skylords.eu/index.php?/topic/2823-frost-t1-pvp-guide-by-radicalx/ (Accessed 10 January 2021) PvP changes are considered, that may influence abilities, counter types and statistics. The thread is up to date on patch #400025. {GM} Emmaerzeh, Battleforge undocumented details, 2020. Available at: https://forum.skylords.eu/index.php?/topic/6669-battleforge-undocumented-details/ (Accessed 15 February 2021)
- 5 replies
-
- guide
- pure frost
- (and 14 more)
-
Hello folks, I need some recommendations regarding an Enlightenment Batariel deck where T2 is shadow. I've seen many players which are playing T1 with Nomand & Mine, then pushing forward to T2 with shadow sphere, from there they push T3 with shadow phoenix - which is (in my opinion) a really nice combi to wipe out the enemies to T3 really fast. I attached my current Enlightenment Batariel deck starting with T1 fire and T2 nature. Greetings and have a nice day / week! :-)
-
Hi zusammen, ich würde hier gerne eine Sammlung von rPVE 10 Decks machen. Ihr könnt gerne eure schicken und ich ergänze es nach und nach.
-
I searched the wiki and the forums, but I couldn't find anywhere a list of how much gold you get in 1, 2 and 4 player maps at each level, 1-10 (does it change with how many players you have? Ex. if you have 3 players instead of 4 on a 4 player rPvE, will everyone get more gold?) Curious if there's a list out there.
-
Hi everyone, I would like to hear which decks you think are good for rPvE, something about level 9-10. Write which card you are using, and if you want, why you are using these cards. Thanks to you all for the information
-
NAME: Game crashes upon finish message SEVERITY: 2 LOCATION: Match REPRODUCIBILITY: Random DESCRIPTION: As soon as you manage to win the match (tested only on rPvE) and "Victory" message appears, game may crash straight to desktop without losing a connection to server or anything else (freezing and then disconnecting -> forced log-out; error message; etc.). ADDITIONAL INFORMATION: > Never happened upon "Lose" message, at least yet. > Seems to happen only in rPvE. According to what other people say, there is another case like a 'freezing midgame', but i think this is a bit different, because it does freeze and then disconnects you. This particular bug freezes the game - yes, but instead force-closes the app, aka crash straight to desktop. > _launcher.log, if so happens, ends with last following line "[22:35:50] Game: Packet forwarded to the server" (time in [brakets] might be different). > Small note, windows will create a crashdata.mdmp file in the game documents directory.
-
NAME: "Critical Error: Assertion failed!" SEVERITY: 2 LOCATION: Starting rPVE REPRODUCIBILITY: NONE DESCRIPTION: Starting rPVE invokes a Whitescreen and an Error Message SCREENSHOT/VIDEO: ADDITIONAL INFORMATION: Not sure when exactly the Error started. My assumption is while pressing "start the game" Errorrating 2, since i havent reproduced the bug and it could be due to server shutdown. pressing the OK button resulted in another error message. was either a .net or visual studio 20XX message saying something about virtual methods. dissapeared in a fraction of a second May be due to shutting down the Servers. Approx. 30s later a Discord Notification popped up: InsaneHawkheute um 19:07 Uhr @everyone Hello Skylords! Our servers are off for now, on purpose, we're doing a maintenance that is quite important on our end. We'll let you know once servers will be back online! Thank you for your patience!
- 2 replies
-
- 2
- Errorcode: 1 !
-
(and 2 more)
Tagged with:


