Cocofang
-
Posts
380 -
Joined
-
Last visited
Everything posted by Cocofang
-
Yes, what you described falls under "Build for specific cards". Which can be anywhere in the tier progression. Like in my example with Juggernaut, the rest of the deck has to warp around its orb requirements, just like in your examples. And there is obviously a lot of overlap. If you decide to build for color you then still have to decide whether to start bottom, mid, top or build for specific cards or maps. Employing and combining multiple of the outlined approaches is a given. But if you are still inexperienced, you have to start somewhere.
-
-Kopie.thumb.png.4fb74bf732bbd2a4d19cf3ee81e21cf4.png)
Guide Navigation [New players--come here for all your needs]
Cocofang replied to Eirias's topic in New Player Help and Guides
Already got a few people telling me the deck helped them a lot, even in expert cPvE: New one for PvE deckbuilding: -
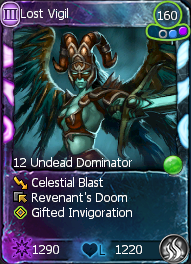
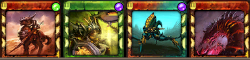
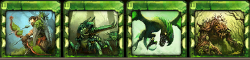
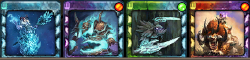
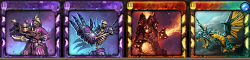
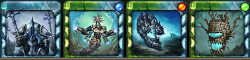
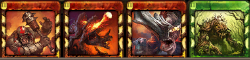
Foreword Content: Orb and Color Overview Picking your Approach General considerations Units in general Units in Tiers Buildings Spells Synergies My other Guides If you recently asked "Can somebody show me a good deck for this color?" or "Can anyone rate my deck?" then this PvE Deckbuilding Guide could give you a foundation to use if you need some early pointers on what to pay attention to when you start building your own deck. Experimentation and exploration are name of the game, so feel free to deviate from conventions. In line with that I will refrain from giving concrete examples or handholding. This is supposed to provide food for thought to point into a helpful direction to build decks yourself if you are still unsure. There is no universal solution for deck building. For many maps, especially on expert difficulty, some adjustments to tackle the individual circumstances are advisable. It’s also quite different whether you play cPvE (campaign maps) or rPvE (randomly generated PvE). You will notice my use of singular letters next to card names, which are referring to the cards affinity. G = Green, P = Purple, B = Blue, R = Red. Cards with affinities have two different versions and they vary in effect, depending on their affinity. Affinities are represented by a small dot on the card in their respective color. They have nothing to do with what Orbs you need to play that card though. Orb and Color Overview Your deck consists of 20 cards and usually you get 4 orbs during a normal game of Skylords. The color of the orbs you pick dictate which cards you are able to play. Every card requires a specific amount of orbs too, these are referred to as tiers, shortened to just T. If a card requires one orb, it’s T1. If you need two orbs, it’s T2 and so on. Lost Vigil G, thus the green nature affinity, is a T3 unit. So for starters you need three orbs to play it. One of these has to be frost and one shadow, represented by the blue and purple dot respectively. The color of the third orb does not matter, which is represented by the grey circle. It doesn’t have to be nature just because its affinity is, it can be anything. The order in which these orb colors were built doesn't matter either. This makes Lost Vigil G a semi-flexible card color wise since it does require two fixed orb colors but leaves the third one up to the player. For example, you wouldn’t be able to play Lost Vigil G if you previously picked two fire orbs for your T2. But one fire orb would be fine. Check out the wiki articles for Monuments and Orbs and Cards for more information. Picking the Approach First you have to settle on the broad idea you want to follow. For that I want to present a few simple approaches. The images are meant to illustrate the concepts, not represent a deck. Build bottom up Pick the color you want to start with on T1. Chose cards that build onto that as T2, either using the same color as T1 or a new one. Repeat for T3. Finally look at what’s left on T4 for the color combination you ended up with. Build order: Starting with Forsaken means my first Orb is . Then I pick Rippers , so I am actually still undecided on which color to pick next. After I decide on Vulcan I have to go for fire on T2 nonetheless because it needs two of those. For my last orb I settle on , which opens up Skycatcher B . Could’ve picked Giant Wyrm , Bloodhorn , Tortugun , Tempest or many other cards instead if I adjusted my 4th Orb accordingly. Build top down Pick T4 cards that fit together color wise first. Which T3 cards can be used with these colors if you subtract one orb? Then check T2, finally pick what’s left for T1. Build order: I pick Lost Dragon P as my T4. That still leaves me enough wiggle room to use Tremor as my T3. For T2 I want War Eagle , so that means I have to build my first shadow orb on T3. It also means I have to start with frost. Build for a color theme Decide which color combination you want to end up with, this will naturally limit your available card pool. Then look in which order you want these orbs and which cards fit that order. Build order: then either or . Last one flexible. I am building a Stonekin deck, which means I am restricting myself to and . So I could start with either of them, in this case. Then add because I really want my first Stonekin unit by T2. T3 could be either or since Deepfang R is flexible. Gemeye G is already covered but maybe another card in the deck needs one more or , so I have to pay attention to that. Build for specific cards Decide what cards you absolutely want to use. If there are multiple, check if they fit together into a linear orb progression. If yes, reverse engineer which other colored cards you can add for the color progression to work. Build order: I really want to use Juggernaut . That means I have to start and also add another on T2. On T4 though, I am free to pick whatever. Either make a pure fire deck or go for something else entirely, like Grimvine . But Juggernaut wouldn’t fit with T1 or T2 cards that require other colors than . Build for specific maps Can be important for the more difficult content. Once you learn a maps hurdles, you can try to adjust decks to tackle them more effectively or build decks for them from the ground up. General considerations Combining Color Color order Something important to look out for is that you are actually able to play all the cards you picked at a certain tier. There are some exceptions to this but in general a deck only functions when most cards can succeed each other. Here the Deep One P cannot be played until T3 because the deck starts with :fireorb:. So this is obviously a waste. Either I change my T1 to or I change my T2 to cards that allow it to be :fireorb:. Color restrictions Orb color requirements dictate which cards you can potentially use together in a normal deck that progresses linearly through T1 up to T4. If you want to mix your orb colors a lot, then you won’t be able to use some cards that have stricter color requirements. Something like this would be a so-called rainbow deck. :frostorb::shadoworb::natureorb::fireorb: is the orb sequence and everything works together just fine. I won’t be able to use any cards that need two of the same color. But one of each leaves me with a sizable card pool to choose from nonetheless. Color flexibility Most cards don't need a fixed color for every orb to be played. These are prime candidates to be splashed, which means being mixed with other colors. Here, despite all cards being nature, it actually only requires one specific :natureorb: to play them all. It’s often the case that your T4 and sometimes even T3 color doesn’t need to be something specific because you got your colors covered beforehand. Taking care of the Army Sustain Coming from units, buildings or spells to keep your army and constructions healthy. If at all available, it’s good if you have one source of sustain in the lower tiers, so T1 or T2 and one stronger source in T3 or T4. Sustain on demand in the form of heals or shields will make a deck more forgiving and durable. Without it your units will eventually die to accumulating damage. All colors have access to different types of sustain. Damage mitigation Defensive buffs for both units and buildings. Especially in T3 and T4 there are some very strong options. Having ways of mitigating damage is valuable because especially in later tiers your army is quite expensive. Damage mitigation also makes every point of health and therefore healing more efficient. Think, with 50% damage reduction, it takes 2 damage to remove 1 HP but only a healing value of 1 to restore it again. Damage buffs If enemies die quicker you take less damage and progress faster. Percentage based buffs (% more damage) are usable at any point in the game even if they are T1 or T2. Taking care of the Enemy Crowd Control (CC) Disabling enemies is very important. It’s great to have CC available at every tier but some lower tier CC can work throughout the entire game. Enemies become resilient against CC for a short time after being affected by it. Also, death is the best CC so if you are unsure then it could be a good idea to go for ... Extra damage Either through unit abilities, spells or even some buildings, a solid burst of frontloaded damage can make fights much easier. AoE damage makes big armies more manageable. Well timed extra damage can turn a loss around or solidify victory. Debuffs There are various debuffs available that weaken enemies. Use them to pick off priority targets or make them less threatening. Lock down Areas Fortification If the situation calls for it, consider adding Towers and Fortresses. Depending on the map it will make defending a lot easier. There are even units that excel at this. Utility Meatshields There are various ways to quickly summon big quantities of disposable units. And although they won’t grant ground presence (they don't have an "aura" that allows you to play out cards next to them), they also don’t bind power and can not only deal some damage but also take the hits instead of your actual entities. Mobility Very powerful if used correctly. Means to traverse the map quickly can turn the tides of war. Either to rush ahead when time is of the essence, make a quick retreat or help out on a different front. Economy Anything with energy management: Get energy faster, preserve it, pay less, recover spent energy from the void pool and so on. Very important if you want to keep running on full steam. Every color has different means to achieve that. Charges in your deck are also part of the economy and can be manipulated if you are in need of that. The beauty of Skylords is that you can combine colors very freely, depending on your collection, intentions, preferences and creativity. You can try to build a more flexible all rounder deck or specialize for a particular aspect. This might seem like a lot to keep in mind but don’t worry about it too much. Some color combinations naturally lean more into certain areas so just look at the cards available and see what you want or can get. No need to worry if you cannot hit all the marks. For example, if you have a lot of sustain, you might not need a lot of damage mitigation, although they have natural synergy with one another. Or vice versa. If your deck can deal a lot of extra damage, maybe you don’t need damage buffs. And so on. Units in general After you have a broad idea how you want to build, it’s time to go into the specific card types. Most of the time a unit roster consists of 1 or 2 cards for each tier. 3 unit cards for one tier is already a noteworthy commitment. Using more can become slot inefficient and you might run out of space to fit good cards into your deck in other places. So usually there are 6 to 8, at times maybe even 10 units in a deck. Some possible picks for unit combinations in each tier are: One ranged unit Sometimes just spamming one solid ranged unit is enough. Take care to have enough charges on that one card to play it repeatedly before it goes on cooldown. Two ranged units Two different ranged units can also be used as a duo if they have good synergy. One ranged and one melee unit Mix one melee and one ranged unit to create a conventional army set-up of a front- and backline. One ranged/melee and one support unit Support units can debuff enemies, buff your own or allied entities, shield or heal. Many beneficial effects to pick from if you are so inclined. Investing too much energy into supportive units will slow you down though. After all, every unit exclusively busy supporting is equivalent to one damage orientated unit, that you could’ve summoned instead, not fighting. If you summon a mix of melee and ranged units, the ratio of your army is usually about 1/3 melee, 2/3 ranged. For supportive units, it’s roughly ¾ ranged/melee and ¼ support. In case you forgo ranged units entirely, don’t leave yourself vulnerable to enemy air units. Also consider that only a certain number of melee units can attack one building at a time. Again, these are general guidelines and deviating from them is fine if you still feel like you get everything you need out of your deck. Adding more units can lead to a more flexible army with interesting synergies. Units in Tiers Tier 1 Already on T1 there are many combinations to discover, so go out and try a few or observe how units do by themselves. Tier 2 Things get more complicated here because now orbs can be splashed and there are much more units to choose from. L sized units are expensive energy wise but deliver a good bang for your buck. If you pick a beefy L melee frontliner, you can supplement them with ranged units. But ranged L units can often hold their own as well. L units are also less susceptible to knockback, which can be a real pain for S and M units. Don't dismiss them entirely though. They often boast strong effects and are cheaper to summon. Good airborne units become broadly available on T2. Those are squishy and die easily but their great damage can make up for it if you use their high mobility to focus weak spots like melee enemies or buildings unable to defend against air. Strong traits like exceptionally long artillery range or siege damage that destroys buildings quickly will also be at your disposal. Units generally start having much more interesting abilities. So consider if you want to have these in your deck as there are many synergies to discover. You can still fall back on your T1 units if necessary. Especially some T1 support units can still keep up. Tier 3 Powerful XL units start being common in T3. They are big energy investments but if you take care of them, they can do some serious work. L units are no slouch either, many of them are loaded with amazing effects. S and M units are usually a bit more specialized here. Knockback against S and M units is very common at this point in the game, so they are more difficult to pilot. However, their abilities can turn the tides of battle. Tier 4 The realm of mighty XL units. The colors you picked in your previous tiers heavily influence which units you have available here. T4 L and S units have powerful offensive abilities. M units are incredible supports. It’s tempting to use a lot of different XL units but you should exercise restraint and not add too many of them into your deck, overloading your T4 unit roster. Their big energy cost means you won’t be able to summon them rapidly. Buildings Usually buildings make up the smallest part of a deck. Sometimes as low as 2, especially in rPvE. For some cPvE maps it can be as much as 7 or 8. But commonly somewhere in the 3 to 5 range. Towers and Fortresses Most of them are pretty straight forward and are simply meant to kill enemies. Defending is their most obvious use but they can also be utilized offensively if you can wait out the construction time when building away from wells and orbs and bait enemies into them. Some towers are dedicated anti-air (AA) and some have additional utility effects giving them extra uses past their damage capabilities. These rarely find a place in rPvE decks where you are mostly on the move. But for cPvE they are very good to fortify key locations. If necessary, 2 of these can be added to the deck at different tiers. 3 if you want to lean into it more heavily and have a smoother transition between tiers. More than that would be a very tower heavy, specialized deck. Always have them in the back of your mind though. These classes of buildings usually have much higher damage and life than any unit for their cost or extremely powerful combat effects. So whenever you repeatedly find yourself in situations where your units have a tough time, maybe backup from a building does the trick. Shrines, Huts and Devices Utility buildings, mostly without damage capabilities by themselves but with useful effects. Like sustain, cross-map mobility for units and support for other entities. Being generally very useful almost all decks have a few of these. You will likely find at the very least 2 helpful buildings within these classes, regardless of your decks purpose. Possibly even more. A very important aspect about these is economy management, especially void return. Speeding up the energy return from your void pool can make your game a lot faster overall. Having at least one building that is able to manipulate energy in some way is a big benefit. Either making summons cost less, affecting well output, changing power refund when killing units or affecting void return. Spells Spells are a very important card type that often turns the tides of battle. So it’s not uncommon for a deck to contain a lot of these. Rarely are there less than 5 spells. More commonly somewhere between 7 or even 10 spell cards. There are three spell classes: Spell Requires ground presence. Which means there has to be a conventionally summoned (played straight from a card) ground entity nearby. Enchantments Global effects that can be played anywhere. Arcane Local effects that can be played anywhere. Spell cards themselves have a lot of different uses. Some buff or heal your own units or buildings. Others deal a lot of damage to enemies. And there are utility spells that offer mobility, CC or have uniquely powerful effects. There are even low tier spell cards that are useful throughout the entire game. A good balance of spells that allow for flexibility is very helpful. They can also be used to further define your decks strengths or cover for weaknesses. You can refer back to the general considerations to decide which spells you prefer in order to cover a given purpose. Synergies Decks really shine if you use cards that work well together. Some synergies are obvious and part of the card description. Like cards that depend on freezes or nearby buildings for full effect. Others are maybe not as immediately apparent. Here are a couple pointers to look out for, with many more waiting to be discovered as you familiarize yourself with the game. Damage reduction is very powerful when combined with sustain since it makes every bit of healing worth so much more. Similarly many self-damage mechanics can also be mitigated, so definitely test those in the forge. Healing combos incredibly well to compensate. There are some ways to directly increase effectiveness of healing, so if you lean a lot into health restoration mechanics, these can vastly improve their performance. Mechanics that summon disposable units work great together with those that require sacrifices or corpses. For mechanics that use corpses as a resource, it’s possible to boost their efficiency. If you are struggling with charges or cooldowns on certain cards, there are ways to replenish them during a game. Internal buffs (effects entities apply to themselves passively) stack with themselves. External buffs (effects that for example a spell applies to an entity) don't stack with themselves. Only the strongest one is applied. Damage redirection abilities don't stack with themselves. Units that specialize in abilities that lock them in place can be very potent together as you can use localized effects much better. Damage buffs on your units and simultaneously damage taken debuffs on enemies have devastating effects. Root networks can develop into very powerful set-ups. My other Guides CHEAP and powerful BEGINNER Deck - If you are interested in a very cheap and flexible mixed deck. CHEAP Pure-Fire Deck - If you are interested in a cheap and flexible fire deck. CHEAP Pure-Shadow Deck - If you are interested in a cheap and flexible shadow deck.

-
Not possible. The volunteer devs of this project do not own the IP. They can't put a game up on Steam that they don't even own.
-
I assume promos have to have a different card ID than their regular version? So being able to put both the normal- and promo-version of a card into the deck will always be possible unless some major breakthrough in reverse engineering happens.
-
Eeeh ... that survey result comes with a hefty caveat, really. It's basically asking "The shiny thing is very rare. Would you like it to be less so, so you could also more easily have the shiny thing?" Obviously a decent chunk of people will say yes to that, regardless of what the state the rarity actually is. Promos should just be eye-candy. As far as the Twilight-edition promos you, you don't need them and you never will. The only one that could be argued as enabling something meaningful is the promo Construct, for a Construct-deck. But that's just as easily done with Offering and Rifle Cultists. All the other ones have irrelevant gameplay implications, so what's the big deal? Well, speaking of tangible upsides for promos they have the unfortunate gameplay implications of allowing the regular version and the promo version of a card to be in a deck at the same time. Again, most of the time that's irrelevant but for neutral cards it supports a new deck archetype in the legendary-deck with Ravenheart and possibly also Mo. A problematically high price tag for a deck. But also more of a novelty deck as well, so it's not too bad. Sure, since video games are a visual medium the aesthetics are important. But it's not like the base-versions look like shit. I can also understand the desire to "show off" seems fulfilled in a more meaningful way if it's tied to personal accomplishments instead of getting lucky or slamming a fistful of cash on the table. But here is a question you didn't consider: What purpose do promos serve for the game right now? Well, the follow up question is: Where do you get promos from? You get them from boosters. Exclusively from boosters. Which means if more promos are to enter the game, then boosters have to be opened. And that's an absolutely fundamental part of the game. People have to keep opening boosters for the entire show to run. You already regularly see people arguing that you'd be better off to just buy from the AH straight up. Well, the supply has to come from somewhere. And while regular cards naturally serve as a draw, the fact that you can also ONLY get promos from opening lots of boosters provides vital additional incentive. I do however agree that the game currently lacks long-term goals for players to work towards. I also agree that a stale meta is rather detrimental to the overall health of the game and makes people miss the wealth of options the intended boundaries offer, making it instead seem shallow and solved, hence less interesting. But the position of promos does not have to be undermined or changed in order to work on that.
-
Opening boosters is a big part of the game. It really depends on what you want here. If you are excited about trying new things and experimenting with cards you haven't used before, then open boosters. Try the stuff you get from them. Not having all the cards and working with what I had was a whole lot of fun in the beginning. So if exploration is interesting to you, just open boosters. If you have certain cards in mind that you really need or want to play, then the AH is the better option, obviously.
-
What I value in PtD is that there is no set meta. People feel comfortable to enter the map with whatever. You see all colors, all sorts of cards. Of course you sometimes have someone Enlightening a Giant Wyrm and going straight for the altars but that's nowhere near meta defining without a feeder, of which I have never encountered one. I am not necessarily in favor of keeping the Expert version on a "anyone can join"-level. But I'd definitely want to preserve "almost anything can be played"-level. Obviously making it harder will weed out extremely wacky decks (of which I have seen very few, the vast majority was a bit more exotic but still functional) but in turn you would actually have something to fight. And, yes, like LEBOVIN noted, the altars prevent respawning Aspects on the other maps. It's just something that comes so naturally with progressing through the map that I didn't consider it as a connection that can be used too. In addition to stronger bandits, the Aspects could also be accompanied with progressively stronger and bigger armies until their altars get destroyed.
-
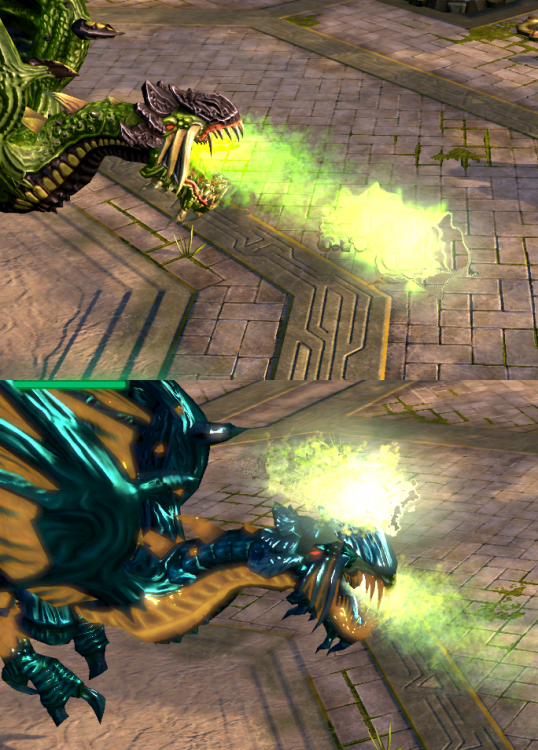
Both Skycatcher Affinities shoot their projectile from the top of their head instead of the mouth.
-
Could even be you that does that.
-
A section on the wall at the starting base cannot be accessed by units because it's blocked by terrain. Also encountered the problem that if you destroy the bases before reaching the wagon the bases are marked as not destroyed until you kill the main base, at which point the quests proceed. As far as aesthetics are concerned, I think the cliffs and edges of the mountains look way too clean and steep. They look, well, modeled by a "raise terrain"-tool and artificial. Take a look at some of the snow and mountain maps in the game to see how they made them look more natural. But that's probably polish to get to once you are completely satisfied with the layout and everything. In the north, I'd move the insta-kill flames back a bit. If you place your army on the small available space before them then melee units can get aggroed into the flames by twilight ranged units. Flying units behave a bit weirdly. They kind of follow the paths that is also accessible to ground entities but at the same time often soar up really high. So after all is said and done, also check the traversable terrain for flyers.
- 35 replies
-
- 2
-

-
- feedback
- community map
- (and 2 more)
-
Yes, I know. It was just an example on how <Unit name> =/= <Unit name> when it comes to gauging PvE-entities power compared to player-entities.
-
The entire takeover mechanic was never functionally implemented into the game. It's an incomplete hackjob full of half measures. LS being immune to it is pretty much an admission of "This is so fucked and not even finished but we don't have the resources to fix existing entities. Let's just block it for now ...". The current "implementation" has multiple extremely powerful effects built into it that aren't even considered most of the time. Takeover insta-kills the targeted entity. So it immediately removes a major threat from the field, which is incredibly potent by itself. Takeover goes even further and adds the entity that was just immediately removed from the opposing force to the army of the player. It's a massive shift in military strength. But those two things are pretty much inherent to a takeover mechanic. Except if you implemented something like a HP threshold and you can only take over weakened entities or something. But the real issues begin afterwards, which are unique to Skylords. Fundamentally speaking, every permanent entity that the player can create binds energy for as long as its on the field. Takeover undermines that by granting assets that are entirely unbound and just from that perspective alone superior to regularly summoned entities. The downside being that they don't grant any ground presence, which is easy to negate by simply mixing in one regularly summoned unit. Nightguard further complicates that by being a T1 unit that can grant access to entities vastly surpassing anything else on that tier by orders of magnitudes. This instantly subverts any maps that attempt to challenge the players with strong opposition on T1. It's almost comparable as if cards like Fathom Lord, Swamp Drake, Stone Warrior or other units with equivalent strength were spells instead of units. Also important to consider that PvE-versions of units are sometimes stronger than card-versions of them. So just because Windhunter is T2 for the player, the PvE-Windhunter is clearly much more powerful equivalent to T3. Because of its on-hit paralyze definitely in the upper echelons, if not low T4. Entities with strength that is equivalent to a player summoned T3 unit, completely energy-unbound and also while insta-killing that entity on the enemies side is just obscene. Even if you look at T2, disregarding Harvester, there are already exceptionally powerful units present and we are talking about commanding those under the aforementioned conditions. There is the argument that Nightguard would be dead if takeover was fixed but that just shows how warped the perception of power has become. Even if it could only swap units that are very strictly equivalent to T2 and 150 energy, you'd still be objectively trading up a whole lot. Not only in military power and detrimental effect on the enemy but also economically. Even if takeover was functioning properly Nightguard would be extremely powerful. So things that have to be considered to actually integrate takeover appropriately into the design of Skylords are: Bound energy. Should taken over entities be exempt from that? Entity power. Which unit-power is reasonable to have access to at which point in the game? Takeover conditions. Should there be additional conditions that need to be fulfilled in order to take over an entity? Clarity. How do you effectively and intuitively communicate to the player which entities can be taken over without them having to look it up externally?
-
As stated, I am very concerned that a simply buffed damage for the wrath immediately creates a very plain and boring green-meta because that orb splash is best equipped to deal with a DoT, up to the point where it becomes too strong and has to be switched. To preserve the diverse playfield that PtD currently offers, looking for other ways to make the wrath more threatening without providing a clear counter that enforces a meta is much more preferable.
-
Main Issue: Amii Monument. It undermines the final objective, making the last orb obsolete. Removes any need to engage with the final camp in any way. Context: The final camp isn't hard to destroy, Amii Monument simply skips it. Additionally, the camp doesn't even need to be wiped out, it's enough to get ground presence up there and clear enough for the Orb to be built. Fix: Make it necessary to capture the fifth orb.
-
Main Issue: The opposing T3 units that players encounter early on represent a major hurdle normally but are instead insta-killed and taken over as unbound entities. Pos3 is useless. Context: Pos1 and 2 are under pressure but it’s usually manageable because there are two people working on the same job. And even if they don’t directly help each other one can still function as a buffer by freeing more civilians if the other is falling behind. As such they are naturally tied to one another. Pos3 is isolated and useless. As long as somebody from the other three has any means to pick off the flame traps, for flyers suffice, they might as well not be there. Pos4 is left on its own and has the most pressure. The map itself provides little means for the other players to help. Fix: Takeover balance pass. Entities with strength equivalent to T3 units should not be able to be insta-killed while also becoming completely power-unbound assets for the player on T1. Fix/Approachability: Just like Pos1 and 2 are tied together and will at least passively help each other out by working on the same goal, Pos3 and 4 can be tied together as well. For example: 3 unlocking artifact-devices for 4 that are one-use spells like Surge of Light, Ensnaring Roots or Suppression on the Living Towers. Maybe even a Wall Breaker. The artifacts become usable for 4 when 3 has cleared key locations. The spell locations are predetermined. Can also work vice versa with 4 unlocking spell devices for 3. Tunnels with limited use that allows 3 to send their own units into the territory of 4. Giving 3 an objective that constructs a wall next to Jornes spawn that will keep him for a few moments longer before he starts chasing after Rogan. Make it possible for 4 to stir up Nature units in 3s territory by progressing, resulting in more Nature attacks on Fire camps. Or spur on Fire units to attack Nature camps.
-
As noted in the community update topic, another thing to look at is the fact that the final wave can be forced by destroying the main twilight buildings. But probably only after the proposed changes are through if it turns out to be troublesome. Guns has some very valuable upgrades that could still be farmed even after gold/XP are considerably adjusted to reward escorting the engineers.
-
Main Issue: I would like to draw attention to what JarodDempsey brought up over in the other topic. Orb stacking to enable a T4 flyer and the defending player having little agency. Context: Bases are well defended but the main hardship are the waves of enemies that need to be managed with crucial altar timing. The power of the waves quickly stacks up to levels that the defending player has trouble holding, which is yet another source of frustration in addition of having less resources. The map is easiest and fastest to clear with one player utilizing the force multiplier that tiers grant and pick off triggers with flyers. Because orb stacking usually also entrails well stacking, the sacrificing player has little to no resources to even play the game. They are left with a very limited pool of options while they get to watch the carry player do their thing. One player is sacrificing their agency in order to enable the other. And because tiers act as force multipliers, it quickly derails a map when one player waltzes into sections with T4 that are tuned for two T2 armies. This makes adjusting the map impossible because if tuned for an even orb split between players it becomes a cakewalk with T4. If tuned for orb stacking it becomes incredibly hard for evenly split orbs. Funneling the maps natural resources (orbs and wells) into one player is a valid approach and usually not an issue when it’s simply one strategy among many. But it is problematic when it becomes the predominant strategy in regular play because it is so lopsided in terms to how the different players get to interact with the game. When orb stacking is the best option, the problem can be summed up with: Nobody wants to be the bitch. But somebody has to be the bitch. And that’s not a good situation to start out with. It makes the whole map less enticing because half the participating players don’t get to engage a whole lot. Fix: Even just adding an orb to the map so that split tier progression becomes more feasible is a great start. The next step would be to look into ways to force split orbs. Like linking two players together and prohibiting one of them from taking more orbs if they already have the higher orb count. This would also directly affect the meta strategy that avoids interacting with the various camps and hurdles altogether by simply spawning a beefy flyer and picking off the triggers. Add additional anti-air measurements to some bases. Not only damage but also CC. Accessibility: Add an extra shadow wave or two that can be fended off, giving players more time to breathe before the fire waves have to be triggered.
-
Main Issue: The instant gate-switch exploit undermines the maps difficulty completely, making it arguably easier than the standard-variant. It is low-execution and has a drastic effect. At the same time letting the gates break prevents incoming waves from building up any significant power. Context: As noted, the main reason why the exploit is used so heavily is just the immense pressure the attacking waves build up. Including really powerful anti-player mechanics like card-blockers and Twilight Dragons. Clicking the gate every 30 seconds is not an execution heavy, intense strategy that elevates gameplay. It's a chore. Letting the gate break is what the player is supposed to avoid because the resulting downside is that both sides have to defend against incomes. But handling the gates correctly and responsibly, i.e. in the way the game tells the player to and letting one side defend the waves while the other progresses, is in fact the LEAST rewarding strategy. The game should never lie to the player so that it turns out not completing objectives as intended is more beneficial than doing so. Fix: Adjust the switch-timer so it can no longer be used to prevent waves from attacking. If the gate breaks, the waves hitting both sides progressively increase in power as they normally would with gate switching. Approachability: As noted, replace at least one Twilight Dragon with an Abomination. Nobody will spontaneously fall into a boredom-coma and auto-win the map because the very first big wave doesn’t have a Twilight Dragon anymore. Adjust the appearance of card-blockers. Not being able to use any abilities or play out new cards in an important area is an extraordinarily powerful effect against players. Pushing these back a bit would leave more opportunities to react to incoming waves. Adjust income spawns so that the ideal time to switch the gate is around the time it starts to buckle and the in-game callout happens. This is the most natural and intuitive time for players to switch as the game explicitly states it and should be rewarded. Adjust well placement on the east side. While west can take two wells in total safety the east has to clear big hurdles first, leaving it at an economical disadvantage.
-
Main Issue: A commonly used tactic to open this map is claiming ill placed wells to the east over a cliff. Context: The existence of a defended wall right behind these wells heavily suggests that the actual path players ought to take when attacking from this direction is overcoming said wall and then proceeding as usual. Instead one can circumvent the defenses and have a save haven to launch an attack from without actually fighting ones way into the camp. Fix: Move these two wells far enough away from the cliff. Where to put them is important though because they could get attacked by twilight entities running through the middle. It may be possible to simply switch positions with the Bandit Tent right next to the wells.
-
Main Issue: The Windhunter guarding the Cultist Master that summons the Death Ray cannot deal damage to the Dropship as long as it stays on the move. Which is pretty obscure. This allows for an instant Death Ray without committing any additional resources. Context: The Death Ray is a pretty powerful asset on the map. Although being slow it can be a big help locking down a direction or provide air support. Especially when the players army is still on T1 or T2. At the very least the player should attack the Windhunter with SOME additional airsupport. Fix: Make the Windhunter hit and consequently paralyze moving targets.
-
Destroying the power shrines is the maps objective. Players are supposed to destroy them, so obviously they will attempt that asap. Grabbing T2 without also destroying the power shrine right next to it is counterintuitive. It's only really a thing that people think of doing once they use the hidden, underlying mechanics of the map to make it easier for themselves. I don't like the idea of leaning into hidden, counterintuitive mechanics at all. If anything it should be other other way around. Moving the top left shrine into range of the orb so it will inevitably be destroyed once players claim it. Not destroying the shrine is the exact opposite of what the map tells players they should do. And that is supposed to be the optimal approach? Reward players for following the path intended by the map's design instead. If you want players to build the orbs without destroying the shrines, then move the shrines into the middle part of the map, which is currently only holding wells. But also mark the location of the orbs with some other objective. So players are enticed to first clear the orbs and then go for the shrines separately. Do not obfuscate things unnecessarily and create situations where players are compelled to ask others what they are supposed to do and the answer ends up being that the game basically lied to them and they ought to do the exact opposite of what the game it telling them.
-
Main Issue: The biggest hurdle is the T1 → T2 progression. It also gets dominated by T1s that can clear the Vileblood-camp quickly and without much trouble. That there are two other camps each side that are vulnerable to different approaches (Whisperer-camp and Dancer-camp) gets drowned out simply by the close proximity of the Vileblood-camp. Context: The first camp is extremely fortified and overwhelms a T1 army with ease, especially combined with the Maelstrom cutting off a potential retreat. Simultaneously stronger and stronger waves have to be intercepted while the most reliable source for power, the Nightmare Shard, is constantly getting contested. Players intuitively attack the closest camp but get crushed by Vilebloods and the Deathglider with powerful spells trapping them in this meatgrinder. Fix: Takeover balance pass. Entities with strength equivalent to T3 units should not be able to be insta-killed while also becoming completely power-unbound assets for the player on T1. To allow players to make more informed decisions about which camp to attack the three outer ones should be permanently revealed and exempt from Fog of War. This way players can gauge the military strength and form an attack plan that doesn’t simply involve going to the closest one (which then goes the usual way of getting crushed, asking in chat and then cheesing the map with some meta strat). The ideal result of this change would be someone looking at all three camps and going “Holy crap, I am not messing with those Vilebloods and the Deathglider. But I can probably handle that other camp …” As an added benefit it could entice players to play the map in drastically different ways and orders, making the possibilities it offers more apparent instead of simply always grinding against the Vileblood-camp. Approachability: Cutting back some of the idle time in the beginning sounds like a good idea. Replace the Twilight Bombard in the middle with a Hatecaster. That way players could approach the Dancer-camp more easily. Slightly reduce tower-presence in the Whisperer-camp to make it a more attractive target. Increase the intervals between the Maelstroms in front of the Vileblood-camp. This would leave players more room to maneuver. Increase the intervals between the Maelstroms in front of the Whisperer-camp. This would give players more time to attack the towers.
-
The problem with the Midwinter is not only that its slow. But also that it is comparatively useless if you consider that there are four players waltzing down the path with T4 armies. There is just no point in it even being there at that stage of the game. Players don't need it. Even if it was powerful. It's just completely redundant. Maybe increase enemy defenses on the common T4 base and let players call the Midwinter before that in order to help clear their orbs.
-
Main Issue: Trapping incomes. A low-execution trap on ranged enemy incomes using Mark of the Keeper disables attacks down south. The same can be done for a part of the top incomes. With no more resources needed north and less needed south, the maps difficulty is completely undermined. Context: The map boasts high pressure on two fronts, both north and south. Power well placement next to the walls locks the player into a harder position to defend. Intuitively you'd fight your way to the teleporter while the more optimal choice is to rush through defending enemies. Not doing this will waste valuable time and leave the player in a worse economical and strategical position. Combined, these factors create a very punishing environment and incentivize breaking the game rather than engaging with it. I know that trapping is an exploit that was decided should stay. However, I think Crusade warrants an exception. In cases where a low-execution trap trapping fundamentally warps and breaks a map it should definitely be addressed. The whole concept of Crusade completely crumbles because of that. Even if trapping is to stay I don’t see how this particular instance is remotely acceptable. Fix: Since the entire wave can be disabled by trapping a single squad, I'll assume all incomes run on the same trigger. So the incomes could be split up into multiple individual parts, running on individual triggers to make it less susceptible to trapping. This way the part of the attack wave that can be trapped and disabled (the one containing the ranges squad) can be isolated while the remaining part keeps coming and needs to be fought. To compensate for the more consistent attacks the timers could be slightly longer. Similarly, up south the initial waves of ranged squads could be split so it can only partially be trapped or not at all. It’s entirely on the table to not remove trapping entirely but making it less effective so the map remains functional. Approachability: The appearance of Twilight Dancers attacking down south could be pushed back a bit. This would make it easier to at least defend the wall for a longer time. Adjustments could be made to make fighting your way to the teleporter not that much worse than rushing it. The timer for the first wave could be extended while also making the teleporter unusable unless enemies are defeated.
