Search the Community
Showing results for tags 'rPvE deck'.
Found 5 results
-
Hey everyone, I was looking for a place where I can find multiple RPvE decks for inspiration for new decks, but I did not find it. The first thing that came to mind was to just create a place ^^ Below you can find a couple of my favorite RPvE decks that can do (at least) difficulty 9. I would love to see your own favorite or unique decks as well!


-
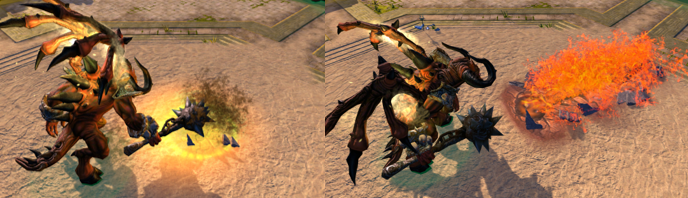
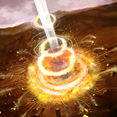
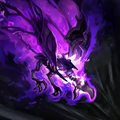
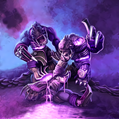
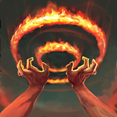
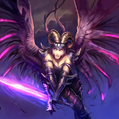
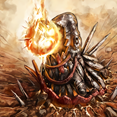
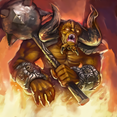
 Welcome to this guide on how to construct and pilot the Batariel deck. This guide will go over all the ins and outs of the deck, what to do in certain situations, and general tips and tricks for both beginning and more advanced Batariel players. Let’s open the Gates of Purgatory and jump in. What does Batariel do? Batariel is a Tier 4 card. It is a rare card and got two affinities. Its first ability is Gates of Hell. ACTIVE: Activate to smash Batariel's giant mace onto the ground, dealing damage to enemies in a 10m radius. The impact will crack open the ground, allowing an enormous cleft to emerge that will erupt fountains of red-hot lava after 5 seconds. Reusable every 30 seconds. Affects ground targets only. The second ability is Infused/Tainted Purgatory. PASSIVE: Unit enters stages of rage in battle depending on how much damage it has recently dealt. Either it does more AoE damage around himself, or he shreds the enemy’s armor, depending on the affinity. But if there is no damage dealt for 4 seconds, the flames will abate again. For this deck we will only be using the fire affinity, and all future references, unless explicitly stated, will refer to the fire affinity Batariel. The fire affinity is used because his passive does more damage, and the shadow affinity reduces the armor of the enemies. Reducing the armor is only relevant if you have other units to do damage as well, in a pure fire deck for example. How is the Batariel summoned if you do not have four Fire orbs? Enlightenment. Enlightenment is three orbs, two of which nature, and it allows you to use any card for the next 20 seconds without orb restriction. You do still have to pay the cost, 300 power in this case. The Deck Let’s start with the Tier 1 options this deck has. When playing a Batariel deck, you have three factions to choose from. Either you start with fire, nature, or shadow. Frost is by all means the worst faction to start with, as a general Batariel deck does not contain a single frost orb. Fire start With fire, most of the time you want to start with 3 Nomads (Nature affinity). An alternative could be Sunderer in some cases where you try to speedrun certain maps, but Nomads are recommended over Sunderer as they heal themselves and can hit air with their ability and are in general more flexible. The second card you want is Mine. Mine is an excellent card to take out the enemy units at your t2 camp. In bandits and Twilight maps, often one Mine should be enough. If you are fighting Fire you could use only one Mine, but if you are less experienced or are not as comfortable with a fire start, you can use two mines. When you encounter Lost Souls, you always place one mine and wait with engaging the camp until a second mine is off cooldown. The reason for this is that you may encounter Tier 3 units like Mana Beasts, one mine if often not enough. If there are also units that give shields, then two Mines might not be enough, and you need to place a third one. The third card you want to bring is Eruption. This card is excellent in taking out pesky (flying) units or to help out your opponents when they are in trouble. Eruption has one other very important use, which is to take our crucial spawn camps. One eruption does 300 damage for 75 power. All small spawning camps have 1200 health, so four eruptions will take out the camp and will set you back 300 power. This tactic is the mostly used in RPvE difficulty 10, but can also be utilized, and encouraged, in RPvE difficulty 9 when you try to clear the Tier 3 camp. In difficulty 9 and below, one to two Eruptions are often enough as you have your Nomads hitting the camp as well. Blaster Cannon an optional card. This card is not necessary in RPvE difficulty 9 and below, but is almost a must-have in difficulty 10. The reason for this is that there can be flying enemy units on your Tier 2 location, which does not happen in difficulty 9 and below. Blaster cannon fire affinity does insane damage versus flying units and because of that it is preferred over the shadow affinity. The shadow affinity also hits air, but traded extra damage against flying units for extra damage to ground units, but that damage is negligible. Sunstriders can be a nice addition too as they could replace blaster Cannon, they are inferior, but more versatile. Shadow start Shadow starts are very straight forward. The first card you want to bring are Forsaken. Forsaken do insane damage and have an awesome ability to do even more ridiculous damage at the cost of dying after the ability wears off. Nox Trooper is a decent alternative to Forsaken, and is far superior against Crystal Fiend camps, where Forsaken get destroyed. Also, they have a better trapping capability as they shoot each unit in a squad one by one. And base damage output is higher than Forsaken, even when they lose overall to frenzied Forsaken especially when getting rid of the spawner. Dreadcharger also a decent alternative, but very situation. Motivate is a card shadow can not go without. This card gives a near-dying unit a new purpose by allowing the same units to do more damage for the next 30 seconds. For Soul Splicer, we want to have the Nature affinity. You want to build this shrine outside the enemies range, as it takes some time to construct it. When constructed, it can collect corpses around itself and a select area. These corpses can be used to heal your Forsaken when they are within the range of the Soul Splicer. A general tactic when approaching the Tier 2 orb is to construct your Soul Splicer and wait until you have 6-8 Forsaken, depending on how comfortable you are. With the Forsaken you want to lure the enemy towards the Soul Splicer, so it can collect their corpses whenever they die. When fighting the enemy, use motivate on one of your Forsaken to allow the others to do more damage, and to have your first corpses inside the Soul Splicer. You want to bring an Embalmer’s Shrine if you bring Shadow Phoenix as your Tier 2 unit. You want to construct two Embalmer’s Shrines before doing anything else. If you play a shadow start in RPVE difficulty 10, then it is recommended to bring 9-11 forsaken, Lost Souls can require more, 3-4 squads gets frenzied and immediately attack the spawner. The remaining units clear the units with the help of a Soul Splicer and Motivate. Nature Start Nature t1 is relatively effective, in some cases better than fire, especially in solo. Basic composition is Windweavers + Dryad (Blue affinity) + Ensnaring Roots, for difficulty 10 Hurricane and Mark of the Keeper are very strong as well, and may be essential. Root is preferred over Hurricane is because it also helps vs non-S-units up to Tier 4. The edge that nature has over fire is solely not having to build a fire orb until an orb switch, with access to cultists + furnace and breeding grounds (especially useful with Shadow Phoenix against stronger t3-t4 camps) Windweavers is the go-to damage dealer for Nature Tier 1. They are versatile and can shoot multiple enemies at once, which makes them excellent in clearing early camps. Dryad provides the units around her with a damage reduction buff. One Dryad is often enough, but keep in mind that she does not buff herself. Having a damage reduction buff on your units allows you to use less heals. Surge of Light is great. It is super good to heal your low health Windweavers, and it scales super good into the later stages of the game as you can still use it to heal your Batariel. Ensnaring Roots is a must have. This spell can create distance between the enemy and your Windweavers. This card is also very effective when you need to take out a spawner in difficulty 10. Mark of the keeper is a must have in difficulty 10, but in difficulty 9 or lower it is not needed. No Shaman? Yes, Shaman is not used in Batariel decks. Shaman is a unit that rarely attacks, and it binds power. For every Shaman you have, you have one Windweaver less. There are only 20 deck slots, and Shaman should not be in there. Tier 2 options On Tier 2, there are a couple options to choose from. When you start with Fire, you are generally safe to use your Nomads + Mine and use Eruptions on the spawning camp. In difficulty 10, you can bring Gladiatrix (Nature affinity) with Curse of Oink, or you can bring Shadow Phoenix with Embalmer’s Shrine. If you start with Shadow, your best option is to bring Shadow Phoenix. You need three Shadow Phoenix to kill a small spawning camp. or When you are playing difficulty 10, if you start with fire and want to use Phoenix, you will need to do an additional orb swap for your Batariel. This sets you back some power, but might be required sometimes. Less optimal, but alternative options are Bandit Minefield and Lavafield. Core of a Batariel deck The core of a Batariel deck are Life Weaving and Unholy Hero. Life Weaving keeps Batariel alive, and Unholy hero allows the Batariel to do insane amounts of damage. Heals are important in every deck, Batariel decks are no exceptions. You should bring at least one heal spell, such as Regrowth. It is recommended to bring a backup heal in case you run out of Regrowth charges or the card is on cooldown. Two options are Surge of Light and Equilibrium (Frost affinity). It is totally fine to bring all three heal spells, as even some veteran players do. Very important spells to bring are both Frenetic Assault’s (one is mandatory, the other is quality of life), Infect (mainly quality of life, you can do without) and Disenchant (depending on the enemy faction). Frenetic Assault makes sure the enemies are not attacking your Batariel, but each other, which gives Batariel more survivability. Both Frenetic Assaults are recommended as they have a long cooldown between casts, and you might need more than one in a difficult camp. Infect serves a similar purpose and cleans up remains. After the enemies kill each other with the Frenetic Assault effect, two Nightcrawlers will spawn from each corpse, up to 10 corpses. 20 extra units to soak up damage and to do more incremental damage. Batariel needs to have his burning passive ability active as soon as possible. He does this be damaging enemy units or buildings. If Batariel is not able to attack, due to a paralyze effect, the chances are the Batariel will die. To solve this, Disenchant is a must-have when you fight enemies like Bandits and Twilight. Those otherwise annoying Willzappers and Windhunters are now useless when you bring Disenchant. Bandits have one boss that permanently reduces the attack by 50% when it does damage: the Equestrian Twins. This debuff can also be nullified with Disenchant. There are two more must have cards in every Batariel deck, which are Curse of Oink and Nether Warp. Curse of Oink was mentioned earlier as well in the Tier 2 section, but it is also an all-star when Batariel is out already. Curse of Oink is an instant CC (crowd control) spell. Whenever Disenchant is on cooldown, or whenever there are scary enemy units, Curse of Oink can keep incoming damage to a minimum. Keep in mind, this has no synergy with Frenetic Assault. When entering an enemy camp, you want to position your burning Batariel in a location where it can either hit as many enemies as possible, or where it can take out a spawner. Nether Warp is the solution for this. After you Batariels AoE burning is active, you can warp him further into the camp. Keep in mind, all the enemies will be able to target him, so make sure you have some heals ready and Life Weaving active. Recommended is the Nature affinity Nether Warp because the Frost affinity debuffs your Batariel with a slow effect. Yes, the Nature affinity heals your opponents units too, but that heal is insignificant compared to the damage output of the Batariel. When you have your core, there are one, two or three spots left for other cards. Thunderstorm is the one that is most recommended bringing as it is such a versatile damage spell. The second card is Soulshatter, as it can decimate smaller camps on its own, but you need to be careful as the damage also damages friendly units. The third option is Earthshaker. This card can take out crucial enemy buildings. This is optional, as Batariel should not have any problem taking out buildings on its own, but can be a quality of life. Void return Because spells are cycled non-stop in this deck, void return is of utmost importance. There are two options available for a Batariel deck. Either Shrine of War, or Cultist Master + Furnace of Flesh. Shrine of War is the best void return card in the game for multiplayer maps. You use spells whenever you want to kill enemy units, and whenever enemy units die, the Shrine of War gives back void power. It is the perfect synergy, there is however a big downside. Shrine of War costs 150 power and has no continuous upkeep. You will need two to be able to keep it running constantly. You will need to invest 300 power, which delays your Batariel immensely. Shine of War is recommended in fire starts. Shrine of War has been nerfed and now require 2 fire orbs, which forces you to play either the alternative option with Furnace of Flesh and Cultist Masters, or rely on a teammate. The ability of the Cultist Master is free, and it summons three Nightcrawlers that die after 20 seconds. When they die near a Furnace of Flesh, it gives back void power. Similar to Shrine of War, you will need to maintain the upkeep of this. It is recommended to have around three Cultist Masters to give reliable void return. If you have more than four, then consider building a second Furnace of Flesh or to alternate between the activations, but this requires way more micro. This option is preferred in Batariel decks that start with Shadow or in solo RPvE maps. If a teammate has a Shrine of War, you can kill the Cultist Masters and the Furnace of Flesh, as Shrine of War is superior to them. Fallen Skyelf Fallen Skyelf can play a critical role in certain scenarios, vs bosses like Twilight Hulk or Abaddon, which have very high damage output, or Hellhound who will eat all your units if you don’t kill him quick enough. And helps overall vs bosses. Plague Double Shadow starters sometimes gravitate towards triple shadow instead of switching to fire. These decks require more precise play due to the lack of cards like Disenchant or Earthshaker, but end up being significantly faster upon being executed well, given how strong Plague is. The spell speeds up camp clears in general and sometimes even allows very powerful pathing advantages as a spell combo around Plague + Infect (+ Frenetic) sometimes removes T4 camps on its own (ideally this even works against small boss camps i.e. Umbabwe/Bandit Lancer). Sometimes Disenchant cannot be removed upon facing factions like Twilight, but whenever there is an angle to cut the fire orb Plague should be your go-to choice when considering the orb swap with a double Shadow start. How to kill a camp When entering a camp best to attack a unit, preferably flying, because Batariel doesn’t dance around those, like he may sometimes when trying to attack ground entities. Also, because Batariel does more damage per hit with his normal attacks against flying units. If power levels/refund permits, then Batariels ability is a great way to enter, use it on a building cluster or a boss. Best to warp after front buildings are destroyed or nearly destroyed (possibly finished by infect). Infect should also be used when entering the camp to maximize the crawlers spawned, after the buffs with frenetic, not necessary, but can be useful, plays an especially important role vs Lost Souls and Twilight bugfest. When playing vs Lost Souls always have at least two Batariels for later camps, keep one in front to tank all the debuffs and for ground presence to cast cc spells against spellbreakers, and teleport second Batariel in the back line, who will take care of the camp. Preferably, use infect to soak up the damage and all the debuffs as well. In case of 2 Lost Bane presence, drag the camp out use spells (with infect) and try to either use Batariels ability on Lost Bane closest to the spawner, and then warp, or if possible just warp in. Can also try to power through after dragging the camp after getting rid of Lost Banes and having crawlers, enemies won’t pose as much threat even if they respawn, just keep eyes on Spellbreakers. Against Twilight Infect is crucial, especially against difficulty 10, where Twilight gazers are bugged and reflect huge damage back to Batariel if not careful, crawlers soak up that damage. Best wait to approach them is to use Batariels ability and maybe even port them together in a bunch, then frenetic/oink and use Batariels ability. But be careful as you won’t have nether warp available to get close to the camp. Bosses Against Bosses, either focus them with Skyelf support, if they can be killed within the ability right away, or warp in the backline and deal with a boss after taking out the majority of the camp. Raven ship is very tricky to kill with a Skyelf, she most likely will get focused, must use infect and possible defensive spells on her, or be on a safe side and deal with the boss without, it’s not too dangerous to Batariel, just have to oink gunner when it spawns. Twilight Dragon boss also takes a while to kill, and Skyelf will heal it if used too early, so it’s better to used when more than half hp is depleted. Nyxia debuff can be disenchanted, which means that the Batariel can freely attack her. Hellhound is best if approached with at least two Batariels like all late game LS camps, and infect must be used. Try to get rid of him asap, before your Nightcrawlers die and he starts eating Batariels. Killing him is not a problem, surviving is. Due to the Lost Spellbreakers Disenchant, engaging with Frenetic Assault (both work here) or Curse of Oink may save you a lot of trouble. Can be tricky, especially in non-motm maps where you don't know exactly where they're located. Against higher tier Souls camps with Banestones: 1 Banestone: Try to disable the Lost Spellbreakers as mentioned above, engage with Batariel ability onto the Banestone and port into the camp. Can be hard with Lost Dragons and such where the Batariels ability couldn’t be used, in that case Disenchant (G) works well. 2 Banestones: From my experience it's best to just wait for the camp wave to spawn into your direction, use Infect on it and engage the camp with the Nightcrawlers before Batariel to distract the Lost Spellbreakers. Try to get one Banestone down as fast as possible and use Frenetic Assault + Nether Warp into the camp (hoping that Bata burns at this point) Fire Bosses: Abaddon, you must avoid his ability at all costs, either send a unit in front to take it, or just dodge/warp in the backline and deal with Abaddon when you have taken care of the camp. Golem should be attacked with ability for the majority of HP, auto-attacking is dangerous. Magma Fiend boss is the most difficult to deal with as a Batariel deck. Must have at least 2 units, if only playing Batariel in t4, have 1 or 2 extra when approaching it, go in with a single Batariel without any buffs and instantly warp in the back line and cc the camp, infect will help as well, then buff Batariel and take care of the camp. After the majority of the camp is gone, send in other Batariels to tank debuff, and buff the one not being attacked. For all these bosses Skyelf is crucial, may not be mandatory. Keep Fallen Skyelf in a distance from Abaddon, she will die very quickly if she is close. General tips You might be asking, but what about Unholy Power? That increases the damage of Batariel too, right? Simple answer, no. Unholy Power is basically a dead card in your deck, as it does not stack with the burning of Batariel. When you fight Lost Souls or Fire, Disenchant is not needed, as these enemies has no way of stopping your Batariel via cc. When you start with Shadow, you can stay and you do not have to switch an orb to fire. If you spawn your Batariel at Tier 3, it is recommended not to build the two wells at your Tier 4 orb location. This will set you back 200 power, and will only pay off when you are floating in power anyway. Batariel does more damage with an attack than against non-flying: XL Ground: 481 L Flying: 697 XL Flying: 1045 This is due to the longer animation when attacking flying units and as the damage per 20 seconds is fixed, attack types with different execution durations deal different damage. @Volin has a in-depth Twitch Stream about Buffed Batariels, where you can see some gameplay: https://www.twitch.tv/videos/1423615481?t=00h06m39s Special thanks to the following people for helping out with this guide! @arabikaa @Damo @Donaar @Kapo @Mocaak @RadicalX @Volin
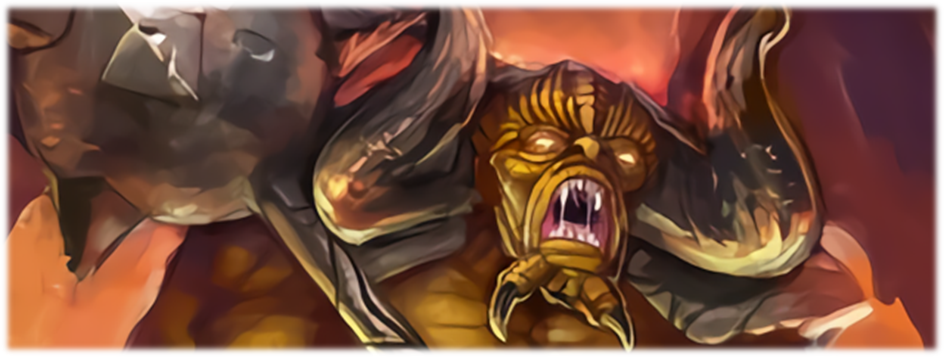


-
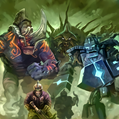
 UPDATED to match 1y-patch from 18.12.21 Hey all, since we have many requests here, but few decks are shown pro-actively, I would like to show some of my RPVE decks (deck kits) over the next few weeks. Each of the decks will be limited by a "theme", they will prolly not all be end-to-end meta approaches - especially since they are relatively simple to get to the point in the BG: Bata = Meta And the rest will run behind. But since I'm a little bored with the Batariel right now - let's take a look at what other fine decks for rpve are out there. This first will touch the meta hard anyways 😄 Theme/Scope: In any row , as much meta as possible and as independently as possible from other players help/heals. Playstyle: Micro > Macro Budget: most expensive Addresses to advanced/expert players Core Deck: - Unity (B) and Bloodhealing give the needed sustain - Heavy spell dependent - the meta makes dmg, distracts enemy via Frenetic, Infect gives dmg and meatshield, the dmg spells clean up most of the units - heavy voidmanipulation via Shrine of War or Cultist Master/Furnace of Flesh enables you to perma use of your spells and abilities - strong T4 options unit wise, with mass Bloodhorns as main carry - T3 is carried by spells and can handle ANY situation - T1/T2 is very flexible and can be designed according to taste T1 - Either or Fire: Nomad (G), Mine, Eruption (possible BG10 addons are Blaster Cannon, Suppression or Sunstriders if needed) Shadow: Forsaken, Soul Splicer (G), Motivate (possible BG10 addon is a good mate supporting your t1 with fire :P) T2 - in any case No matter what your t1 has been, your want a shadow orb as your second. If you started fire you want now to move asap to your double shadow, if you started shadow you want to raise your Boosters NOW 🙂 Isn't shadow T1 better then? Perhaps sometimes but not in general. Every start has its own pros and cons, the pros of a fire start is that it is lean, fast, self healing, team-friendly and due to its spells strong and flexible. I often prefer to run into a BG9 T3 camp with 3 nomads and my fire spells rather then having a few Forsaken and almost no support. Cool-kids-t2-stuff is - Best-in-Slot solution is probably Shadow Phoenix/Embalmers Shrine (almost mandatory for BG10) - Gladiatrix (Gladis shine only really with Green Support, but mass Gladis with good positioning can do the job, more an advanced players solution I assume) - Windhunter is the T2 alternative to Gladiatrix now (Bithday Patch) and outshines Gladiatrix in stats - Firestalkers (nice siege, cheap throw-away t2) - Harvester or Shadow Mages can be pure Shadow options if that suits, Undead Army can scale quite ok'ish with Bloodhealing into T4) - Skyfire Drake is not big carrier, but can do an insane job on some maps - Bandit Minefield is okish, but usually not worth the slot in this meta approach. If you come from Fire T1 to Shadow T2 you already bring your mine and if you start Double Shadow ... you get it 😄 - Undead Army shines with Blood Healing and is almost a must-pick for harder situations. This combo is way more flexible as the Grim Bahir option that I posted in the first run Be aware that map depending is one of the weakest (not weak, only in relation) options aviable but usually not much of a problem. T3 - you want to have now - time to shine! At the T3 stage Void Manipulation and your -spells kick in the door! Though some nice T3 units are aviable the only options for this deck are imo Cultist Master (if you prefer Culstist/FoF over SoW) and Fallen Skyelf (as boss-killer support in T4). T4 Camps can be taken out with Nomads/Forsaken and spells and so can be handled a possible close camp. As far not mentioned interesting T3 cards are: - Incredible Mo (not really needed here but always nice to have one) - Soulshatter (if there is a possibility to take it, do so! You want to have as much dmg-spells as possible) - Amii Monument (only for solo, but there very handy) Last word on t3: No, I did not oversee Sandstorm - not worth a slot 🙂 T4 - finally Carrier is the Bloodhorn (BH) - fast, strong dmg, heals nice via stampeding buildings. Get out 2 and play more as soon it is possible, if you play a second unit get it in the mix after the second BH. Always let 250+ energy left to have spell energy. Before engaging a camp bind your units together with a Unity (b) First spell when engaging is either Frenetic or Cluster (Amok can do the job too), the other second, asap Infect then further according to the remaining priorities. I like to use Bloodhealing on Undead Army skelletons or Grim Bahir crawlers - that a reason for the Grim Bahir for me, though ofc this is not mandatory. Bloodhealing does a nice job too on a BH with Unity running, it does not loose much HP. Earthshaker is a nice skill, but does not perform as stong as we know it in this deck due to the mass BH spam 🙂 If you have room it can prolly clean up last buildings, but I tended to cut it. Just to say it: OFC you can do various T4 units in the mix here, but naming them all would go beyond the scope of this. Though this is more a deck-kit then a deck, I want to give ideas how to play a faction not to give an overview over the faction as a whole. Any more options: - The classic shadow buffs (Life Weaving, Unholy Power & Hero) do a great job on BH! - Never go out without your Disenchant - Warp is always nice to have - Offering (g) can resett your stong spells, if you decide to do so, prolly cut the Cluster (P) (this will get an even nicer option with the comming Grim Bahir changes (Test Server)) - purple Amok gives a nice damage buff and can either replace one Frenetic or be added. Beware to play it not on your units, as they will take friendly-fire then. Also be aware not to play it on your teammates units (same reason) and this is grief play. Bosses you struggle with ... none that comes to my mind. Any other dangerous situations for this deck: Engaging Twilight Dragons with a spell-protected (Twilight Negator) Willzapper nearby (a ugly situation for most decks). Play your Unity as late as possible and strike HARD with the first engage! If more questions come, please feel free to ask or discuss this, I will edit this "guide" Personal, tested(!), samples of my decks are BG9 allrounder for random maps with random groups: BG10, adapted for 1Player-MOTM 2021-06 BG10, 4player, random maps with random groups, assuming SoW by Mate btw one Joker slot Replays deleted as they are broken due to patches. I attach a few replays to see it in action. Be aware, non of this replays is "perfect" or aim to be that. This are raw takeouts to give you an idea how this can be played. I played this deck a lot in the last weeks and can assure that it can work in ANY BG9 situation completly independent from other players heals and can even carry a group. Even the BG10 performance was not as bad as you may think without the perma present green splash 😄 BG10solo_pureBandittest A random BG10 solo in below 23min, easy Bandit map, but still not bad I think. Lost my t4 orb in the second last camp that forces me to retreat. This was my first test in BG10. Here a pure BH T4 w/o Grim Bahir BG10_4player_Pure_Bandit_Test Super nervous played mess - my first group attempt in BG10. In 14min I ran sleeping into a dragon = thx for the rescure group ^^ But hey, this is normal BG10 random group gameplay, nobody is perfect. Really not a carry here, but neither a total fail. Straight average BG10 shit BG9_Bloodhealing Showcase <- recommended!!! A quite strong performance in a 4player BG9 with Command Walker Boss in the End (for me alooooooone) 🙂 BG10_SOLO_MOTM_ PureBandit_rank7 And as last one the current 1player MOTM. This is a first try, I swear, and far from clean, but still a good perfomance I think and at least for now it is a top10 time. Finally: You have feedback, suggestions, nice replays or storys about this deck, please feel free to post below! I am looking forward to your reactions 😄 Is this helpfull? Want more of this?


- 4 replies
-
- 7
-

-
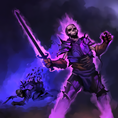
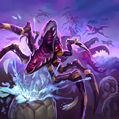
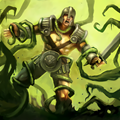
- Bloodhorn
- Bloodhealing
- (and 4 more)
-
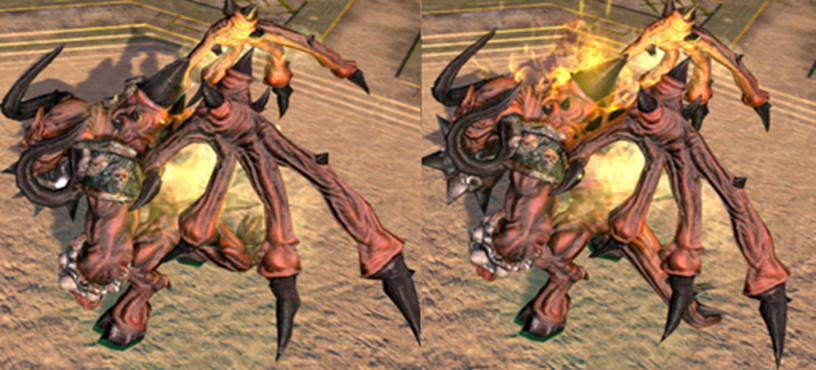
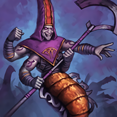
Hey all, as the last deck that I showed was more an super-expensive expert deck, let's speak about the most beloved beginner faction this time - Stonekin. Prologue: Even though I don't want to present simple solutions with fixed 20 cards, I have to split the Stonekin topic into 3 parts. There are always nice cards that you can not take because of the limited slots, or other cards that offer other options, but that would be just another deck. Stonekin is a great example. So that the tension is not quite so unbearable, already the outlook for you: 1/3 will be a classic Stonekin deck with (any row), a macro deck, with a small budget and equally popular among beginners as well as suitable for them. 2/3 will be a bit more expensive and a bit more advanced, taking advantage of the -meta. The deck becomes (slightly) faster, significantly stronger, but in the same measure becomes more "vulnerable" and requires significantly more intervention from the player. 3/3 will follow with the next patch as I have some changes in view on the test server. Here we will focus on the freeze mechanics and build a nice strong, but even more micro-intensive deck. A great fun! 1/3 Classical Stonekin Theme/Scope: classic Stonekin deck with (any row), prefering Stonekin-Faction over pure Faction where it makes sense, easy to play Playstyle: Macro Budget: low budget Addresses to beginners Core Deck: (as RPVE Decks mostly happen in T4, every RPVE Deck considering should be done from T4 downwards imo - just to explain my approach) - Our scope sets Grinder as core unit as there are only 3 cards in this orb range. The other 2 cards have no value for us here, as they are about defense, a thing that we don't even consider for a second in Battlegrounds. Always forward, never backward. - The Grinder is an incredibly good tank, but unfortunately does very little damage - we need a Damage Dealer (DD) and here Gemeye offers itself, more on this below - Since we don't have good void manipulation ourselves, we rely more on armies than spells in all tiers. ("more" does not mean only) - We use our nice crowd control (CC) spells that we have through all tiers - We use large area buffs and heals for maximum efficiency with only a few interventions - the 2 dmg Spells that we have speed up killing alot T1: Either or Basically, with any deck, keep the T1/T2/T3 as large as necessary and as small as possible Nature Start - A classic, the most common start, and yet something to talk about, many do a lot "wrong" here - Windweavers (WW), Surge of Light and Ensnaring Roots are usually set and enough for any rpve9. This is the gold standard. - Dryad (B) is a great addition, but to me a waste slot as it is not needed. Shaman is a nice Quality of Life (QoL) addition but usually not needed either. If you want to take one of this two cards don't play too much. Usually build not more then 2 Dryads or 2-3 Shamans. For BG10 I would recommend Dryad (B), even more then a Shaman. If you play Dryad (B) I would recommend beginners to switch them to dmg (not using sleeping) it makes them easier to hold in line with your WW. - Treespirits or Mana Wings are Rare, aren't they an option to Windweavers? Not a bit, WW are the superior nature allrounder. Mana Wings can be a rare solution against Lost Souls (if you play a MOTM where you know you face LS) as some of their strong units can't attack flying. But this is a too rare case to use Mana Wings as allrounder - Melee Units or Amazon are simply no beginner options, please just trust me. Most melee T1 units lead to unintended pulls and Amazon is too weak for BG imo. - Other T1 options that are worth mentioning: Mark of the Keeper as Upgrade for BG10, Hurricane is great against S- Units but usually not worth the short T1 stage (nice BG10 Upgrade), Fountain of Rebirth can be a nice addon in 4player groups, solo not worth the pick (BG10 and such... 🙂 ) In BG9 usually bring out 4-6 Windweavers, root smart and have one Surge of Light ready and T2 should be clear. Against LS play 6-8 WW, one of the rare cases where you want to pull enemys to you a bit out of the camp and clean beasts one by one. Fokus your fire a bit and your troops will do better. Frost Start - the underestimated alternative, a shitload more damage but less sustain - Frost Mages mixed with Masterarches in ratios between 1:1 and 1:2 supported by Homesoil/Ice Barrier can handle any BG9. If you choose to go for blue T1 then there is no way around Homesoil/Ice Barrier, use this combination the whole match until late T4 for your Gemeyes - again melee tanks are no option in the scope of a beginner deck, though this is a valid option for more sustain melees usually do more harm then they give a benefit (aka unintended pulls) - Nice BG10 addons can be: Glyph of Frost, one of the Wintertides, Lightblade (very micro intense), Frost Sorc (very micro intense) Use your Homesoil (eventual Ice Barrier) to clear T2, ~6 Units deal insane dmg with that support, Barrier can be used to heal units too in some cases. T2 either or - the opposite of the T1 choice As we want to make a stonekin Deck, lets go Stonekin with our T2, where we get great options in our faction. As both colors come with some great splash cards at t2 too, we will focus on Stonekin and only go for "mandatory" splash cards, like the omnipresent Oink - never go out without your Oink! 🙂 Again we want to have a most lean T2, so pick at maximum 2 of the following considerable Units: - Razorshard (G) is my hidden champion here on the paper he may look not that great (another S-Counter, you need to use ability, delayed damage), but he performs outstanding against most BG9 enemys, he gives your remaining T1 force a nice basic heal that gives a shitload of sustain - Crystal Fiend (B) moooore sustain though is audio sucks - a really strong option, but beware that your army does not only consists of supporters and healers, a common "mistake" - Stone Tempest a bit fiddly but a good M counter and providing nice CC via his knockback, though in some cases annoying - Aggressor - ok'ish unit as L counter if needed, please consider that he is rather a supporter too then a damage dealer From the Mono color units the following might be worth mentioning: Stormsinger (any) as strong air-counter or Burrower as swift sieger. As most of the above mentioned are pure supporters or more-supporters keep some/all of your T1 force alive. Usually at T2 a Breeding Ground is not worth (building). After getting mix in - depending on the T3 situation - 0-4 of the above Units. All your T1 options are still viable and your army supported even with your T2 spells now should be fine to deal with anything and everything. The following spells are nice at T2: - Oink, as said, never have a deck with a that goes without - if you started Frost you still can consider to take a Surge of Light. Usually T1 spells are not worth a T2 slot, this is an exception - Matter Mastery, expensive but strong and fun, can be used in combination with Homesoil if you started frost - in rare cases: Gravity Surge (B) but Stormsinger would be prolly a better T2 choice for most uses here - and finally the big question "to freeze or not to freeze" -> Coldsnap It is a super strong tool in some rare cases but often used brainless, where it hurts more then it helps. I like to have it with me for seldom super hard T3 camps or to stop a frontline in late match when I am completly on my own. Always have in mind, that freezed enemys only take 50% dmg, which is a very significant penalty. Freeze is very strong against Lost Souls T3 camps, Coldsnap while running in and take out spawner + other buildings to weaken the Lost Vigils. And please be very careful about freezing units for others, decks that have high burst damage or also rely on triggering their infects can be put in quite a hassle by a single freeze. As a rule of thumb, if you want to help your mates, buff or heal them, but unsolicited freezes are rarely welcome. T3 (?) Let's speak about void first. Stonekin has two obvious options here, either Shrine of Memory () or Shrine of Martyrs () that both can be made available at T3, if we stay in the scope of Stonekin and mixed T2. I don't consider Shrine of Martyrs to be usefull in a deck that is not build around freezing, and even then it is doubtful. Shrine of Memory is very weak too, and I think leaving it out at all can be an option, but after hundreds of games with and hundreds without I have the weak feeling that the 2x 100 energy are just about worth the investment. I find it very difficult to make an absolute statement here, but my cautious recommendation goes in the direction of SoMem, hence the choice of headline "" As my Stonekin T1/2 units give usually give a very solid mix I tend not to take any T3 units for the usually quite short T3 stage - spells and my remaining force needs to do the job. If you want to take in a unit, it must be something really beneficial like taking in an XL unit like Deepcoil Worm or Deepfang. There are ofc other nice'ish units, but noting that really adds something that you couldn't do with your T1/T2. You may now say "Hey, it's Stonekin, what about Rageflame/Stone Warrior" and you are right, those give an excellent combo. But still in this deck they would be aliens and not really solve any ugly T4 camp situations for which you would take them in now. I will have a close look on those two in part 3/3 of this "guide". Spellwise T3 brings two mandatory ones for me, for this deck: - Revenge - Stone Shell (G) Easy to use, both stack, and make your already strong force almost invincible. Next "mandatory" pick: Thunderstorm - a perfect allrounder you want to have with you if you play a green splash. If there is a Shrine of War from your mates, use your Thunderstorm all the time either for waves (don't stop for them) or when you fight camps. Thunderstorm is as Curse of Oink - this card can't be wrong in most of your decks. Other spells worth mentioning would be - Equilibrium (G) if you feel need for more heal, here it is. Usually this should not be needed but can be a nice filler if you feel better with it Neither Enlightenment nor Frost Shard would add something at T3, so they are not considerable for me. And now comes the part where opinions differ: Support Buildings - Wheels of Gifts are no option for me in this deck whereby I have to emphasize here "for me" just as much as the "no" option. Wheels bind 540 (405 with construction hut) energy that can't be invested in units. Solo even with taking muuuuch time it is hard to reach even the break even point where the wheels are useful. In groups ofc wheels pay out earlier, but are usually not really worth slowing down one player that strong. The problem is compounded by the nature of the Stonekin faction, as individual units are not as strong here, but they become stronger when combined, having almost 2 units less on the field hurts me a lot there. Another reason for me to do without the wheels is that only one wheel buff is very profitable for ourselves, namely the attack buff. On easy maps, a skilled Stonekin player doesn't even need a single heal, to buff this further with Wheels (partly it wouldn't even stack) would be absurd for me. However, I also know my Battlegrounds so well that many factors are no longer random for me, but well predictable, that it is very difficult for me to fully take a beginner's perspective here. 20% is 20% more - and if you feel better to wait 1-2 min and take that 20%, then do it! - Healing Gardens - a great buff! But still I rarely play them, as I consider most content well doable if all decks around are build well, it's a bit the same as for the wheels. But again, of course, if you feel the 300 energy for 2 HG is worth it, then play them (in a group). I would also prefer the HG over the Wheels. T4 We have 2 Units in our Faction at T4, as both work together well, why not build around them? - Grinder is our tank, usually I would only want to have one slot for it and take one of either affinty. Honestly, the fewest will use the skill. But it's not completely useless, though, so give it a try. I therefore slightly prefer the purple. I think having 2 is recommended, the more the better ofc. Grinders benefit greatly from grouping, I would want to set up 2-3 straight up and have 4-5 towards the end, then they are actually almost immortal, especially if you buff them nicely. - Both Gemeyes are great for me, I like to have them both. Usually I play 1 green, put out all my purples and play Grinders or further purple Gemeyes when the cooldown is off. I would recommend to charge the purple Gemeye for this deck sooner or later. Ofc the green can be cut if you have other preferences. - always leave some energy left for 1-2 spells Ofc other Units can support this mix, though I don't feel a need for it. Primeval Watcher for example could go as supporter, Giant Wyrm as super budget DD. The two spells I recommend the most here are Regrowth and Ice Tornado. The former is mandatory in most unit based decks though I don't often feel the need to use it in a Stonekin Deck. The latter is a great damage spell and should be set in the back of most camps, while you fight the frontline. Also it is a nice support for bosses or just as helper to increase dmg on endless crossing fights. Tornado and Thunderstorm should be used all the time if a Shrine of War of a group member is running. Maelstorm can be an option to get even more sustain, but hey, freezing, we had this topic - be smart when you freeze! There are other cool spells in this color range, but none that I would consider for this deck Any more options throughout the the tiers? - Incredible Mo is important against LS, if you play random maps make sure there is one around or take yourself (Yellow buff to avoid anti-range debuff) - Amii Mon for solo purpose ofc possible - construction hut if you considered any of the Buff Buildings or Amii - Frost Bite (P) does work on bosses, usually not worth the slot to me but hey it needs to be mentioned Bosses you struggle with: - Hellhound can be dangerous, avoid to face him with a too small army alone. Keep your buffs up, take out spawner via Tornado and perhaps focus the boss then - fear very early Urzachs and Infester, keep your Gemeyes out of range but close enough for your Grinders to count for their passive heal Any other dangerous situations for this deck: - early bosses, especially when you are on your shitty SoMem. Know your deck and retreat if needed in time - Ugly T4 situations end in quite a "zerg" - even t3 units do not change much about that - usually not a deck I want to bring to BG10 random maps/groups as it is too slow for the given time frame - Willzappers in early match, reason enough for me to justfy Matter Mastery (that is useless against Lost Souls) Personally tested Deck proposals, as always from Spells over Units to Buildings BG9 allrounder BG10 Solo Replays: BG9_4pl_motm_Stonekin_noheals The very easy current motm, I guess I did not even use a regrowth in that match, perhaps one lazy one in the end. If maps are that easy usually this deck cannot ever be beaten. BG10_1pl_MOTM_Stonekin Current super easy motm tempted me to do it with a stonekin - slow but steady, deck above. I will add a replay of a close and ugly T4 situation (current motm 3/4 comes to my mind) the next days. This is noting you want to have with this deck, but still doable. BG9_4pl_MOTM_Stonekin_close_t4_fight As I have seen many people struggling with this Pos3/4 (I am sitting in 4 here) I was a bit afraid to play it with this deck. A very low rank, Deck lvl 7 sat next to me. He touched every next camp in advance to trigger useless further spawn and brought non-optimal units to the field - a perfect stress-test for our Stonekin deck. And what shall I say, have a look yourself, we are super-clean t4 in ~8min. Far from being fast, but for this map and situation still rock-solid imo. If you have feedback, suggestions, nice replays or storys about this deck, please feel free to post below! As always, all information without guarantee and with strong personal preference. See you in the Battlegrounds! Thanks to https://www.deepl.com/translator for helping me with some partly translations BG9_4pl_motm_Stonekin_noheals.pmv BG10_1pl_MOTM_Stonekin.pmv BG9_4pl_MOTM_Stonekin_close_t4_fight.pmv


-
Hi everyone, I would like to hear which decks you think are good for rPvE, something about level 9-10. Write which card you are using, and if you want, why you are using these cards. Thanks to you all for the information