Search the Community
Showing results for tags 'PvP'.
-
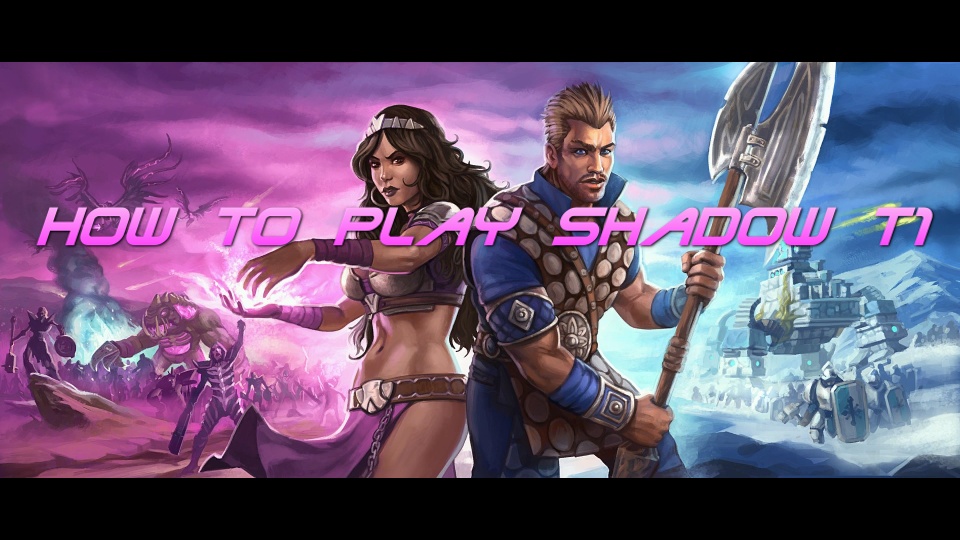
a PvP Guide by RadicalX -General talk- Since some people asked me to do this I decided to make a small guide regarding Shadow T1. This guide provides information for every type of player (from new to experienced). I will try to explain every single matchup and I hope this is going to be helpful for some of you, who want to improve their gameplay when we get to play again. Note: Every statement refers to 1v1-PvP since 2v2 doesn't always works in the same way. First of all: What makes Shadow T1 so attractive? Shadow T1 & Fire T1 were the most played T1's in the game for a simple reason: Both of them haven't got any major weaknesses. Frost T1 often loses Map control due to the lack of swift units and Nature struggles seriously against towers or can get entirely ruined by an instant T2. Meanwhile Shadow doesn't have these issues and it doesn't lack in strenghts either. The early T1 is the strongest out of all colours. - the Deck - (This is just a short list without in depth explanation. For some more detailed information take a look at Eirias' Deck building guide: [http://forum.bfreborn.com/index.php?/topic/917-how-to-build-a-pvp-deck-guide/]) Group 1 - The "must have" Units (you won't be able to compete on a high level without them): Dreadcharger Forsaken Nox Trooper Nasty Group 2 - Strong additional cards, which provide safety for some matchups: Motivate Skeleton Warriors Phasetower Nightguard Group 3 - Cards, that are only useful for higher Tier combinations: Embalmers Shrine Life Weaving Group 4 - Cards that are only useful in a single certain scenario (usually not viable): Snapjaws Witchclaws (both affinities) Wrathblades Soulsplicer (green) Decomposer Lifestealer (For specific information ask @Hirooo) Executor Group 5 - Trash Offering (both affinites) Soulsplicer (red) You should make sure that your T1 has a good synergy with the rest of your Deck. Some examples: - If you play Shadow Nature, Life Weaving would be a trash card, but in a Bandits-T2 Life Weaving is essential to support your skyfire drakes. - Phasetower gets even stronger in a shadow/frost deck, because you can support them in T2 with Kobold Trick & Glacier Shell. - Shadow Nature has a nice synergy with nightguard because the cheap cc allows you easily to catch the enemies units / you can prevent the nightguard from escaping after she used her ability. The average Shadow T1 includes 6-7 cards (I usually played Dreadcharger, Forsaken, Nox-Trooper, Skeleton Warriors, Nasty & Motivate (+ Life Weaving in Bandits & Pure Shadow). In theory Phasetower has to be included since this card is a little bit OP (especially against nature), but Phasetowerspam doesn't require any micro and these dirty wins weren't really satisfying. - Matchups - Shadow vs Fire Lets start with this matchup since it's the most popular one. Most important cards in this matchup: Shadow: 1. Dreadcharger - 2. Forsaken - 3. Nasty - 4. Motivate Fire: 1. Scavenger - 2. Sunstriders - 3. Thugs- 4. Sunderer - 5. Eruption Core strategy: Your first unit is Dreadcharger. Apparently this should be your starting unit in every single matchup, because the Dreadcharger is fast and has the shortest spawn animation out of every T1 swift unit (werebeasts are equal, but they weren't really popular). This means you will always reach important positions like middle orbs on random maps before your opponent. The first thing you have to notice is your map. As long as you play on a large map you are allowed to take a power well without any concern, but on smaller maps like Elyon for example you shouldn't take anything, otherwise you are going to lose immediately against a Sunderer rush. On smaller maps you have to go for a dazed fight. So lets take a look at "How to play dazed fights": 1. Spawn a dreadcharger, walk towards the position you intend to capture. 2. Spam mass forsaken and split your units (as long as your units are dazed you shouldn't have multiple ones at the same position, otherwise the can get erupted. If your Units reach full hp it's okay to have 2 Forsaken-squads close to each other). If you got multiple units in position you are ready to fight! 3. Your opponent will use Scavenger, Thugs & Sunstrider. Your first focus should be the scavenger, Sunstriders may have next to no health and are very vulnerable, but the scavy can slow your unit -> your opponent will kite you to death. The Fire player on the other hand has to focus your dreadcharger, because he won't reach your forsaken with his 540hp Scavenger, who has got inferior stats compared to dreadcharger, but a superior ability and aslong as they focus each other they are even in terms of strength. 4. If your units are close to death try to get them out of combat and heal them up later. Save as many units as you can and always try to have a good focus to catch out your opponent's Sunstriders as long as the scavy is out of the fight. If one of your Forsaken squads is out of position close to your enemies units just frenzy them to force your opponent back to get a positional advantage or - in the case where your opponent doesn't retreat - deal tons of damage (Frenzy Forsaken are devastating for Fire) and motivate them afterwards to get an even bigger damage boost. 5. Many people play thugs since their micro isn't good enough to win a dazed fight against frenzy Forsaken. The most important thing to notice is that Thugs are more expensive than Forsaken, which means the focussed forsaken squad can just run away, the thugs have to chase them, but your opponent has 10 additional bound power which creates an advantage for you. But be careful! Don't get lazy with your micro against thugs, because otherwise they can delete your forsaken and their passive will give your opponent even more power. Your micro has to be on point in this situation. EDIT: Since there was some discussion about thugs I want to expand this paragraph. It's very important to note that 2 Forsaken can kill Thugs, that are played in your backline before they get out of daze. So a very important tip against Thugs is to avoid early engagements and get up a decent amount of Forsaken (at least 4-5). This allows you to burst down dazed squads & full hp thugs from the other side will be easier to kite. Thugs are powerful, but onedimensional cards, so this strategy works with a high consistency to prevent them from destroying and zoning your backline and ensures you to win the early dazed fight. 6. If you get an advantage take a super aggressive power well to gain map control. If you lose the dazed fight try to take a safe position and buy time to recover your temporary disadvantage (but be careful, if your opponent tries to abuse this and starts spamming power wells. Pure Fire benefits heavily from this.). If you get a good amount of practice with this, you should win at least 90% out of your dazed fights against Fire T1. Important notes: Even if Nasty and Eruption can be game changing in the perfect moment they are usually not efficient in dazed fights! They are only good to punish mistakes, aside from that spawning additional units is the better choice. Sometimes you can spawn a single squad Skeleton Warriors with their tank ability they can easily reach good nasty positions, but you still shouldn't rely on the use of Nasty to win the fight. NEVER use lifeweaving on your Dreadcharger. It's just not good to spend 70 power to support a unit without substantial damage. Your opponent can just run away or change his focus and would always win the trade. If you think you really need a tank in your fight choose skeleton warriors. They do have got even more effective hp (1.5k) with their ability and you have to spend only 50 power which is fine. Fake Frenzy is pretty funny ^-^ You have to wait a split second until Frenzy gets activated which means you can easily cancel the animation by walking around -> sometimes your opponent thinks you really activated your Forsaken and retreats immediately. Always try to play at your power limit. It's pointless to hold anything back since the only useful spell in your Deck is Motivate which costs next to nothing. Here is a replay that shows how a dazed fight between two good players looks like: https://www.youtube.com/watch?v=-Cm1gRHwA0U Hirooo made some small mistakes but that was an overall well executed T1. Sadly the commentating isn't always on point since Farrock doesn't have the same game knowledge as the top players (No offense against him, I respect his work & effort alot). The dazed fight is pretty much the most important thing to master in this matchup, because even on alot of the bigger maps you will fight under the same conditions after taking a power well. But lets take a look at another very common scenario: The close well fights This fights are way more aggressive, because Forsaken & Thugs are way more efficient in these situations. The reason for that is very simple: As a fire player you can't just run away from Frenzy Forsaken because otherwise they will just focus your well and delete it in no time. Thugs are super strong to support the fire players' defence. But keep in mind you got the early advantage in this matchup, so play as aggressive as you can. The power of fire scales proportionate with gametime as long as no wells go down, because Sundererspam can get really dangerous in the later stages of your T1. If you have to defend a Sunderer just use a Dreadcharger to block its walkpath as fast as you can (this slows the unit down severely) and focus it as much as you can before it's able to reach your power well (Use Nox Trooper + overload if you need a little bit more burst to finish it of when your opponent retreats). You have to keep calm in these situations, because if you panic and go for something like "mass frenzy" your opponent just walks away, waits 20 seconds and returns with a second Sunderer and this is ... lets say it's not good ... I also found a replay that shows how to abuse the early power of Shadow in a close well fight. Very nice decisionmaking by killroy in this game (he didn't waste any units). He does a really good job in terms of snowballing the game by attacking 2 spots at the same time, it's worth it to watch this game: https://www.youtube.com/watch?v=XD_n3CbbbMk This is a pretty rare scenario, but some maps do have big well distances and promote passive play (Simai does this because the Shadow player doesn't take the middle since he's scared of cliffdancer, meanwhile the Fire player prefers high well distances). Nox Trooper gets more valuable on maps like this. Usually they are inferior compared to forsaken in this matchup but they can create a high amount of burst and on this maps you don't have to deal with such a high amount of Sunstriders. The Overload-ability does 487,5 damage -> 1 hit + overload kills a scavenger in 6 seconds for sure and creates a little temporary power advantage for you. Just abuse this and take another power well, your opponents' attacks will be predictable since the map is big which allows you to defend well against sunderer. You can create a small, but reliable lead like this and this allows you a safe transition into your T2. [I didn't find a good replay for this, but I'm going to add one as soon as I got one] - Map Advantages - This matchup is the least map dependend one (Shadow mirror doesn't count ^^), but there are still some maps that give you advantages or disadvantges. Elyon: Small map, fast and early T1 fight -> it's easy to secure map control and sometimes you will be able to prevent your opponent from his T3. Yrmia: This is a very small map aswell with close wells next to each other, but the map isn't as fancy for you as it looks. The passages on this map are really really small, you won't be able to split your units unless you attack from multiple areas! Keep that in mind, otherwise Eruptions can be a threat at this map. Haladur: This matchup is pretty balanced on this map and very entertaining aswell. Pretty much one of the main reasons why Haladur was such a popular map in the community. Simai: As explained this map promotes a slow & passive T1. It's usually a solid map for you, but be careful against these nasty pure fire player, who abuses this to get into a high powerlevel T2. Lajesh: Weird map for casual ranked games, since you always have to pay attentions at your walls + it gets really easy to turtle with wallspamming. In tournament maps this can be one of the greatest maps in the game as long as both players agree to play without walls. Whazai: This map is fine for T1 action, but has some risks for you. It has a very small passage before you reach the middle which is a dangerous eruption spot and the small area gives you a hard time microing against thugs at the same time. But if both players take a well in the middle you are at a clear advantage. It's very easy to let your Forsaken attack the well & the main base at the same time and since there is a cliff next to the main base thugs & scavenger can't reach the Forsaken in time. But careful! This map gets really nasty against pure fire, especially if you decide to take that well in the middle. Uro: The most dangerous map for you. Wells are so far away from each other, it's even hard to move your units between your own wells to defend properly against Sunderer without a disadvantage. Sometimes you get forced to trade wells - you can't just sit back and play passive. Calm decisionmaking is even more important on this map. Generated maps: Small maps usually favour you a little bit since they are mid centered and you will most likely win the dazed fight, big maps are really shitty to be honest. T1 doesn't really matter, the better T3 usually wins. Shadow vs Frost The second matchup will be against Frost. I think a very important thing to notice is that this matchup is very map dependend. Most important cards in this matchup: Shadow: 1. Dreadcharger 2. Nox Trooper 3. Motivate Frost: 1.Master Archers 2. Ice Guardian 3. Ice Barrier 4. Home Soil Core strategy: Playing against Frost is always a little bit tricky. You will start with your Dreadcharger as fast as you can! Don't waste time, you have to reach your opponent as fast as possible to force a dazed fight, because Shadow will win that dazed fight against Frost every single time. Dreadchargerspam will always beat Masterarcherspam, just be careful with wintertide. If your opponent plays it just stop any move command and micro your units very carefully. Aslong as you don't suicide your Dreadcharger, Wintertide won't have any impact on the game. If you catch your opponent before he takes a power well, you can deny him access to the entire map, which is litereally game over. But lets get over to the interesting part where you can't deny the power well: 1. Your opponent has to take a well: You get a 100 power advantage and now it's your turn to use that to attack (unless you play on a super big random map). Your core units in this situation are Dreadcharger & Nox Trooper. That's everything you need since Forsaken are very weak against Master Archer (sometimes you can play a single squad, but be careful with the use of Forsaken against Frost). 2. It is very important to notice which starting unit your opponent got. If it's a Lightblade just go for 2 Dreadcharger + Nox Trooper spam. If he got only Master Archers you should think about more Dreadcharger. 3. After that you have to react to your opponents' unit composition. If he chooses to play ice Guardians, play more Nox Trooper - against Master Archers you have to get more Dreadcharger. In the perfect scenario the Dreadcharger take out the Master-Archers without beeing hit by the Ice Guardians, who get smashed by your Nox Trooper in the meantime. But this doesn't always work out perfectly. https://youtu.be/F-uawwk6hRg?t=23m5s At this game it worked out pretty well, even if it's a 2v2 match. That would've worked on a small 1v1 map aswell. 4. If one of your units starts to get very low just pull it out of the fight. It's easy to micro the fast Shadow units. Sometimes you won't be able to kick the power well, but you can take out so many units without losing a single one. 5. If you get around 4-5 low hp units just take your own power well, heal your units and continue to pressure. Your temporary advantage is still massive and even if your opponent got a good amount of power thorugh his extra well he doesn't have that much extra power, because he lost many units already and only 90% of the power returns back into the void. 5 power lost per unit and this adds up pretty fast in this matchup. Especially if you continue your attacked with your healed units. Now it's your time to get a massive advantage. 6. If you think you can take your opponents' power well you can use motivate to give your units some extra punch, but be careful. Frost has already access to Glacier Shell, you have to deal around 3,8k damage in a very short time. It's usually wise to go for the units first & take the well down later when you got an overwhelming amount of units. Important notes: Nasty is usually not very useful against Frost units, because they have just too many hp. In addition to that Ice barrier can be used to block alot of the damage in dangerous Situations. You need at least T2 units like Lyrish Knight for example to make some effective nasties. If you have to wait for some units to heal up or something like that, try to tease a little bit with your Dreadcharger to force a early home soil or maybe even a frost glyph. You need godly reaction to entirely dodge a well placed Frost Glyph, but keep in mind that it's not that bad when you get hit unless your opponent has already 5+ units, which shouldn't be the case as long as you are aggressive. Otherwise just use the focussed unit as motivate-food ^-^ Many people don't consider attacking as the best choice, but that's just a huge mistake. If you just take your own well against frost, the power level will rise and your opponent benefits from that since Frost T1 Units are very cheap and have very good stats. Back in 2011 I lost so many games, because I wasn't aggressive enough in this matchup. Double Ice Guardian + MA spam + homesoil will be way to efficient at some point, there is not alot you can do against then after you played a passive early T1. -Again I would love to add a replay at that point, but I didn't find a decent one. If anyone knows some good Shadow vs X replays on youtube send me a pm please.- Ok lets get through the Map part. Frost is super map dependend due to the lack of a swift unit, so it's really important to abuse your map-advantages. Haladur: The more common "Scavy-spam" works on Haladur aswell with Dreadchargers. Your opponent takes a well in the middle, but the distance between the well & main base are incredible high. So you just have to spam Dreadcharger and run down to the main base, attack there and if your opponent spawns alot of units just walk back to the well in the middle. The Frost units will be to slow to follow and you can overwhelm your opponent. Motivate is essential to this strategy! Aside from that Frost even has an advantage on Haladur if your opponent gets his position in the middle since the power wells are very close to each other and Frost T1 excels at that scenario. So try to zone him from the main entrance to the center of the map. Elyon: One of the easier maps for you. You can get control over the middle wells & orbs, which denies your opponent a T3 spot. You don't even have to take anything there. Just use your units to prevent the Frost player from reaching the area. Later on you just need to stall for T3 and win basically without taking any risks. Yrmia: Very difficult map. Power wells are really close to each other, there is no way to get superior map control or something like that. At least it is a really small map which allows you to attack very early with a strong rush. But if you fail to control the early game you may end up beeing at a bad spot because Frost T1 results nearly every time in a Timeless One based T3 which is very powerful. Simai: Slow Map, you can make an aggressive push to deny your opponent control over the wells at the top of the map. Aside from that the well distances are very high unless you take any stupid power wells which makes it a low pressure map. But if your opponent takes a well at the start you actually get to zone him from his T2, which gives you control over the early game though. Whazai: Great Map for you, you can get immediate control over the mid spot and in addition to that nox trooper can attack 2 of the power wells in the base over cliffs, which makes it sooo difficult to defend against this with Ice Guardians. Keep in mind that Frost can spawn dazed Iceguardian with an active (!) Shield behind the cliff at their main base, so don't rely on a simple Dreadchargerspam. Uro: The best map for you. It's important to do a quick start, because you have to walk very far. This map is litereally an autoloose for Frost because you can deny your opponent every position on the entire map. You will be able to force a dazed fight, that shadow is going to win without any Problems. Lajesh: With walls again very weird to play. Very slow and passive gameplay. If both players agree to play without walls the game gets really great. Small map with alot of potential for aggression, but potential close wells on the other hand. Generated Maps: small maps are nearly a freewin since they are usually mid-centered (as I said before) and you will be able to control the mid-wells. Large maps will be boring & usually end up in a T3 fight, which is not so good against Timeless One decks. Shadow vs Nature The matchup with the potential to be the greatest out of all, but 2 cards influence the balancing in a negative way (Phasetower & Treespirit). Most important cards in this matchup: Shadow without Phasetower: 1. Dreadcharger 2. Nox Trooper 3. Nasty Surprise 4. Motivate 5.Forsaken (!) Nature without Treespirit: 1.Spearman 2. Windweavers 3. Ensnaring Roots 4. Surge of Light Core strategy: There are 2 ways of playing the matchup Shadow vs Nature and I'll start with the easy one. It includes the use of Phasetower, a card that is ridicilously broken in this matchup for multiple reasons: 1. Phasetower has insane stats (900/1200) and is even with his teleport debuff stronger than any unit nature can offer (Primal defender can match him in terms of strength, but Phasetower has his insane teleport ability which makes him way more versitile). His strength is so overwhelming that his transition into T2 is still amazing (especially for shadow frost that can protect the turrets with kobold trick and glacier shell). 2. Phasetower has splash damage which allows him to finish off windweavers squads very quickly (The Nox Trooper for example has to shot at every single unit at the end to kill the entire squad) 3. Buildings are uneffected by crowd control which is a huge advantage against nature, that usually relies on Ensnaring roots in this matchup. 4. Nature doesn't have a counter unit against phasetower (apparently Sunderer is the only unit with Siege damage in the entire T1 -> no nature Unit, that can threaten buildings.). 5. I do consider Treespirit as a ridicilous card, that needs a rework and destroys the beauty of nature T1. But Phasetower is the perfect counter against them, because of superior stats and the fact, that they are unaffected by the poison. 6. Since nature is forced to play slow units against shadow it is possible to take a well on mid centered maps and defend it successfully with a Phasetower to gain map control for free, which is devestating on maps like Elyon. Just overall: Phasetower is op and I will just show a short replay that demonstrates the power of Phasetower without any micro-effort. https://www.youtube.com/watch?v=i1x8GEMpyAI (Game 3 of a showmatch series between Elendil & Sarlesch - german cast by JMCW) Sarlesch wanted to go instant T2, that's why he started with amazon. He changed his mind after 30 seconds and played 2 Windweaver squads (I guess the reasoning behind this was the fact, that elendil was able to rush his instant T2 in the previous game). And after that his chance of winning went down to litereally 0%. Elendil realized immediatly Sarlesch couldn't go T2 anymore, built up some phasetowers and won the game with no effort. The matchup gets way more interesting without Phasetower or Treespirits (btw. I recommend instant T2 against Treespirit as long as you play without Phasetower) included. The start is pretty interesting against nature because nature has different starting units against different colours. Swiftclaw, which is usually the best choice, is just awful against Nox Trooper and against shadow in general. So as long as your opponent doesn't know you play Shadow T1, you can try to play some mindgames. Just don't play a single unit in the first 10 seconds and see how your opponent reacts. Some people will get impatient and start with the swiftclaw which gives you a massive advantage. Nature needs 4+ units (Spearmen + Windweaver spam) and around 100 extra power to be able to use crowd control and surge of light. If he plays an aditional useless 80 power unit it takes such a long time for him to reach a state where he is able to fight you. A time window that can get abused heavily. At that point you can just go ahead and beat your opponent with a nox trooper spam. If he retreats you can use your temporary advantage to secure map control with an aggressive T2, which is litereally "gg" beacuse nature struggles really hard against T2 since its units are super expensive with low dps. If your opponent doesn't fall for the bait just go ahead with your Dreadcharger and look for an immediate fight because at late T1 stages Ensnaring roots & Surge of light provide way to much power. On the other hand Shadow has the early fight advantage beacuse you've got cheap high dps units, that can overwhelm the nature player easily. Dreadcharger and Nox Trooper are your core units at this stage. How to play a dazed fight against nature: If you get to fight your opponent before he gets a critical amount of units you have to play around 2 things: 1. Ensnaring roots This is why you need at least 2 dreadcharger to run around your opponents' slow units and attack from multiple positions with them and multiple nox trooper. Otherwise your entire army gets rooted and 3+ windweaver squads can easiliy take out 2-3 units in those 15 seconds with a 45 power spell. If your opponent tries to kill the rooted units the other army can attack without interference (maybe even with a motivate boost). 2. Surge of light It is very important to notice, that nox troopers don't finish 6 unit squads immediatly. They have to shoot at every single unit once to kill it. It is really important to finish off the windweaver/spearmen squads immediatly to prevent efficient heals. There are many ways to do this: - Dreadcharger can use his "stomp" to finish them off since it does a small amount of damage when you knock back units - If your opponent plays with Spearmen it's fine to have a single forsaken squad added to your unit composition. They can finish off squads very fast, but be careful with your positioning, Forsaken are really squishy in this matchup - Windweavers can take them out really fast. And don't play 2 squads at the same position otherwise hurricane is going to hurt you - Nasty surprise can outclass heal in this matchup. If your Dreadcharger is in a good position and you can finish a single unit + damage other ones, just go for it. Your opponent can't make an efficient heal against that (150 vs 110 power). In addition to that the power of nature decreases tremendously with every unit loss since this just lowers the efficency of crowd control. How to play if your opponent takes a power well: Just attack at 2 positions at once with the compositions of 1 dreadcharger, 1 nox trooper & 1 forsaken squad. There is no way nature can match this even if you built up your own power well. Just spawn additional Dreadcharger/Nox Trooper over time and apply as much pressure as possible. If one of your attacks seems to go down, just use motivate to start the big push on the other side. You can kick a power well for sure. After that just go immediatly T2 to negate your opponents temporary advantage due to a superior amount of left units. Nature can't use cc at multiple positions, playing around this is your main win condition. Important notes: - This doesn't work against Treespirit! So be careful if you don't know your opponents' playstyle. - You can force your opponent to take a well as long as you play with phasetower, because shadow can just take a power well and defend it without any problems due to phasetower. If your opponent then decides to take his own well you have 2 places to attack, even if he is a smart player who tries to avoid unfavourable early fights. Map specific information: Haladur: Great Map for you! You can split your army really well and threaten the main base & the middle position at the same time. Haladur is really troublesome for nature, your opponnent may think about an instant T2. Elyon: With phasetower an absolute freewin. Without Phasetower it can get a little troublesome because the main base it protected through the wall. Your main approach is winning an early fight in the middle since there is alot of space to play around ensnaring roots. Afterwards you can secure map control with an early T2 Yrmia: Great map to attack from multiple positions, but can get sometimes a little bit tricky because there isn't that much room to split your units that well. But since the map is really small you can apply an insane amount of early pressure. With phasetower it's nearly a freewin. Simai: Very slow map that doesn't really promote early fights unless both players try to go for the middle immediatly. At that point you have a good shot at beating the nature player with a good nasty if you play well around ensnaring roots. Whazai: Ridiculous phasetower map. You need 2 ports from your base to be able to attack your opponents power wells. Without Phasetower it's important to use the side ways to surround your opponent. If you are only focussed on the middle you will get serious trouble against roots. Uro: You can run around your opponent due to the fast Dreadcharger. But keep in mind, Uro is a really big map and it takes time to reach the enemies base which favours the nature player. Your advantage: An early T2 at a good position can be devastating for your opponent. Lajesh: Favours Nature heavily. The Walls just block every kind of early aggression. On lajesh without walls you have a better shot since the map is really small and you can play more aggressive. But there is a wellcluster pretty close to the main base which is easy to defend for the nature player. Pretty balanced map aslong as both players agree to play without walls. Generated Maps: Small maps favour Shadow with Phasetower heavily, because you can just take the middle, build a turret and ... it's gg (okay to be honest Phasetower-Shadow T1 has an advantage on every map). Without Phasetower you can get problems on mid centered maps, but atleast there is alot of space to play around Ensnaring Roots. Large generated maps favour you a little bit, because you can just play super aggressive without anything to worry about. Even if you mess up, your opponent won't be able to reach you in time, because it sometimes takes around 50-60 seconds for remaining windweavers & spearmen to reach their destination. Enough time for your void to come back to you. Shadow vs Shadow The mirror matchup is pretty interesting since small mistakes can get punished super hard (especially with high dps units like Forsaken). The Most important cards for the mirror matchup: 1.Dreadcharger 2.Forsaken 3.Skeleton Warriors 4.Motivate 5.Nasty Surprise Core strategy: In theory this matchup consists mainly of Dreadcharger + Forsaken spam vs Dreadcharger + Forsaken spam and the guy with better micro (or the one who hits the clutch-nasty) wins the game since both players use the same cards. If you want to reach the highest ranks you should practise the mirror match opening, because the first skirmish is super important since you can't avoid it unless you go instant T2. You can't just take an additional power well unless the distance between you and your enemy is incredible big. If your opponent gets greedy and takes a well you can just attack, destroy it and the game is pretty much over. And this is how the rush works: Spawn 2 Dreadchargers to prepare an attack from 2 spots. Your opponent loses his opportunity to defend with a huge nasty. Spawn additional units and focus the power well. There is nothing your opponent can do against this since he just spent 100 power more which is massive in the early game (you can play 2 additional Forsaken squads, which adds more than 2.000 dp20s). https://www.youtube.com/watch?v=u965vcN2cug Here is an example of a T1 rush against the strongest defence shadow can offer (Phasetower + wrathblades). I made some horrible mistakes in the early T2 stage, but if you can destroy a power well that early in the game you get such a massive advantage. The game was just over. My opponent was more than prepared for an attack (I used the same strategy to beat him in the first game in this bo5 series) but there is nothing you can do to stop the rush. If your opponent doesn't go for a power well things will get a little bit harder. Micro management gets super important, but also the decisionmaking. The way you use the Frenzy ability of your Forsaken often decides who wins the fight. You can increase your dps in the skirmish, but if you activate to many Forsaken your opponent can just retreat and wait for them to die for nothing. More important notes: - Always be aware of nasties. Dreadcharger is very fast and if you leave it at full hp you can get in trouble if your units aren't well positioned - Motivate can be massive. The amount of additional damage you can deal for literally no power is very good for any kind of skirmishes. Use it on the first Forsaken squad that is close to die. - Phasetower can be super useful on maps like Whazai, but usually isn't the best choice, because Shadow has got high dps Units to deal with it. But lets go ahead and talk about one of the most important cards in this matchup. Skeleton Warriors are monsters against Shadow. 50 power and 1,65k effective hp with their ability is huge. Shadow just hasn't got anything to deal with them. They can tank against Forsaken forever, they beat Dreadcharger with their ability and the most dangerous thing: You can't just ignore them and kite because they are a massive nasty threat aswell. Many players would just think of Wrathblades as a solution. But here is the problem: Wrathblades have got only 600hp and can get killed super fast by Forsaken and even if you don't focus them Wrathblades get a dp20s of 1512 against S units with their ability. If you compare the stats (1512dmg/600health vs 600dmg/1650health) you will realise, that Skeleton Warriors win the 1v1 against the Wrathblades. This is why Wrathblades are pretty useless, at least for dazed fights. If you managed to win the first skirmish you can use your temporary advantage to take a power well at a position that gives you map control. Try to make a gameplan from that point, maybe you can use your position to deny a T3 spot, or maybe try to get close to your opponent to push your advantage. If you are even after the first small fights you can also try to take a power well, but maybe at a safe spot. If the power level gets higher it is unlikely to get rushed that easily, because you can spam more units to intercept your opponent. In addition to that nasty gets way more effective at that point since it's harder to split the high amount of units well enough to prevent nasties from beeing power efficient. How to play when both players aquired a power well: Try to play as aggressive as possible. Never be passive, that will lose you the game for a simple reason. If the enemies Forsaken manage to reach your base you'll get a problem. At that point your opponent can just activate frenzy and you can't get rid of them, because it's super bad to frenzy your Forsaken in a defensive position. Even if you kill the enemies units, your own Forsaken will die aswell and you will just sit there with a low power well. You can play more units, but the next attack will finish the well most likely and if you decide to repair your well you won't have enough power to play any units. This is why you have to force skirmishes on an open ground and if you get an advantage due to superior micro just play as aggressive as you can. If you get pressured at some point just don't lose your nerves and activate your Forsaken. You will lose your chance to use a temporary advantage for a counterattack. Attacking at multiple positions is always a good choice. It is just way more difficult to react properly if you apply pressure everywhere even if your opponent has got enough power in theory. If you manage to control and micro your units well you can gain massive advantages because so many players struggle with multitasking especially when they have to react fast and have to prevent you from reaching their power wells. A common strategy: If you get an overwhelming amount of units just go ahead, and frenzy all of them. Just go for the wellfocus, but go T2 at the same time. This will allow you to deal with the counterattack (Darkelf Assassins, Shadow Phoenix, CC vs Frenzy, AoE damage spells like lavafield or lyrish nasty). There aren't many map specific advantages because both players have got access to the same cards so i won't make a map list for this matchup. Just keep this in mind: - Phasetower is super effective on Whazai (I mentioned this earlier aswell) - Big generated maps are just awful, you can't be aggressive on these maps, because if your opponent takes a well you just have to take one aswell. You need atleast an entire minute to reach him, which means your opponent can build up a good defense and even gets around 30-40 power back even before you applied any sort of pressure. But this is just an exception. So keep in mind: Good micro and the ability to be proactive are the most important things you need to master the shadow mirror. Okay, this is the end of my Shadow T1 guide. I hope this will help some of you in the upcoming future. Since I've got some requests I will write something about different colors at some point too, you can find my Frost T1 guide in the new player section and I almost finished Nature T1 too which will be released soon. So thank you for reading this, enjoy your day and stay hyped. Best regards, RadicalX
-
So here I'd like to work out any math problems people may have about Battleforge! Send me your questions and I'll try to answer them. For starters, here is a mathematical model of your power pool and an explanation of why t4 is a terrible idea in PvP 1v1. time t is measured in 2 second increments (because that's how the game adds power)v(t) is the power in the void pool as a function of time t.p(t) is the power in the power pool as a function of time t.w is the number of power wells a player hasp0 is the power at the start (i.e. p(t0)=p0)Your void pool returns 1/50 of its power to the power pool. If we modeled a differential equation, dv/dt=-1/50v. Solving for v, v=v0e-t/50. This is perhaps a little complicated, so I'll show you another way that is more intuitive. Let's develop the model by inspection. v(t1)=(49/50)v(t0) because at 2 seconds [that's v(t1)], the void has lost 1/50 of the void at 0 seconds [that's v(t0), or v0]. v(t2)=(49/50)v(t1) for the same reason as above. Since v(t1)=(49/50)v0, v(t2)=(49/50)(49/50)v0. In other words, v(t2)=(49/50)2(v0). v(t3)=(49/50)v(t2) which equals (49/50)3(v0) and I think you can get the pattern. The void pool can then be calculated as v(t)=v0(49/50)t with t measured in 2 second increments (so t=4 means 8 seconds). This way is actually a bit more accurate (since the method with a first order linear homogeneous differential equation is compounded continuously and it's actually compounded every 2 seconds) so we will go from here. This model describes the void pool at any given time (assuming that nothing else is added to it). So to find the amount of power that the void pool injects into the power pool, it will be v0-v0(49/50)t. Or in other words: v0(1-(49/50)t). We furthermore know that the power in the power pool increases by 1 power every 2 seconds from every well. Thus, p(t)=wt +v0(1-(49/50)t) +p0 * @Hirooo commented that the portion v0(1-49/50)t maxes out at 20. So if your void goes above 1000, you will get a steady +20 from the void every 2 seconds until the pool goes below 1000, when you'll gain like normal. If you plug this into a graphing calculator, you can easily see what a difference in void power makes. For instance, type p=wt+v(1-(49/50)^t) +C into https://www.desmos.com/calculator and make sure to use sliders for w, v, and C (you can use any letters). This will model any power if you assume that nothing gets added to the void pool and no wells drop or get added. I'll illustrate how to use this model to explain why t4 is bad for power. Sometimes people ask "since enlightenment is 260 power, why isn't it just better to use t4 for an extra 40 power, and then you can play t4 cards whenever." Here is why. Suppose you've graphed that function in desmos. C&P so there's two and then change the variables w,v, and p for random constants (if you want a ballpark estimate, w=4, v=600, p=100). Those constants don't really matter for this though, so you can even make anything that doesn't change 0 if you want. That's what I will do for this comparison. Since we want to see what happens if I spend 260 power (234 void) for enlightenment vs 300 power (0 void) for a monument. The equation for using enlightenment looks like p=234(1-(49/50)^t) +40 because w=0 (it doesn't matter if we assume both players have the same wells) and C=40 because enlightenment is 40 power less than a monument. The other player has p=0 because w=0, v=0, and C=0. Note that you can put whatever numbers you want here as long as the first equation has C=40 higher than the second equation's C, v=234 higher than the second equation's v, and w is equal. The difference between these two functions tells us how much more power the player who used enlightenment has. After 10 seconds (t=5), the player who used enlightenment has 62 more power than the other. After 30 seconds (when the monument gets built) the player with enlightenment has 101 power more than the other. As time goes on, the player who used enlightenment will eventually get 273 power more than the other. Hope this model was useful! Feel free to ask any questions or propose more math subjects! I have also created a supplementary video: https://www.youtube.com/watch?v=zhqUuZMUb0Q
-
Dear Skylords I opened this threat, because of the discussions concerning the PvP-Balance we allready have in this Forums. Because the discussions both deal with specific cards or specific ideas for balancing and i have the feeling that it is missleading at the moment (eg. talking about giving pure fire a Wareagle counter on the one hand and talking about OPness of (pure fire) Cliffdancing on the other hand). To get the balancing PvP discussion better organized i want to collect all (perceived) balancing issues in PvP here in this thread. The goal is to first make a list with all of those issues, then go down that list point for point to discuss it: Is this realy an issue, does it has to be changed, how could it be changed. As a conclusion we would have a list of REAL Issues that should be adressed (with ideas on how they could be adressed) and a list of only PERCEIVED Issues, that are no real ones and only come because people don't know how to play vs certain strategies or vs certain Decks. Please as a first step only post (in short words) which Balancing Issues YOU think are in Battelforge that need to be adressed. I am gonna collect all of those in a List here in the first post. After some time of collecting we can discuss each issue and see if it realy is a thing that needs a fix, or if it's not. After we have a list of REAL Balancing Issues we can start to discuss those in seperate threads again. I Hope this will lead to a more sophisticated Discussion about PvP balancing and will lead us in a direction so that we can start to balance or test balancing ideas when the server is up and running (maybe on a seperate testserver). I am gonna start that List with the issues that I think are problematic in BaFo PvP. I am gonna ad the name of the person who reports an issue in brackets behind it. Please be aware, that not everybody has to be your opinion, just post everything YOU THINK is a balancing Problem in PvP. You don't have to post any ideas how to solve this problem, lets first only collect, then discuss all the points. Perceived Balancing Issues in PvP: - Weakness of Bandit T2 and Shadow/Nature T2 (Nachtalb) - Shadow/Frost T3 is overpowered (Nachtalb) - Tree Spirits are problematic in Nature T1 (Nachtalb) - lack of a cheap t2 m/m counter in pure nature (LagOps) - phasetower is problematic against nature (and maybe frost?) t1 (LagOps) - lack of reliable wareagle counters for pure fire (LagOps) - bandits being underpowered vs frostsplash T2s (SunWu II.) - cursewell being overpowered in frostsplash T3s (SunWu II.) - shield building being overpowered (SunWu II.) - war eagle + stormsinger(ability) being overpowered vs pure fire and fire/nature T2 (SunWu II.) - firedancers over cliffs/walls being overpowered (SunWu II.) - the (bug ab)use of netherwarp (green) casted on shadow mages being overpowered (SunWu II.) - Brannoc's special ability being too strong (SunWu II.) - pure nature being slightly underpowered vs certain m-unit attacks in early T2 (SunWu II.) - lost grigori's special ability being slightly too strong (SunWu II.) - phasetower and mortar being slightly too strong (SunWu II.) - Grigori's taunt bug (Aragorn) - Razorshard knockback delay bug (Aragorn) - Nothern star bug (Aragorn) - Juggernaut and Mo's ability CC-Bug (Aragorn) - Brannoc : Ability too strong (Aragorn) - Nature t1 : Give them something to deal with structure (mortar and phase tower) (Aragorn) - Nature t2 : Give them a M/M. (Aragorn) - Additional energie (energy parasite, thugs, etc.): Bad Concept (Aragorn) - Mountainer: Shield ability OP (Aragorn) - Well curse OP in 2vs2 (Aragorn) - Lajesh unbalanced : Too much wall and cliff potential on nearly every well. (Aragorn) - Bandits UP (Aragorn) - PvP is balanced/there should be no discussions at the forums at this point (Anonymous, xHighTech)
-
Circadia has created a fantastic guide back in 2009 encompassing basically everything that is to know about BattleForge and how to get better at the game. It was built around the concept of PvP, but all kinds of mechanics and strategies are explained within, in great detail. To prove that, here is a quote: I mean, c'mon! How cool is that? The actual guide is 44 pages long, and was only available in pdf format. Unfortunately, converting it to doc throws the formatting/tables and embedding 44 images isn't a healthy option either. You can download the original pdf file by clicking HERE. Here is the Table of Contents to give you guys an idea of what the guide entails: 1. Who this guide is intended for.................... 3 2. What to expect from Battleforge PvP.......... 4 1. MT:G meets Dawn of War................. 4 2. The Fog Lifts....................................... 4 3. Victory Objectives.............................. 5 3. Reading Cards............................................... 6 1. Unit Cards........................................... 6 2. Building Cards..................................... 8 3. Spell Cards......................................... 9 4. More Information................................ 10 4. Building a PvP Deck..................................... 11 1. The Four Elements............................. 11 2. The Tier System................................. 12 5. Deck Purity.................................................... 12 1. Deck Interface.................................... 13 5. The Power System........................................ 14 6. Why you need power.................................... 14 1. Mechanics of the Power System....... 14 2. Practical Power Usage....................... 17 3. Know your Income!............................ 18 6. The Counter System..................................... 19 1. What is it?........................................... 19 2. Attack Type and Unit Size.................. 19 3. Complex Counters.............................. 19 4. Counters and Power........................... 21 7. The Playing Field........................................... 23 1. Layout of a Map.................................. 23 2. Point Control....................................... 23 3. Playing your Cards............................. 24 4. Healing and Repair............................. 29 8. Basic Strategies............................................ 32 1. Rushing............................................... 32 2. Harassment........................................ 33 3. One Unit Wonders.............................. 33 4. Infiltration............................................ 34 5. Wall Offense....................................... 35 6. Map Domination................................. 35 7. Turtling................................................ 36 9. PvP Rewards.................................................. 37 1. ELO and Rank.................................... 37 2. Tokens and Gold................................ 38 3. Collection or Tome?........................... 38 4. Upgrade System................................. 38 10. Glossary of Terms........................................ 41 11. Acknowledgements...................................... 44 Suffice to say, all credits go to Circadia for his time and dedication.
-
How to Build a (PvP) Deck A Battleforge Guide by Eirias Last update: 6/3/16 This guide is primarily for players new to Player vs Player (PvP) matches. Perhaps an experienced player could gain some information playing an unfamiliar faction, although I would assume he knows the basics already. I will attempt to explain the reasons behind why certain cards are included and why certain cards are not included. In addition, I will provide examples from my own deck illustrating my rise from noobdom to pro (perhaps that was an exaggeration. I was roughly in the top 30 at my best and my PvP rank was usually around Hero. I could complain about my handicaps, but that is neither here nor there). I am totally new to this game. Should I start PvP or will I get stomped and ragequit? Most people will advise you to start PvE (these are the storyline maps, or the random maps that generate enemies). I will do no such thing! Although people love this game for a myriad of reasons, I think it’s the PvP aspect that is the best. Yes, you will get stomped immediately. I’d recommend reading Circadia’s guide before you start, as that is the most prominent one up at the time of writing. Of course, if I write my own, I’ll direct you there instead. J If you don’t know any of the following terms, go read a guide explaining basic gameplay: orb, well, void pool, unit size, unit counters, power pool, bound power, siege, PPD (permanent power disadvantage), t1, t2, t3, BFP, cc. Elendil and Kaldra wrote a pretty good one explaining the basic mechanics of Battleforge. Now answer the following question: What wins matches? If your answer is “skill,” keep reading. If you think cards win matches, correct your misconception and read this anyway. Cards do not win matches—they are the medium from which matches are won, but they don’t do it themselves. Many players hold that one can make Legend with only the tutorial deck. I think that’s hogwash, but you can certainly get somewhere between destroyer and annihilator (14 and 20) with it. Also, you will almost definitely get stomped your first few matches. I shall do my best to prevent that, but if you have a tendency to ragequit, start in the sparring grounds or start with PvE. Why do you keep mentioning these really technical aspects of cards like I’m not a beginner who has no idea what half the cards are? Simply put, I’m lazy and this guide is long enough. I’m doing my best to be beginner-friendly and I’m barely using any abbreviations (and when I do, I make sure they’re clear), but this is a guide to explain the usefulness and synergy of each card in a particular deck, not an explanation of the card itself. I’d highly recommend using this site as your companion: http://allcards.bfreborn.com/. If you don’t know a card, look it up there. This is much better than having to sit through another 50 pages of me explaining that a particular card cost 70 power and requires 1 nature and 1 neutral orb and has swift and can do an acid spit that attacks walls. Just look it up. If there’s still something that’s not clear, comment on it and I’ll add a clarification note on the guide. I’m playing with the F2P deck (starter cards) and Nomads/Frost mage/ Firesworn/other lame card is an insta-win. If I save up to get that card, will I make it to the top 20? Not a chance. You will jump a bunch of ranks, but then you will get shut down. When I was a noob I always got stomped by nomads (get it J). Nomads were the first card I bought when I had money. I just rushed everyone and won a bunch of games. Then I was paired with someone half-decent (maybe rank 11 or so) and I got shut down hard. I’ll discuss lamer counters later in the guide. Suffice it to say for now that no cards are broken, especially in t1. T1 is very well balanced. As long as you do the balancing yourself. So sit tight and pay careful attention to my section on t1. I have no BFP. Does that mean your advice doesn’t apply to me? Actually, no. My advice should be especially helpful to you. Unlike other guides, I won’t just hand you a grocery list of cards you need (I’ll actually do my best to avoid that). I’ll be illustrating guiding principles. Obviously some techniques will be better than others, and better techniques usually arise from better cards, but most decks work just fine with about 15 “free” cards. I’m also a particularly good person to be writing a guide for those with little BFP, because I was completely P4F in the old game. I got no handouts from other players and spent no money in the game. In BFReborn, there will never be another player as destitute as I was. However, I can imagine that many of you will not have earned enough BFP for a list of “ideal” cards yet, so I’ll provide what advice I can so you can keep playing until you can come back and revise your deck with the more expensive, optimal options. So I heard that nobody plays t4 in PvP. T4 is awesome and I’m going to play it anyway! Power to you! Just please don’t rage when you lose. I’m all for people ignoring my advice and doing whatever the really want to do! I’m not here to force you to do anything, only to offer my advice and experience so you can accelerate your learning process. Not using t4 is probably something you would have figured out at some point (even I figured that one out on my own), because it’s really, really obvious when it comes down to it. T4 requires 300 power, and a waiting period. Do you have any idea how fast I can murder someone with 300 power laying around in t3? Your monument that’s about to get built won’t stand a chance if we’re even, and if you’re winning so much that you can safely go t4, why don’t you just finish the game already? Even worse, that 300 power is not eco-friendly. It’s bound, which means it doesn’t get recycled. If it drops that’s a huge chunk of power gone, although it’s still permanently gone even if it doesn’t drop. Additionally, many maps don’t have enough orbs to allow you to t4 safely. Spending 300 power just invites such a massive counterattack that you have no hope of defending it—even if you bring Amii Ritual. And somehow have the power to play it. In fact, you’ll probably lose merely because you’re holding on to 300 power in your pool. Imagine you are building up power for t4 and I cast 2 soulshatters, or a sandstorm, or I just summon a Grigori and nasty it. If that doesn’t kill you (which it totally will, but maybe I was being dumb), I will still get more power than you. That sudden loss of 300 power will bring back somewhere between 100 and 200 by the time your monument gets up. Even then, I’ll be getting power faster than you because my void will have 300 power more than yours. So if you think you have what it takes to play t4 in PvP, go for it. Just don’t hold me responsible for sending you out into the world uneducated. About now I scrolled down to see when the actual guide starts. Then I realized this thing is borderline superlatively HUGE! What’s up with this? Fear not! An actual guide does exist in here, I’m just trying to get the preliminary questions that I anticipate noobs asking out of the way. This guide is so long because I am trying to be thorough and show you guys how to build a deck. I want to give you tools to do it yourself so you can custom-make your own decks and be original. Please don’t take anything I say as absolute law (although you will probably come around eventually, if you disagree with me). I also include a lot of personal comments and stories, because I’d like you guys to learn from my mistakes. I also feel they illustrate points better. If you don’t have time to read this whole thing, here is what I suggest: Take a look at my section on the metagame and figure out which deck fits your play style. Read my fire-nature section for an in-depth analysis of how to build a deck from scratch, then go to the section you want to actually play. You will learn more about all the decks—and especially get a better idea of what to expect when you play against them—if you read the entire thing, but I understand that is too large of a time commitment for some people. Do you have any biases? Absolutely! Due to only being a P4F player, I only played one deck seriously: Fire-Nature. That said, I did have some other “fun” decks that I messed around in the sparring grounds. I played t1 fire almost exclusively, although I also tried my hand at frost. I never bothered to acquire the necessary t1 for nature or shadow, although I’ve played with lots of players who had. So my comments regarding other factions will be from my perspective as a fire-nature player. I also played 2v2 extensively with several very good shadow-frost players, so all together I have strong personal experience with all of the factions. That said, if any other veterans want to chime in with advice or things I missed in this guide, I’ll happily add them in and credit you. Now, on to the meat of the guide. How does the metagame work? · Pure Fire o Your biggest advantage is fire dancers. You are the most aggressive faction, and your primary goal is to set up fire dancer camps; even better if you can do so from behind a wall or cliff. Your strategy is very simple and one dimensional, but highly effective. Rally banner to fire dancers. Enforcers and skyfire drake to defend the dancers. This faction is the most map-dependent faction. Additionally pure fire has an excellent t3 in juggernaut, which is probably the best t3 unit in the game. You will typically struggle more in t2 than t1 or t3 because of your inability to defend: you have no heals, repairs, or cc’s. You live by the adage that the best defense is a good offense, but that is the extent of your defense. If your attack fails, it is often not recoverable. Pure fire is notably bad at preventing its opponent from converting temporary advantages into permanent ones—although it is quite good at the conversion itself. Fire is often fun to play because of its simplicity and sheer power, but many players feel the “cliffdancing” is lame and avoid pure fire because of it. Pure fire has very good matchups against pure nature and pure shadow, but very poor matchups against pure frost and stonekin. · Fire-Nature o Your biggest advantage is the synergy of fire spells and nature spells. Another quite popular deck, fire-nature is known for its hard hitters. This deck has slightly worse offense than pure fire, but better defense. This deck is the best at “brute force” attacks. With enough power, you can spam heals and cc tank through to the well. A massed fire-nature army is particularly dangerous, although it only occurs rarely because of how much power the units cost. Cc can be used for defense as well as offense, and while most player prefer to use it offensively, you need to be careful about expending too much power in an attack. It is often possible to spend an immense amount of power to guarantee a well drops, but the backlash from the defending army will often overwhelm you completely. This deck is fairly good at preventing temporary advantages from converting to permanent ones through judicious use of cc and mortar camping. This deck is too volatile to try accumulating small advantages—just rush. Defending requires a good deal of proactivity, and the most successful defense is usually to counterattack instead of defending. This deck is probably the best deck to have a lot of power at t2, but it is one of the worst to have lots of power at t3. Since the nerf of sun reaver, fire-nature has easily the worst t3 of any faction. Because of the nature of fire-nature t3, it’s often impossible to prevent an orb from dropping in t3. For this reason, it is highly recommended to play the t3 orb the same color as your starting orb. Often the best outcome of a t3 fight is for both of you to lose your orb—if your t3 and t1 are the same color, you will only drop to t2 when this happens, instead of t0. This deck has perfected the strategy of attacking multiple places at once, but is ironically highly susceptible to the same tactic: with equal power, fire nature can defend any t2 attack in one place, but it often requires just a little more power to defend than the attacker needs to attack. The deficit piles up very quickly when many small attacks are initiated. Fire nature is especially good for you if you like long, creative, perilous t2 battles. There are no t2 matchups that are particularly terrible for fire-nature, but the drawback is that it has no particular advantages over any other faction. Stonekin, and fire-frost will probably give you the most trouble, especially stonekin. · Fire-Shadow o You are aggressive and depend on buffs. You’re particularly good at turning an insignificant threat into a serious one. Cc’s are the bane of your existence, but you also possess the tools to strike in many areas at once, mitigating the effect of cc. You can just as easily spam 4 nightcrawlers to 4 different bases buffed 4 different ways as you can put all your energy into one attack with a rallying banner and darkelf assasins, nightcrawlers, rageclaws, or shadow phoenixes. Matches tend to be one-sided: either you dominate, or you get dominated. T1 control is often critical to play a good bandits deck. Your t3 is one of the best, with nigh unstoppable options such as giant slayers, ashbone pyros, sandstorm, soulhunter, and cultist master. Having lots of power in t3 benefits you more than almost any faction. Most players consider bandits to be the weakest faction, but you ignore the opinions of the unenlightened because they don’t understand the meaning of “style.” · Fire-Frost o You are the deck of contradictions. You have the high attack of fire combined with the defense of frost. You abuse ice shields even more than pure frost, because your normally squishy fire units can do absurd damage when they’re not worried about dying. You are the deck of building shenanigans—if anyone is going to pull some mischief with termite hill, it will be you, with your building repairs, cc, and warden sigil. There are quite a lot of interesting building combos at your disposal, but most are just too impractical. Nonetheless, you consider yourself to be the most creative faction, testing ideas that everyone else has written off. You need to be attentive and demonstrate excellent micro to play this deck. Additionally, your t3 is not the strongest because you must pick between giant slayers and tremors. Fire-frost has no particularly good or weak matchups, and is a good deck for preventing random losses. It is probably the most difficult deck to master, as well as being extremely expensive—mountaineer is fairly essential for fire-frost. @Hirrooo disagrees with me here; he states that fire-frost can get almost as much mileage out of rageclaws and that fire-frost is quite viable on a budget. He’s better than me, so you should believe himJ. @YaBro0 mentions that this deck can be played very creatively, or not at all (mountaineer and stormsinger spam). · Pure Shadow o Oh, the combos! You love being needlessly complicated. You have an interesting dichotomy—on one hand you have sheer shadow mage aggression; on the other, you have the tactic of building up power for a harvester. You can choose to take the initiative with cheap units, or you can play passively, conserving power for a harvester. This deck is very good at punishing mistakes, and if you like slowly accruing a power advantage, the harvester allows an easily convertible reward for having all that power. This is the ultimate risk/reward deck, and has many options for combos based on corpse collecting. Your t3 is phenomenal, especially if you go frost t3. Pure shadow is very strong against non-frost splashes, but struggles against frost splashes and pure fire. · Shadow-Frost o You want to win at any cost. Let them call you a lamer! At the end of the day you’ll have the higher ELO. This deck is notorious for its laming ability, but it’s a strong deck even when played like a gentleman. Frost and shadow combo well together, with the high health of frost boosting sacrificial damage from shadow. You have all the bases covered with cc and building repairs. Lost souls has the largest variety of viable t2 units—there are so many good options, it’s hard to choose! You have one of the best t3, and it’s definitely possible to get away with a light t2 to carry a large t3 army. This is the deck that can spare slots for curse well or church of negation. This deck is the best for camping t3, but you can just as viably go aggressive t2 instead of saving those spots for the long t3. Lost souls has the best average matchups of any deck. It has a slight edge against many decks, and a large edge over a few. Stonekin or pure nature is probably its hardest matchup, but this deck has so many strong options that you can easily change it to accommodate if you have trouble against a particular deck. Pure fire is also pretty good against shadow-frost (one of the reasons many top players played pure fire). · Shadow-Nature o This deck is all about those M units. Burrower and nightcrawler are your right and left hands. You are the evil twin to fire-nature, lagging slightly in defense but making up for it in offense. You must rely on a multitude of units because you have no strong solo unit. You excel at keeping your units alive during an attack because of your buffs, heals, and cc. You are great at getting a unit advantage and then keeping it. This is one of the most balanced decks. Stonekin is your worst nightmare because your 2 main attack units (nightcrawler and burrower) get countered by stoneshards and knockback, while hurricane takes out your darkelf assassins. Pure fire will also give you a lot of trouble because you lean heavily on burrowers and nightcrawlers, which are both M units that die to enforcers. You also don’t have building defense. @Hirrooo considers shadow-nature to be the strongest against frost because ghostspears and nightguard are difficult for the frost player to deal with. · Pure Frost o Your biggest advantage is war eagle. Arguably the best t2 unit in the game, your entire strategy hinges on it. This deck epitomizes the “one-hit wonder.” Your goal is to keep your war eagles alive and support it while it kills everything else. The deck is very defensive, but doesn’t launch quick attacks very well. While the war eagle can solo, especially against t1, it moves slowly. You can defend one attack very well because war eagle kills everything and your building repairs take care of the rest, but multiple attacks are hard to fend off because of the cost of war eagle. Often the pure frost battles are determined by who controls the sky. As such you have very good matchups against pure fire and very poor ones against pure nature. Overall it’s a fairly balanced deck with no outstanding weaknesses. · Frost-Nature o This deck is all about standing army control. Attacks are slow, but you definitely have the option to do some t2 rushing with burrowers. They probably won’t succeed because you don’t have offensive spells to assist, but you definitely have the means to add pressure. In general though, you will win by passively accumulating a standing army and then strangling your opponent to death. You have both heals and building repairs, your units take less damage, and many of your units are knockback based. These factors combine to make you the ultimate survivor. Add in the fact that you have OP S/M beast counters and razorshards, and it’s easy to see why nobody likes to play against this deck. Many feel that it takes the fun out of Battleforge because of how long stonekin matches take. Andre Philidor revolutionized chess to show that slow, positional play beats fast-paced tactical aggression, and stonekin player seek to do the same in Battleforge. As far as I’m aware, this deck has no bad matchups (although it does have some unfavorable ones that depend on individual decks—for instance, some players pack mauler explicitly for stonekin matchups), and it does have some very good ones against pure fire, pure shadow, and bandits. Pure nature is probably stonekin’s hardest matchup. · Pure Nature o This deck is all about power manipulation. You have energy parasites and shrine of memory. Deep ones are also quite powerful, but the truth is that you just use them as a distraction to set up your power manipulation. You have Deep Ones and Burrowers to go strong on the offensive, but with no attack spells you are unlikely to make a successful offensive without a power advantage. Your parasite swarms are also a tad overpowered, but they’re difficult to use because they cost a lot (this is a theme with pure nature). Pure nature is unique in that it can be played in two completely different ways—it’s almost as if root decks are a separate faction. Root decks rely on cards comboing with a root nexus to build a large standing army and maintain it. This style of playing is most similar to stonekin. Pure nature has a particularly easy time against pure frost because of energy parasite, but a very hard time against pure fire because of its lack of building repairs or unit damaging options. What do I need for t1? The t1 metagame is pretty advanced, but it’s very balanced. Note that it’s only balanced when the optimal cards are employed. If you need a cheap deck, shadow and frost have the cheapest t1. (For those interested, shadow used to be crazy expensive because dreadcharger was very pricy. Then witchclaws were introduced as a common and now shadow t1 can theoretically be played with only commons). For every t1, you need a SWIFT unit to get as much map control as possible. Note that frost has no swift units in t1—it compensates for this with just being generally OP J. You also need a RANGED unit. Kiting is important, and ranged units spam easier than melee units because melee units sometimes get in each other’s way. Ranged units can also be spread out to minimize the danger of an eruption or nasty surprise. Additionally, you must use each faction’s core spell. That would be surge of light, eruption, glacier shell, and nasty surprise. These are the most important four cards in the game. The entire metagame is based off of them. Furthermore, you must have S and M counters, and units which are not countered by S or M counters. Fire t1: Your essential cards are: Eruption, Scavenger, and Sun Strider. For fun, I’ve played matches only carrying those 3 cards. It’s really not optimal, however, and it forces t2 rushing (which is a terrible habit). With one notable exception, all the pros I am aware of play an extended t1. They try to build a t1 power advantage, and it’s simply not possible to do so with only these cards. Nonetheless, if you play defensively and concede to a map-control disadvantage, you can play with only this. Note that sometimes you will lose to a t1 rush that you just can’t handle. I’m looking at you, MA spam with homesoil and wintertide. The next most important card is Thugs. It’s really hard to fight shadow forsaken spam without thugs. Following these, the usefulness of t1 cards are as follows: Firesworn = Mortar > Sunderer > Mine > Scorched Earth > Wrecker > Nomad. Please don’t use nomads. See below for why. As a general rule of thumb, take the cards in this order. Decide which cards you want in t2 and figure out how much space you need. Allot your t1 cards according to your empty deck slots. For instance, in my most successful deck, I had five spots for t1. I brought eruption, scavenger, sun strider, thugs, and mortar. I think mortar is more essential than firesworn, but I think most players disagree with me. Regardless, I played without firesworn for most of my matches, and I never used sunderer except in some 2v2s and 1v1s when I messed around with pure fire. Commentary on the pros and cons of each card: Eruption: This card. It does 300 damage (U3—assume everything I say is U3) to 3 targets, including air. This card is a primary anti-air defense, as well as generator nuke. If a nature player has an expensive unit <300 health, instantly erupt it. If a frost player has a well <300 health, instantly erupt it. If there are multiple units clumped together, erupt them and finish off with sunstriders. Scavenger: This is a great swift card. It’s cheap, a great S counter, and has crippling bite. Scavengers work great with sunstriders because between the two, you have both S and M counters, and you can slow enemies with the scav and kite with sunstriders. Sunstriders: Not a particularly great t1 ranged unit, but ranged units are essential, and the sunstriders have to be weak because scavenger pairs so well with ranged attack. Despite their low health, they have great attack. If you face a Fire Drake with ravage, make two sunstriders and erupt the drake as soon as it’s HP <300. Other factions have a much harder time defending Fire Drakes in t1. Thugs are a terrific card. They are S/S, so forsaken don’t eat them—this tends to be a problem with scavengers: although scavenger are M/S and forsaken are S/M, the forsaken are cheaper, have longer range, and can frenzy or motivate. Spamming scavengers and spamming forsaken will lead to an easy shadow win. If you don’t have thugs, forsaken spams are very hard to deal with. They also help vs windweavers, but the real reason you need them in your deck is to combat forsaken. Thugs also have a looter ability, which gives you power for attacking units (proportional to the unit’s power, I believe). I don’t really know how it works, but sometimes I send thugs out against grigoris or juggernauts just in case. Firesworn have multiple uses. They knock back small units, which really helps against frost Master Archer and windweaver spam. Unfortunately they cost a lot and have low health, so I generally don’t recommend their use for knockback. They die very quickly to frostbite, and a roots with well-placed windweavers can kill Firesworn without them getting a shot off. If you use them versus forsaken, you need to be able to make one for every forsaken, which is quite difficult. It has more use if you can make it so your firesworn is not dazed while the forsaken are, which makes them good for defending forsaken spams at wells as long as the forsaken have not been pre-summoned. Of course, if you see your opponent making 3-4 forsaken at once, that’s a good cue to make a mortar tower. Generally the red affinity is better. Some prefer the blue (especially fire-nature, to knock back a large unit and root it), but most like red better. Mortar Tower has saved me so many times. It works well in my deck, because I play a defensive t1 with the goal of saving card spots. It’s also useful for punishing laziness. Some maps have areas with wells that really shouldn’t be taken because of mortar tower pressure, but if your opponent takes them anyway, punish. The #1 reason I play this card is to stop frost rushes. I also like welling up more than my opponent, and when he builds a bunch of units to rush me, I build a mortar. The relatively quick build time on this card also helps saves. I even use it in t3 (!) to defend against things like juggernauts. I have a few more secrets with my precious mortar, but I won’t share them because as far as I know, I’m the only one who does this. Sunderer: The only t1 L unit, this card really helps against shadow. Against nature’s amazons or roots + windweaver it’s pretty pointless, and the combination of lightblade and glacier shell makes it practically useless against frost. Fire can generally deal with sunderers easily through eruptions and scavenger bites with kiting sunstriders, or a simple firesworn. It’s still more useful against fire than frost or nature, however. Shadow struggles the most with Sunderers because of its lack of t1 L counters. Simply put, nightguard does very little damage, and the shadow player has usually lost the well by the time nightguard’s swapping ability is ready. For this reason, many shadow players don’t even carry nightguard. For shadow to defend a sunderer, it must usually nasty a dreadcharger while the sunderer is dazed. Alternatively, you can walk the dreadcharger into the sunderer to slow it and kite with frenzied forsaken. In general, the shadow response to a sunderer is to let it get the well down, kill it, and then launch a responding offensive with all the defending units. Mine: Honestly, I think this has more use in t2. The mine does such a ridiculous amount of damage that it basically one-shots anything in t1. The downside is that the opponent must walk into it, and it has a smallish blast range. It’s basically a shot from a mortar tower except you don’t need to wait for the tower to build. It combos nicely with fire-nature’s hurricane or ensnaring roots, and it can be a semi-useful cc (crowd control) for pure fire or bandits. Scorched Earth: It has its uses. I saw it used quite effectively in a match between SchokoPeace and xAragornx linked here: https://www.youtube.com/watch?v=XcFRUgSda7A. Nonetheless, it is a nicety and is useful only situationally. Pure fire is pretty much the only deck that can spend a slot on this card. If you use this, make sure to use the red affinity. Wreckers: I have a deep love for wreckers. They were my go-to unit as a noob. They’re great cards. But they’re not that useful. Not with fire. The thing is just that melee non-swift units are very vulnerable, and wreckers have it even worse because of their low health. They can be quite useful vs frost mages and dryads, but roots or ice guardians usually beats them. Their rally skill is useful, especially for surprise sunderers, but they’re hardly worth the deck slot. I used to carry them instead of thugs to deal with frost rushes, but I learned to just get better at using mortar and scavenger micro. Nomads: The green ones are better, and these cards are notorious for noob-stomping. I remember when I was new, all I wanted was a nomad (or frost mage) because they are great against small units. Right? Wrong. Nomads are M/M units, same as wreckers, and have the same utility. Except worse. Nomads reward spamming the same unit, but spamming is punished harder than Nomads reward it. Eruption takes out a group of Nomads because they are grouped. 6 sunstriders can be made with the same power as 4 nomads (which is pretty much the minimum number needed to rush), and the nomads will drop to 2 sunstriders. Additionally, you can erupt every spawned nomad because they cost the same as an eruption, and the eruption will also hurt the nearby units. If I see someone make a bunch of nomads, I just take a well with the knowledge that my defense will be very easy. Nature can simply root all the nomads and shoot them with windweavers. Shadow can nasty surprise, or just spam forsaken back (forsaken win). Frost probably has the hardest time, but ice guardians are good against them, as well as lightblade and frostbite. Remember that as soon as the number of nomads drops below three, they lose their buff. The switch from nomads to scavenger is the best decision you can make in a fire deck. Two days after I did that, I jumped several rankings (something like 10). Nomads are just not very good as swift units. They cost too much, and they are M/M so they are useless with sunstriders (If fire had Master Archers instead of sunstriders, nomads would be much more useful. But that’s not the case). Makeshift Tower: This can be useful for noobs against noobs, but it’s not useful otherwise. It helps against windweaver or master archer spam, but the tower really isn’t worth the deck slot. Although the tower does great knockback, it does very little damage. Basically thugs and scavengers are better at doing damage to small units than makeshift tower is at knocking them back. If you need the knockback super badly, there is always firesworn, which has utility elsewhere as well. Banner of Glory: I never see this played, but it does have its uses. I once won a bunch of tome matches with this card, but that’s because neither player had the optimal t1. It’s about as useful as makeshift tower. Strikers: Nope. They have the same issue as nomads, but they’re even worse. I have nothing more to say except a warning not to bring them. Suppression, Blaster Cannon, and Other Nonsense: Completely useless. There are no other fire t1 cards even worth considering. Additional thoughts: The order I listed above is actually pretty strict, comparatively. Fire cards don’t have a ton of redundancy or options. Pretty much each card is better than all the cards listed after it. However, there are cases when it is better to bring one card over another. For instance, fire-nature players may take mine instead of firesworn, sunderer, or mortar tower because the card combos really well with roots in t2. You’re more likely to see mortar tower in a fire-nature deck than a fire-shadow deck for the same reason. In theory, you could take all of these cards with you (except nomad, please) and have basically no t2 or t3. I have seen good players take that route—they straight up rush t1 every time. Of course, if your t1 rush fails you don’t stand a chance, so I don’t think these players ever made it into the top 20 this way. Despite my animosity towards nomads, if you ABSOLUTELY cannot afford a scavenger, there are ways to make it work. See one of my noob decks below for an example, but you need thugs 100% (and probably makeshift tower) if you don’t take scavenger. And your best bet is to avoid t1 confrontation as much as possible. @SunWu II commented that he’d rather leave out eruption than sunderer or firesworn. If he has a full t1 I can see where he is coming from. Eruption is sort of the jack-of-all trades; it does a lot of things pretty well (like helping against L counters, knocking back small units, or helping drop a well). If you can do all the other things without eruption, then perhaps I wouldn’t list it as completely essential. But if you’re trying to skimp on t1 slots, eruption is the most versatile for replacing the other options (mortar as well). Eruption also punishes beginner mistakes. It’s not that essential when playing high-ranked players because they rarely allow great eruptions, but it can end games very quickly against noobs. Like my target audience. @Dexirian commented that he played without thugs all the time. I suspect he used firesworn and sunderer though, and would respond to forsaken with a sunderer rush to drop a well. @Hirooo, in response to Dexirian, said, “Thugs give a huge edge vs fire and are even stronger against shadow since both were pretty much 1 swift s counter + s unit m counter spam. Also made welldefense way easier and enabled you to take one well up earlier than without. Not a must have no but I would strongly advise using them at least in every firesplash that isnt fire/nature since that one stretches the cardlimit a bit harder.” All of these are respectable players (otherwise I wouldn’t be quoting them), but Hirooo is especially high ranked. Take what you will from the discussion. Shadow t1: I can’t speak for lower level play, but this faction is the most-played t1 in the upper ranks. FarRock once claimed that 60% of top players played it—I’m pretty sure he just made that number up, but it seems about right. This might also be due to the prominence of shad-frost players, which I’d estimate to make up about 2/5 to 3/5 of the top 200 players (like FarRock, I’m making this up). Shadow t1 rewards good micro, while at the same time it’s a relatively easy faction to play well, even if your micro isn’t that good. You can play with a variety of t1 luxuries, most notably: lifeweaving > motivate > phase tower. @YaBro0 notes that lifeweaving is essential for bandits or pure shadow, while motivate is essential for shadow nature. Your essential cards are Dreadcharger/Witchclaws, Forsaken, Nasty Surprise, and Nox Trooper. I suppose in theory you could get by without nox trooper, but I really don’t recommend it. Lifeweaving and Motivate are also a staple in most decks, but you can manage without them. In general, the only other unit you should consider t1 is Nightguard. Dreadcharger: The most common t1 starting card. It has a smidgen less health than witchclaws, but it has a better ability, tramples small units, and cost 5 less power. Witchclaws: Playable as your 1st unit, but the general consensus is that dreadcharger is better. The reason to take witchclaws over dreadcharger is that it has more health for a better nasty (witchclaws can kill a skyfire drake, but dreadcharger can’t), but it’s not that much of a difference. Witchclaws are much cheaper by rarity, and TBPeti feels they are an acceptable substitute if you can’t afford dreadchargers. @Hiroo feels witchclaws are a “really bad idea” if you can afford the dreadcharger. Windweavers can do double damage to them, their attack halves when one dies (squad probs), they have a longer spawn animation and they cost 5 more power. In return, they get a mere 30 hp bonus and a terrible ability. @YaBro0 said that witchclaws are better in shadow mirrors because when they nasty, they exactly kill a full health squad of forsaken. Nightguard: Although I’ve seen some people play this as their starter unit, I don’t recommend it. They are very weak, and you’ll almost definitely lose a t1 fight without witchclaws or dreadcharger. And if you have those, why would you start with nightguard? Nightguard does have use against L units though. The swap is very nice, but not so useful in t1 because sunderer is the only card worth swapping, and the nightguard’s ability has a large cooldown. Your well will probably be gone if you’re waiting to swap. This card is much more useful in t2 against cards like Deep One, Lost Reaver, War eagle, etc. The choice of affinities is personal preference—swift helps you catch the unit you want to swap with, but it also helps your swapped nightguard get away. I’d recommend the green affinity, but TBPeti preferred the blue in his shadow-nature deck—he would cc the unit he wanted to swap with, and then catch the normal speed nightguard. Forsaken: These guys are amazing, and a necessary addition to every shadow deck. Their frenzy does great damage, and forsaken spams are reliable ways of dropping wells against fire. They have a harder time against frost and nature because of S knockback, but if you drop a well in t1 it will be by spamming these guys or nox troopers. Nox Trooper: I would consider these to be essential for t1. When playing against nature, you will probably need to spam these. (@TBPeti feels spamming isn’t the best idea because S units have better stats, but they’re still needed in judicious quantities.) Nox helps against hit-and-run tactics. They are essential to stay t1 against things like burrower rush. You’ll also need them to take out frost mages so your forsaken can do work. Nasty Surprise: An absolute must. Many of the shadow threats hinge upon a well-placed nasty. Although it is definitely the least used core spell (eruption, surge of light, glacier shell, and nasty), it is completely necessary for t1. Lifeweaving: I thought this card was essential for shadow, but @Hirooo reminded me that its usefulness actually increases as tiers increase. It’s often not used much in t1, but becomes more prominent in t2. As such, if you don’t plan to use it much in t2, it’s often a wasted deck slot for t1. It’s almost always bad to use lifeweaving in t1. The only exceptions I can think of are when a well is about to drop or you need to maintain ground presence. Motivate: This, nightguard, lifeweaving, and phase towers are the four cards that change between shadow players. Almost everyone uses dreadcharger, forsaken, nasty, and nox; these 4 cards switch around, and it’s very rare to see anything else. Most players value motivate more than phase tower, and phase tower more than nightguard. Lifeweaving is different; you’ll do best to treat it like a t2 card when deciding whether to bring it. Phase Tower: This leads to very campy t1 fights, and there are some places where it gets quite lame (certain cliffing maps, for instance). It’s especially strong against nature and frost. Fire tends to do better against it because of eruption. If you struggle against frost or nature t1, this is a good addition to your deck. Skeleton Warriors: I, like most people, thought these guys were trash, but Matos once used them against me when he was ranked #2. They’re basically forsaken, except worse because they don’t have range. On the plus side, they’re super hard to kill with their ability and have great health for nasty surprise, so they can be good at getting wells down, especially against fire. @TBPeti and @RadicalX feel these are the most underrated t1 cards. They can tank 1650 damage over 30 seconds with their ability—TBPeti attributed making it into the top 5 to his use of them. With their ability, they even beat wrathblades. TBPeti suggests using them instead of phase tower. Wrathblades: These can be an answer to fire’s thugs, and can help you in shadow matchups. However, S units are notoriously weak against frost and nature. I don’t recommend them. However, there was player in the top 20 who used them once upon a time, so they’re not useless. Executor: This is shadow’s equivalent of a wrecker, except it doesn’t even have the rally. Don’t bother with him. If you know you’re going to play someone with a frost t1, they add some nice aggressive options (credit @Hirooo) but they are useless otherwise. Decomposer: This can have some use, but not in any sort of classical t1 fight. Don’t bother with it. Embalmer’s Shrine: This has more uses than the decomposer. It works well with some pure shadow techniques, but doesn’t combo well with anything t1 except soul splicer. Rumor has it there’s an interesting combo with this card, soul splicer, and furnace of flesh, but I wouldn’t trust everything you hear. . . . Soul Splicer: The green is much better. It heals quite a bit, and can make a good offensive post to attack from. It’s rare that your opponent lets you get one of these up away from a well though. A more common technique is to pull it up near your well when you and your opponent have wells in close proximity. Then you can attack and constantly pull back for the building’s healing. It’s still an unusual card, although most pure shadow players use it (OP with shadow mages). Snapjaws: I’ve seen good players take these. They’re interesting, and much more useful in higher tiers. The problem is that they’re expensive, and do little to nothing in t1. @Hirooo said they have some use in defending sunderer in high power t1 fights. @TBPeti feels the damage-decreasing ones can have some use against L/XL units, but the defense-decreasing ones are just a worse frostbite. Neither affinity is worth the power or deck slot, however. Offering: It’s rare to lose all of your charges in PvP. This card is not worth wasting a slot on for the rare occurrence. If you have low upgrades, however, this might be useful. Still, it seems like a lot of power to get your charges back. Lifestealer: Don’t bother. If you want a building, take phase tower. Shadow is one of the most common t1s for a reason: it’s good. It’s also easy to play, and doesn’t require a ton of cards. Taking less than 5 cards for t1 is possible with every faction (except frost), but you will really have to avoid t1 encounters away from wells. Shadow can go light and still be fully competitive without phase tower or lifeweaving (motivate is pretty essential if you want to go toe-to-toe with fire or nature, however). The three optional cards are luxuries that give you more options, but good micro can get you through without them. Nature t1: Arguably, this is the “best” t1, although it requires insane micro and a lot of cards. It’s the most efficient faction at high power levels, but it becomes quite difficult to play when you’re desperate for power. I’d generally recommend starting t1 fire or shadow if you’re using those splashes, because you’ll probably save deck space that way. Alternatively, you can join the minimalist movement pioneered by xAragornx. Nature has a lot more options than other decks: there is no unit that you can’t play without. I won’t go into too much detail but rather list the pros and cons of each card. You’ll need a swift unit, a ranged unit, and a medium unit that can stand against hurricane or frost mages. If you really wanted to, you can accomplish that with just 2 units: treespirit and amazon. Your spells are not optional. You must have surge of light and ensnaring roots. I’ve heard of decks that neglected hurricane, but that’s like neglecting thugs for fire. Theoretically possible, but you should really keep it in. Since I can’t really list nature cards by order of usefulness like I can fire, I’ll just give an overview of each card and let you decide what you need. Dyrad: The blue affinity is much better than the green. The primary use of this card is doing damage prevention against eruptions. If this card is not in your deck, you cannot get in an aggressive t1 fight with fire, except in certain specific situations. The dryad is nice because it also puts units to sleep, but my suggestion is not even to bother with the green affinity if you don’t have the blue. Some players have commented that they bring both affinities for fun, because the green has certain highly situational uses in t2. Shaman: Very useful, but not as much as the dryad. I’ve seen good players that prefer not to take him, but he’s a mainstay in an extended t1 fight. If he’s not dazed, he can be very annoying to deal with. Amazon: A swift unit. Blue affinity is better. She is better than a swiftclaw alone, but if you have a large army, the swiftclaw is more useful. She’s a great counter to sunderer, and as a fire player, I like to see swiftclaws more than amazons. Actually, the t1 swift unit that strikes the most fear into my heart is werebeast. Amazons are annoying to deal with as fire because you can’t spam sun striders against her, otherwise your scavenger will kill them. I think the other factions have an easier time with amazon than swiftclaw, however. Swiftclaw: Another swift unit. This one does insane damage (almost 1500), especially against M. The animation to deal extra damage takes a bit of time. 1 scavenger and 1 sun strider typically beat 1 swiftclaw and 1 windweaver because the fire player can also erupt, ending it all. Same with nasty surprise and shadow. Swiftclaws are also fairly susceptible to kiting because of the time it takes to animate. @RadicalX pointed out that swiftclaws are fairly essential to combat nature doubles or frost mage spam. @YaBro0 said that swiftclaw should be the main damage dealer in a nature deck. Werebeast: These cards are often perceived as underpowered, although they can be quite useful in the hands of a good player. They require good micro to use, so that’s probably not you. Maybe in the futureJ. Don’t use them unless they are U3. Their heal ability becomes quite handy then, and you can annoy your opponent with all sorts of hit-and-run tactics. If you use this card, you need to be taking a very large t1. @YaBro0 said that if you have a deck slot for werebeasts, you should probably use spearmen instead. Windweavers: Probably the most important t1 unit for nature, although xAragornx has shown that you can get by on treespirits instead. Their multishot is very powerful, and they combo well with roots. You will probably spam them, especially against shadow. Mana Wing: In short, it’s super cool but not worth it. Spearmen: This is a very nice luxury, but not necessary. They are particularly good against shadow, and it’s not uncommon to start with them (instead of a swift) against shadow on a small map. Recommended if you’re having trouble against shadow. @RadicalX also lists them as quasi-essential against nature. Treespirits: Most people argue that these guys are overpowered. I do too. Spamming them works, which is just wrong. The green ones do especially high damage, but the purple ones are quite good to stay t1 and defend against frost. @RadicalX noted that the purple are also good against Nature dittos because it ignores the dryad damage reduction. You can also kill an Avatar of Frost with one purple treespirit and a root. Purple treespirit also goes through glacier shell. xAragornx plays this card and Amazon as the only two units in his t1. If you play a large t1, this card is probably not necessary. Envenom: I don’t see it much, but I hear that some of the great pure nature players used this to use this to help stay t1 vs t2. There is probably not room in your deck for it, otherwise a good option. I sometimes used it in my fire-nature deck as a counter to L units and especially war eagle or skyfire drake. Fountain of Rebirth is not actually as good as it seems. The reason is because you rarely have large standing armies that would benefit from a slow mass heal, and it’s pretty slow. Your opponent will not give you much opportunity to benefit from this. Mark of the Keeper: I hate this card. It’s not common, but it really helps in defending against factions that use a lot of spells (like fire-nature). I suspect it also shuts down pure frost, because pure frost doesn’t really have good melee units. But this is more of a t2 defense card, and it’s a luxury with a high price. It works really well against noobs, but if you want to get better you’re better off just learning how to defend properly. Mumbo Jumbo seems useful in theory, but it’s not so good. Very rarely do enemies only spawn one unit for a t1 encounter. It’s also 40 power, which is a lot. That said, I have seen it used on occasion. I don’t think I’ve ever lost to someone who employed it against me, though. Primal Defender is actually not bad. It’s a hard counter to phase tower. I don’t think it has much besides that, but phase towers can be very annoying for nature to deal with. If you can’t handle them (especially difficult on Wazhai), put this card in your deck. I don’t play nature much, but my opinion is that you want to avoid needing hard counters to certain cards. But ultimately do what helps you win, and if this card prevents you from being rushed, go for it. Stranglehold: Nah, you probably shouldn’t use this. It can help defend in t2, but if you’re permanently on the defensive, you’re going to have problems. Tunnel: Tunnel is the only nature card I’ve never seen used at some point in PvP (and I have seen it, but only from complete noobs—don’t be like them!). While they are probably the least useful nature t1 card, @RadicalX pointed out that some players like Kyllbuster did use them in t2 to whisk his units away from dying or avoiding coldsnaps. In summary, nature has great spells in t1. If you want to follow in xAragornx’s minimalist footsteps, you can get away with just Amazon, Treespirit, and spells. If you don’t want to avoid t1 conflict, go for a medium-sized t1 (I would recommend this). If you absolutely want to rush t1, I think Nature is the best option because it has so many good cards with many options. The problem is that all those cards are often useful only in certain situations, and the slots are often better used for t2. You can watch any of beijinguy’s replays for full-on nature t1 assault (I don’t even know if he played t2 in some decks). Against frost t1, hurricane is going to be very important against MA. Roots and windweavers can do a good job against ice guardians or frost mages, and treespirits are good as well. Against fire, micro is important, as well as judicious use of roots and hurricane. As long as you keep scavengers or thugs at a distance, you should be fine. Mortar tower makes this matchup much harder for you. Shadow fights often boil down to you spamming windweavers and him spamming nox troopers. Spearmen can help tip the tide in your favor. Frost t1: You have no swift units. Waa, waa. To make up for this, your units generally have the best stats/power cost ratio of any faction. Frost spams are nothing to laugh at because of the sheer power—even if they do arrive late to the fight. Frost is not an especially popular t1 choice, however, because most players dislike the lack of a swift unit. You need to play frost differently than fire and shadow, and most players that are accustomed to the more popular t1’s don’t want to put in the effort to learn frost. As far as I know, MaranV is the best frost t1 player. Because of frost’s great stats, it should win against any faction in an even power situation where both players have a well. For instance, a common frost tactic on Haladur is to try to take a well right next to their opponent’s (if fire or shadow) and then spam units. Frost also has a problem with harassment. Scavengers in particular can hit and run faster than frost can defend. This is defendable, but you really need to be on your toes. You’ll need to use a combination of lightblade and frostbite to make sure the swift units don’t get away, and it requires precise power balancing that you don’t spend too much power in one defense, just for the swift unit to run away to attack somewhere else. To play frost, you must take Master Archers, Ice Guardians, and Lightblade. In theory lightblade is optional, but frost’s lack of swift unit hampers some options and lightblade is really necessary to prevent lameness from your opponent. Ice barrier is an incredibly useful card especially with Homesoil. Glacier Shell is your core spell, but homesoil is probably more useful in practice. Usually it’s the threat of glacier shell that you need, so you would theoretically be fine as long people only assumed you have it. Frost mage is an incredibly useful card, as the second-best S counter in t1. Unfortunately, Master Archers are the best S counters in t1, so frost mages are slightly redundant. Imperials, Frost Sorceress, and Ice Shield Tower are your most-likely-to-use nonessential cards. Master Archers: Stat for power, I’ve heard it claimed that these guys are the best t1 units. That doesn’t mean everything, but MA are certainly good. They have 600 health and they’re a squad, so you can’t be erupted when they’re dazed (each unit survives with about 1 health, runs away, and gets the health back after daze). They’re incredible S/S, combining the best qualities of a spammer—high health, ranged attack, and low cost. Their attack is a bit low, but they still pack a punch when paired with homesoil. Being S units has its pros and cons. They are knocked back quite a bit, but they also do very well against the other spammed units (windweavers, sunstriders, thugs, and forsaken). Most player will start the match with master archers because they are cheap and don’t lose effectiveness over time like ice guardians do. Ice Guardians: These are your melee units. Their attack isn’t so good, but they still do well against M units. With their ice shields, they have over 1000 health—for only 50 power. This health isn’t overpowered (although it certainly is good) because ice guardians are rarely attacked. Typically they are used to defend, when the enemy is trying to drop a well. They do have some use in an offensive, although transporting them without losing their ice shield is a pain. Although they only cost 50 power and have even better stats than the master archers because of the shield, they are a poor choice to start a match with because they will lose their shield by the time they arrive anywhere. Lightblade: One of the best t1 units. He is essential to dealing with sunderer, but he’s so overpowered that he’s still a very viable t2 L counter. His ability is also necessary for making sure units don’t get away and combos well with frostbite. There are just so many terrible things lightblade can do. Both affinities are good, and it depends on your use for which one is better in your deck. The red one is better when you are using the lightblade to kill t1swift units. The purple is better when you are using it as a cc on L or XL units in t2 or t3. MaranV often starts with a lightblade because it has good stats and wins any 1v1 fight. Frost Mage: This is the frost equivalent to thugs. Very useful, but you can get by without it. Frost mages are amazing against unspreaded archers, or things like thugs or skeleton warriors. They are very strong against fire because they take away fire’s M counter. They are good against frost dittos to take out MA, and they are strong against nature because nature’s hurricane takes out MA. They are not necessary against any of these, however, because Master Archers are better—they just don’t have the knockback. MaranV didn’t use them in his deck because the FM’s redundancy as an S counter. Glacier Shell: Similarly to nasty surprise, this card isn’t spammed. It’s more the threat that you can defend a well that manipulates your opponent’s playstyle around it. Still, I’d say it’s fairly essential since the main reason you are playing frost is for your ability to defend your structures, and having this in addition to kobold trick (the spammed spell) increases your defensive options. That said, it is probably the core spell which you can most get away with not using, as it has a better version in t2. You have to know exactly what you’re doing to get away with not using this card, however, so I’m going to consider it essential for you. Frostbite: This card is pretty essential to play frost t1. A lot of players use it for t2 as well, because it makes it much easier to kill strong enemies (especially fliers). The purple is much better than the red. This card and lightblade are all that stand between your wells and a scavenger guerrilla attack. Ice Barrier: For 20 power you get ground presence. If it sounds underpowered, that’s only because you haven’t played enough yet. This card is great for preventing walls from going up, for gaining and maintaining map control (difficult with slow frost units), for giving structure bonuses (homesoil, lyrish knight, ice guardians), and for absorbing splash damage. An essential card, not because it defends against anything in particular but because it is so useful—to skip this card would be like skipping eruption. Homesoil is pretty necessary for frost because frost does such little base damage. Pairing it with splashes such as lost souls (or, heaven forbid, fire dancers in 2v2) greatly increases its effectiveness. You would be remiss in skipping this card—while it is an “optional” card, it’s so much more useful than any other optional card that it may as well be mandatory. Imperials help in certain matchups, but they are not the most useful in t1. S/M units w/o range just don’t have a ton of use because most of the t1 M units are swift. Nonetheless they do have great stats and can be quite useful in a rush because they take so little damage. They also perform well in a scenario where you stay t1 against t2, because of the prominence of M/M t2 units. This is not an uncommon frost t1 card, but not a particularly common one either. Northguards are literally the most useless t1 units in the game. Not because they are especially bad—because their stats are okay—but because they are so redundant it hurts. Frost already has the best S/S and M/S t1 in the game. Why on earth would you need a mediocre melee S/S? Frost Sorceress: This unit is more useful in t2, and is a staple for fire-frost decks. It can still be good in t1, especially with frost mage or lightblade, but the real reason to use her is to get those ice shields onto hard hitters. Ice Shield Tower: This card is better than the frost sorceress for giving out shields, but the problem is that you need to get a tower up. I see this in fire-frost or pure frost decks occasionally, but you will probably not use it for t1, but rather t2. Only use this if you derive sick pleasure from lame camping J. Warden’s Sigil: Another t1 card that is really more useful in t2. You’ll want to use the blue affinity so you can shield buildings under construction. This pairs well with ice shield tower or termite hill in fire-frost decks, and is useful for protecting power wells should the need arise. Again, it’s really only a specialty card. Wintertide is one of the lamest cards. It allows you to get away with MA spams much easier, since they take less damage and can’t be knocked back. It’s really only useful if you’re trying to rush, and that only works against some decks on some maps, so it’s a fairly situational card. Most good players dislike risking a wasted deck slot to get a potentially cheap win, so it isn’t the most common card. Both affinities are good, but the red one works well with lightblade for killing L or XL units quickly (it also insta-kills dreadchargers). All in all though, I think this card just builds bad habits that won’t work on good players that are expecting the rush. Glyph of Frost: I’ve seen some good players take this, but not very many. It’s hard to use against a very good opponent, because perfect micro can trigger the glyph and get out without any units being frozen. I would not recommend spending a deck slot on it, but @Morathyls mentioned that he considered it a core frost card to deal with scavenger spams. @YaBro0 mentioned that Freemka and DragonDave used glyph of frost often because it can catch an unsuspecting opponent off-guard. You can use something like a lightblade to activate it as well (and this combo is even useful against t3 XL units). It can also be used as a way to prevent your opponent from retreating, if you lay the glyph behind them. Glaciation: Pretty much useless. If your opponent makes a mistake and you get a wall up, 1) Do you really want to win like that? 2) Do you really want to make it even more impossible for him to recover? Construction Hut, Defense Tower, Northern Keep: Nope. If you want a building, you can take Warden’s Sigil or Ice Shield Tower. Buildings are inherently suspect because they bind void power, take a while to go up, and your opponent can maneuver around them, so it’s rarely a good idea to make a building without a specific purpose. Frost t1 has some really great cards, and it’s quite tempting to want to take them all. You need to conserve room for your t2 and t3, however, so restrain yourself in your t1. Frost is very strong and has cards that continue to be useful in t2 (frost sorceress, lightblade, frostbite, ice barrier, homesoil…), but most player still dislike the lack of swift t1. Frost t1 is most dependent on the map for what kind of advantage is possible to get. T1 on a Budget: This should not be a large concern in BFReborn, because bfp should be easier to get, but I’d still like to explain some economical considerations for which t1 is the cheapest. Note that approximate bfp values I give are when I was searching for a picky deal, and they may no longer be accurate in BFR. Bfp values I give are also for a single unit, and you’ll need to consider charges. If I don’t list a price, that means it was common (aka: free). Price should really not be your primary concern, but here are the cheapest options. Fire: When I started playing, this was by far the cheapest t1 to play. You can get by with scavenger (~15 bfp), eruption, sunstrider, thugs, and supplementary cards to deal with frost or nature. Mortar tower (~50 bfp) is the best single card to add, although a combination of makeshift tower (~15 bfp) and wrecker does a fair job as well. If you’re really strapped for bfp, you can take nomad, but makeshift tower becomes essential, and it’s really a subpar setup. The only reason I even mention it is because you need a minimum of 2 charges of scavenger to survive, but only one makeshift tower. Verdict: 45 (playable)-100 (slightly more playable)-200 (fully playable) Shadow: Since witchclaws are available, this faction is probably the cheapest to play. You’ll need witchclaws, forsaken, and nasty surprise. Nox trooper is also pretty essential, although I suppose it’s possible to play without them, maybe if you use skeleton warriors. I’m not super sure about the prices, but I believe nox trooper was about 20-50 bfp, and lifeweaving and motivate were in the 50-75 bfp range. It’s quite possible to play without lifeweaving and motivate, although it will limit your aggressive options. Nox trooper needs a minimum of 2-3 charges. Verdict: 0 (barely playable)-100 (mostly playable)-200 (highly playable) Nature: You’ll have to go minimalist for sure. Amazon (~50 bfp), treespirit, hurricane (~50 bfp), surge of light, and ensnaring roots (~40 bfp). No choice. Verdict: 180 (playable)-260 (playable with more charges) Frost: There are ways to play this for cheap, but more than any other faction, it really suffers. Ice guardians are much better than imperials because frost struggles with knockback. You can’t really use wintertide to make up for it because that’s also a few hundred bfp. You might be able to get by with Master Archers, Imperials, Lightblade, Frost Sorceress (~10 bfp), ice barrier, and frostbite. There’s not really any other alternative if you want to keep a pretense of being economical: frost mage, ice guardians, and homesoil are all quite expensive. Verdict: 20 bfp (barely playable)-600 (almost fully playable) What about t2 cards? I’m glad I asked myself this. If I wasn’t, I’d edit it. With t2, it’s important to keep in mind other things. There are more options in t2, so you need to be able to defend more things. For instance, t1 L counters are not essential because you don’t have to deal with all L units, only sunderer (which has low health). In t2, there are many great L units: Lost Reaver, Deep One, Vileblood, Stone Tempest, Mountaineer; as well as flying ones like Fire Drake, War Eagle, and Windhunter. In general, you want to fulfil 3 large categories—a way to drop wells, a way to prevent wells from dropping, and a way to clear enemy units. For some factions (lookin’ at you, pure fire), the way to prevent wells from dropping really turns into “drop more wells faster than my opponent can.” In t2, you need to following: · Counters for S, M, L, and XL units (XL counters are important because of harvester and people that get to t3 earlier than you.) · A way to slow your opponent. Usually cc, but this can also include things like mine or wildfire which force your opponent to leave your wells alone. · Siege units. They don’t actually have to be siege, but you need something whose primary purpose is dropping wells. War Eagle is a good example of this. · Cheap, spammable units · Defensive units · Anti-air. Self-explanatory; War Eagles and Skyfire drakes are common and powerful. · (Optional nicety): Sick combos · Additionally, each faction has inherent advantages that it should take advantage of. I’ll spend the most detail outlining fire-nature and the cards that fit these categories and possible ways of comboing them. I’ll be briefer in the other factions that I don’t know as well, trusting you to take the tools I’ve given you to sort out the basics for yourself. Fire-Nature: T2 Cards Overview: Let’s go through the deck building process. First, I’ll look for the basics—counters and ways to kill units. Note that I’ll only be mentioning cards which are still useful in t2. So thugs aren’t very useful S/S because ghostspears are just better. Also keep in mind that M units are generally worse in t2. That’s because there are a lot of cards that do great damage to M units (like skyfire drake, enforcer, ghostspears, war eagle, and nightcrawler), and those great M/M units are typically spammable. · Small o Deathglider—only the blue affinity is worth anything. They’re flying units that deal extra damage to small and they knock them back as a nice bonus. Plus they’re cheap. Looks good! The immediate downside I see is the low health, but I have cc’s and heals to mitigate that. o Firestalker—listed here because of the knockback. The knockback is not bad actually. o Ghostspears—they have great stats, and they can change to deal extra damage to S or M units. The downside is that they cost a lot (80 power to deal extra vs small) and 90% of the small units you encounter will be Darkelf Assassins, which tear through small units. o Scythe fiends—tremendous stats, and swift to boot! They are a bit expensive for M units though, and stonekin will destroy them for a variety of reasons. o Viridya—she seems good. She definitely has her uses. Pretty low attack, so not that useful as a S counter, but maybe her special powers will help? Except one of them is a slow healing, which is sort of redundant because of surge of light. Also a bit pricy, and has low health. She does knock back small units, but something like a fire drake or a nightcrawler would destroy her. · Medium o Ghostspears—see above. The extra advantage here is that they only cost 70 power to fight M units, and there are few M/S units to counter them. Scythe fiends are really the only M units that ghostspears won’t do well against. o Rageclaws—similar to ghostspears, except they are sturdier and do more damage. Unfortunately they take a long time to build up rage and are extremely susceptible to knockback or cc. They also don’t have the option to counter S. o Rogan Kayle—these are great stats! Much better than Moon or Viridya. Unfortunately, most M/M units have great stats. He will lose to nightcrawler or enforcer in a heartbeat, and he cost much more than them. On the upside, he makes units deal more damage (a plus with an aggressive faction like fire-nat). He also has a cc, although it’s not that good. Fire-nat doesn’t benefit as much from the cc as something like pure shadow or pure frost, because we already have roots and oink, which are quite useful. o Skyfire drake—a flying unit! Wonderful! This will help against things like enforcer or nightcrawler which tend to go berserk and deal tons of damage. Also look at the damage on that thing! Note that it doesn’t have much health though. o Twilight Brute—good stats, like Rogan Kayle but much cheaper. Unfortunately, as we’ve discussed, it loses to other M/M’s like nightcrawler and enforcer. o Twilight Minions—these are ghostspears that cost 10 power less and don’t have the option to counter S units. If you pack hurricane, that should help tip the tide in favor of twilight minions. Commandos will be the only S units you can’t deal with easily, but they aren’t that good and they aren’t used much. You can also oink them if they get buffed too much. Mauler also shuts down commandos, if you’re super worried. · Large o Fire Stalker—they do extra damage vs. large units. They have mediocre-to-poor stats, but they can work. o Firesworn—even though it’s a t1 card, it still does great damage vs L units. Especially with the ability. Note that they can’t hit air though. Also, they die easily and can be cc’ed without much difficulty. They are t1, after all. o Gladiatrix—a ranged L counter that does tons of damage. The green one is swift, which is nice also. The purple has a better disenchant, but both work. It’s not efficient to use the gladiatrix for its disenchant (cost 150 power) but it’s very nice to have if you have a gladiatrix already out. Which you should, because most of the buffed cards will be L anyway. As a general rule of thumb I prefer the green because you’ll usually have 2 gladiatrix to counter a L unit anyway, so if he buffs twice you can disenchant twice. If you pack the purple disenchant, the green gladiatrix is definitely the way to go. o Mauler—very good stats, although the gladiatrix is a better L counter because she can attack from range; it’s even better if you get a root off. If the mauler is attacking a melee L unit, he will probably die because L units just have good stats. HOWEVER, the mauler has a great ability that shuts down ranged attacks and prevents special abilities from being used. This makes him a great counter to ashbone pyros and mountaineers. He’s pretty great all around vs stonekin, because stonekin thrives on ranged attacks with knockback. I make this comment because fire-nature usually has a very hard time with stonekin. He’s also good against defenders or commandos (remember the problem with twilight minions?) because they can camp all they want, but he will prevent them from shooting. There’s nothing better than a frost player who saves up power for a defender spam and then camps outside your base, knowing you can’t do anything about it, until you send one mauler to each defender and waste it all. o Moon—terrible stats. Well, actually, they’re not bad. But she costs a lot and dies pretty easily to M counters. Her necroshade can be good, especially if you paired with a ranged attack like gladiatrix or spirit hunters. Her dark arts can be a situationally useful heal, but fire-nature doesn’t really need it because of surge of light. o Slaver—very expensive, its stats aren’t that good, and because it’s a medium unit, it’s extra squishy. Its ability isn’t useful. While I’m on the subject, none of the twilight transformations are very useful. This card might be in the running for the worst t2 L counter in the game. o Skyfire drake—it has high dps and can’t be hit by most L units. If you’re using it to counter L units it’s basically a glady, but more useful after the L unit has died. · X-Large o Gladiatrix—actually, fire-nat has 0 (!) XL counters at t2. That makes us especially susceptible to harvester or t3 rushes. Gladiatrix is the best thing we have. It’s useful because it can attack at range, and so stay out of the XL’s amazing damage. You need to pair this with cc, preferably roots, so the glady can still attack. o Mortar Tower—Believe it or not, this building has the highest dps of any card at your disposal. Build a mortar tower and try to send a scavenger to slow down the harvester while the building comes up. Then root the XL, bombard it, and hit it with gladies. o Skyfire drake—has good dps and can fly away. Use it for similar reasons as the glady o Rogan Kayle—great because of his cc. It doesn’t prevent the XL from stomping on people, but that doesn’t do near as much damage as the alternative. Credit to @RadicalX for pointing out that his cc is particularly useful because it stacks with cc spells. Your defensive gladies will also benefit from Rogan’s buff because of their high dps, but they will probably be spread too far to do much benefit. · Siege o Burrower—these guys are fairly cheap (read: spammable) and have good stats. They die quickly to M counters. They also have an ability to knock units off walls. This is useful if you don’t have hurricane, not so much if you do. The swift is also nice. o Fire Stalker—Wow! This is the third time he has appeared. He’s been mediocre the other two times, and he is here as well. He just doesn’t do much damage. The upshot is that he stays far enough from your other units that a lavafield or cc won’t do too much to him. The shots are also delayed, so it continues to do about 200-300 (I think?) damage to wells after it has died. This is particularly useful against non-frost factions, but even worse than if it did all the damage upfront when the frost player has time to kobold or glacier shell. Also, in regards to it being good at everything, did I mention it has swift? o Vileblood—a good card, but expensive. It’s not spammable, but it does do a great amount of damage. But if you look at the stats, it seems much better to just make 2 burrowers than a vileblood. That’s not necessarily the case, however. For one, heals work better on VB. If the enemy focuses your burrowers one at a time, you have to heal roughly every 700 health. With a vileblood, you can get away with every 1300 health. Also, ravage is nice on him because it’s one unit vs 2. AoE spells don’t spread to do double damage. Furthermore, if you have a VB already up, it basically takes 80 power to summon each new one (surge of light), which is practically the cost of a burrower. Additionally, L counters are typically much worse than M counters. The downside of VB is that he’s completely useless vs frost (Lightblade). Also, if you were to make 2 burrowers it’s often a good idea to send them different places (unless the opponent has nightcrawlers). VBs can’t go to 2 places. So in short VB is better against non-frost factions and burrower is better against frost factions. o Rageclaws—they don’t technically have siege, but the thing about wells is that you attack them for a long time. This means rageclaws will have rage built up, in which case they’ll deal as much damage as burrowers (I think?) while being hardier and useful M counters. The downside is that you can’t rush wells with them because they take so long to rage up, and they’re very susceptible to cc or knockback. o Termite hill—does great damage against wells and orbs, but the card is hard to use. Fire-nat has an easier time than bandits or pure fire because of cc, but it’s still tough and situational. · Specialty o Spirit hunters—these guys are great at doing damage to many places at once. They’re like a slower lavafield. Take the green ones. The purple do much less damage, but you can use them if you don’t have a disenchant. The problem is that they attack so slowly, and they only do 5 damage per second more than green spirit hunters on a creature with lifeweaving, while doing 10 damage per second less on normal creatures—which will be the majority of what you use spirit hunters for. o Skyfire drake—it’s very useful because it flies. I’ll not go into specific tactics here, but flying counts as a random plus. o Deathgliders—also flies, same as skyfire drake. Note that having 2 fliers can have aspects of redundancy. o Mauler—slam ability. Check out its usefulness above. o Rogan Kayle and Viridya—also useful for more than their ability to deal and take damage. For this deck, Rogan’s abilities are more useful. Check out usefulness above. Now let’s take a look at buildings. In general, buildings are bad because they bind power and are immobile. · Rallying banner—a building, extremely necessary in bandits and pure fire. However, it’s not so necessary for fire-nat because we can usually spawn dazed units without repercussions. A lot of our units have high health, and we can support them until they get out of daze with cc or heals. The card is nice to have, but even if it was in my deck, I wouldn’t use it much. · Breeding grounds—this card is probably more useful than rallying banner, but not a ton. The building binds power and it’s most useful for spamming large amounts of units at once. Usually if you have enough power to make a breeding grounds and spam burrowers, it’s better just to spam them immediately. · Willzapper—sounds great in theory, but I have never successfully used it, nor seen anyone use it. · Mortar Tower—Yep, still useful here. I listed it more above. And most importantly, spells. Unlike units, spells rarely decline in usefulness as you go up tiers. Each spell is different, so it’s rare to see a t2 spell that is just a better version of a t1 spell. · Curse of Oink—a cc, and a great one. It’s more useful for offense than defense, because units will transform back if they are attacked after 5 seconds. It’s still a good way to counteract spam, because you can attack each unit individually while the others are incapacitated. Note that oink combos very poorly with spirit hunters, because the poison wakes the units up. · Disenchant—removes buffs. Generally the buffs you want to remove will be on enemies, so the purple one is better. Note that oink can serve like a disenchant in a pinch by incapacitating the buffed unit. Occasionally this card has use on your own units to get out of cc, but that is only useful in rare occasions and usually on giant slayer. Typically it’s better to make another giant slayer than to disenchant the one you have. It can also be used to get VB out of cc, although it’s generally a better idea to just heal it and wait for the cc to run out. · Ensnaring roots—a great cc. It doesn’t work on ranged units, but it does a great job on melee units. There is no damage reduction and the units will not come out of it when attacked. Combos well with mine, mortar, skyfire drake, spirit hunters, and gladiatrix. This spell is critical for defense, but it’s also useful for offense if your opponent has spammed melee units that haven’t encountered your offense yet. · Envenom—does a lot of damage, but pricy. It’s also easy to ward off. This is the rare case of a t1 spell just being a worse t2 spell (parasite) · Eruption—great for taking down anything that has less than 300 health. Can be used for defense to kill a unit before it does more damage, as anti-air, as a preventative measure against a heal, and as offense to take down a well. It takes 7 eruptions to drop a well, and 10 to drop a monument. · Hurricane—very useful against small units. Sometimes it can be used to prevent a well from healing, although if that’s a concern it’s generally better to simply erupt it. · Lavafield—good AoE damage, especially against spammed units. This is more defensive than anything. It has a few nice combos, however, because of its knockback. This tends to be a card I either find really useful or not at all, depending on the match. · Mine—believe it or not, this does more damage than lavafield. But it’s less useful because it has a smaller AoE and requires the enemy to make a mistake to trigger it. On one hand it’s less useful for fire-nat than other factions because we don’t need its meager cc abilities, but we can also combo it very well with hurricane or roots. · Parasite—does damage to lots of targets. Useless when facing nature splashes. Pretty much spirit hunters in spell form. · Ravage—I’ve heard this claimed as the best healing spell in the game. It’s especially useful because it heals gradually, allowing for heals greater than the max HP of the unit. It’s also super cheap to cast. · Scorched earth—same use as in t1. It helps prevent t3. · Surge of light—a fantastic spell. You are playing fire-nature for this single card. Maybe oink and roots as well, but pretty much for this single card. I’m not going to explain why it’s so useful, because if it’s not in your deck switch factions. I have literally seen people t3 nature for this 1 card. · Ray of Light—when I first started playing, I assumed that Ray of Light was better than Surge of Light because Ray is t2. That’s not true. Surge is instant, while Ray takes a long time, which makes it almost useless in PvP. · Twilight Curse—this can be used like an L counter or anti-air. The only use I can think of for it would be war eagles or windhunters. But fire-nat tends to do a fairly good job at those anyway. The problem is that twilight bugs are actually pretty good. It might actually be better to use on one of your own units, but it’s pricy—just make a vileblood if you want one unit with good stats. It is quite good against mountaineer, which fire-nat can struggle with. So if you want a counter to one specific card, this is the deal. You could use it on harvester as well. (allbfcards claims this does not have a unit with max power cost that it can be used on, but I recall it couldn’t be used on anything that cost more than 150?) · Wallbreaker, Girl Power, and other Shenanigans—Please no. Please. T3 Cards Overview: I’m going to lump t3 with the t2 section, since you shouldn’t have many t3 cards. In t3, your goals are simple: End your opponent without being ended yourself. Cards are chosen which have high offense, especially for fire-nature. In general, you can use your t2 cc for defense. My rule of thumb for t3 is as follows: 3 cards—one for killing wells, one for killing enemy units, and one to be swift and spawn well-killers all over the place. Typically fire-nature takes a light t3, in favor of larger t2. I knew a great player who only carried giant slayers in his deck, and another that doesn’t take t3 at all! · Offensive cards o Backlash—deals a lot of damage, but it’s rarely used because it only does half damage against structures. o Brannoc—extremely powerful. The best XL unit this faction can support. The biggest problem with him is what happens when you rely on him but your opponent pulls him first. Most people think he’s lame. o Curse well—very slow. If you use this card, you need to play a mostly defensive t3 and bleed your opponent dry. Using this card immediately awards you the title “lamer.” Additionally, get out of fire-nature because we don’t have time for that nonsense. o Deepcoil worm—an XL unit, but a bit weak. Fire-nature thrives on its aggressiveness, and it has more options that do faster damage. That said, you have six XL units to choose from as fire-nature, and I’m not going to bother explaining why Santa, Mo, Lordy Cyrian, and Razorleaf aren’t worth playing. o Drones—great stats, and swift to boot! A bit pricy though. o Enlightenment—wreaks havoc with earthshaker. Very pricey though. Fire-nat generally has a more efficient way to dish out the damage, and one 50 power card (shield building) can completely negate all 370 power spent on this combo. This especially stings because the only scenario where you need such massive overkill as earthshaker is against campy lost souls Church of Negation spammers, and they typically pack shield building. o Giantslayer—when raged up, they deal a ton of damage (1000 per charge). They are especially susceptible to cc’s though. In one of the great ironies of the game, it is better to defend giantslayers with t2 cards than t3 cards. Don’t use this card if you rush t3 while your opponent stays t2, unless you also have a power advantage. The biggest plus of this card is that it’s difficult to cost-effectively defend against, making it very spammable. o Inferno—sure, it does a lot of damage. But you’re probably better off just using enlightenment and earthshaker for that much power. o Mutating Maniac—a worse Fathom Lord, that costs more and can’t paralyze. The upshot is that you can use them with giant slayers. Unfortunately, that isn’t such a big plus because both are XL counters. o Shrine of War—a great card, but I doubt you’ll be able to make much use of it. That’s a lot of power to bind and the cooldown is long. The match will probably be over before it’s ready. o Sun Reaver—used to be the fire equivalent of the ashbone pyro. Then it got nerfed to oblivion. It’s hardly worth using now. It takes so long to build up its flame that a giant slayer will kill the well faster. I would like to see this card get buffed so it deals regular damage against structures and slower damage against units. But until this happens, you have a large, slow giant slayer that can’t charge or hamstring. I’d also put the unnerfed one as defensive, but this is useless at killing units. o Swamp drake—useful for attacking, not because it has good stats, but because it’s an air unit. Many people don’t bring anti-air to t3, and this card is difficult to counter. It can also do hit-and-runs, and general annoyance. However, such techniques require a lot of micro, and are generally too slow to be worth it. The cc sleep is also much better for offense than defense. o Twilight warfare—I don’t even know what this does. o Virtuoso—fairly good stats. The ability does a lot of damage to structures. Also a good L/L, although it can’t take advantage of roots. o Vulcan—great attack, but low health. It can be supported with heals, but I’ve generally found there to be better attack options. I would have brought him anyway for shooting air, except he can’t. · Defensive cards o Backlash, to kill attacking enemies. The problem is that backlash is expensive and has a large cooldown, making it inefficient against spammy t3 units. o Fathom Lord—great stats for the price. And their paralyze is good. They’re also great at defending vs XL units. They’re slow though, which limits their offensive capabilities. o Giantslayer—I told you these cards were ironic, right? Despite their name, they’re not the best XL counters. They can do a good job, but you’d think that 240 power of giantslayers would beat 220 worth of a juggernaut, right? Especially since giantslayers counter XL, and juggers don’t? But giantslayers suffer from very low health, so most XL’s 2-shot them before they can get rage built up. If the gs is raged, a single one can take out an XL unit (if you support it with cc and heals and get the 1500 damage charge). But if they aren’t raged, they don’t do so well. I believe it takes 4 giant slayers to kill 1 juggernaut if they start from rest. Nasty surprises, lifeweaving, or wildfires defeat them easily. However, giantslayers are still very useful because of their hamstring effect. It slows enemies down to give you more time to prepare your defenses. It’s also good for defending spammy units, because giantslayers are just as cheap as them. o Magma Hurler—not great stats, but it’s ranged and knocks back M units. They’re pretty good at defending if you play roots. They’re also nice anti-air. Air units are typically bad in t3, but every now and then you have that one guy who uses them and if you don’t have an answer, you start to rage and call him a lamer in the chatbox. Pointed out by @RadicalX: their biggest downside is that they take 4 seconds between shots, allowing your opponent to micro around them and kill the magma hurler without taking any damage. This isn’t that bad an issue, however, because nobody has time to micro one unit obsessively in t3 and 2 de-synced magma hurlers or a cc can prevent the dodging. Also, a magma hurler does not want to attack anything that also wants to attack it. o Magma Spore—good anti-air defenders. Not good at defending much else (actually, they can do a lot of damage to L units with their ability). Also good at spamming. o Swamp Drake—probably the quintessential defensive card for fire-nature. XL counter, especially good with root. It’s ranged, so it can brute force as anti-air with heals and cc. It can also cc sleep, which isn’t that useful for defense unless you’re proactive. o Thornbark—M counter, which has its uses in a large t3, but generally not that useful if you’re going light on t3. Hits air, so good defense there. Gets stronger with root network. Unfortunately, they have very little health and can only really go offensive en masse. Which is not good in t3, because mass concentration in one spot is a good way to lose your entire army. o Thunderstorm—Does lots of damage to units, none to structures. Works well with roots, but really only useful if your opponent spams a lot to one place. He should be smarter than that. o Treefiend—honestly, I’ve never used this or seen it used. Its stats are terrible and they cost an arm and a leg. 150 power for 1200 health? I don’t even know what its upgraded health is, but I wouldn’t pay 150 power for something with twice that health. o Twilight creeper—allbfcards doesn’t have the difference between their affinities. Nonetheless, they have bad stats, and don’t have any real knockback. Just take magma hurler if you want an L/L ranged. o Twilight Hag—also never seen her used, so I can’t comment on her usefulness. Doesn’t seem very useful though, with low attack and health. Her ability seems more like a joke from the developers than anything. o Vulcan—can do massive damage with his ability and roots. Unfortunately, he cost a lot, so it doesn’t defend against cheap spammy cards well. · Spammy cards o Drones—good stats, and swift, but a bit expensive to spam. o Giantslayer—cheap, does a TON of damage, and swift. Also can’t be knocked back. They are very susceptible to cc, however. And they lost to most t3 units 1on1. However, giantslayers should primarily be used to spam 1 to every base, forcing the enemy to waste at least 120 power at each one. This gives you a power advantage, and you push harder at the weakest one with your offensive unit. Spamming 1 to each base also negates the efficiency of cc. o Magma Spore—cheap, and their ability is good. They’re also air units, which makes them especially good against any non-shadow faction (that has no ashbone pyro). The biggest problem with them is trying to micro them. They’re easy to forget about. If memory serves me, it takes 6 to drop a base of 2 wells and 1 orb. And obviously you can branch out even more with t3 than this. The first deck I played, I went t3 shadow for ashbone pyro. That solved problems of anti-air and siege. xAragornx still uses that strategy. However, going three different orbs is very risky because you can’t let your t2 or t1 drop. If you play t3 the same color as one of your first two orbs (far and away the most common choice), you have added tactical options. For instance, I am willing to trade my first orb against xAragornx (fire-nat-fire vs nat-frost-shad) because I’ll be t2 and he’ll be t0. So he can’t attack with reckless abandon for his orb, while I can. Building the Deck: So now let’s build this deck! Let’s start with the easy choices, in t2. Take a look at which cards show up under a lot of categories. We have: Rogan, deathglider, Skyfire drake, rageclaws, mauler, mortar tower, gladiatrix, firestalker, and ghostspears. Notably, 2 cards are weaker than the rest. Deathglider and Fire Stalker serve so many roles that they don’t do a great job at any of them. Rogan Kayle also suffers from a similar problem. The others are good, but some are redundant. Ghostspears and Rageclaws serve the same main purpose. Skyfire drake is also an M counter, but it’s good to have 2 M counters that have different sizes, because M units are the most common in t2. Skyfire is unique in that it can’t be hit by melee, and gladiatrix is similarly unique in our list of multi-functioners. I will add Skyfire Drake and Gladiatrix to my deck as the first 2 cards. Eh, let’s throw in Rogan Kayle, Fire Stalker, and Deathglider as well. I may take them out later. Using Mortar Tower will probably depend on what I do t1, as well as how comfortable I feel my t2 defenses are. Let’s hold on that one. But what about rageclaws and ghostspears? We already have 1 M counter (Skyfire Drake), so 1 more should suffice. It should be cheap, and primarily used for defense. I want to be able to defend against someone spamming 1 nightcrawler/burrower to every base, and I can’t do that with skyfire drake because I won’t be able to sustain it. The cheaper the M counter, the better. So as my M counter, I want to pick one from rageclaws, ghostspears, twilight minions, and twilight brute. I want to shy away from M/Ms, so let’s get rid of twilight brute. Remember, M units are typically the squishiest in t2, and if we keep rogan it will make the M/M redundant. So we have the choice of three S/M units. Which to take? Rageclaws and ghostspears are about equal, except rageclaws do worse at defending and much better at attacking. If we take good siege units (I plan to), this will make the rageclaws ability to drop well unnecessary. So ghostspears or twilight minions? They’re basically the same card except twilight minions cost 10 power less and can’t hurt S units. So my choice of whether to take ghostspears or twilight minion depends on how good the rest of my deck is against S units. For now I’ll take ghostspears and substitute twilight minions in if I feel my S counters are a bit overkill. The deck is now: Skyfire Drake, gladiatrix, (Rogan Kayle, Fire Stalker, Deathglider), and ghostspears. Let’s choose our well-droppers next. We can choose from fire stalker, burrower, vileblood, and rageclaws. Actually, let’s not consider rageclaws. They work in a tight spot, but burrower and vileblood do such massive siege damage that rageclaws won’t be very useful for it. I also didn’t consider termite hill, because it’s a real pain to set up. If I have extra deck slots after I’ve hit the essentials, I might stick it in. So which siege unit is the best? We already have fire stalker tentatively in. If we’re only taking 1 siege unit, burrowers is definitely the way to go. I like vileblood better, but certain cards like lightblade make him useless. There’s no way I’ll have room for all three. If I take 2, however, it’s a bit of a tossup between vileblood and firestalker or vileblood and burrower (note that I’m not considering firestalker and burrower, because then my offense will be particularly weak against decks with good M counters, which is every deck). I decided to take Vileblood and Fire stalker, and if I need more deck slots I can replace both of them with burrower. Also, I decided to make Rogan Kayle a more permanent addition because he works well with vileblood (it forces the enemy to make a L counter and M counter, and the cc is great for attacking). Deck: Skyfire Drake, Gladiatrix, Rogan Kayle, Fire Stalker, (Deathglider), Ghostspears, and Vileblood. Let’s get to S counters. The only card (besides Viridya) we don’t have in our deck is Scythe Fiends. Deathgliders and Fires Stalker do good knockback, but our deck currently depends on ghostspears for doing actual damage to S. If we have Scythe Fiends, we should probably pare down our “semi-S” counters. Or we could leave them . . . I think I’ll leave out scythe fiends for now because I don’t have enough charges (the card is expensive!). In the future, the combination of Scythe Fiends, hurricane, and twilight minions can probably replace fire stalker, deathglider, and ghostspears. If we drop fire stalker, we may as well get rid of Vileblood and/or Rogan Kayle and replace them with burrowers. So much of this is interdependent! But for now, nothing changes except making Deathgliders a more permanent fixture. Our last group of counters are the L counters. We’ve already included 2 L counters, the gladiatrix and fire stalker. We probably don’t need another, especially if we take firesworn in t1. Mauler catches my eye, but he’s so much more useful for his slam ability than for his L counter. If we decide to bring him later it will be because of that, completely ignoring the fact that he is an L counter. Now let’s talk about spells and special cards! Surge of Light goes in, no questions asked. Curse of Oink should be another easy choice. Ensnaring Roots is another great card, but let’s not use it by default yet. If I had 50 slots in my deck, which cards would I take and which wouldn’t I bother with? Then we can sort through the useful ones to fit our 20-slot deck. Reality Check: Let’s rate how good our t2 deck is against certain common enemy tactics! This will help us see if we need to change anything, and maybe influence our t1 or t3. 1. Defending walls 2. Defending t3 rushes (or harvester) 3. Defending cheap spams for spread-out agro 4. Performing cheap spams for spread-out agro 5. Defending a full-on attack at one place 6. Performing a full-on attack at one place 7. Preventing a large standing army 8. Building a large standing army Currently our deck has Skyfire Drake, Gladiatrix, Rogan Kayle, Fire Stalker, (Deathglider), Ghostspears, Vileblood, Surge of Light, and Curse of Oink. 1. We can’t defend walling at all. Hurricane or burrower can solve this, but we’ve already decided not to use the burrower. This may be a large selling point for hurricane, but the truth is that walls are easy to prevent. We already have enough ways for S knockback, and it’s not worth spending a deck slot to bail you out when your opponent builds a wall. Just get better so you don’t give him those opportunities. 2. How about defending t3 rushes? This can be when the enemy builds t3 just a bit faster than you, or when he does it too early hoping that one ashbone will wipe you out. In the second case, you will probably see an ashbone pyro or tremor. Maybe a giant slayer. Giant slayers are easy to deal with. Oink stops their rage, and ghostspears or skyfire drake do a lot of damage. Even in t3, the best way to defend against giant slayer spams is to root + skyfire drake. Tremors are harder, but roots and 2-3 gladiatrix does the job. If he buffs it, the gladiatrix has a ready disenchant. Ashbone pyros are the hardest to deal with. They do so much damage, and they’re ranged so you can’t get them with gladiatrix. Mauler would be a great way to stop it. Otherwise you just have to spam gladiatrix and fire stalkers. Mortar Tower is also a good way to defend against early ashbones, because the opponent doesn’t have enough power for more than one. (That’s why it’s a t3 rush. If he can go t3 and has the same power as you, that’s when it’s time to YOLO it and spam random stuff. You’ve already lost, but sometimes you can save it if you just ignore defending and go full offensive). In response to a t3 rush, this deck also has the ability to send 2 Vilebloods out, which will generally end the game, especially if one is paired with Rogan for that damage buff. VB spam is not as effective as burrower spam, however, because you are limited on the number of bases you can hit at once. What can this deck do about harvesters, or what happens if you’re both going t3 and that pure fire player gets it first and pulls out a juggernaut? Both should be defended with gladiatrix, skyfire drake, and roots. Mortar towers are necessary if you want to kill a juggernaut, but you should really be stalling it. Either way, I’m giving points to mortar tower, and I’m going to say Ensnaring Roots probably just needs to get in here already. 3. A common tactic for attack is so send cheap units to every base, forcing you to spend a bit of power at each one. Then, when you’re out of power, the enemy puts larger pressure on one area. How well does this deck defend that? Typically, the spammed unit will be a nightcrawler or burrower. Skyfire drake will eat both of those units, but if you have 5 different bases, 5 nightcrawlers are much more affordable than 5 skyfire drakes. Their even more affordable than ghostspears, which means that we don’t do too well against multiple small attacks. Even twilight minions, which cost the same as a nightcrawler, is not effective because the nightcrawler can run away. We can, however, be proactive. A roots allows us to bottleneck the road and kill the nighcrawler or burrower before they spawn more. Aren’t you glad we added roots? Nonetheless, I’m going to say this deck scores below average for defending spammed units. On a 1-10, let’s go with 3.5. There’s really not a way to improve it, though. For an additional way to defend this with this deck, see point (6). 4. Can we do the annoying tactic back? Eh, not really. Most of our units cost too much. We could improve our ability to do so with rageclaws (which would involve rebalancing to improve our S counters), as well as burrowers. We can, however, attack TWO places at once very reliably. When facing frost splashes (or shadow, actually, because of Aura of Corruption—actually, this is a fairly valid technique against any faction), it is critical to attack multiple places. Sometimes it’s better to spam lightly everywhere at once, but usually it will suffice to attack in just 2 places. This can be done with Rogan + ghostspears +fire stalker at one front, and VB at another front. You can also vary combinations. If you assist with cc and heals, and support them evenly until you decide which one is more likely to fall and put extra pressure there, you will probably down a well. The added benefit of the cards is that rogan and firestalker, in particular, are very underestimated. I did this type of attack against MaranV (a candidate for the best Battleforge player) when I was a noob, and the attack succeeded! I obviously didn’t win the game, but I did win his respect and he provided me with advice that helped bring me out of noobdom. I’d say this gets a 7.5. If we used burrowers, however, it’s a solid 10 for hitting everywhere at once. There is no deck that can do this more than burrowers assisted with fire and nature. Sometimes that’s not the best tactic though, so it’s a tossup between many weak attacks and 2 fairly strong attacks. For this deck, I’ve gone with the 2 medium attacks, but it’s more a matter of preference (and cost). 5. So we have a bit of trouble defending multiple places at once. Do we do better defending one place? Oh yeah! Err, maybe. If we bring mortar tower, that will improve our score here a lot. That tower keeps getting so many pluses… Seriously though, with roots a mortar tower does fantastic damage. If you play fire t1, but this in. If you go nature t1, it’s a little iffy one whether you want to spend the deck slot on mortar tower, because you can usually get by without it. All that said, I probably used mortar more in t2 than t1. All of our defense comes from having good attack and good cc and killing the enemy before it reaches our wells. Once the enemy is at the wells, we have a much harder time, especially with buffs. We can always cc a buff, but that’s often a waste of a cc. Gladiatrix works will for the disenchant ability, although we will always have trouble with things like lifeweaved nightcrawler. In t3, the threat of buffs are even worse, so Disenchant may be useful to combat that. However, I think we can get along with just the gladiatrix sobering for this deck. We have all the counters except XL, and that can be fairly easily dealt with through roots and ranged attack. How do we do against a massive amount of units, like pure fire or stonekin attacks? That one’s harder, because we don’t have great AoE damage. Although there is a particular spell that helps with that. To improve our defenses, let’s add Lavafield. We could also add spirit hunters, but they’re much slower than lavafield. I’ll say our defense at one place is a 6, or a 7 with mortar tower. 6. Now we get to our true method of defense: attack! As far as dps goes, I think fire-nat is 2nd, right after pure fire. But we have cc and heals. If you realize you can’t defend an attack, compensate for your loss of wells by taking some of your opponent’s! Along with Rogan (not counting his damage), a vileblood can drop a well in 16 seconds (!). If you see cards that are good counters to the VB, use a cc. Additionally, any fire stalkers in the back can do splash damage to different wells, making frost repairs more difficult. Along with surge of light and ravage, makes the vileblood very hard to kill. Let’s add ravage because of its usefulness. Furthermore, eruptions are GREAT for offense. When a unit spawns near a well, you can erupt it dealing 300 damage to the well, and the unit will die faster. If there are a lot of units attacking your offensive, cc or lavafield them. 7. Preventing a large standing army is only a concern versus a few decks. Stonekin, most notably. This is one of the best decks for doing so, because eruption or lavafield can finsh off enemies before they escape or heal. Standing armies are also very important for establishing air dominance. Eruptions are especially good for this since air creature have comparatively low health. An essential combo against fire drakes is to get one shot from a gladiatrix and erupt. Instead of a gladiatrix, you can also do it with your own skyfire drake, but be aware that he will be erupted as well. Time for Eruption to enter the deck. 8. Actually, you can build a large standing army with this deck. It’s more often a bad thing than a good thing, but you have heals and cc to save your units. With good saves, you can field multiple VBs, which gets very hard to defend. Now that we’ve fleshed out the deck, we have: Skyfire Drake, Gladiatrix, Rogan Kayle, Fire Stalker, Deathglider, Ghostspears, Vileblood, Surge of Light, Curse of Oink, Eruption, Ravage, Lavafield, and Ensnaring Roots. I’d like to add Mauler, Hurricane, and Disenchant, but none of them seem necessary. Mauler is probably the most useful of the three, but let’s see. It’s looking like we’ll be low on deck slots. For t3, I’m going to be a bit brief because there are so many possibilities. As long as you have hit all the bases, you should be fine. Let’s bring Giantslayer for all the nice reasons I listed above. I will take Swamp Drake for an additional benefit against XLs, and its anti-air possibilities. Lastly, let’s round it out with Virtuoso for its L counter and good damage against structures. If I have only room for 2 units (like if I put that mauler in), I’d go with giant slayer and magma hurler—magma hurler serving as a sort of compromise between virtuosos and swamp drake. Matchups Check: Now a quick rundown of how we can use this deck against all other factions. · Pure fire o Necessitates defending against one spot. The oink will do you good. Skyfire drakes and ghostspears will also be spammed. To attack, VB is the best option because gladies or firesworn can be cc’d or lavafielded. Pure fire has trouble defending against L units, especially with heal and cc support. Bringing VB tips this match in your favor—if you have burrowers, not so much. · Fire-frost o This is a fairly weird deck. You’ll need to deal with mountaineer, as well as good defenses and fire drakes. Mountaineers are very troublesome without mauler or a large power advantage. Shielded fire drakes and scythe fiends are another huge nuisance. Your best bet is to go offensive on exactly 2 fronts. This is probably one of the worst matchups for the deck we picked, although if it’s a big worry, we can tip the scales in our favor. Mauler makes this matchup much easier. Some top players have also included twilight curse solely for mountaineer. · Fire-shadow o This deck is fairly rare because it has a hard time against frost splashes. We don’t have a frost splash. They will rely on a lot of buffs and single strong units to take you down. Lavafield is essential for dealing with darkelf spams. Gladiatrix is also needed for disenchants, and save your oinks to use on buffed fire drakes. They are surprisingly hard to deal with if your cc is in cooldown. Luckily, if push comes to shove, you can spawn Rogan and use his cc in a pinch. A normal fire-nat deck will have difficulty attacking because nightcrawler will destroy burrowers, but we have vileblood and fire stalker which do much better. This matchup is pretty fair, although in my experience one side tends to demolish the other. Twilight vs bandits don’t tend to have long trench-warfare. · Fire-nature o This deck actually has an advantage against the standard fire-nature deck. You may have figured out by now that I’m using some fairly interesting cards. This deck has a harder time against frost splashes (especially shadow-frost) than the typical fire-nature deck, with some advantages in that it does better against non-frost splashes. VB is a double edged sword, because you both have roots and cc and damaging spells. Generally speaking, however, fire-nature has an easier time countering burrower spams than VB, especially when Rogan gets involved. Fire-nat also has an infuriating time trying to deal with fire stalkers: a well-placed oink or roots will ensure that a well drops. You have all the tools you need to stop a burrower spam. · Pure Shadow o Shadow tends to have difficulty with L units like VB. You need to be careful about spending too much power in one place, because Aura of Corruption kills everything. Shadow mages shred M units. Cc works marvels on shadow mages, and fire-drake is your best friend in this matchup. Ravage is a must. Lava field punishes any large offensives. Try to apply so much pressure that the harvester can’t come. If it does appear, make 2 gladiatrix and a skyfire drake. Mortar as well, if you have it, but make sure the mortar is in a place that the harvy must go through—you’ve wasted 50 power if he just walks around to attack another base. Green gladiatrix is better here, because you can harass the harvy all the way to your base without your unit dying. As long as you keep 2 gladies, you don’t need to worry about lifeweaving + unholy power because you have 2 disenchants. For offensives, fire stalkers work much better than burrowers (!). Shadow mages murder burrowers, but have a much harder time with fire stalkers. Once a very good player (Warchief or Patriarch, I think) who played pure shadow tried to convince me that fire stalkers aren’t as good as burrowers. He made this comment after I beat him with my firestalkers, so we did another match and I still won. (In the end I switched to burrowers because I didn’t need any more advantages against pure shadow, preferring to have them against shadow-frost.) · Shadow-Nature o This is another deck you’ll struggle with. Buffed nightcrawlers or burrowers are a nightmare, and the cost to spawn a glady and unbuff is rarely worth it. This deck is supreme at spamming a little bit to every base. Try to be proactive and use roots often to be on the safe side. Fire drake and ghostspears are immensely useful. Note that shad-nat struggles against Vileblood because their L counter is mauler, which has low range. You can root him. Also be aware that you will be getting cc’d and the enemy units can heal, so apply lavafield and erupt judiciously to take out the last bit of health. Shadow-nature probably has a slight edge, but VB helps. Disenchant might also help. · Shadow-Frost o Most people would argue that this is the best deck in the game. I’m not sure if I agree, but it is very strong. There are also a lot of different tactics shad-frost players can use, making it one of the hardest decks to prepare against. At the very least, be prepared for nightcrawler spams and Reaver-runs. Both of these need to be rooted and sniped with glady/skyfire. Ghostspears are good vs nightcrawlers, but terrible against reavers. If he decides to attack hard at one place, expect darkelf assassins and homesoil. Lavafield works well, and you can use deathgliders against darkelf assasins. VB has a 50/50 chance of working. Lightblades tend to render them useless. However, if you can oink one and get him to spawn 2, he’s wasted a lot of power. If you really want to push, bring a drake to deal with lightblades, but fire drakes die easily to nightcrawler nasty or darkelf assasins. Spamming to multiple places doesn’t really work because nightcrawlers with frenzy are a cheaper counter to whatever you spam. Hitting one well doesn’t work so well because of frost repairs. If you invest too much power in one place, you’ll get an aura of corruption. Also be wary of the cc, although yours are better. This will be a tough fight. In t3, Lost Souls has the advantage against every deck, with the possible exception of pure fire. Giant slayers are a must to combat silverwind lancers. · Pure Frost o Frost splashes are hard. They have great defense, and your deck is built around offense. Pure frost relies almost entirely on war eagles. Whoever controls the skies wins. Glady is good against them, but war eagles are even better against gladies. Cc is critical, as well as eruptions. Lava field has less use. If you can prevent frost mages with rogan or skyfire drake, frost doesn’t really have an answer to small units. · Frost-Nature o Stonekin, the bane of our existence. This will be a slow strangulation to death. You can deal with burrower spams, but a true stonekin player will slowly make engagements with you and keep his units alive until he has a huge army that he can rush you with. Neither of your offensives are likely to be successful unless one of you makes a large mistake. Your best bet is weather out the storm in t2 and go t3 when you have enough power to avoid being burrower spammed to death. Skyfire and ghostspears are a must. Mauler is the easiest way to make this matchup better for you. Scythe fiends and burrowers die very quickly to razorshards, but while you might think this is good for you because of VB, lightblades or aggressors will nullify the VB without an assisting mauler. · Pure Nature o Skyfire drakes are essential to combat burrowers and energy parasite. You have to be super careful of your VB because of parasite swarm. Fire stalker works especially well against pure nature. If the pure nature player goes for a roots-themed deck, mauler secures an easy advantage. If not, deep ones are hard to deal with but spamming gladiatrix and skyfire drakes usually works. Roots are nice, and mortar is a good way to kill them. Side note: When building t2, it’s generally a bad idea to think “Look at this sick combo!” Often that combo will work really well against some factions, but it will be a wasted 2-3 slots against other factions. Look at all the factors I’ve laid out to see if your “sick combo” is worth it. Final Touches: Finally, a note about t1. Ultimately, you should play the t1 you’re best at. That said, let’s try to figure out if a particular t1 works best with this deck. So far we have 16 cards: Skyfire Drake, Gladiatrix, Rogan Kayle, Fire Stalker, Deathglider, Ghostspears, Vileblood, Surge of Light, Curse of Oink, Eruption, Ravage, Lavafield, Ensnaring Roots, Giant Slayer, Swamp Drake, and Virtuoso. If you notice, 1 of the fire cards you use in t2 (2 if you count mortar), is actually a t1. 2 of the nature cards (3 if you have hurricane) are t1. This means we have room to add 4 more t1 cards. If you want more, you can pare back the t2 and rebalance it. Experienced players usually value t1 more than t2. However, most of the fighting happens in t2. So my philosophy is to go bigger t2, and just try to stay alive for t1. For beginners, t2 is much more important, although it is good to learn how to fight t1. T1 is much more technical, however. At any rate, you can do what you want with your deck. In my experience teaching chess, I’ve found that beginners often get hung up trying to memorize openings and miss out on the middlegame experience—where most of the game is played. My advice to them is to stay away from technical openings; learn general principles enough to survive the opening and reach an even middlegame. From there, the better player will win. I think the same advice holds true in Battleforge. Yes, at top play the slightest inaccuracy in t1 can make you suffer all game—if you don’t outright lose (this is also applicable to grandmasters in chess). But if you’re anywhere in the middle ranks, a t1 inaccuracy will not cost you the game. Yes you should know general ideas, but knowing that whether to spawn 2 sunstriders and 2 thugs or 3 sunstriders and 1 thugs when you meet shadow in the center of Simai is not relevant yet: your time is better spent elsewhere. Things like winning a skyfire drake ditto with one shot and erupting are much more useful. Basically, don’t overextend yourself trying for a t1 advantage; just try to “survive” it and learn to play t2. You’ll pick up t1 along the way. I’ve run into countless Legend/Supreme ranked players that play a better t1 than me. Sure they get that small advantage, but they count on winning all their games from that t1 advantage and they just fumble it in t2. Learn your basics first—I’ll improve every game I play with getting slightly better at t1, but these guys need to rework their fundamentals. Here is an excellent example of MaranV being outplayed in t1 but coming back to win in t2: https://www.youtube.com/watch?v=MLvl_hWIvns For the purposes of making this guide easier to follow, I’m going to be stubborn and say that this is all the room I have for t1. If I play fire, the choice is easy: Scavenger, Sun Striders, Thugs, and Mortar. If I play nature, the choice is more difficult. If I wanted to be truly minimalist, I could play just Treespirit and Amazon. You would also need to add Hurricane, and maybe adjust the t2 balancing around S counters. And I could still add mortar tower. However, I would not recommend trying to work with such minimalism as a beginner. If you play nature and want to actually engage in a t1 fight, you need a swift unit (probably swiftclaw), hurricane, dryad, windweavers, and shaman. Treespirits are also nice. Unfortunately, that’s a lot of cards. For this reason, most fire-nat will start fire t1, especially because it gives them an excuse to use the mortar tower. My final demo deck is: T1: Scavenger, Eruption, Sun Strider, Thugs, Mortar Tower, T2: Surge of Light, Ravage, Ensnaring Roots, Curse of Oink, Lavafield, Rogan Kayle, Ghostspears, Skyfire Drake, Deathgliders, Fire Stalker, Vileblood, Gladiatrix, T3: Giant Slayer, Virtuoso, and Swamp Drake. @SilenceKiller99 asked: Could you say some more about nature-fire (with a nature T1) and how it is different from fire-nature? Yes, of course I can! . . . Oh, I suppose you wanted me to actually make those comments. Very well. Fire-nature and nature-fire really don’t have any fundamental differences past t1. There are some t2 strategies that are more likely because of t1 cards, but overall the gameplay is the same. In general, nature has t1 cards that are more useful in t2, but is easier to play and slightly more flexible. I’ve also found that people who start nature t1 (GreatKudi is a good example of this) tend to play more unconventional t2 choices, such as spirit hunters. The biggest concrete difference past t1 is that having dryad can be very useful for t2 offense, while having mortar can be very useful in t2 defense. Also, I prefer the safety of having my 3rd and 1st orbs be the same color, and nature-fire-nature is probably a stronger t3 than fire-nature-fire, so that is another consideration. Evolution of the Deck: This next section of the tutorial will outline how my decks evolved, and why that was better. This section will not be present in my discussion of the 9 other factions, or it will be written by someone else. Despite the negativity that I rain down on nomads, my first complete deck had them. That deck was: Nomad_nature,Sunstriders,Eruption,Wrecker,Makeshift-Tower,Surge-of-Light,Ravage,Lava-Field,Curse-of-Oink,Spirit-Hunters_nature,Twilight-Minions_fire,Deathglider_frost,Rogan-Kayle,Vileblood_nature,Skyfire-Drake,Fire-Stalker,Mauler,Sun-Reaver_nature,Drones,Ashbone-Pyro T1: Nomad, Sun Strider, Eruption, Wrecker, Makeshift Tower, T2: Surge of light, Ravage, Lavafield, Curse of Oink, Spirit Hunters, Twilight Minions, Deathglider, Rogan Kayle, Vileblood, Skyfire Drake, Fire Stalker, Mauler, T3: Sun Reaver, Drones, Ashbone Pryo It’s interesting to note that, while this deck cannot be considered competitive at top play, it’s still remarkably balanced. I could probably achieve Ruler level with it. As it was, I was an archfiend because I didn’t even understand what counters were. @TBPeti told me about that and void power and it changed my life. I jumped to Grandmaster the next day, after changing my t1. As I’m sure you’ve noticed, I have no S counters in there. This is why nomads are bad. I generally avoided large t1 confrontations, and if I needed to defend S, the makeshift tower worked pretty well. Not the best, but it halfway worked. The second thing you should notice, after my ranting about the wonders of gladiatrix, is that she’s missing. That’s because I was completely P4F, and they hadn’t even started giving out daily rewards. I could afford maybe 2 gladies, but I wanted to have the BFP in my pocket so I could continue to make more BFP. My anti-air was fairly coordinated as well. Not ideal, but it worked. Spirit hunters were good. They couldn’t even damage a ravaged drake though, so I would use the nomad spear for that. If I had known better, I would have spawned a drake and shot+erupted, or just double erupted. Admittedly, the nomad spear was pretty good against war eagles and windhunters. I’m not condoning them, I’m just saying that they did a bit to fill in the gladiatrix void. I used deathgliders and fire stalkers against S units. As soon as I learned about unit counters, I subbed in ghostspears for twilight minions. I was using the minions because I thought having stricter orb requirements (1 fire 1 nature, rather than 1 nature 1 neutral) would mean a better unit. That’s not the case. For t3, I went shadow for ashbone pyro. That’s just a great card, and it solved problems of siege and anti-air. I played around with my t3 a lot (staying shadow the whole time), sometimes doing things like soulshatter or sandstorm or unholy power. I didn’t like my drones very much. It’s pretty risky to take a different t3 orb just for one card, even a card as great as ashbone pyro. I had that conversation with TBPeti, and wizened up. I changed my nomad to scavenger immediately, which sort of forced me to get a gladiatrix and drop spirit hunters, but I held off the rest of the changes until I could do them more gradually. The next time I thought my deck was finished, it had Scavenger,Sunstriders,Eruption,Thugs,Mortar-Tower,Surge-of-Light,Ensnaring-Roots,Ravage,Lava-Field,Curse-of-Oink,Rogan-Kayle,Ghostspears,Skyfire-Drake,Fire-Stalker,Vileblood_nature,Gladiatrix_nature,Mauler,Giant-Slayer,Magma-Hurler,Sun-Reaver_nature T1: Scavenger, Eruption, Sun Strider, Thugs, Mortar Tower, T2: Surge of Light, Ensnaring Roots, Ravage, Lavafield, Curse of Oink, Rogan Kayle, Ghostspears, Skyfire Drake, Fire Stalker, Vileblood, Gladiatrix, Mauler, T3: Giant Slayer, Magma Hurler, Sun Reaver Much improved! Pro fire-nature players will disagree with this a lot, but I prided myself on the deck’s A). Originality, and B). Low price. I was ranked about Legend with this deck, and I kept it until I heard the announcement that Battleforge was shutting down. The comments for VB vs burrowers are still valid. I dropped deathgliders, and I relied on ghostspears and fire stalker for my S counter. I did get in the occasional trouble with darkelf spamming or stone shard spamming, but overall it was okay. If the enemy spammed too much S units, lavafield was generally okay. It was a fine line to tread to overwhelm me, but at around Legend level people could do it fairly reliably. I also realized that most of the time I wasn’t using the VB, but rather just charging in with Rogan and a Ghostspear, with Fire Stalker in the back. I used the mauler because I had a lot of trouble dealing with ashbone pyros and stonekin. Sun Reavers were also not nerfed yet. When I heard the game was shutting down, I finally gave up my pride and decided to just try to improve my rank. My deck was: Scavenger,Sunstriders,Eruption,Thugs,Mortar-Tower,Surge-of-Light,Ensnaring-Roots,Ravage,Lava-Field,Curse-of-Oink,Rogan-Kayle-promo,Ghostspears,Skyfire-Drake,Scythe-Fiends,Gladiatrix_nature,Burrower,Mauler,Giant-Slayer,Magma-Hurler,Sun-Reaver_nature T1: Scavenger, Eruption, Sun Strider, Thugs, Mortar Tower, T2: Surge of Light, Ensnaring Roots, Ravage, Lavafield, Curse of Oink, Rogan Kayle, Ghostspears, Skyfire Drake, Burrower, Scythe Fiends, Gladiatrix, Mauler, T3: Giant Slayer, Magma Hurler, Sun Reaver You’ll notice there are only 2 changes. Burrowers and Scythe fiends. The harmony of the rest of the deck still holds, with a bit better of an S counter. Occasionally I would remove Rogan and use an extra t1 card. My deck was becoming more and more the standard fire-nature deck. Ultimately, at the very top levels, it always comes down to the same cards. I will now present to you the “Pro-Player’s Fire-Nature Deck.” I don’t agree with everything in them, but I do know that my results tended to get better the more I conformed to them. Don’t just take this list and copy it, because the reasons for why cards are in your deck are more important than the cards themselves. The following deck differs from the deck I just presented for very small, tactical reasons. It’s not guided by principles, so explaining those reasons will not be of much use to you. I mostly include it so I don’t have pro players pulling out their hair and saying “firestalker? Rogan Kayle? How could you??” If you wanted just the grocery list below, you can ask any player and he could give you one. Really, the only reason I have this is to establish my credibility. Pro decks: T1: Scavenger, Eruption, Sun Striders, Thugs, Firesworn, Sunderer, Mortar, T2: Surge of Light, Ensnaring Roots, Hurricane, Ravage, Lavafield, Curse of Oink, Ghostspears, Skyfire Drake, Burrower, Scythe Fiends, Gladiatrix, T3: Giantslayers, Brannoc Mine also works well, although a lot of players don’t have room for it. Similarly with disenchant. I’ve known some players to even forgo t3 entirely to make room for those cards. Some also drop Mortar/Sunderer.