

Dreamer001
-
Posts
1 -
Joined
-
Last visited
Reputation Activity
-
 Screamo liked a post in a topic by Dreamer001 in Expert Campaign - Missions Briefing - Among the Old Gods achievement
So first of all thanks to Dallarian for this great guide and everyone who helped with the information. I've been playing battleforge since EA times, but did learn a lot new tricks here.
I want to add two tricks for players struggling with the Nighmare maps. I've beaten both maps on expert solo with them.
1) Nightmare Shard:
In Nightmare Shard the witch spawn group/patrol consists of 1 Twilight Witch, 2 Vilebloods and after a while 2 Twilight Whisperers. There are 4 witch patrols (1 from each camp type?). They spawn alternating at east and west camps. If you don't kill the witches, no new patrols will spawn.
The easiest way to do this is to kill only the witches on the east side (easy to do at your wall in the blue rectangle) and to trap the witches on the west side with MotK and a bait (e.g. Primal Defender). If the bait is within the aggro-radius, the witch will walk inside the MotK and therefore can't attack, walk away and draws aggro again.
The best spot I found for MotK is on the south-west cliff. I placed the Primal Defender in Skywatch-mode right next to it. Be carefull for air units, if they kill the bait, the witches will walk to the Shard resulting in a loss. I solved this with a total of 2 MotK and 2 Primal Defenders.
If you've successfully trapped all 4 witches, only single crawlers and single air units will come for you. That means you can essentially just walk through the map at your own pace.
The best point is this: You can start with the Mana Wing strategy and after that there's enough time for building the MotK and Primal Defender on the cliff.
I actually never tried the strategy with a second player, but I guess it'll become even easier.
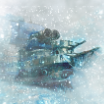
A warning at this point: Moon is very annoying if you trap witches close to the shard... You can see it kind of in the screenshot.
2) Nightmare's End
This map is indeed a pain but instead of defending your T1 against these strong waves, you can also just trap the first waves. There are actually just 4 spawn waves coming to your T1 - 2 from the south and 2 from the north. At the beginning a spawn waves consists of 2 melee squads and 1 Shaman. If you kill them, soon bigger waves with large enemies will come. If you trap them, no new waves will bother you. I did this with 3 Shamans in the north and 3 Shamans in the south for the first wave. As soon as the second wave reaches the first wave, I added 2 more Shamans and 1 non-attacking Dryad to each side. A bit of micro may be needed.
If you successfully trapped the waves like this, you can take the T2 in the middle of the map. No spawn will bother you at this point, so you can just build up several thousand energy and steamroll the map. I recommend taking T3 for Amii-Monument in the northwest without destroying the shrine and then step-by-step build up T4 defence at each spawn point. You can see an example of a perfectly working defense in the screenshot below. Also you can get a glimpse of my Fire Stalker army and if you look closely at the time: over 30 minutes have passed and I didn't need to upgrade my defenses over this.
Another warning: Do NOT underestimate the waves at the end. Even if you build T4-towers all over the map, you may still need strong units.
PS: I think of myself as a mediocre player because I'm neither good at micro nor good at multi-tasking. Meaning everyone can learn how to do even the Nightmare maps solo on expert atleast with these tricks.
PPS: I didn't optimize these strategies, probably there are even easier version of them (e.g. MotK usage may make it easier to trap the waves).
-
 __luc liked a post in a topic by Dreamer001 in Expert Campaign - Missions Briefing - Among the Old Gods achievement
So first of all thanks to Dallarian for this great guide and everyone who helped with the information. I've been playing battleforge since EA times, but did learn a lot new tricks here.
I want to add two tricks for players struggling with the Nighmare maps. I've beaten both maps on expert solo with them.
1) Nightmare Shard:
In Nightmare Shard the witch spawn group/patrol consists of 1 Twilight Witch, 2 Vilebloods and after a while 2 Twilight Whisperers. There are 4 witch patrols (1 from each camp type?). They spawn alternating at east and west camps. If you don't kill the witches, no new patrols will spawn.
The easiest way to do this is to kill only the witches on the east side (easy to do at your wall in the blue rectangle) and to trap the witches on the west side with MotK and a bait (e.g. Primal Defender). If the bait is within the aggro-radius, the witch will walk inside the MotK and therefore can't attack, walk away and draws aggro again.
The best spot I found for MotK is on the south-west cliff. I placed the Primal Defender in Skywatch-mode right next to it. Be carefull for air units, if they kill the bait, the witches will walk to the Shard resulting in a loss. I solved this with a total of 2 MotK and 2 Primal Defenders.
If you've successfully trapped all 4 witches, only single crawlers and single air units will come for you. That means you can essentially just walk through the map at your own pace.
The best point is this: You can start with the Mana Wing strategy and after that there's enough time for building the MotK and Primal Defender on the cliff.
I actually never tried the strategy with a second player, but I guess it'll become even easier.
A warning at this point: Moon is very annoying if you trap witches close to the shard... You can see it kind of in the screenshot.
2) Nightmare's End
This map is indeed a pain but instead of defending your T1 against these strong waves, you can also just trap the first waves. There are actually just 4 spawn waves coming to your T1 - 2 from the south and 2 from the north. At the beginning a spawn waves consists of 2 melee squads and 1 Shaman. If you kill them, soon bigger waves with large enemies will come. If you trap them, no new waves will bother you. I did this with 3 Shamans in the north and 3 Shamans in the south for the first wave. As soon as the second wave reaches the first wave, I added 2 more Shamans and 1 non-attacking Dryad to each side. A bit of micro may be needed.
If you successfully trapped the waves like this, you can take the T2 in the middle of the map. No spawn will bother you at this point, so you can just build up several thousand energy and steamroll the map. I recommend taking T3 for Amii-Monument in the northwest without destroying the shrine and then step-by-step build up T4 defence at each spawn point. You can see an example of a perfectly working defense in the screenshot below. Also you can get a glimpse of my Fire Stalker army and if you look closely at the time: over 30 minutes have passed and I didn't need to upgrade my defenses over this.
Another warning: Do NOT underestimate the waves at the end. Even if you build T4-towers all over the map, you may still need strong units.
PS: I think of myself as a mediocre player because I'm neither good at micro nor good at multi-tasking. Meaning everyone can learn how to do even the Nightmare maps solo on expert atleast with these tricks.
PPS: I didn't optimize these strategies, probably there are even easier version of them (e.g. MotK usage may make it easier to trap the waves).
-
 Dallarian liked a post in a topic by Dreamer001 in Expert Campaign - Missions Briefing - Among the Old Gods achievement
So first of all thanks to Dallarian for this great guide and everyone who helped with the information. I've been playing battleforge since EA times, but did learn a lot new tricks here.
I want to add two tricks for players struggling with the Nighmare maps. I've beaten both maps on expert solo with them.
1) Nightmare Shard:
In Nightmare Shard the witch spawn group/patrol consists of 1 Twilight Witch, 2 Vilebloods and after a while 2 Twilight Whisperers. There are 4 witch patrols (1 from each camp type?). They spawn alternating at east and west camps. If you don't kill the witches, no new patrols will spawn.
The easiest way to do this is to kill only the witches on the east side (easy to do at your wall in the blue rectangle) and to trap the witches on the west side with MotK and a bait (e.g. Primal Defender). If the bait is within the aggro-radius, the witch will walk inside the MotK and therefore can't attack, walk away and draws aggro again.
The best spot I found for MotK is on the south-west cliff. I placed the Primal Defender in Skywatch-mode right next to it. Be carefull for air units, if they kill the bait, the witches will walk to the Shard resulting in a loss. I solved this with a total of 2 MotK and 2 Primal Defenders.
If you've successfully trapped all 4 witches, only single crawlers and single air units will come for you. That means you can essentially just walk through the map at your own pace.
The best point is this: You can start with the Mana Wing strategy and after that there's enough time for building the MotK and Primal Defender on the cliff.
I actually never tried the strategy with a second player, but I guess it'll become even easier.
A warning at this point: Moon is very annoying if you trap witches close to the shard... You can see it kind of in the screenshot.
2) Nightmare's End
This map is indeed a pain but instead of defending your T1 against these strong waves, you can also just trap the first waves. There are actually just 4 spawn waves coming to your T1 - 2 from the south and 2 from the north. At the beginning a spawn waves consists of 2 melee squads and 1 Shaman. If you kill them, soon bigger waves with large enemies will come. If you trap them, no new waves will bother you. I did this with 3 Shamans in the north and 3 Shamans in the south for the first wave. As soon as the second wave reaches the first wave, I added 2 more Shamans and 1 non-attacking Dryad to each side. A bit of micro may be needed.
If you successfully trapped the waves like this, you can take the T2 in the middle of the map. No spawn will bother you at this point, so you can just build up several thousand energy and steamroll the map. I recommend taking T3 for Amii-Monument in the northwest without destroying the shrine and then step-by-step build up T4 defence at each spawn point. You can see an example of a perfectly working defense in the screenshot below. Also you can get a glimpse of my Fire Stalker army and if you look closely at the time: over 30 minutes have passed and I didn't need to upgrade my defenses over this.
Another warning: Do NOT underestimate the waves at the end. Even if you build T4-towers all over the map, you may still need strong units.
PS: I think of myself as a mediocre player because I'm neither good at micro nor good at multi-tasking. Meaning everyone can learn how to do even the Nightmare maps solo on expert atleast with these tricks.
PPS: I didn't optimize these strategies, probably there are even easier version of them (e.g. MotK usage may make it easier to trap the waves).